With WP Ultimate CSV Importer, you can easily import posts, pages, custom posts, taxonomies, custom fields, seo data, etc., with the CSV file into WordPress. Choose the data type you want to import and map the CSV data fields with their corresponding WordPress core fields, then import them. In this guide, you will learn how to import a CSV to WordPress.
Note: Not just CSV, the plugin supports various formats like XML, Excel(XLS & XLSX), and TSV files. However, whatever file types you use, the import methods are always the same.
Step 1: Create a New Import #
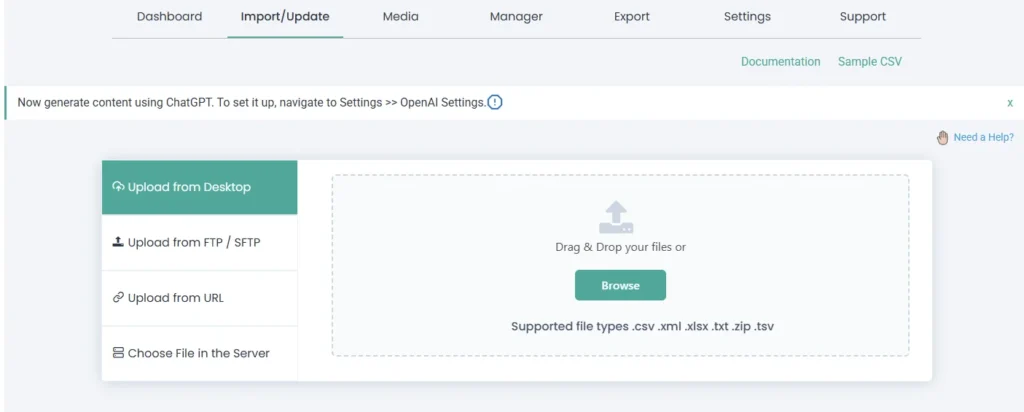
To create a new WordPress import, navigate to WP Ultimate CSV Importer → Import/Update. Next, upload your import file from sources like desktop, URL, or via FTP/SFTP. You can also locate and select the file from the server.
Once uploaded, select ‘Fresh Import’ for new records to import into WordPress or select ‘Update Content’ to overwrite available content in WordPress. If you want to import additional data from the posts already published on your site, select ‘Update Content’.
After that, choose the data types you want to import from the provided ‘Import each record as’ dropdown. It will list post types like Posts, Pages, all Custom Posts, Categories, WooCommerce Products, Variations, Orders, Coupons, and all taxonomies. Based on the supported plugins activated on your website, you’ll see their post types listed here. For example, if you have activated the JetEngine plugin and already created a post type with this plugin, you can see that the post type name is listed in this dropdown. Check below in this guide to know the complete plugins lists we have supported.
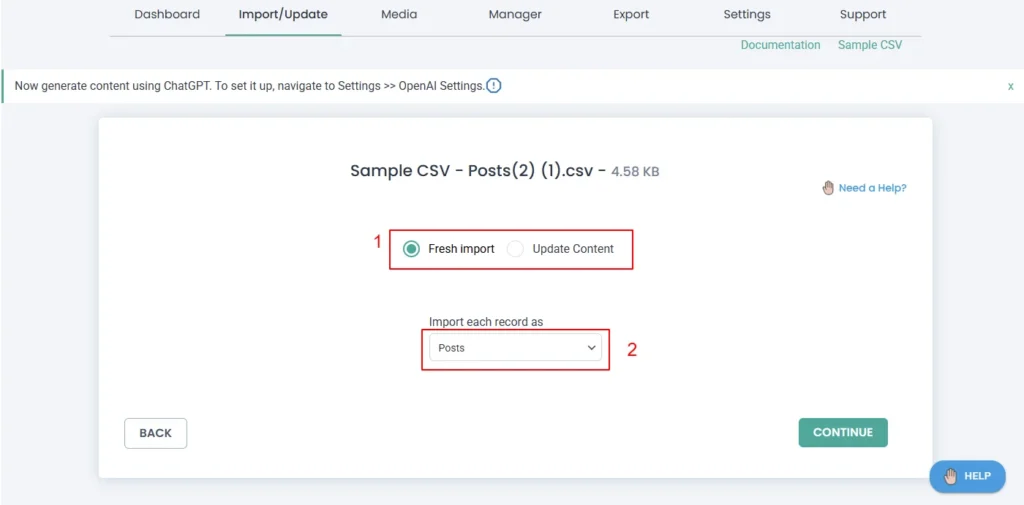
Click Continue now.
Step 2: Map the file fields with a simple dropdown or drag-and-drop method #
This section is crucial as it decides where to import the values of your CSV columns to the WordPress fields. The importer has two mapping modes: Advanced Mode and Drag & Drop Mode.
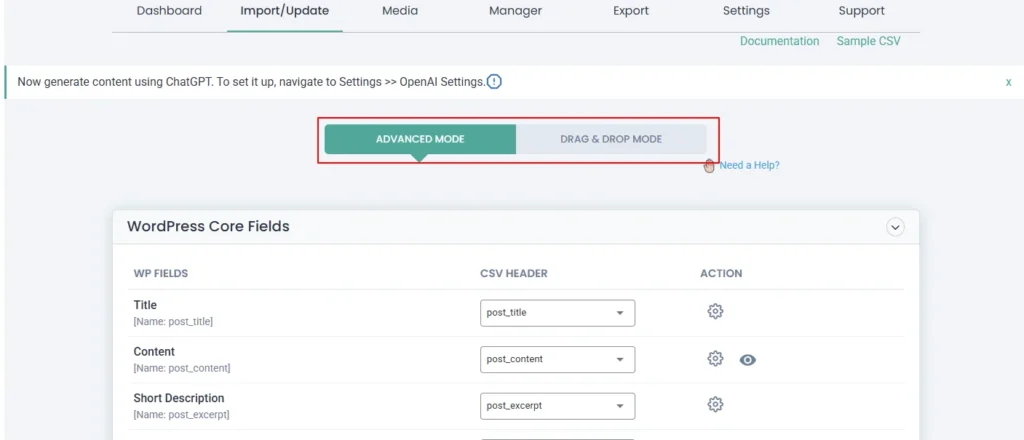
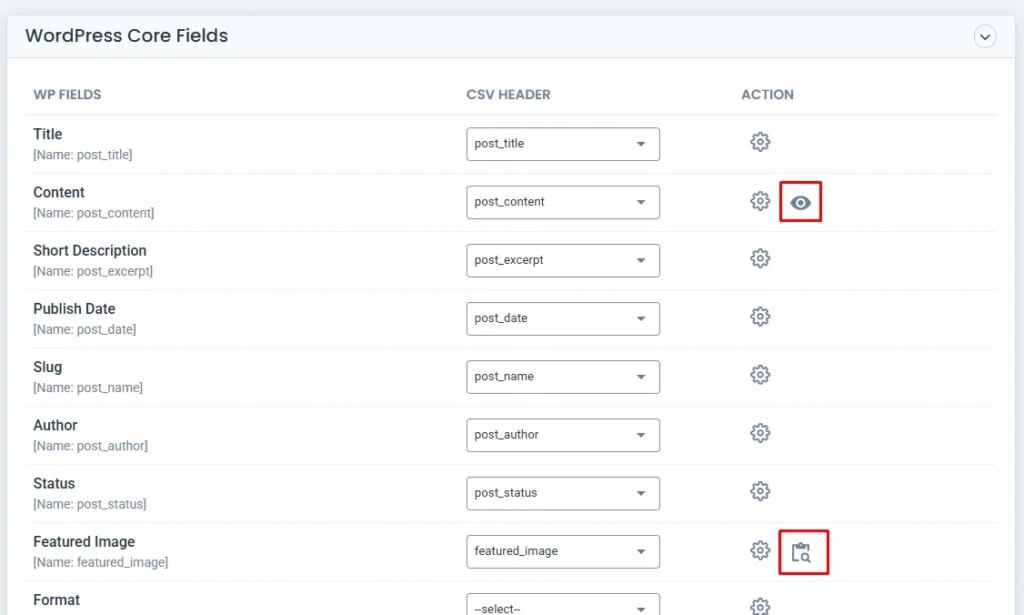
Advanced mode #
Advanced mapping is a simple dropdown mapping mode. Here, if the CSV column names are the same as the WordPress fields, the CSV importer will automatically map those fields.
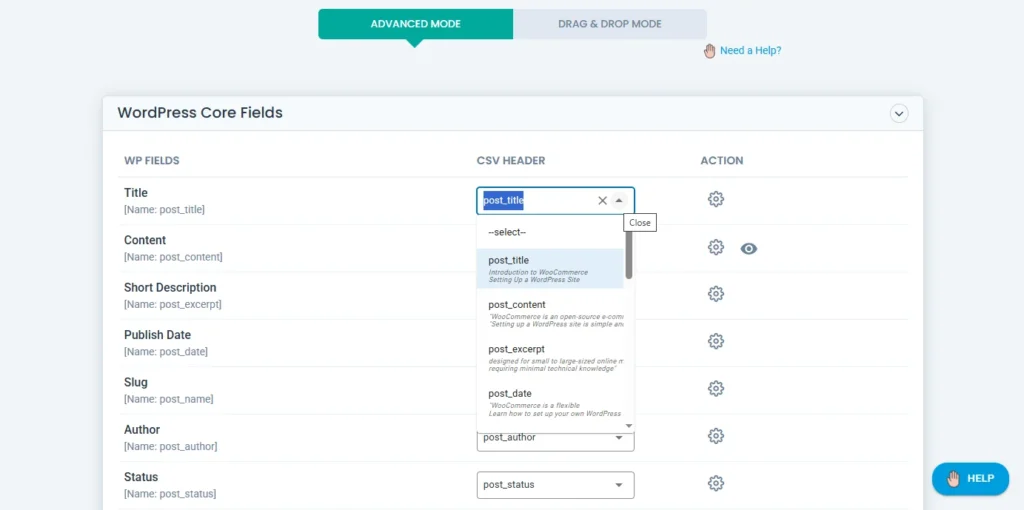
You can do a lot more in this section, like customizing the imports.
Click the settings icon in the actions area. You can see this icon beside each field area. Clicking on this will open up a small window that has four tabs like static, formula, custom, and AI.
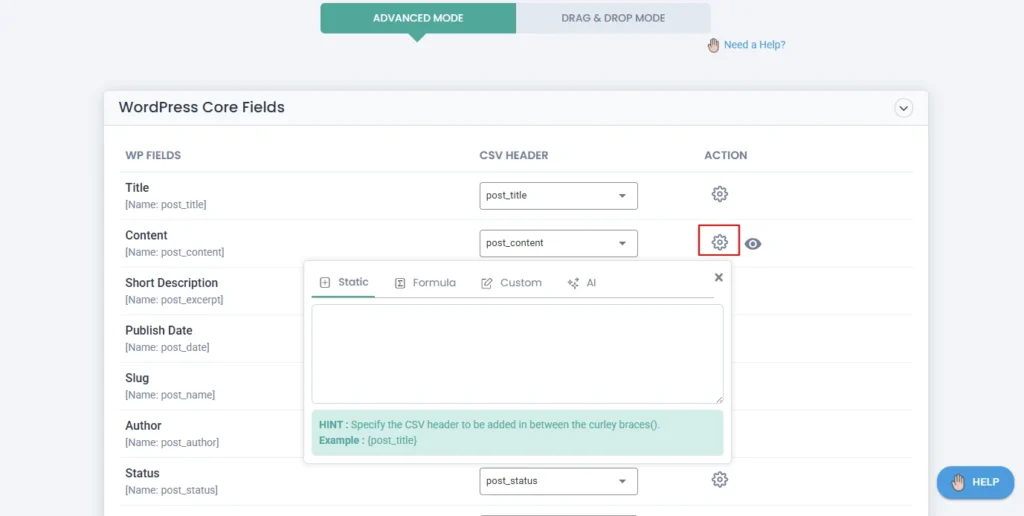
Note: You will only see the AI tab if you have configured with any of the AI providers in Settings > AI.
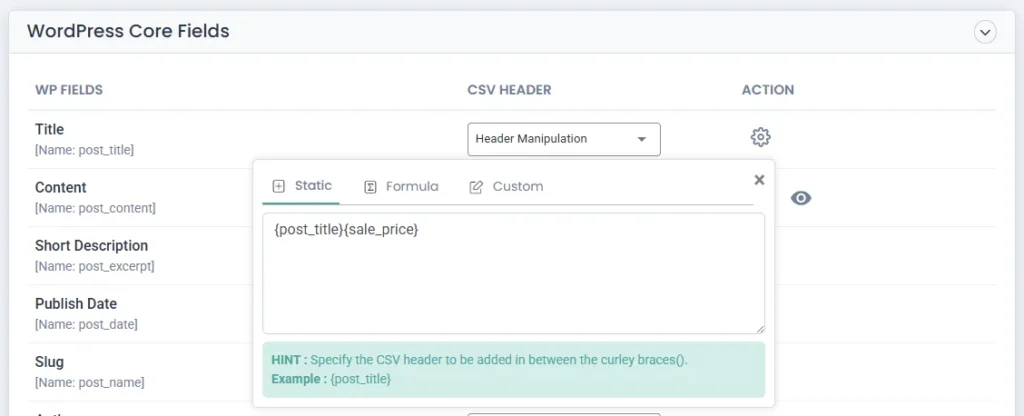
The Static option is to configure merge fields. For example, if you want to add a sale price to the post title field, you can provide a value here like {post_title} {sale_price}. This will import both the post title and the sale price values into that field.
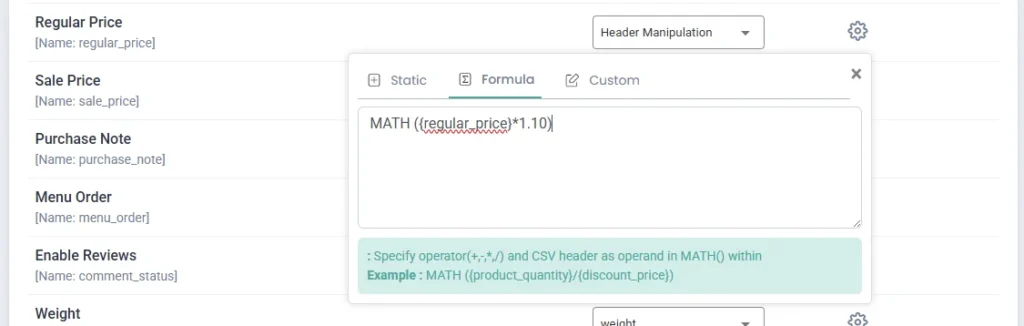
The formula area is used to define the math calculations if you run in the field.
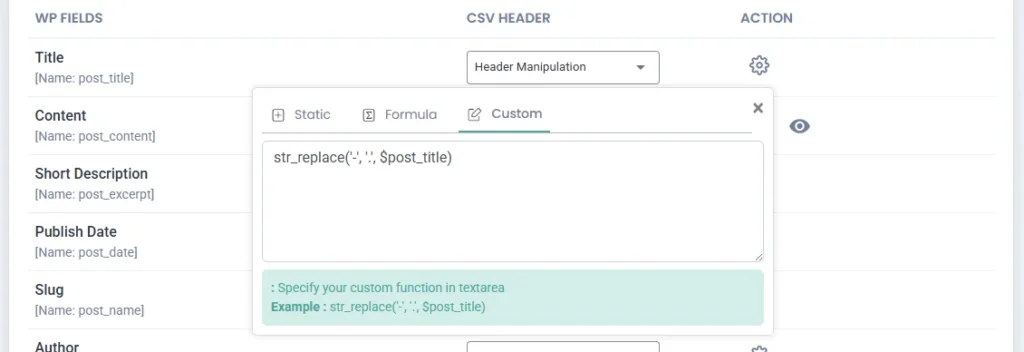
Custom is for adding custom PHP functions.
Inside the AI tab, you can add prompts to generate content.
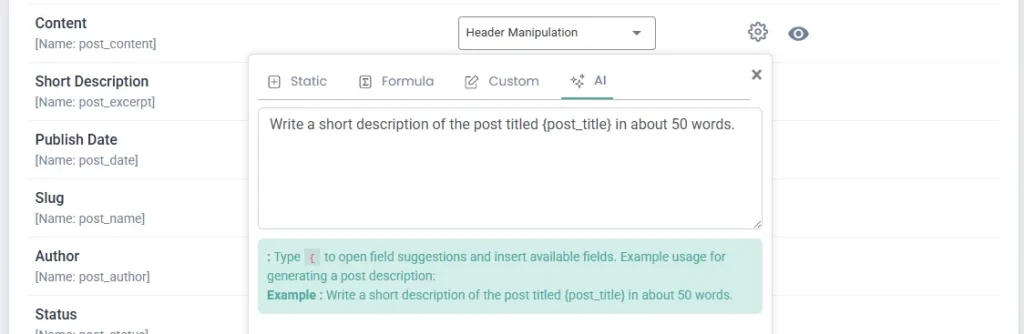
Once you start typing a value in any of the tabs, you can see that field mapping is automatically set to header manipulation.
You can preview the values of post content and featured image here using the eye icon beside the fields.
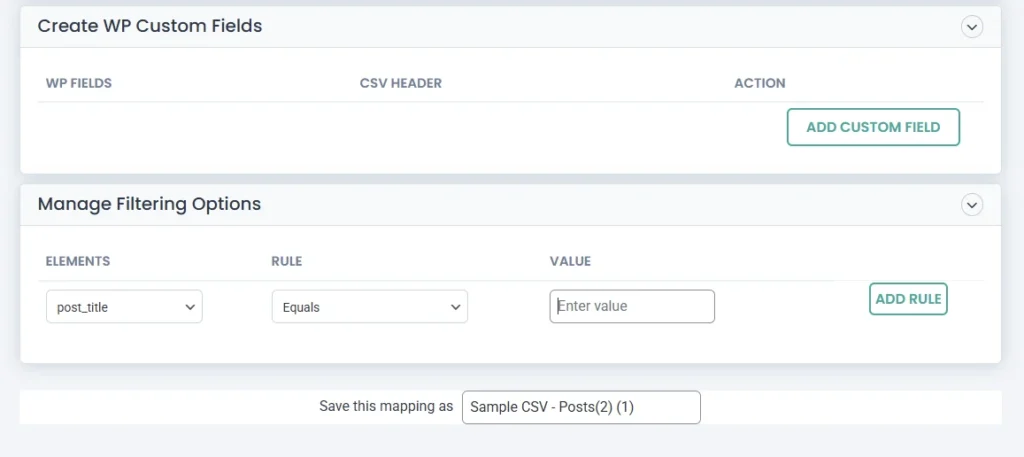
To filter import particular CSV rows, use the Manage Filters and start applying the filters. Learn more about applying import filters here.
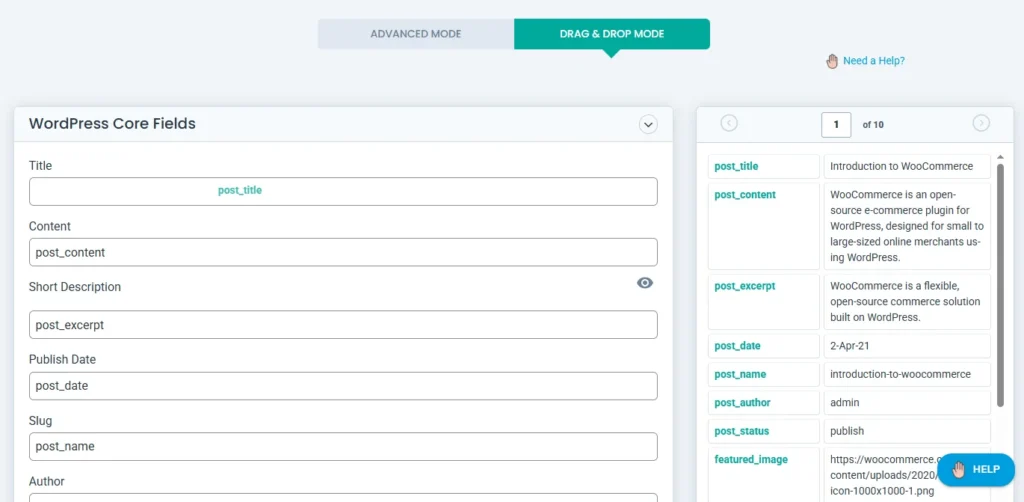
Drag and Drop Mode #
In the drag and drop mode, the fields of your import file will display on the right side inside the ‘Field Mapping Panel’. Whereas the WordPress fields you need to import will be listed on the left side. Fields are grouped based on categories. Click the dropdown of a particular widget to see the fields under it. To map, drag the right fields from the field mapping panel and drop them in the appropriate fields area.
For example: Drag the post title from the fields mapping panel and drop it exactly on the post title field listed.
Note: Map all the fields in your import file or the fields you want to import.
Once you have mapped, save the mapping with a unique name to reuse it for later. Provide a name in the ‘Save this mapping as’ textarea and click Continue.
Step 3: Configure the Media & Import Settings #
Now you’ll land on the import configuration page. Here, the first section is the Manage Media Uploads. This is useful to handle the media on your import.
Choose options like use available media images, overwrite existing ones, or always create new images.
Below that is the ‘Download the post content external images to media’ option. Configure it to download all the media inside your post content into the media library.
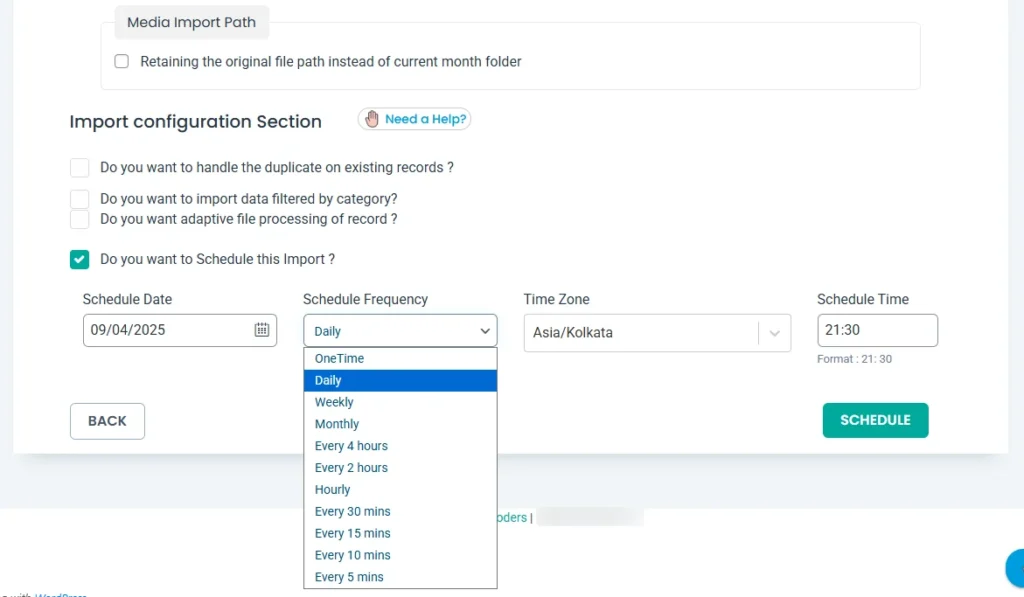
Enable the “Retaining the original file path instead of the current month folder” in the media import path to use your media file’s original path instead of creating a new one when importing.
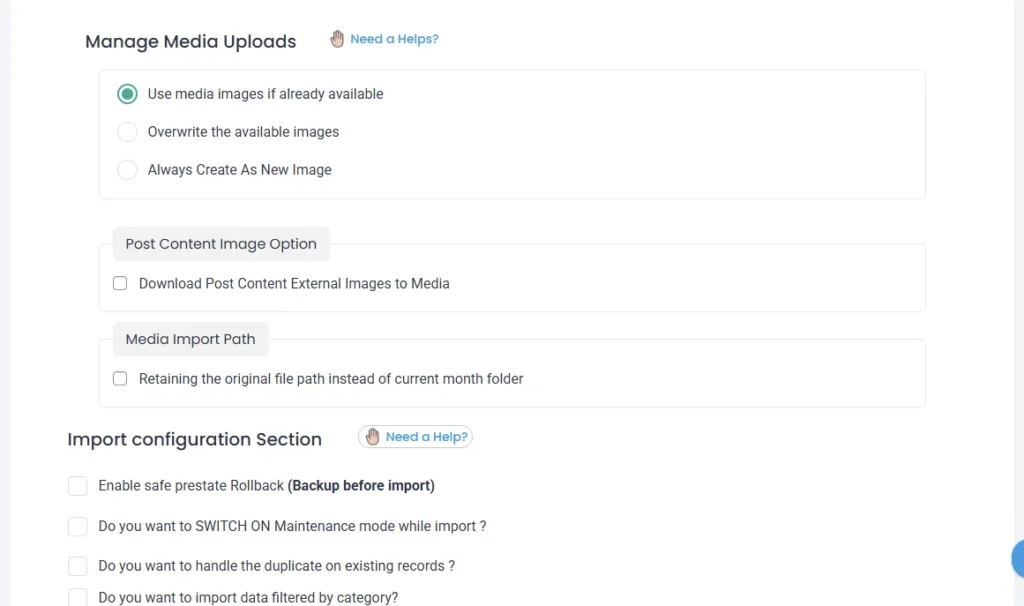
Next, scroll down to see the Import Configuration Section. Here, configure the essential import settings before running the import.
Choose options like “Enable safe prestate Rollback (Backup before import)” and “Do you want to SWITCH ON Maintenance mode while import?” for safer imports. The rollback is useful to switch back to the previous state before import if you find any problems after import. The maintenance mode is useful to notify your visitors when you run a bulk import.
Select “Do you want to handle the duplicate on existing records?” to handle duplicate record import. Choose a field like id, title, or slug to check for duplicates(based on the field type selection). This will avoid duplicate records import completely.
Enable “Do you want to import data filtered by category?” and choose categories from the list to import records of those categories only.
Configure the “Do you want adaptive file processing of record?” option if you have bulk records to import. Learn more about iteration-based importing here.
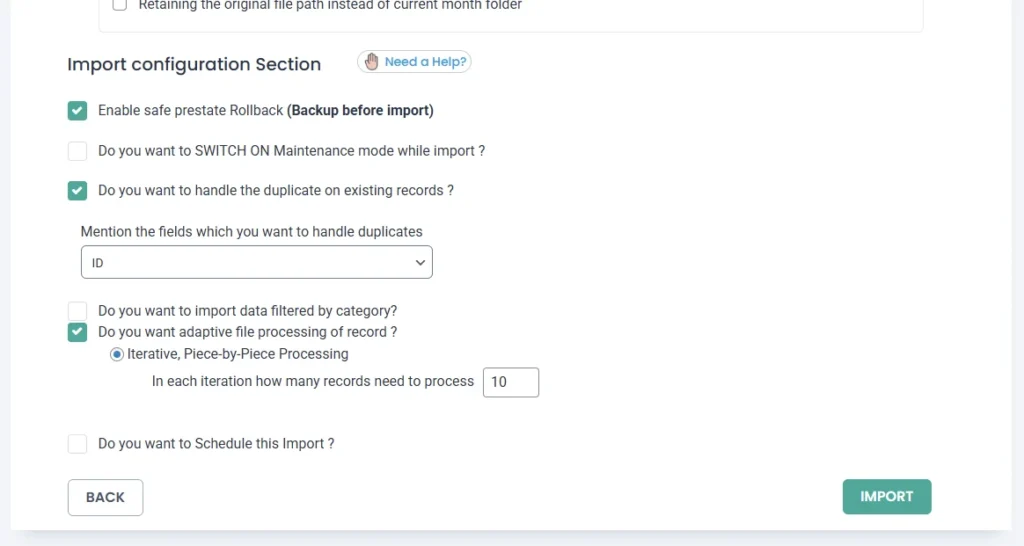
And at last, configure “Do you want to Schedule this Import?” to schedule to run your import at your preferred time.
Step 4: Run the Import #
Just hit the Import button to run the import instantly after configuring essential media handling and import configuration settings. Now your records will start to be created or updated on your WordPress site. Once done, a pop-up window will appear with the message Import Completed. You can download failed media and import summary logs from there.
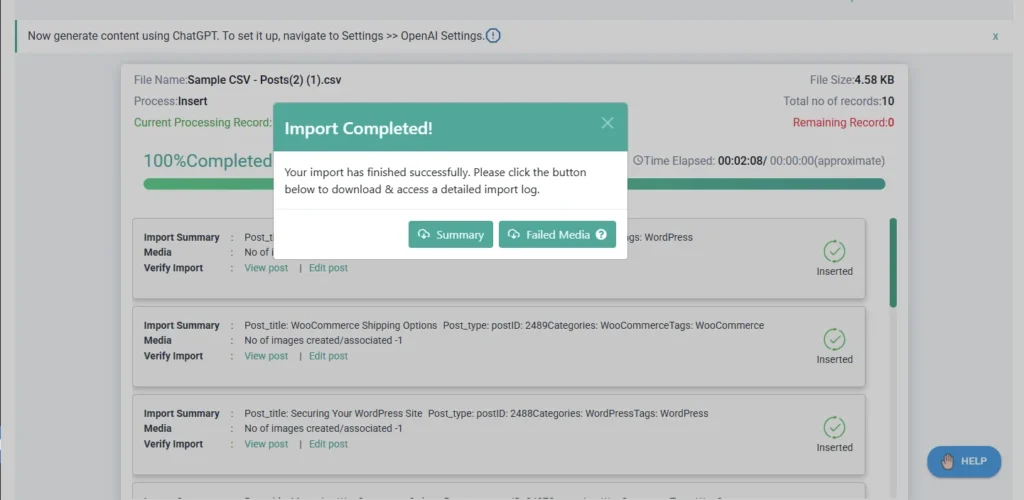
Or just close the window to see the import log view for each record. From here, you can see the status and visit each record in both admin and front view. You can also directly visit the post type to confirm the records import.

For example, if you have imported the posts, then verify the import by navigating to the Posts -> All Posts.
Advanced Options #
Save your import template and reuse it as needed #
WP Ultimate CSV Importer allows you to save the import mapping template, and this saved template can be used for future/new import processes.
Since mapping plays an important role in accurate data import, saving the mapping template will save you time and effort on mapping the same data every time you import, especially if you have many fields to map.
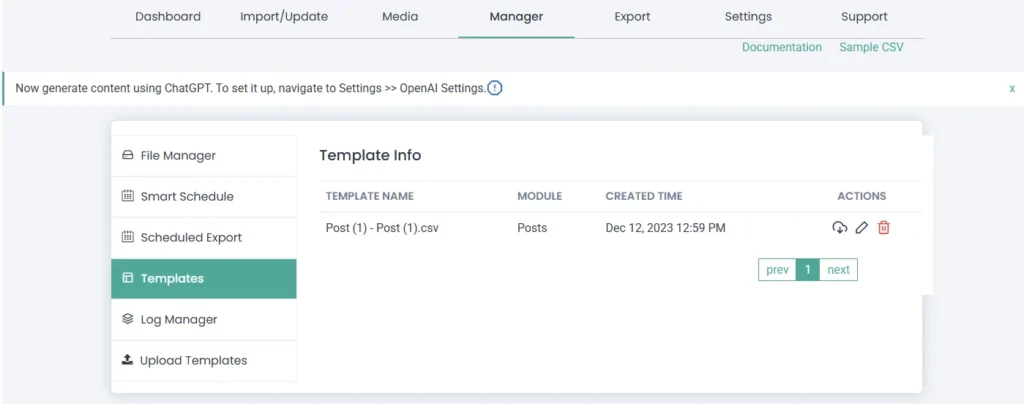
To save the import template, follow step 2 above. Just provide the template a name after mapping and click on Continue. After you complete this step, the importer will save your mapping template. You can find all the saved mapping templates by visiting the Manager > Templates section. Here you can download, modify, and delete templates.
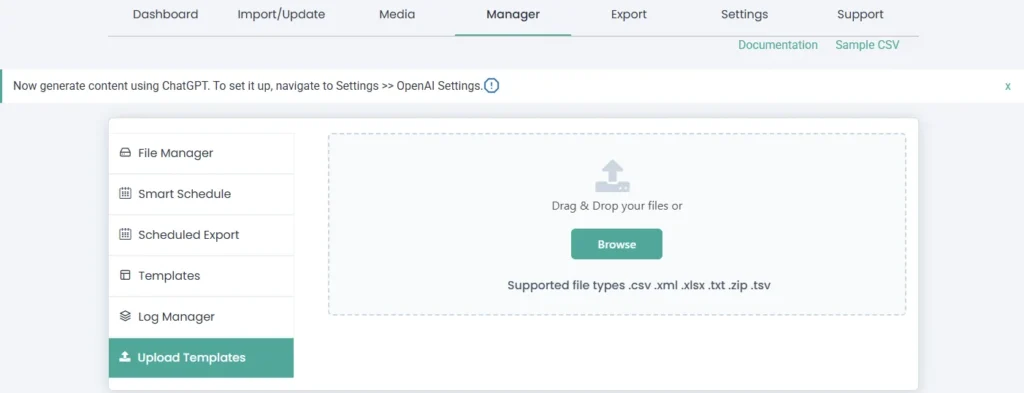
The downloaded templates can be uploaded into the importer. For this, visit the Manager > Upload Templates section. This is helpful if you have installed the importer on another website and want to configure the same mapping.
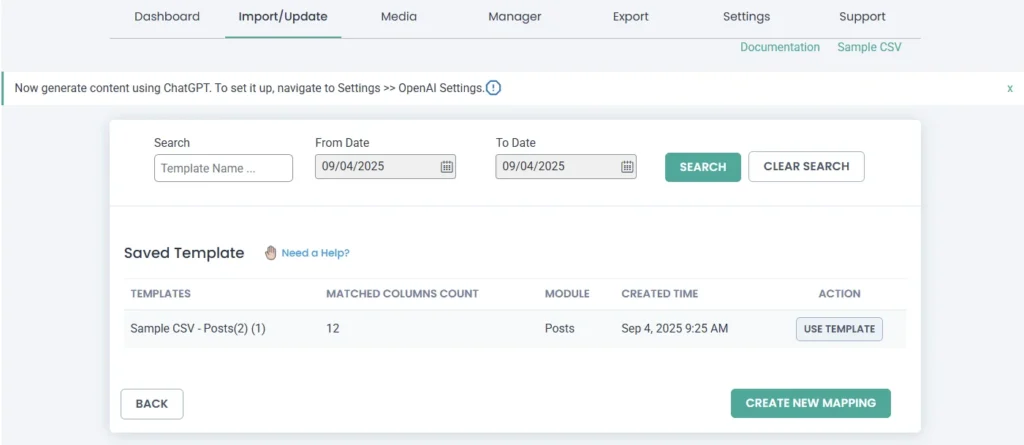
When importing any new file to WordPress, Step 2 will display the saved import template screen with its settings (If the file name is the same as the old import file name). You can use any one saved template for your new import, or create a new template by clicking on the ‘Create New Mapping’ option.
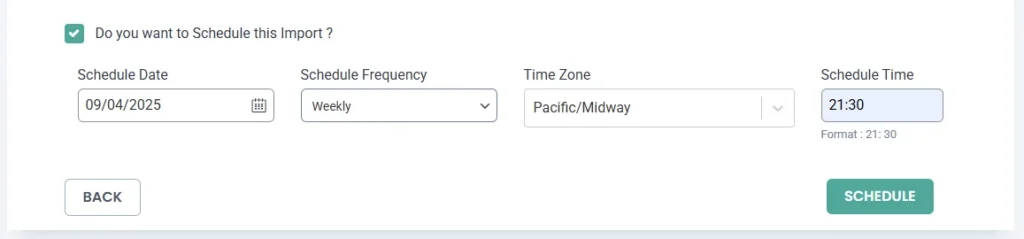
Schedule WordPress Data Import #
WP Ultimate CSV Importer Pro allows you to schedule your import process based on your needs. In Step 4, configure the import settings, enable the Schedule option last, and provide the values like schedule date, time, frequency, and time zone to successfully schedule your import. Once you click Schedule, you can see the import scheduled successfully message. These scheduled imports can be seen inside Manager > Smart Schedule. From here, you can directly edit existing scheduled events and also delete them if needed.
Note: Before scheduling an import, make sure you have added a cron entry in your WordPress. Learn more in this blog about enabling cron in your WordPress. If you have any doubts, please reach out to us.
Frequently Asked Questions about WordPress Data Import #
1. How to import a CSV file into WordPress? #
The import procedure we discussed above is the same for all file types we support. To import a CSV file into WordPress, just upload the CSV file inside the Import/update tab on WP Ultimate CSV Importer. Configure the post type and import type. Our plugin will recognize the post types and list out fields accordingly to match. Match your CSV headers with WordPress fields, and in the next step, just hit Import. All your CSV records will be imported into WordPress.
2. How to import XML files into WordPress with WP Ultimate CSV Importer? #
Follow these three simple steps to import your XML files into WordPress. Upload the prepared XML file inside the Importer. Configure post type and import type(new import or update records). Match the XML columns with the corresponding WordPress fields. Then click Import.
3. Can I import Custom Posts into WordPress? #
Yes, you can import custom posts into WordPress. It is easy to import the custom post by simply selecting the Custom post types that you need to import in the post types section explained in Step 1. Follow the subsequent steps explained in the above guide to import custom posts to your WordPress site.
4. How to import my Website data into the WordPress site? #
To import your website data into the WordPress site, you need to have a valid import file in CSV/XML/TXT/JSON format. If you don’t have the file to be imported, you can export your Website data using the Export option in WP Ultimate CSV Importer. Upload the exported file and follow the import procedure we’ve explained above.
5. How to export WordPress data as CSV files? #
To export your WordPress site data as CSV files,
– Navigate to the Ultimate CSV Importer -> Export.
– Choose the desired post type. For example, Posts or WooCommerce Products.
– Click Continue.
– Provide the file name and choose the file type as CSV.
– Configure the advanced filters based on your needs to export desired posts or products.
– Click Export.
– Now your posts or products on your WordPress site will be exported successfully as a CSV file.
– Learn more about how to export WordPress data with WP Ultimate CSV Importer here.
6. Does WP Ultimate CSV Importer support WooCommerce Products import? #
Yes, WP Ultimate CSV Importer supports the data import of almost all aspects of WooCommerce products, such as variations, categories, prices, images, stock level, etc. Learn more about how to import WooCommerce products with WP Ultimate CSV Importer.
Supported Third-party Plugins – WP Ultimate CSV Importer #
Below are the supported third-party plugins:
eCommerce Plugins
- WooCommerce
- WP eCommerce
WooCommerce Import
- Products
- Variations Import
- WooCommerce Orders
- WooCommerce Coupons
- WooCommerce Refunds
WooCommerce Addons
- WooCommerce Subscriptions
- Chained Products
- Pre Orders
- Product Retailers
- Product Addons
- Returns & Warranty Request
- Product Bundles
Other WooCommerce Add-ons
- YITH WooCommerce Barcodes
- YITH Cost of Goods
- WooCommerce Min Max Quantities
- WooCommerce Variation Swatches
- YITH order tracking plugin
- PPOM WC product addon
- Tiered Price Table for WooCommerce
- Product Addons for Woocommerce – Product Options with Custom Fields
- Woo Extra Product Options
Supported Custom Fields Plugins
- ACF Free & PRO
- CMB2
- Toolset Types
- Pods
- Custom Fields Suite(CFS)
- CCTM
- JetEngine
- MetaBox
- ACPT & ACPT Lite
Custom Post Plugins
- Custom Post Type UI
- ACF
- Toolset Types
- Pods
- CCTM
- JetEngine
- CFS
- CMB2
- MetaBox
Multilingual Plugins
SEO Plugins
- Yoast SEO Free & Pro
- All In One SEO Free & Pro
- Rank Math SEO Free & Pro
- SEOPress Free & Pro
Membership Plugins
- WP-Members
- Members
- Ultimate Member
- MemberPress
LMS plugins
- LearnPress
- Lifter LMS
- MasterStudy LMS
Other Supported Plugins
- Events Manager Free & Pro
- WP Customer Reviews
- bbPress
- NextGEN Gallery
- WP Job Manager
- Featured Image from URL
- Elementor
- WPComplete
- Exmage image
- Gravity Forms
Crocoblock Plugins
- JetBookings
- JetReviews
Directory Plugins
- Business Directory Plugin
- GeoDirectory
- Advanced Classifieds & Directory Pro Listings
AI Providers Integrations
- ChatGPT
- Gemini
- Claude

WP Ultimate CSV Importer Pro
Get Ultimate CSV/XML Importer to import data on WordPress faster, quicker and safer.