We have added compatibility for importing and exporting JetBookings data using the CSV Importer. If you are looking to understand how to import and export JetBookings records, along with their related post types, this guide will walk you through the process.
Note: The plugin currently supports migrating booking details. This means it can serialize export/import JetBookings data.
How to Import JetBookings data #
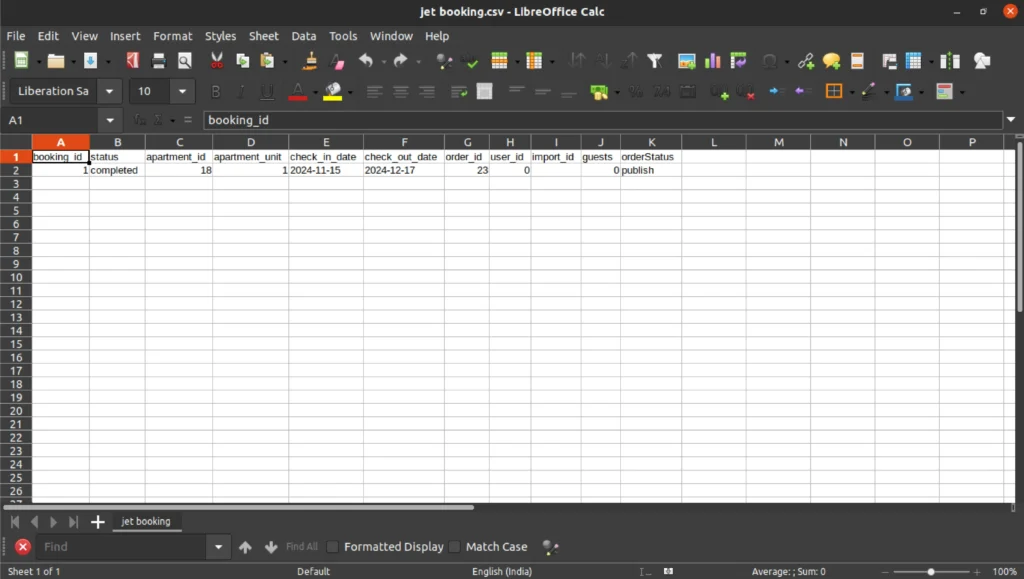
To import JetBookings data, you need an exported JetBookings CSV file that includes essential fields such as booking_id, booking_status, apartment_id, apartment_unit, check_in_date, check_out_date, user_id, guests, order_id, and orderstatus.
Field Descriptions:
- booking_id is a unique id for each booking.
- booking_status indicates the current status of the booking (e.g., pending, confirmed, on-hold, canceled, etc.,)
- apartment_id is the unique identifier for the related post type, such as posts, pages, or custom posts. You can also use the title here during import.
- apartment_unit: refers to the specific unit within the apartment or property being booked.
- check_in_date is the date and time when the customer is scheduled to check in
- check_out_date is the date and time when the customer is scheduled to check out from the property or booking
- user_id is the unique identifier for the users who made the bookings.
- The guest’s field includes the number of people associated with a particular booking. – Order_id is the unique identifier for the order associated with the booking. Typically an ecommerce order is generated when the customer makes the booking. – Order status indicates the current status of the order or the payment like pending, completed, failed or canceled.
Make sure to include the above fields in your CSV file and follow the steps below to import the data.
Step 1: Upload the prepared Bookings CSV file
Tip: Before uploading, make sure your CSV file is properly verified with a tool like CSV Lint to avoid upload issues.
CSV Importer offers multiple upload methods like from desktop, ftp/sftp, urls, or the server.Choose any of your preferred methods. For details on these upload methods, refer to the file upload documentation.
To upload it via desktop, click Browse, select the Bookings CSV file, and click Open. The file will begin uploading.
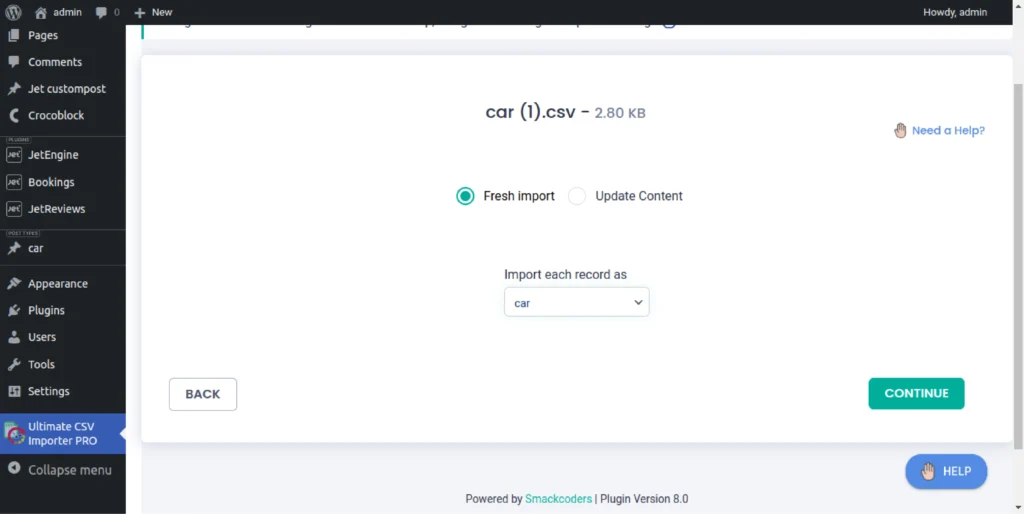
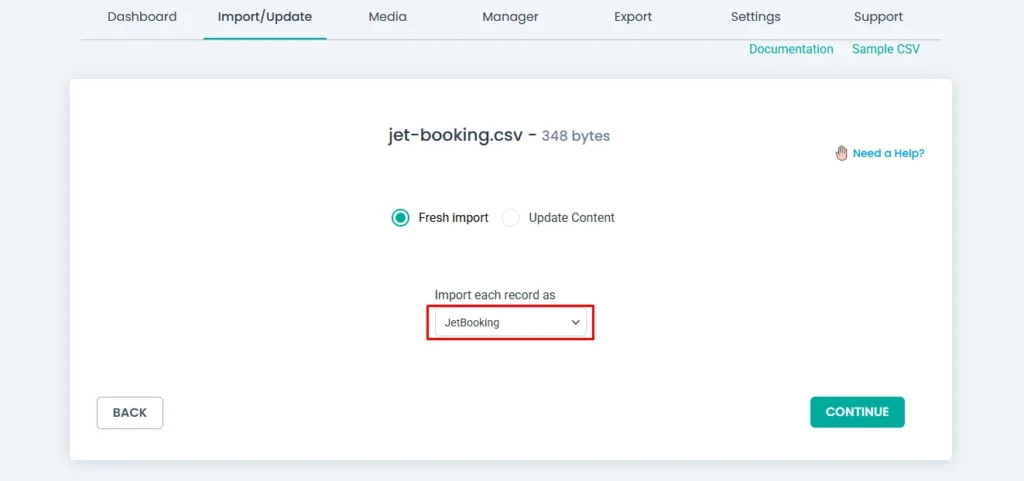
Once the upload reaches 100%, you will be redirected to the next screen to choose the post type and import type. The post type “JetBooking” will be selected automatically. If not, choose it from the dropdown under ‘Import each record as’.
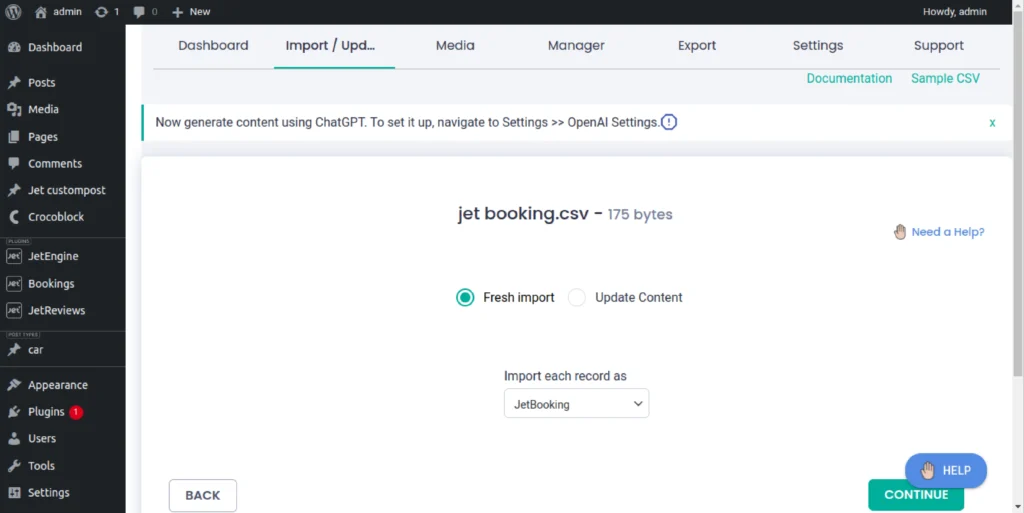
Choose ‘fresh import’ for importing new data, or select ‘update content’ if you want to update existing bookings.
Step 2: Map the CSV Fields to JetBookings Fields
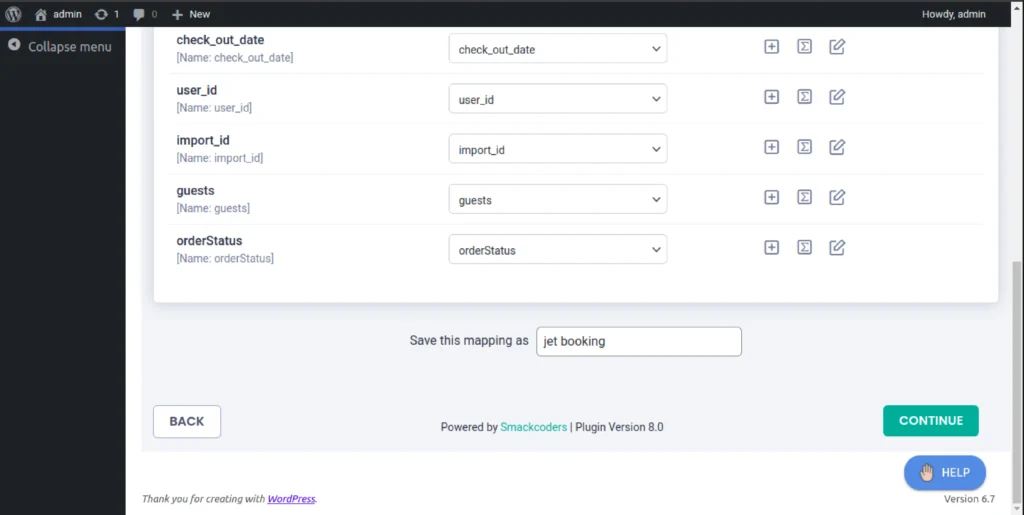
The plugin will attempt to automatically map the columns in your CSV file to the corresponding JetBooking fields. This is possible if the file headers name exactly matches the JetBookings fields header name. Otherwise, use drag and drop or dropdown mapping methods and correctly match the CSV fields for the corresponding JetBooking fields.
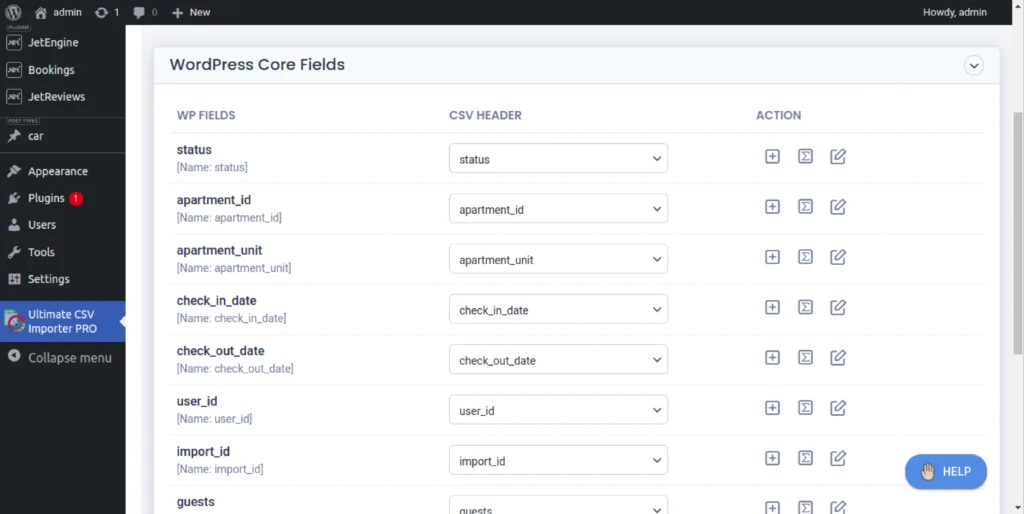
Note: if you’re updating JetBookings data, the booking_id field is mandatory. When importing new bookings, the apartment_id field is mandatory.
Step 3: Configure the JetBookings Import Settings
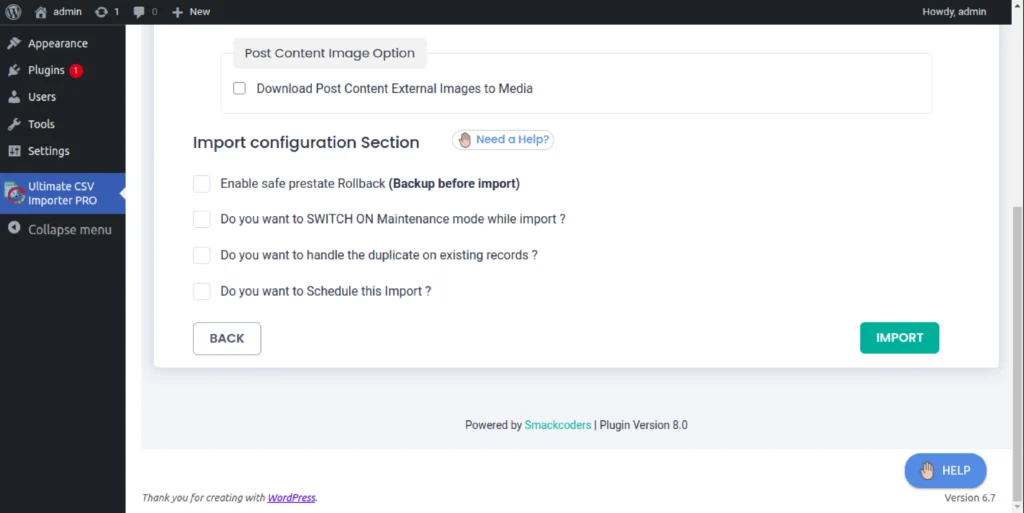
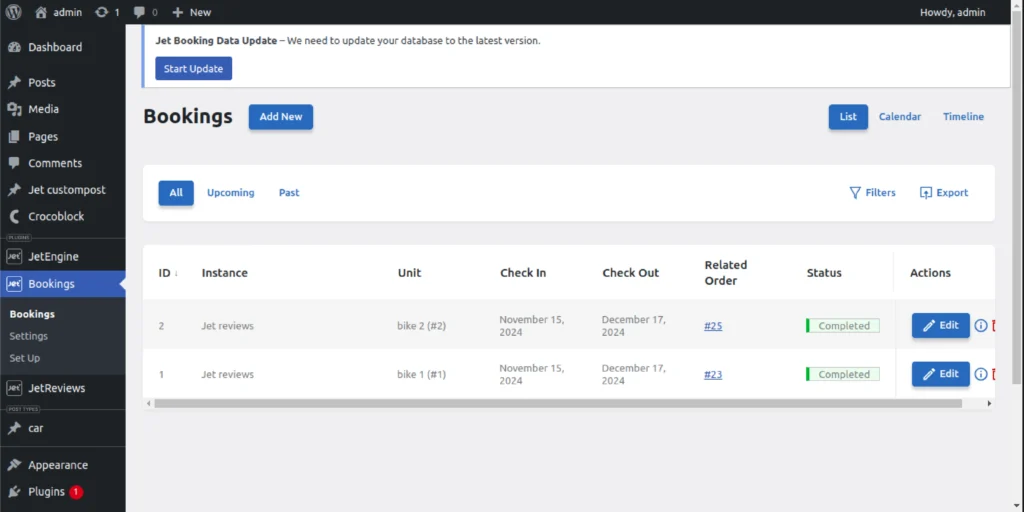
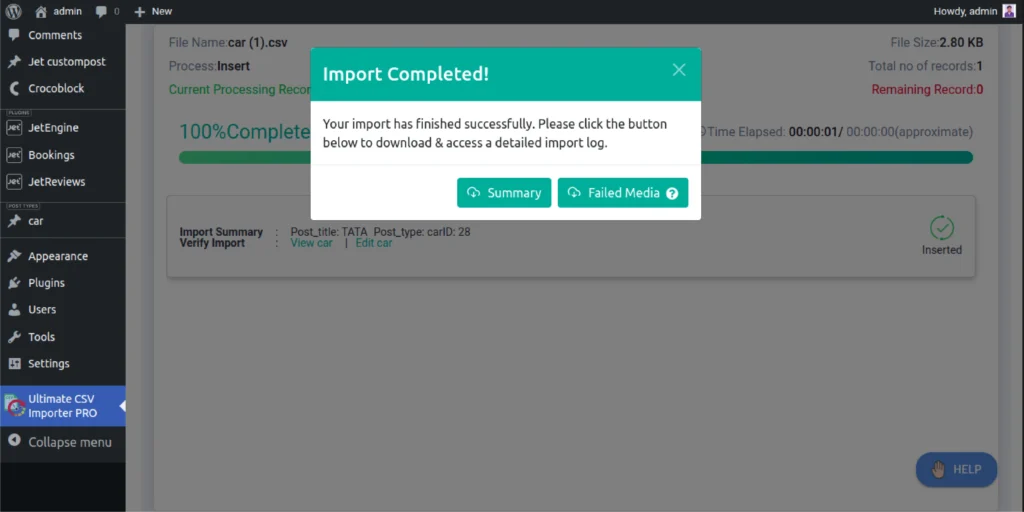
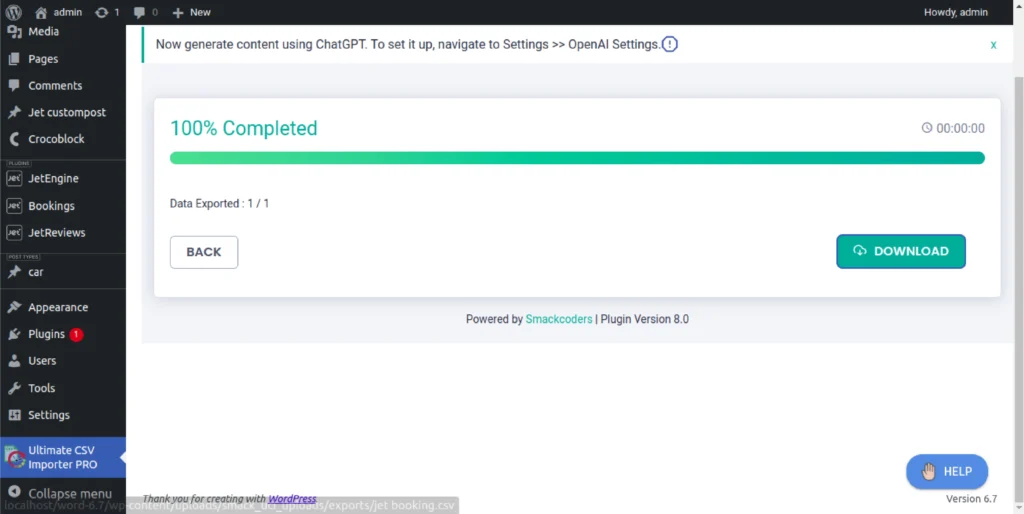
Scroll down, and click Import. The importer will start to run the import process. You can monitor the progress of each record without leaving the page. Once it completes, a popup will appear, offering you the option to download the import summary file. You can download the summary to verify the import, or simply visit the Bookings page directly to check your importer data.

How to Export JetBookings Data #
Exporting JetBookings data is easier. Just choose the JetBooking module, select the import file type, provide the name for the file, and hit export. The Bookings data will be exported and the file will be ready for download.
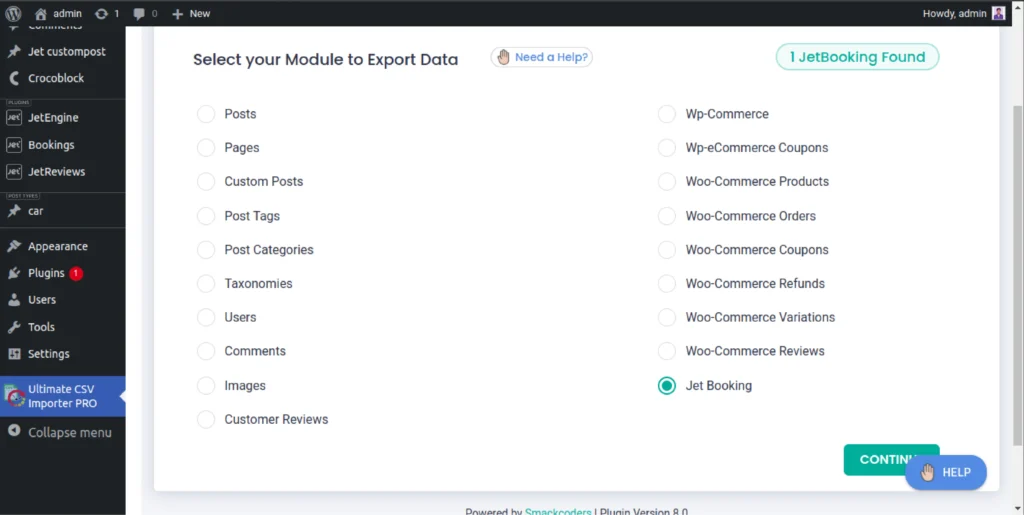
Step 1: Choose the JetBooking Module
Visit the Export tab in the plugin. It will list many post types the plugin supported. Select the “Jet Booking” checkbox to export it. At the top of the export screen, you’ll see how many records are in the Bookings post type.
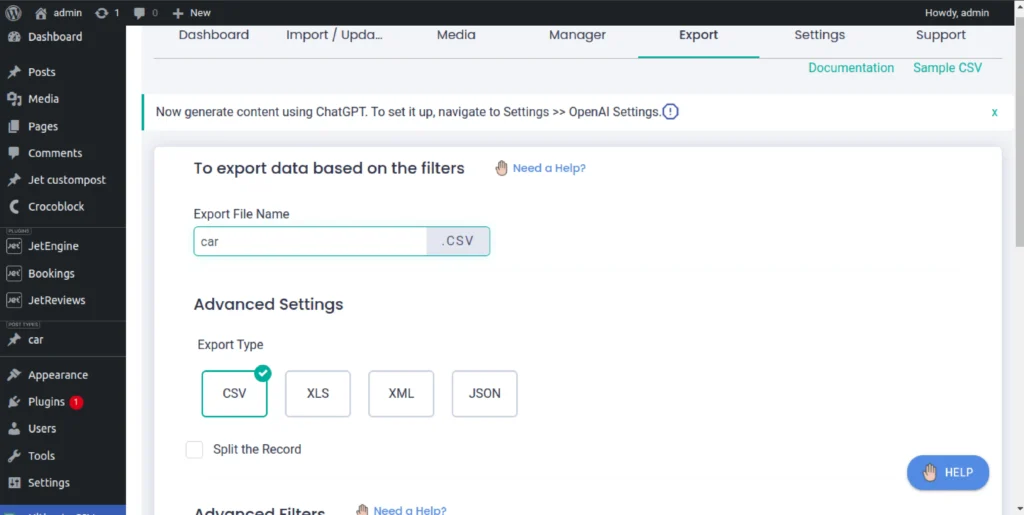
Step 2: Configure Export settings
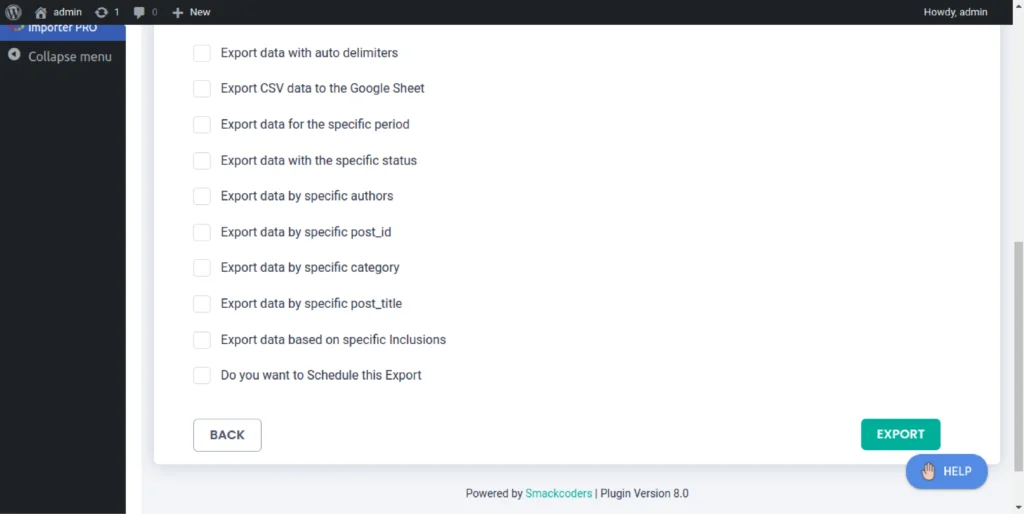
Click continue to proceed. In the next screen, fill in the export file name inside the textbox. Choose the export type under the advanced settings section.
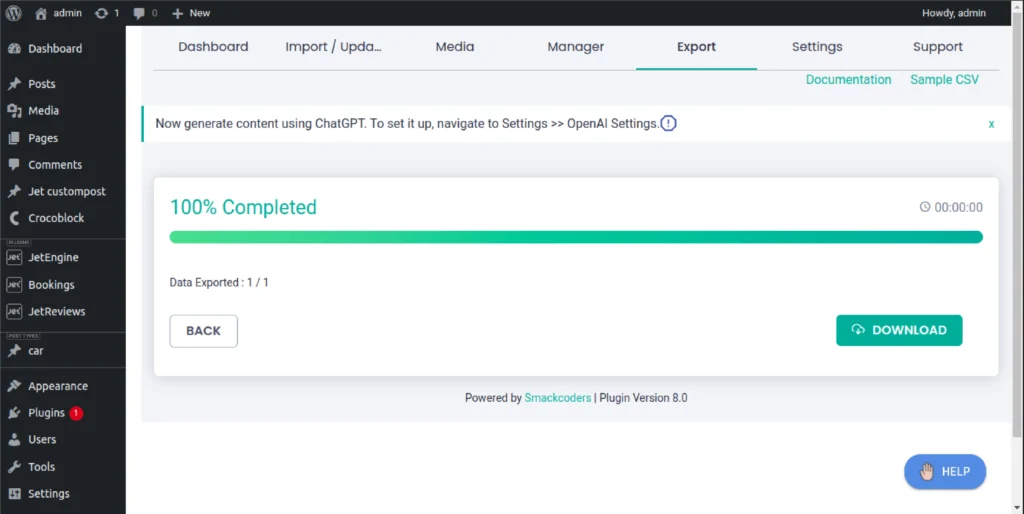
Step 3: Export and Download JetBookings Data
Scroll down and click Export to generate the export file to download. The file will be ready to download. Click Download and save the file to your computer. Open the file and ensure that all your JetBookings data has been correctly exported.
Note: This exported file can now be used to import bookings data to another WordPress site.
How to Import JetBookings Fields Associated with Post Types #
You can import JetBookings fields associated post types like Posts, Pages, and Custom Posts. For instance, if you’ve associated a post type like ‘Rooms’ with Jet Bookings, you can import and export Room data along with JetBooking Fields.
Supported Fields for Migration:
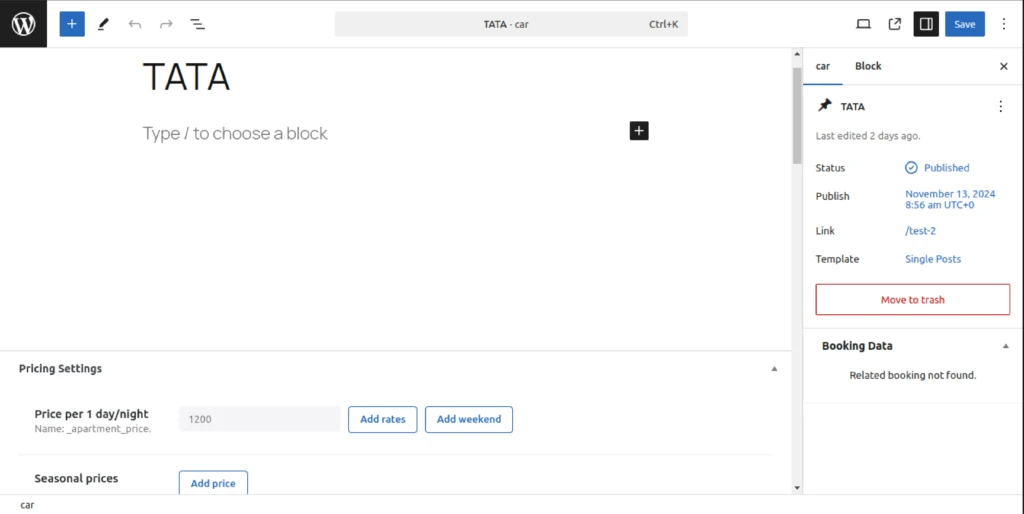
- Pricing Settings
- Custom Schedule
- Date Picker Config
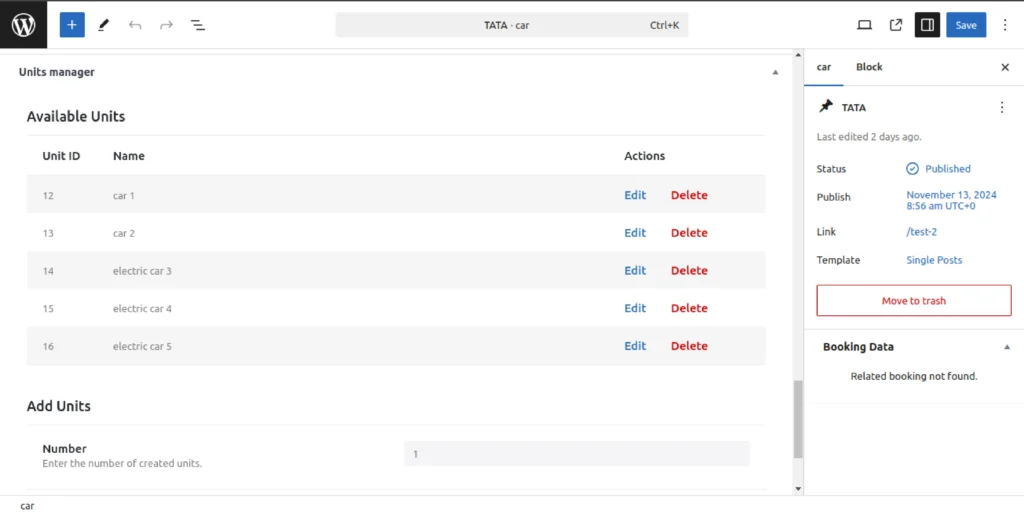
- Unit Title
- Unit Number
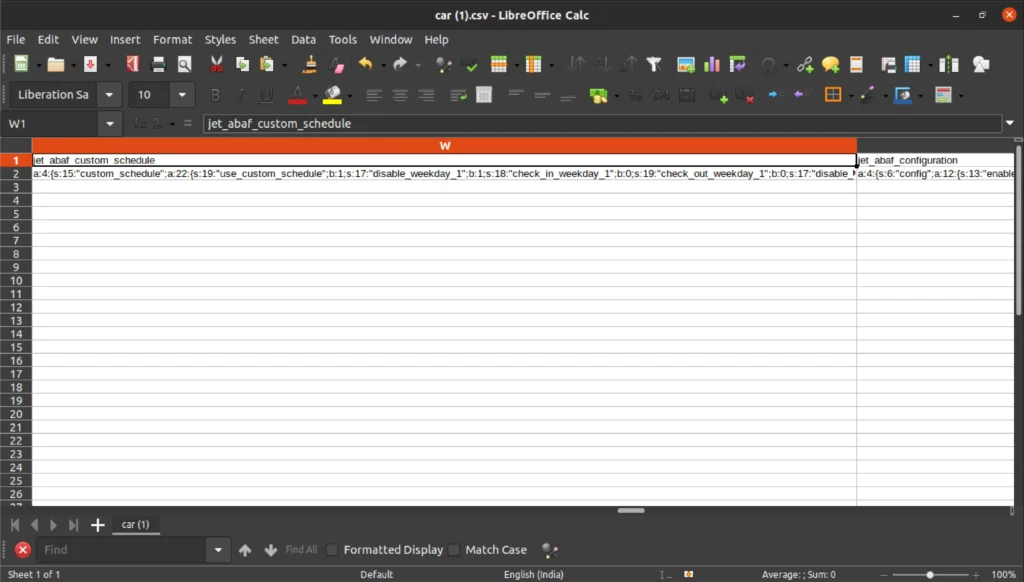
Note: Pricing settings, custom schedule, and data picker config fields will be exported and imported in serialized formats.
For unit_title, provide the unit id values, separated by pipes(|). For unit_number, provide values separated by pipes.
Import JetBooking Fields For Custom Posts(e.g., Rooms)
Follow these steps to import the JetBookings custom fields values for Custom Post type (such as “Car”) using WP Ultimate CSV Importer:
Step 1: Uploading the File with JetBooking Fields
Go to ‘Import/Update’ and upload your CSV file.
Select ‘Fresh Content’ for new data import and choose the post type (e.g., Car).
Step 2: Map the JetBooking Fields
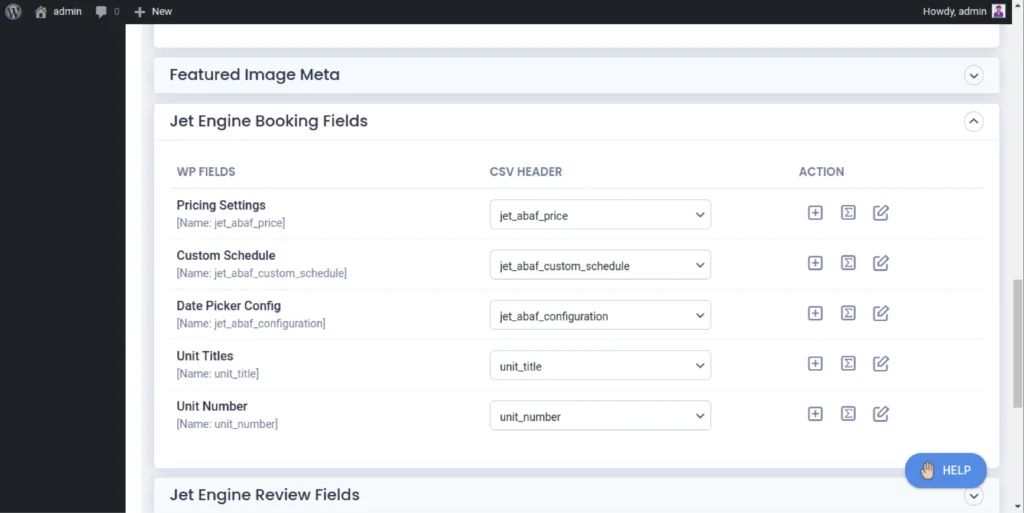
Click continue. In the mapping section, map the relevant fields under ‘Jet Engine Booking Fields’ (e.g., pricing settings, custom schedule, data picker config, booking unit titles, and unit number).
Save the field mapping template.
Step 3: Import Jet Booking Fields to the Post Type
On the next page, click Import, to add the booking fields to the post type.
Verify the import by checking the import log or visiting the post type directly.
How to Export JetBookings Fields Data Associated with any Post Types #
To export JetBookings Fields associated with post types such as posts, pages, or custom posts, you’ll need to navigate to the export section of WP Ultimate CSV Importer.
Step1: Choose the Post Type containing JetBookings Data
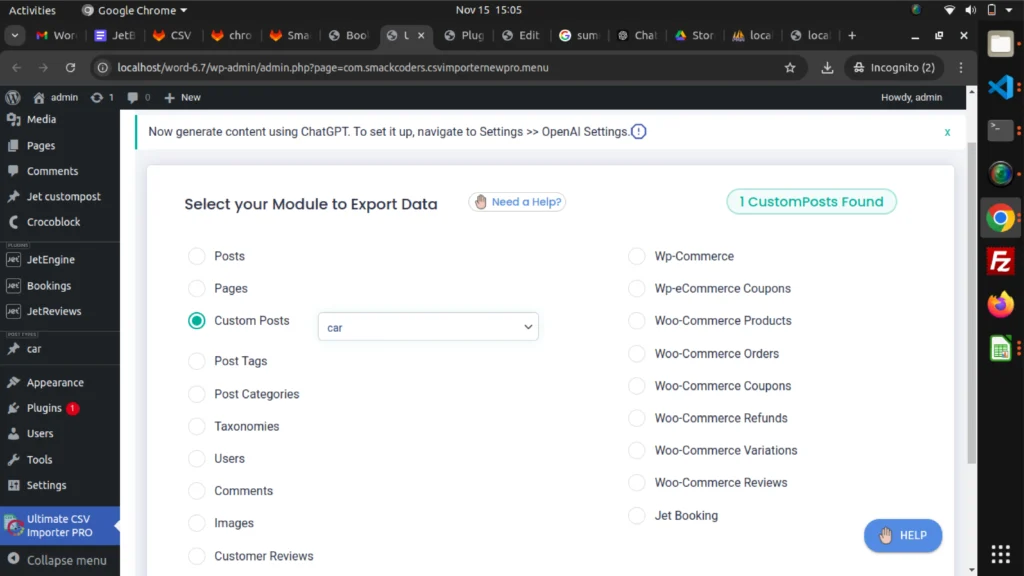
It will list out all the supported modules. Choose the post type. For example, if you’ve associated JetBooking fields for a custom post like Car. Choose Custom posts and select the name ‘Car’ from the dropdown.
Step 2: Configure file name, file type, and advanced filters
On the next page, provide the file name, filter type, and configure the advanced filters. You can export specific post type records based on their IDs or title.
Step 3: Export and Download File
Click Export to extract the desired record in your preferred formats. Download the file for a backup on your computer. Learn more about export features here.
How to Import/Export Bookings Data With WooCommerce Order Details (WooCommerce-Based Mode) #
WP Ultimate CSV Importer supports JetBookings WooCommerce integration. This feature ensures smooth handling of JetBooking-specific data like booking details and associated WooCommerce orders. If you’ve configured WooCommerce-Based Mode in JetBookings settings, you can seamlessly migrate your bookings data with WP Ultimate CSV Importer. Below read the detailed steps, if you’re looking to import and export booking records, including associated WooCommerce details.
To get started, make sure you’ve
- Installed JetBookings and JetEngine plugins. Configure WooCommerce-Based Mode in JetBookings > Settings > General > Booking Mode. Also, configure other JetBooking settings following this official JetBooking guide from Crocoblock.
- Create a JetBooking WooCommerce Product Type: When creating products for JetBooking, set the product type to JetEngine Product and define attributes specific to JetBooking.
- To create an attribute for JetEngine Product Type, visit Products > Attributes. Provide attribute name and slug. Choose ‘Booking Service’ from Type and click ‘Add attribute’ to create a new Attribute. Next, create terms for the attribute by clicking the Configure terms link for the attribute. Provide name, slug, description, service cost, and cost format value. Enable the multiply cost by guests count and everyday service checkbox if needed and click Add new to create a new term. Learn more about creating attributes for JetEngine Product Type here.
Once you have completed these steps, you are ready to import booking data.
How to Import Booking Data with WooCommerce Order Details
To import booking data, you need a properly formatted CSV/XML file containing the following essential fields:
- Booking Status: Indicates the current status of the booking (e.g., processing, confirmed, pending, canceled, etc.).
- Unit ID: Refers to a specific unit within the product or property being booked.
- Check-in Date: The date when the booking starts. (e.g: 2025-01-22)
- Check-out Date: The date when the booking ends.(e.g: 2025-01-27)
- User ID: The user id who made the booking.
- Order ID: The unique id for the WooCommerce order associated with the booking.
- Product ID: The unique id for the product associated with the booking.
- Attributes: Any custom attributes associated with the booking. Provide attribute name plus its value like in this format ‘attributename ->termvalue1|termvalue2’. Separate term values with pipeline if you’re selecting multiple values. (Eg: meals->non-veg|veg).
- Guests: The number of guests for the booking. (Eg: 2)
- First Name, Last Name, Email, and Phone: Provide the customer details in these fields.
- Order Status: The current payment status of the order (e.g., completed, pending, failed).
Note: When you import booking, it automatically generates the corresponding order in the WooCommerce Orders section.
Step 1: Prepare Your Bookings CSV File
Ensure your CSV file includes all required fields described above and is verified using a CSV validation tool like CSV Lint. This step helps avoid errors during the upload process.
Step 2: Upload the CSV File
Navigate to the Import/Update tab in WP Ultimate CSV Importer. Upload the CSV file using any of the supported methods—desktop upload, FTP/SFTP, URL, or server location. Select the post type as “JetBooking” and choose the import type: Fresh Import for new bookings or Update Content to modify existing bookings.
Note: If you’re updating, make sure to provide the Bookings Id value in your CSV file.
Step 3: Map CSV Fields to Booking Fields
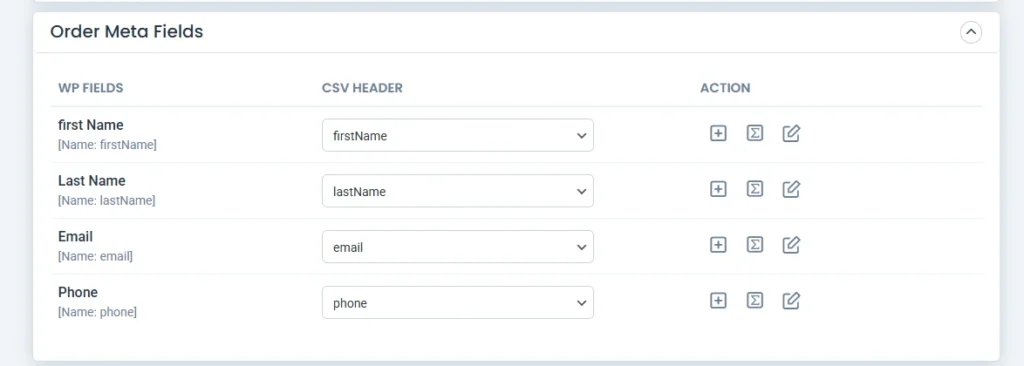
The importer will attempt to auto-map CSV columns to the corresponding booking fields. Use drag-and-drop mapping or advanced mapping if it doesn’t auto-map. Ensure all the critical fields like Product ID and Booking Status are correctly matched. Also, map the Order meta fields provided in a separate widget. Click Continue.

Step 4: Configure Import Settings
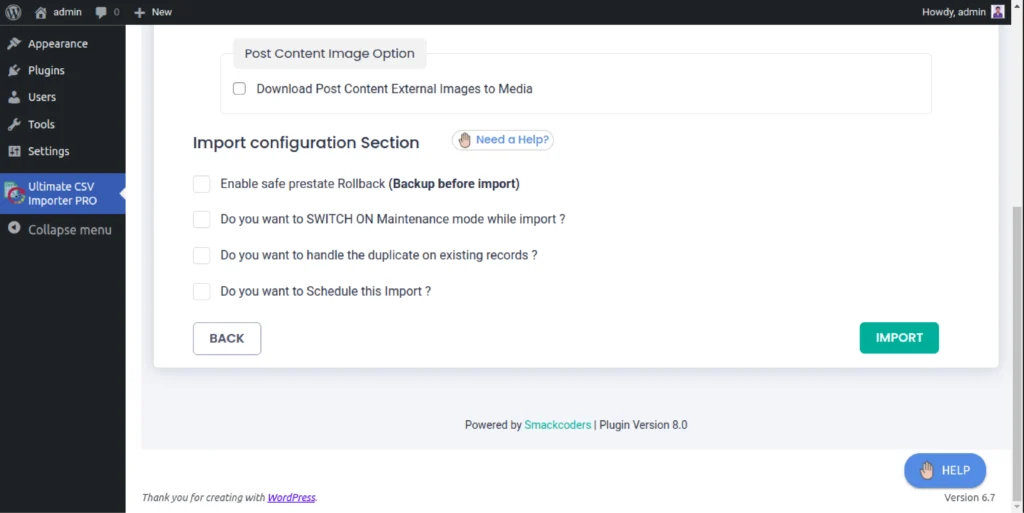
Review the import settings and adjust advanced options, if needed like media uploads, enable rollback or duplicate records handling. Start the import process by clicking the Import button and monitor progress directly on the screen.
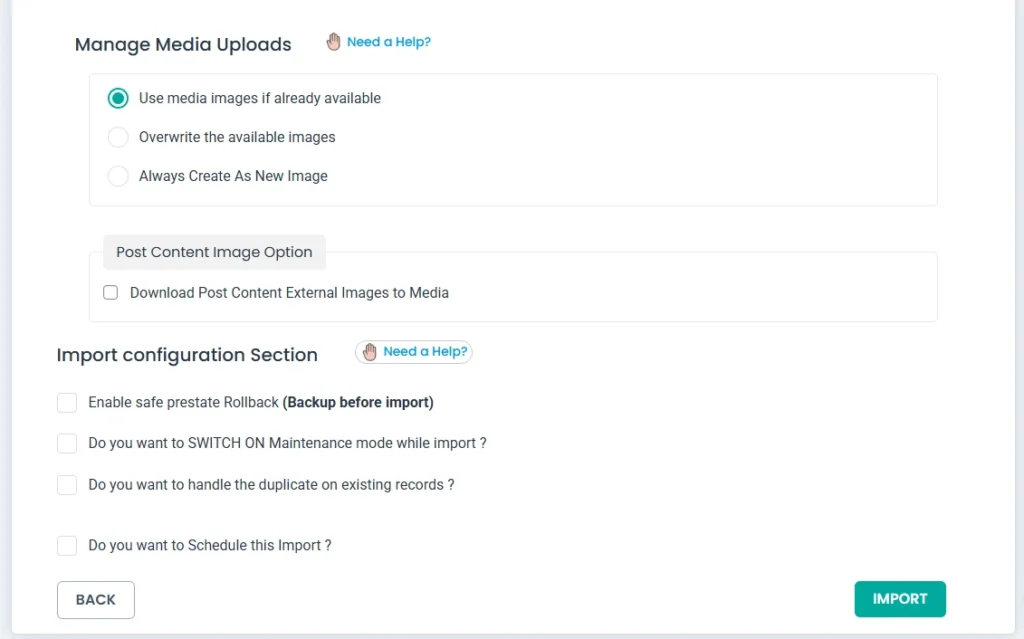
After completion, download the summary file or verify the data in the “Bookings” section of your WordPress dashboard.
How to Export Bookings Data
Exporting Bookings data is straightforward and allows you to back up or transfer your records.
Step 1: Select the Booking Module
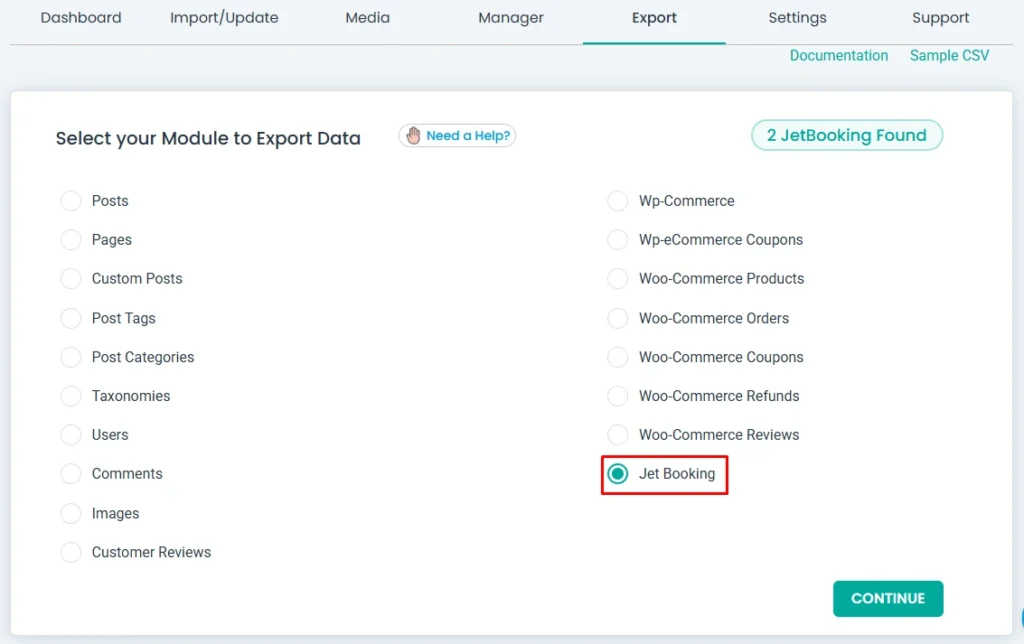
Go to the Export tab in the WP Ultimate CSV Importer plugin.
Select “Jet Booking” from the list of post types and note the number of records available for export.
Step 2: Configure Export Settings
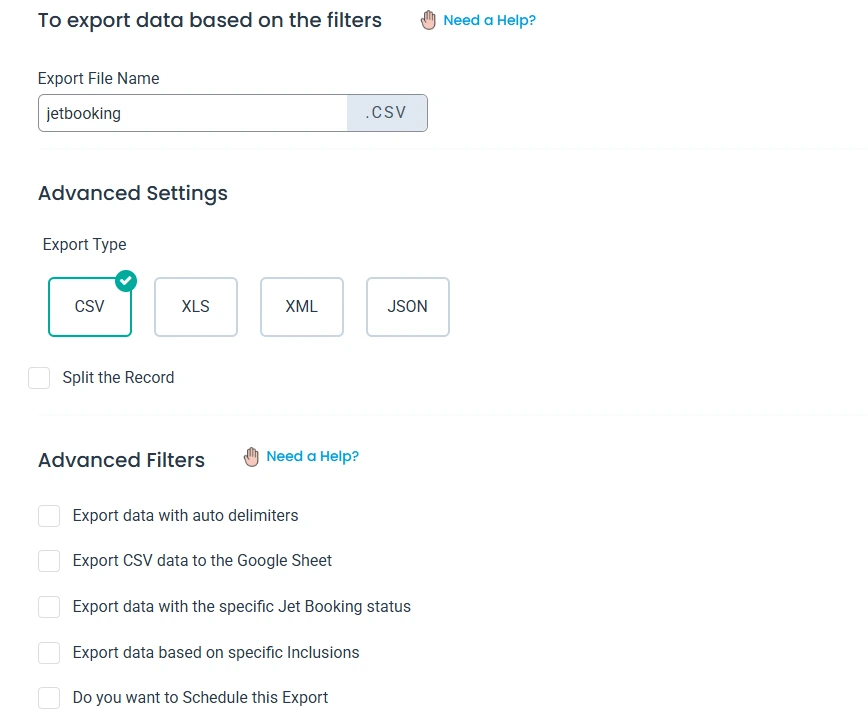
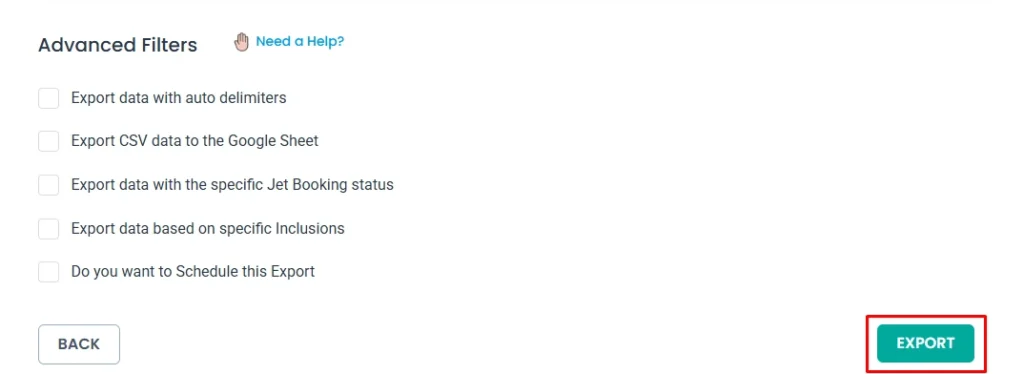
Specify the export file name and format (CSV, XML, or Excel).
Use advanced filters to refine the exported data (e.g., export specific booking status or export to google sheet, etc.,).
Step 3: Export and Download the File
Click Export to generate the file, and download it to your device. Use this file to import bookings data into another WordPress site or for backup purposes.

WP Ultimate CSV Importer Pro
Get Ultimate CSV/XML Importer to import data on WordPress faster, quicker and safer.