With WP Ultimate CSV Importer, you can import and export Easy Digital Downloads (EDD) Downloads (Products) data. EDD Downloads represent your digital products, including pricing, downloadable files, categories, tags, and product-level settings. You’ll learn how to bulk manage EDD Downloads for tasks such as product migrations, bulk updates, backups, and content restructuring. The importer supports all EDD product types: Single Products, Bundles, and Services. Also, it works with CSV, XML, Excel, and other supported file formats.
How to Import EDD Downloads #
EDD Downloads represent your digital products. This includes pricing, downloadable files, categories, tags, and product-level settings. WP Ultimate CSV Importer imports all three product types: Single Product, Bundle, and Service. Also, supports all the fields the EDD free version offers.
Step 1: Prepare the Import File
Your import file (CSV, XML, Excel, Google Sheet, or other type of file) should contain one row per download. Common fields include:
- Download ID (required for updates)
- Download Name
- Description
- Short Description
- Price
- Variable Pricing (yes/no)
- Price Type (single / variable)
- SKU
- Download File URLs or file paths
- Categories
- Tags
- Featured Image URL
- Product Notes
- Bundled Products
- Download Limit
- Download Expiration
Add required values for these fields. Download the EDD Downloads CSV file to know how to format the field values. Use absolute URLs for download files to avoid missing file issues.
Step 2: Create a New Import
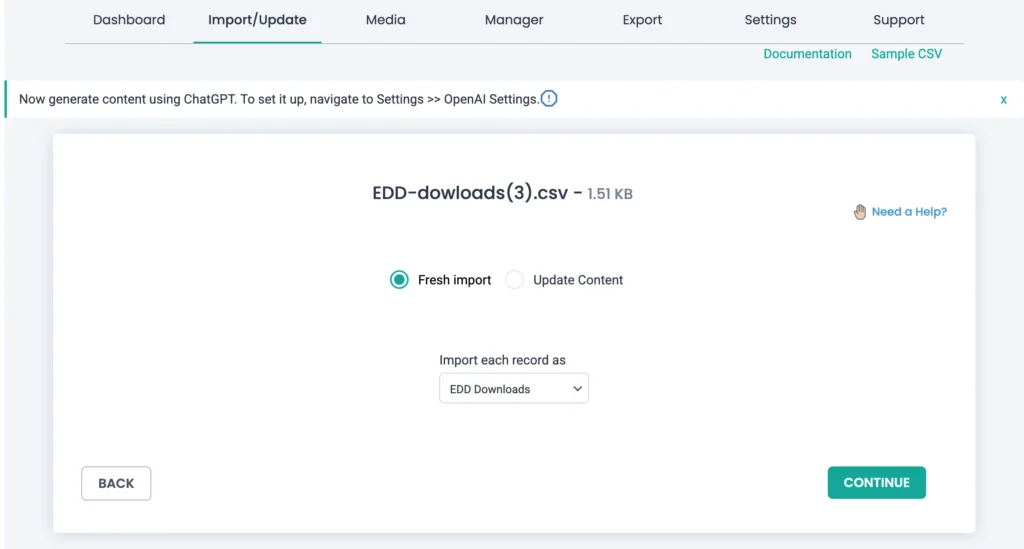
Navigate to WP Ultimate CSV Importer → Import/Update. Upload your prepared import file from your desktop, URL, FTP/SFTP, server, or from external sources like Dropbox and Google Sheets.

Choose Fresh Import for new downloads (products) import or Update Content to update existing ones. From the Import each record as dropdown, select EDD Downloads. Click Continue.
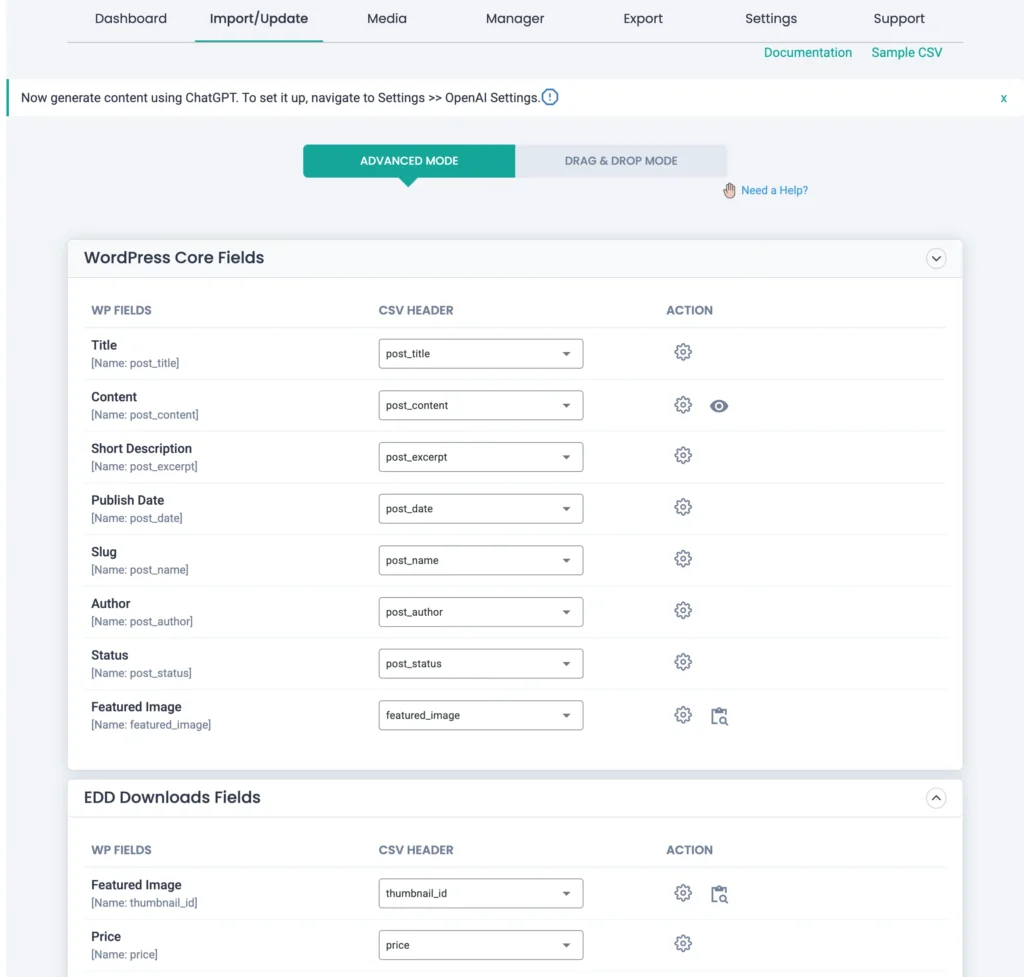
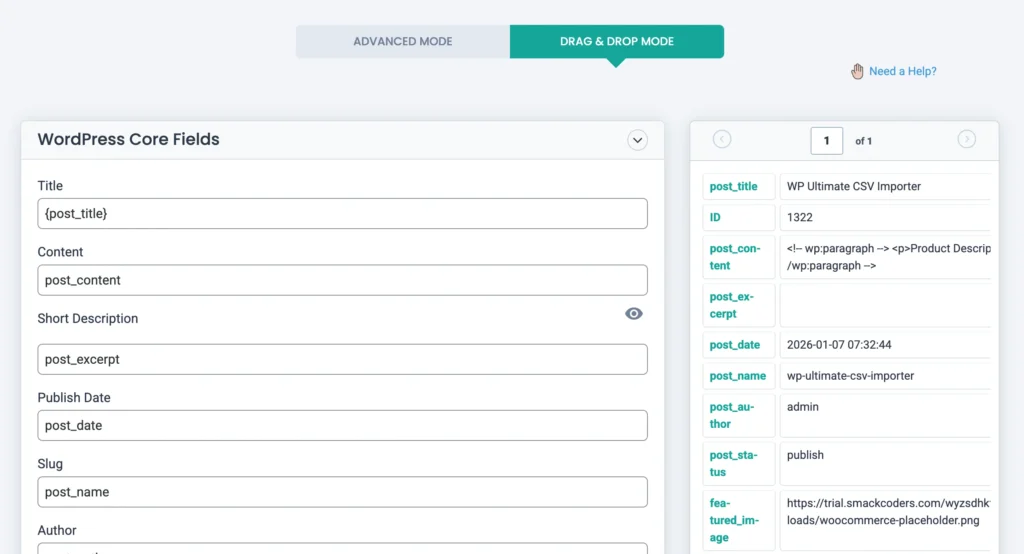
Step 3: Map Download Fields
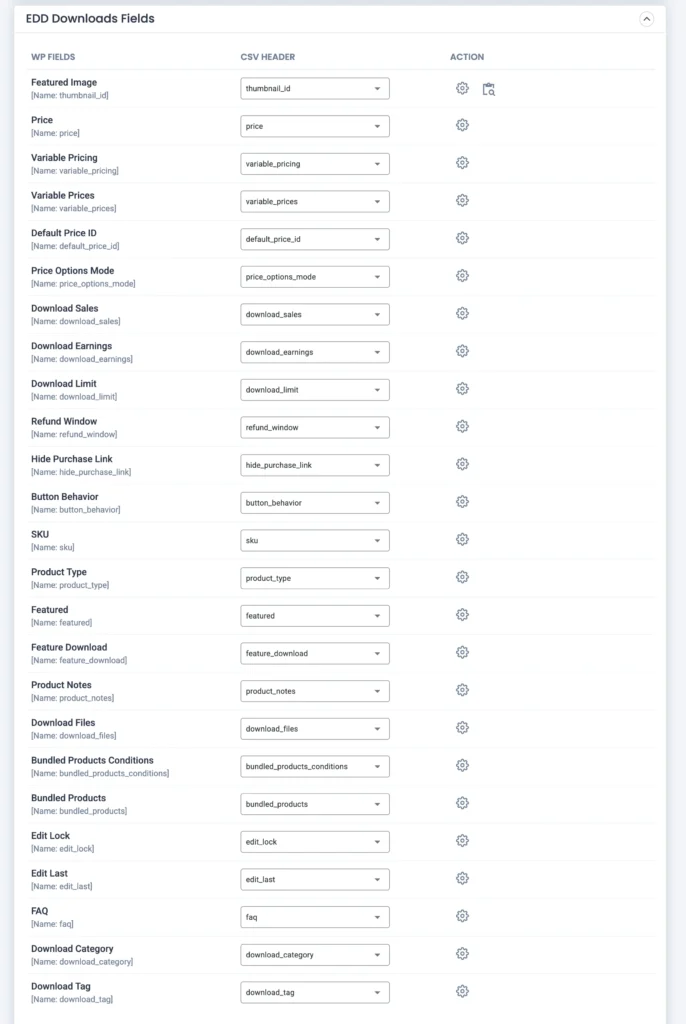
Map import file columns, such as Download Name, Price, and File URLs, to their corresponding EDD fields. Map the fields in the WordPress Core Fields and EDD Downloads Fields widgets.
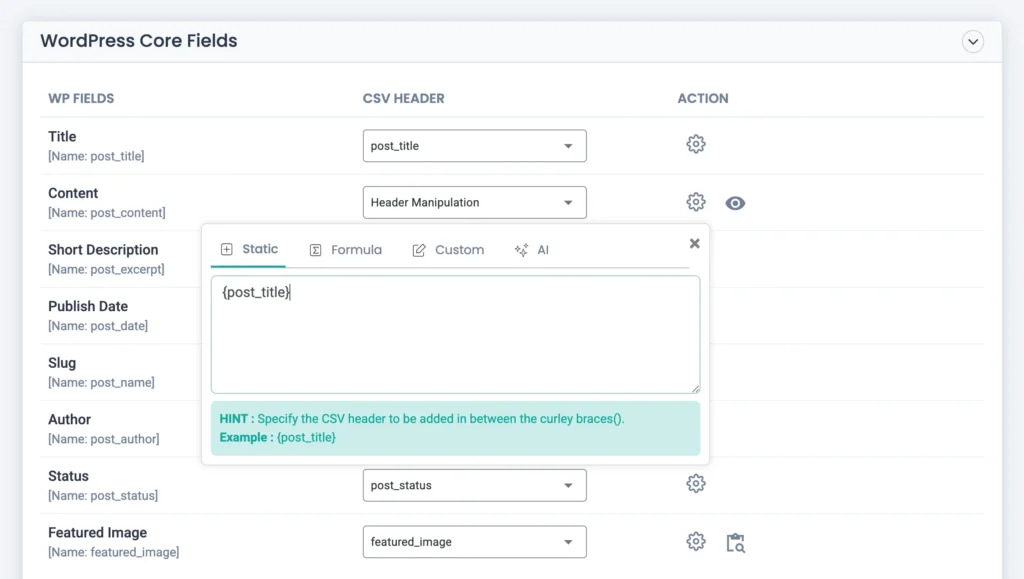
Use Advanced Mode and access the settings icon provided for each field under the Action area if you want to:
- Combine values using static text
- Run formulas for pricing
- Apply custom PHP functions (supports only built-in functions for now)
- Use AI for content generation by adding prompts
Learn more about how to access these import manipulation features here.
Otherwise, use the drag and drop mode to match the fields.
You can add a new WP custom field and manage filtering options here by specifying conditions to process the import.
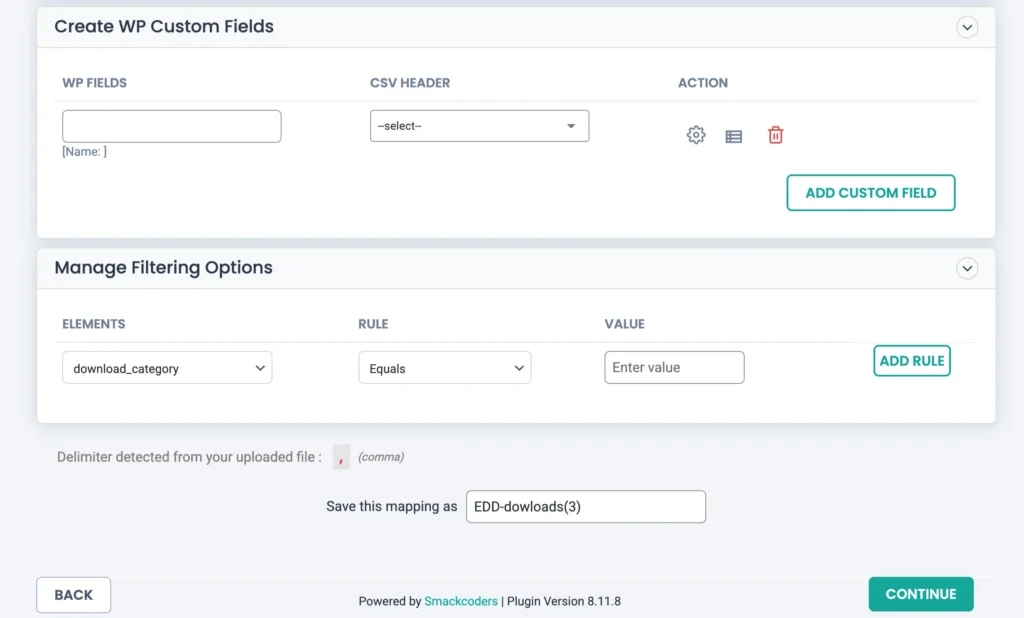
Save the mapping template with a name to reuse it. Click Continue.
Step 4: Configure Import Settings & Run Import
Before import configuration, set up media settings like how you want to handle the media import. Choose any one of the provided options: Choose media images if already available (chosen by default), Overwrite the available images, or Always create as a new image.
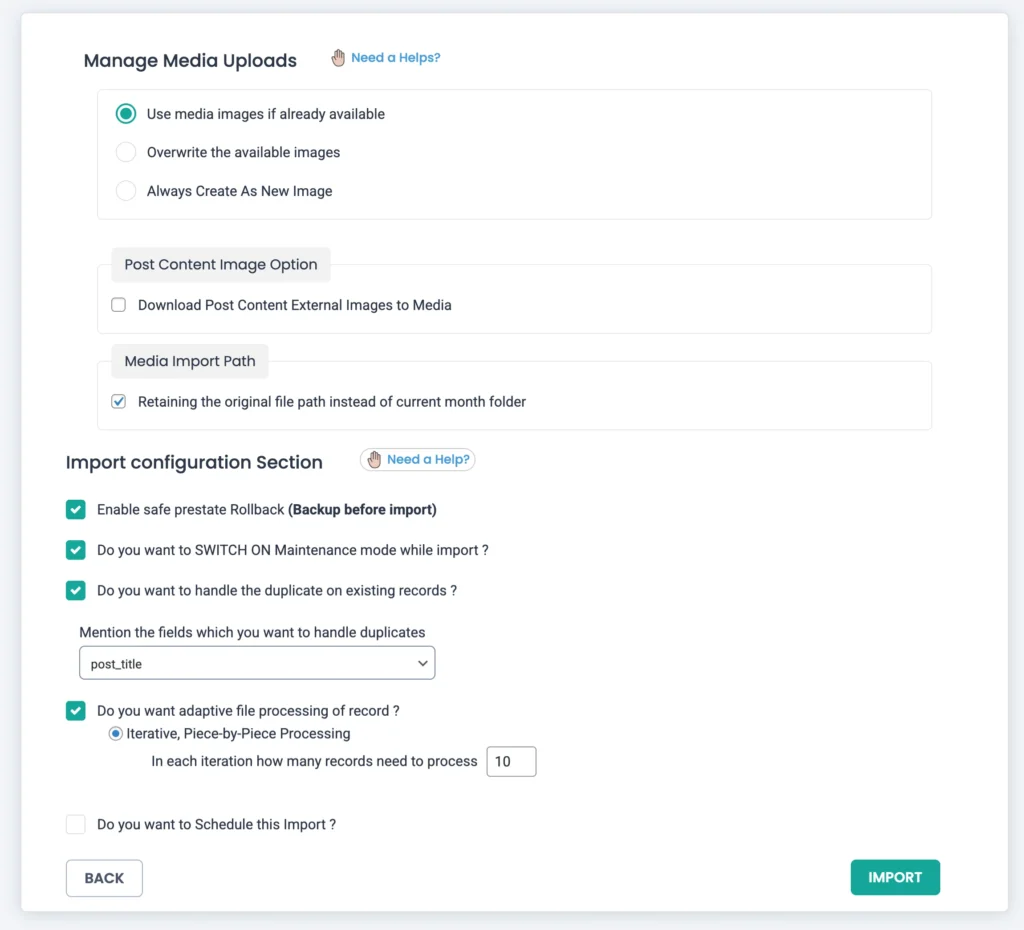
Enable the ‘Retaining the original file path instead of current month folder’ to use the same media path.
Below are the import settings. Here, enable rollback and maintenance mode if required.
Enable ‘Do you want to handle the duplicate on existing records?’ to handle duplicate downloads using Download ID or slug.
Turn on the ‘Do you want adaptive file processing of record?’ to enable the iteration-based import. This will process the records import batch by batch based on the number provided.
You can schedule the import with the advanced scheduling option. Learn more about import scheduling with WP Ultimate CSV Importer.
Click Import to start the process.
Once completed, verify downloads (products) under Downloads → Downloads.
How to Export EDD Downloads (Digital Products) from WordPress #
The EDD Downloads export generates a complete dataset of your digital products, including:
- Download ID and product name
- Full description and short description
- Pricing details (single price or variable pricing)
- SKU and price type
- Downloadable file URLs or paths
- Categories and tags
- Featured image URLs
- Product notes and bundled products
- Download limits and expiration settings
- Custom meta fields related to downloads
Step 1: Open the Export Module
Navigate to WP Ultimate CSV Importer → Export.
From the list of available export types, choose Custom Posts and select EDD Downloads from the dropdown. This option is visible only when the Easy Digital Downloads plugin is active.
The total count of Downloads (Products) present on your website will be shown in the right corner.
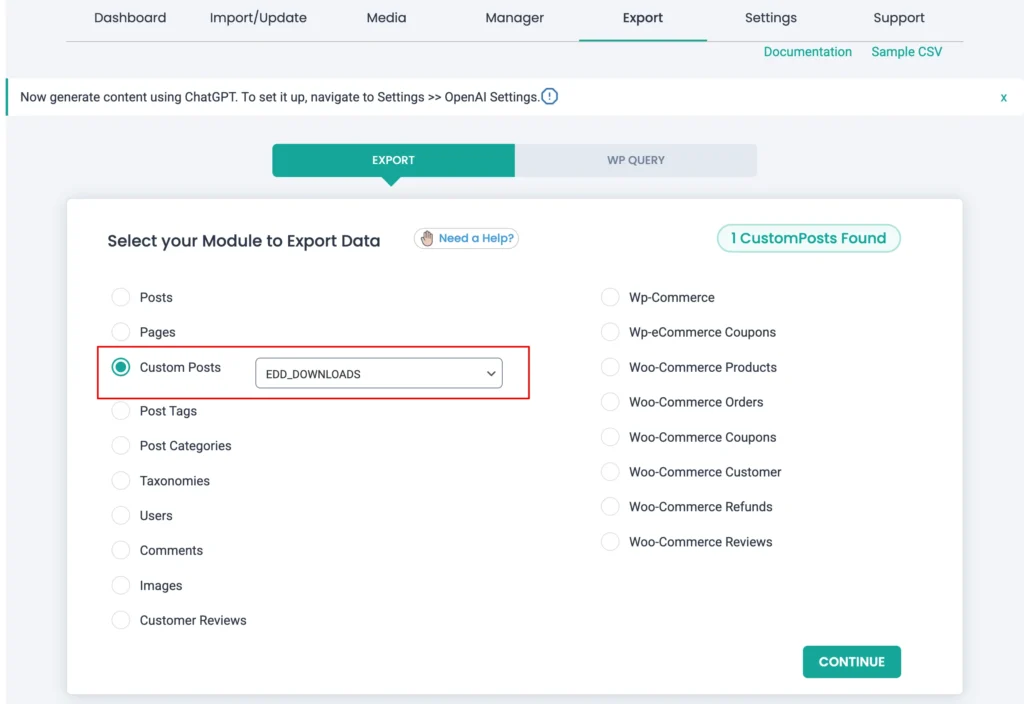
Click Continue to proceed to the export configuration screen.
Step 2: Choose the Export File Format
Add a file name and select the file format you want to export, like:
- CSV
- Excel (XLS/XLSX)
- XML
- TSV
- JSON

The data structure remains the same across formats; only the file type changes. You can configure the data export to Google Sheets option provided under the Advanced filters, which we will see next. Make sure to configure your Google Account details inside Settings → Google Sheet.
Step 3: Apply Export Filters (Optional but effective when you need selective data export)
You can narrow down which downloads are exported using filters such as:
- Export only selected downloads (filter by post ids or titles)
- Export only selected fields data, etc.
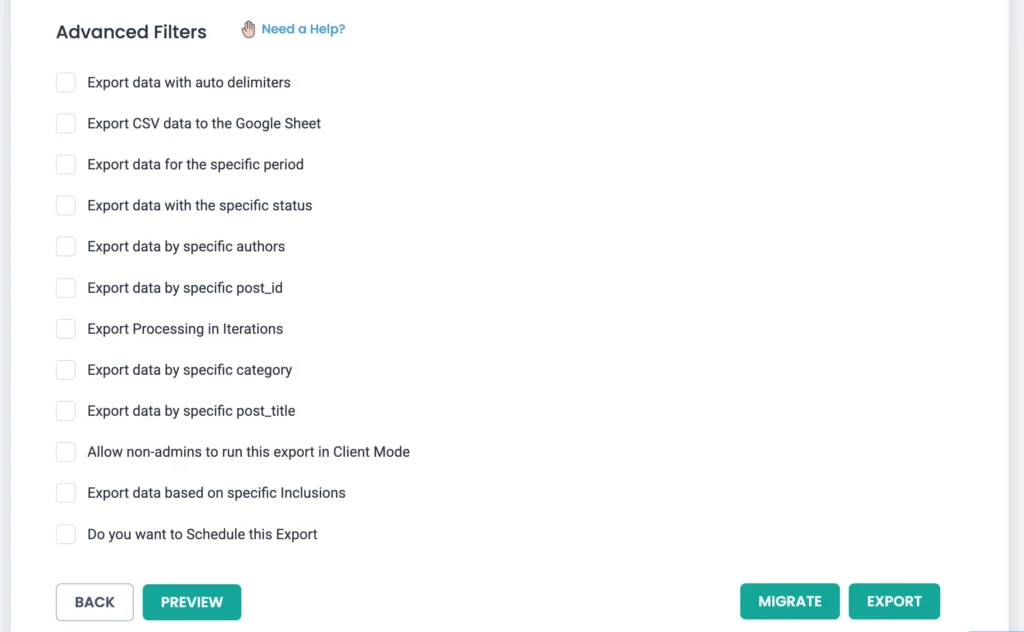
Using filters helps when working with large stores or when you only need specific products (Downloads) for migration or updates.
If you want to schedule the Downloads export repeatedly, check the ‘Do you want to Schedule this Export?’ option, configure the necessary export settings, and click Schedule. You can monitor the export schedules inside Manager → Scheduled Export.
Note: Always add a cron entry before proceeding with the schedule export. Learn here how to add a cron entry in WordPress.
Step 4: Generate and Download the Export File
Click Export to generate the file. Once processing is complete, the file will be downloaded automatically to your system.
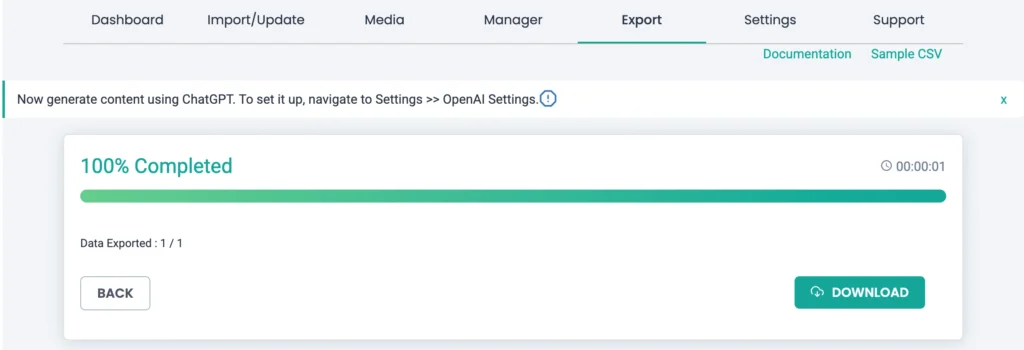
You can now use this file for re-importing into another WordPress site, updating prices or files in bulk, or creating offline backups of your product catalog.