WP Ultimate CSV Importer integrates with the ACPT (Advanced Custom Post Type) plugin, allowing you to easily import and export content from your post types along with their custom fields. It supports ACPT custom post types, meta fields, and custom taxonomies.
Note: Current integration supports only ACPT Lite. Support for ACPT Pro is coming soon.
How to Import Data to ACPT Fields #
To import data to fields created with the ACPT plugin, go to WP Ultimate CSV Importer > Import/Update. Upload your CSV or Excel or any other file containing the field information and select the post type (e.g., event_registration). Then, map your CSV or Excel columns to the WordPress fields and your ACPT meta fields. Finally, run the import with Ultimate CSV Importer.
Follow the detailed instructions below to try this out in your own environment.
Step 1: Prepare your import file
Create a file(CSV or Excel or XML) with essential data to import. For example, we’ll import data into a custom post type named event_registration created with ACPT.
The import file should include at least fields like post_title and post_content (for the post content itself), core WordPress fields like post_status, and ACPT fields such as text, texarea, and on. We support all the field types provided in ACPT lite.
Step 2: Create a new import
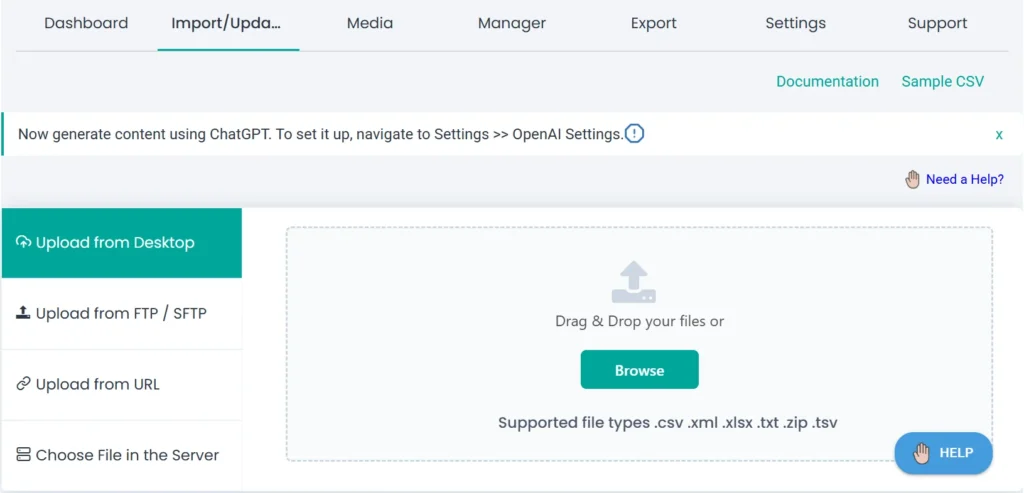
Once your file is ready, begin to create a new import. Go to WP Ultimate CSV Importer > Import/Update page.
Insert the file using one of the available options: upload from desktop, upload from FTP/SFTP, choose from external URL, or choose file from server.
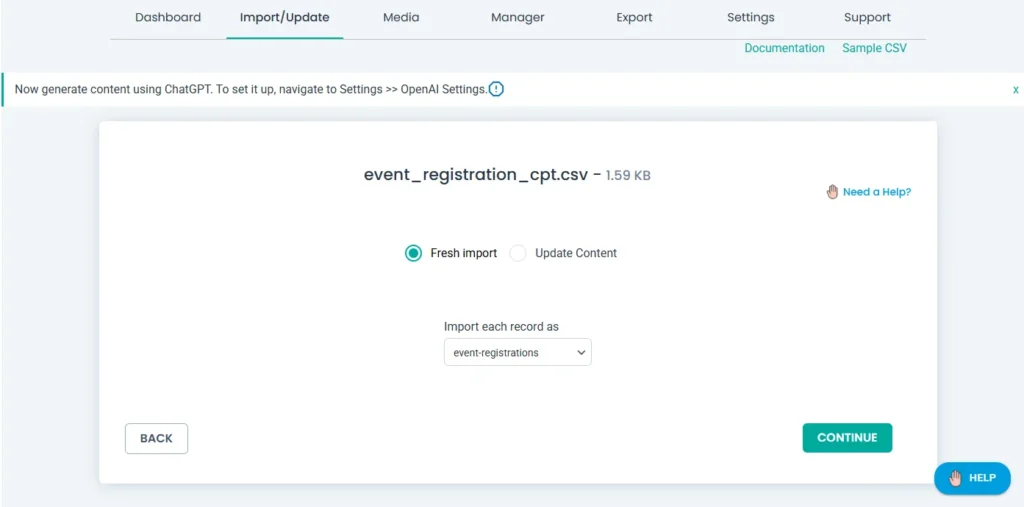
After the file is uploaded 100%, you’ll be directed to the page where you need to select an import type. Select ‘Fresh Import’ to import data newly or choose ‘Update Content’ for modifying available content.
Choose your post type name from the list (e.g., event_registration) from the below dropdown. Click Continue to proceed.
Step 3: Map your ACPT fields
In the mapping section, the plugin will try to auto-map fields with the same names. Map all the essential WordPress core fields. For ACPT fields, make sure to map all the fields provided under ACPT fields widget.
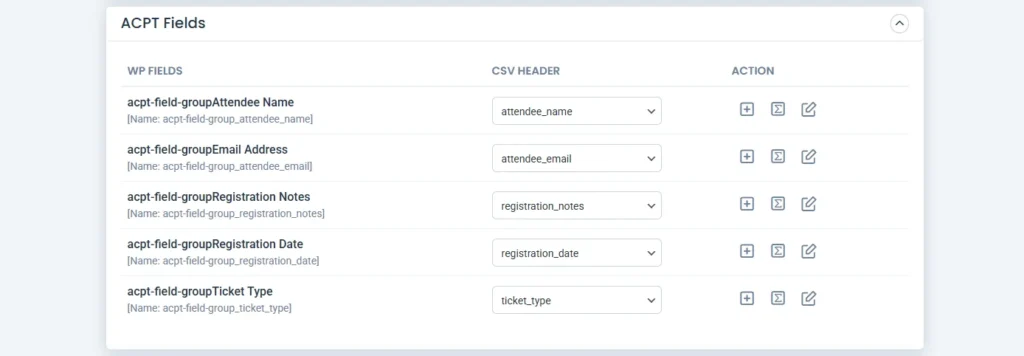
You can switch between Advanced Mode(dropdown) and Drag and Drop Mode during mapping.
At the bottom of the page, save your mapping template with a unique name for reuse, and click Continue.
Step 4: Configure import and other settings
Here, you’ll see several helpful options like:
- Manage media uploads: Configure any one option you would like to handle the media upload like new image import, overwrite existing, and skips import if exist)
- Download Post Content External Images to Media: This lets you to download external URL images in post content to media library
- Media Import Path: Helps to retain the original file path instead of current month folder
- Rollback: To restore your site if something goes wrong
- Maintenance mode: Show a coming soon page during import
- Duplicate handling: Avoid inserting the same record again
- Filter by category: Import records based on the category selected
- Adaptive file processing(iteration method import): Provide a numeric value to import records chunk by chunk upon the specific count provided.(optional)
- Schedule this import: run this import on a schedule (optional)
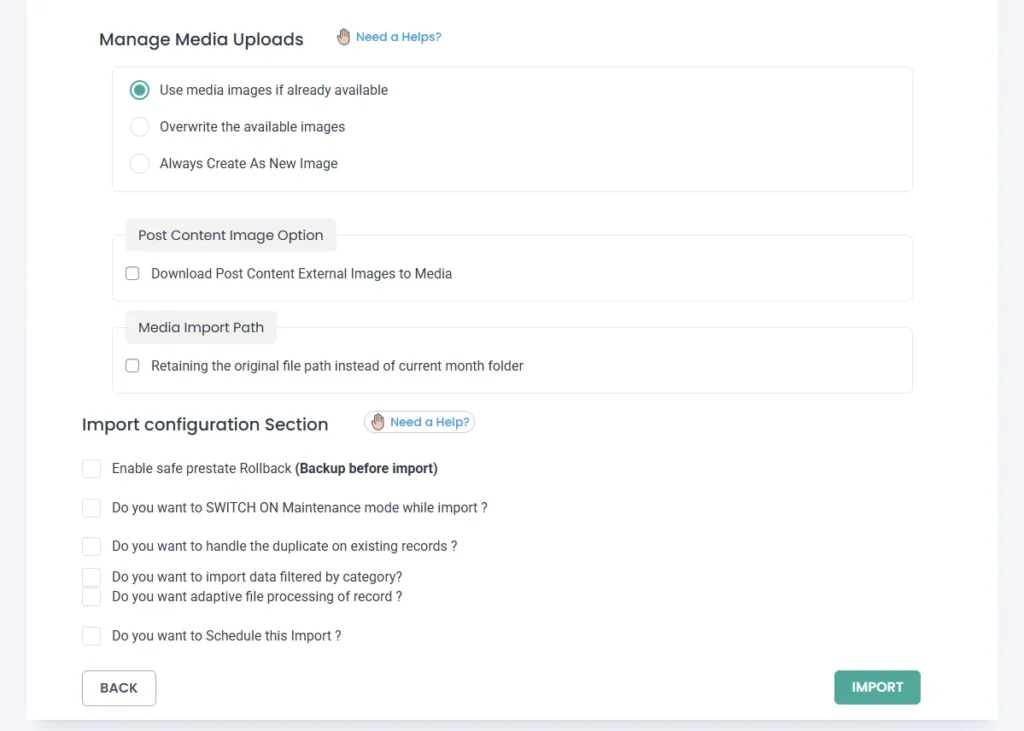
Choose your preferences and click Import.
Step 5: Check the Import Result
Once import is 100% completed, you’ll see a confirmation message showing in the popup window along with an import summary log, and a media failure log(if importing images).
Download them and check the results if you want.
Else, close the popup and visit the admin view of Event Registration (or your post type name) records shown in the import log summary one by one to check your newly imported record and their ACPT fields.
How to export ACPT fields data from WordPress #
You can export your ACPT fields data just as easily using the Export tab.
Step 1: Choose the post type you’ve assigned ACPT fields to export
Go to WP Ultimate CSV Importer > Export. Select your post type here. If you are using ACPT custom post types then select the custom posts option and choose the cpt name from dropdown, e.g., event_registration.
The plugin will show you the number of existing records under that post type in the top right corner.
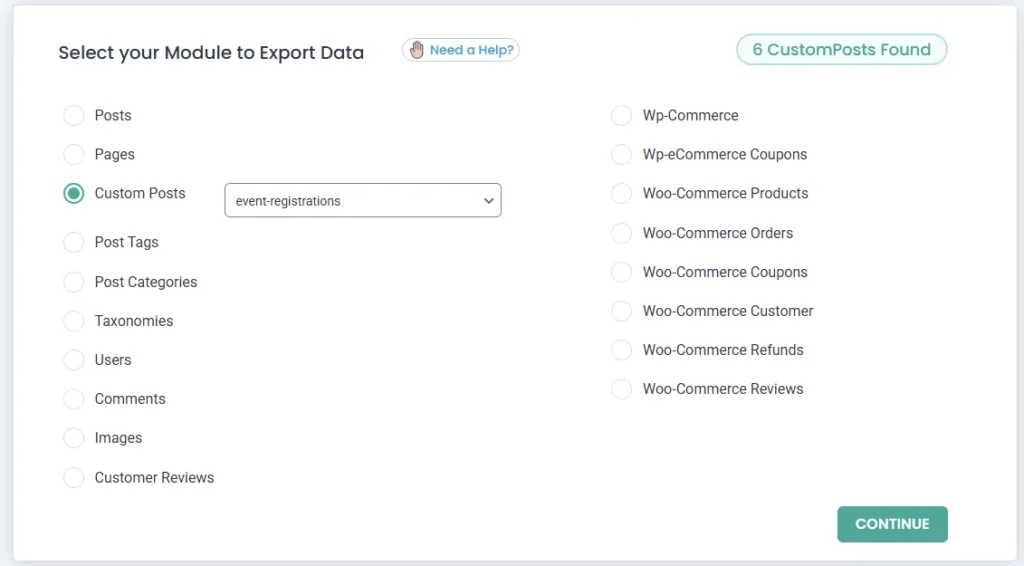
Click Continue.
Step 2: Configure export settings
Now, specify your export preferences like file name (for your export), file format. Choose one like CSV, XLS, XLSX, XML, or JSON.
Enable the Split the Record option for large exports. This will divide your export into multiple files and bundle them into a ZIP.

Step 3: Apply filters (optional)
You can apply export filters to narrow down data. For example, export data of specific period, status, post_id, category, title, etc.,
In addition to this, you can configure export to Google Sheets. Setup your google sheets api under Settings Page.
And many options like iteration export, client mode for non-admins, and schedule your export.
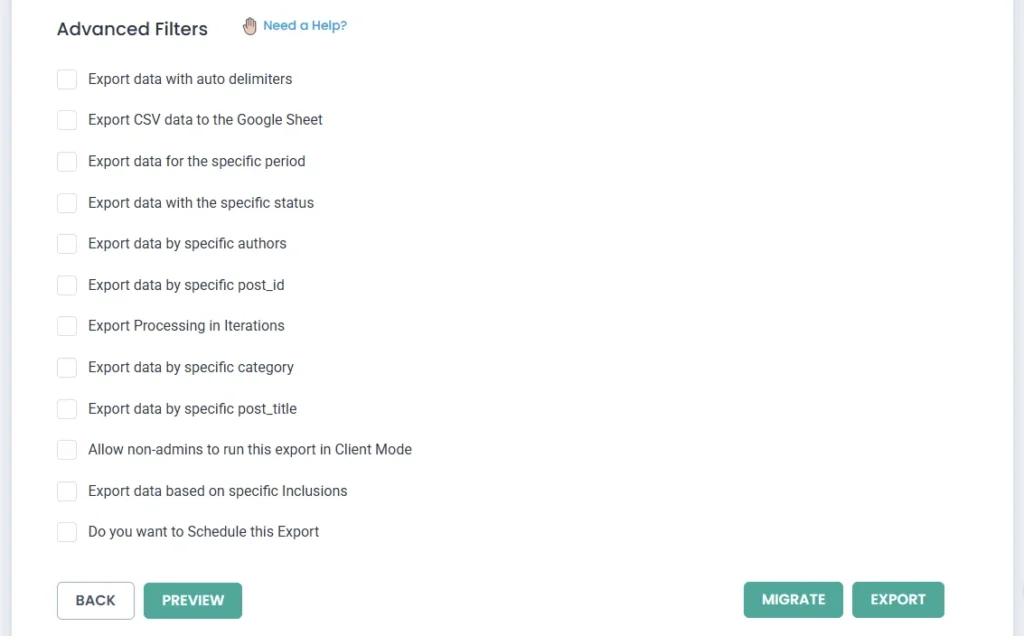
Step 4: Export the data
Click Export to start and complete the export process. Once done, you’ll get a Download link for your export file.
Use the Migrate button beside the Export, to export details with their mapping configurations which will be useful for migrations. Learn more about this in One-Click Import & Migrate Feature documentation.
Now click Download and download the file. Check all your ACPT fields are exported.
That’s all about ACPT fields import export. Do you need any help or a sample file? Reach us at [email protected].