The WP Ultimate CSV Importer now supports direct integration with leading AI providers, including Google Gemini, Anthropic Claude, and OpenAI ChatGPT, to help you automate data population during imports. This ai integration feature is particularly useful for tasks such as rewriting titles, generating SEO descriptions, creating new text dynamically, or creating featured images,and more, all during the import process with our plugin.
Step 1: Configure Your AI Credentials #
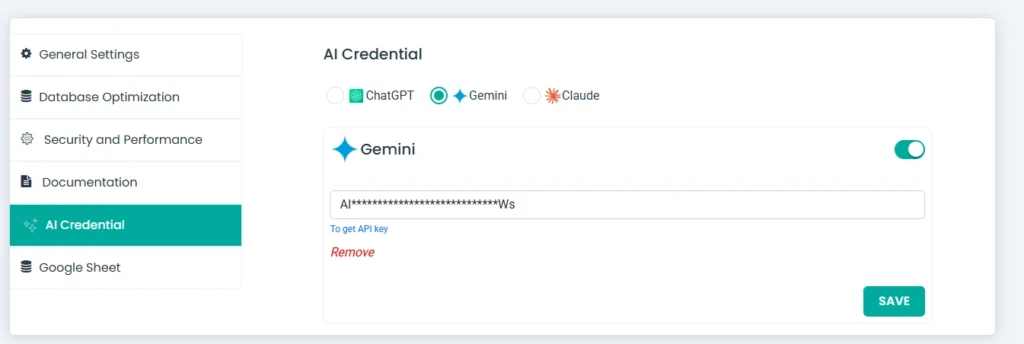
Before using AI features, you must connect the importer to your chosen AI provider by adding its API key.
To configure:
- Go to Settings → AI Credential
- Choose one AI provider from the list of options such as:
- ChatGPT (OpenAI)
- Gemini (Google)
- Claude (Anthropic)
- ChatGPT (OpenAI)
- Enter your API key for the selected provider.
- You can get your API key from your provider’s developer portal.
- You can get your API key from your provider’s developer portal.
- Click Save.
Note:
- Without adding your API key, the AI option will not appear in the field mapping screen.
- If you switch from one AI provider to another (e.g., Gemini → Claude), the plugin will ask you to confirm a reset before applying the change. This ensures settings and cached preferences are cleared for the new provider.
Step 2: Start a New Import #
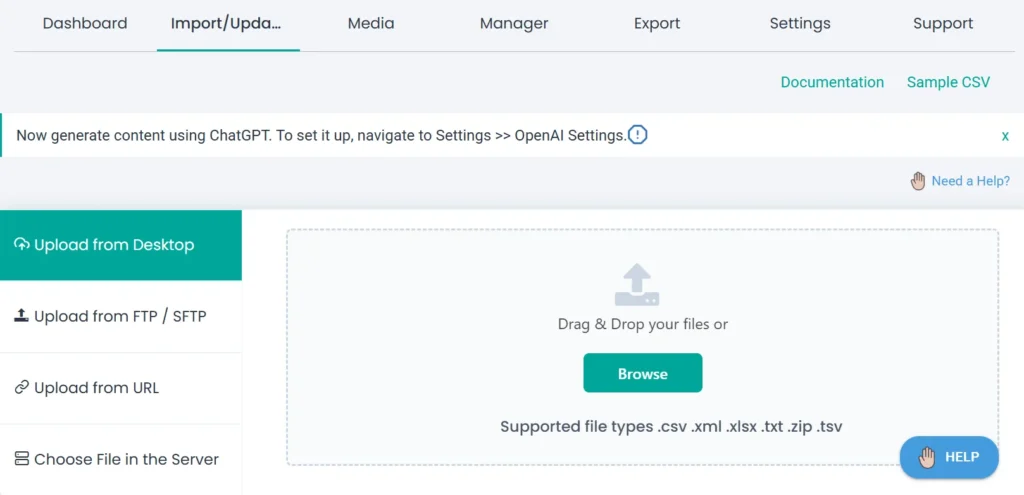
Once your AI credentials are set up, we now need to start a new import. For that, you can use a file like CSV, XML, Excel, or other file type we support with necessary information filled and leaving the columns empty where you want the AI to fill the content dynamically during import.
- Create a new import by uploading a file like XML or Excel. You can input a file in any one of the ways like provide your file directly from the desktop, provide ftp/sftp file location, or add the url of the file in cloud storage like Dropbox or Google Sheet. Otherwise, choose the file from the server.
2. After that, configure the post type, based on this, the next section will be processed. For example, choose posts or WooCommerce product.
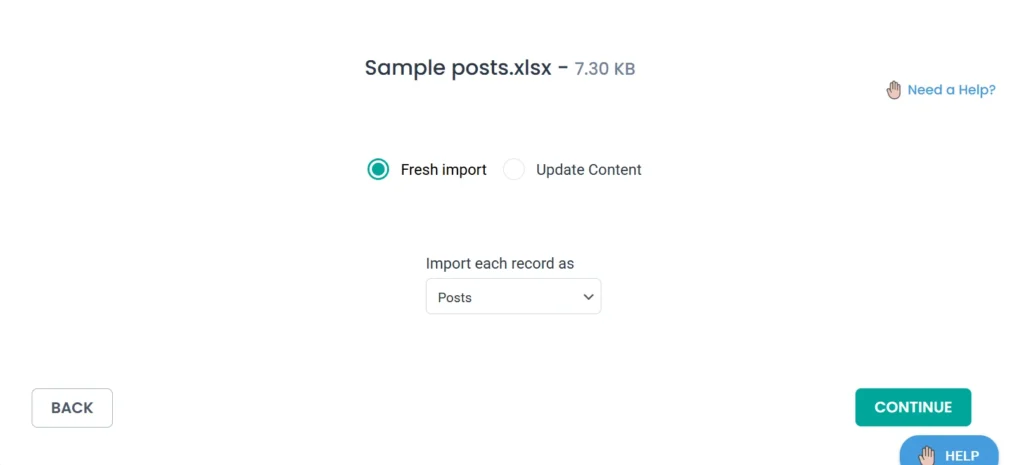
3. Above that, you will see two options: ‘Fresh Import’ and ‘Update Content’. This section is to select the import type like new import or update old content. Based on your needs, you can choose any one.
4. Now, click on Continue.
Step 3: Match the File Column with WordPress Fields #
Now, you’ll land in the field mapping area. Here the advanced mode is selected by default. Also, this mapping mode only has the ai accessing feature.
- Start to match the columns from your import file to the corresponding WordPress fields.
- For any field you want AI to populate (e.g., Post Content, Featured Image, Product Description, Meta Title, Meta Description):
- In the dropdown, select Header Manipulation.
- Click the Settings (gear) icon next to it.
- Choose AI from the options (Static, Formula, Custom, AI).
- The AI prompt area will appear and this is where you tell the AI how to process the field.
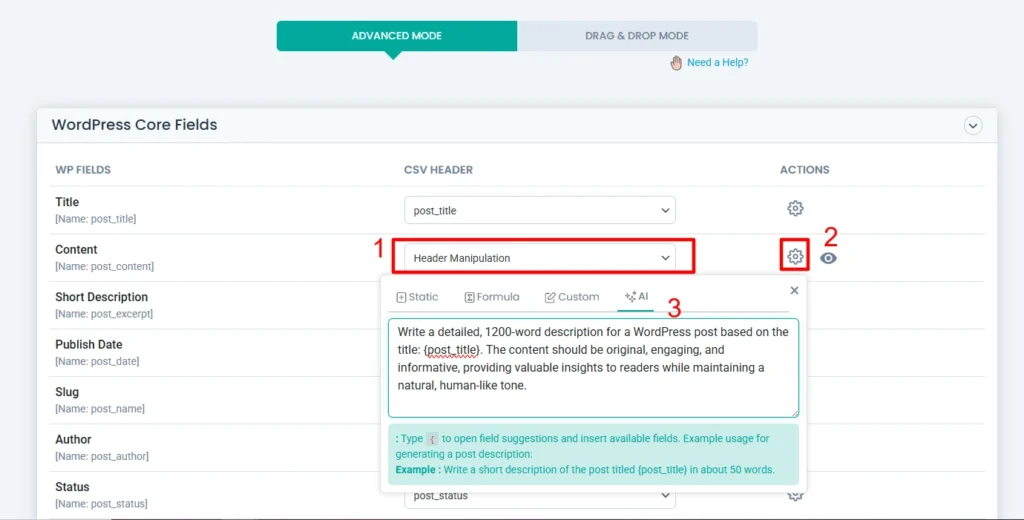
Note: You’ll see the AI option if your credentials are configured.
Writing AI Prompts
When the AI prompt box appears, write a clear instruction for Gemini, Claude, or ChatGPT to generate content for the selected field.
Example prompts:
- Generate an SEO-friendly product description of about 250 words based on {post_title}.
- Create a short, catchy tagline for {post_title}.
- Translate {product_description} into Spanish.
- Generate a unique blog introduction using {post_title} and {category}.
Using Placeholders
If you want to insert values from your import file like CSV into the AI prompt dynamically, use curly braces {} around the field name exactly as it appears in your file header. The importer will suggest available field headers once you type an opening brace {.
Examples:
- {post_title} → Inserts the Post Title column’s value.
- {product_description} → Inserts the Product Description column’s value.
Save Mapping Template
Once all fields are mapped:
- Scroll to the bottom of the mapping page.
- Enter a name for the mapping template (useful for future imports).
- Click Continue.
Step 4: Configure Import Settings & Run the Import #
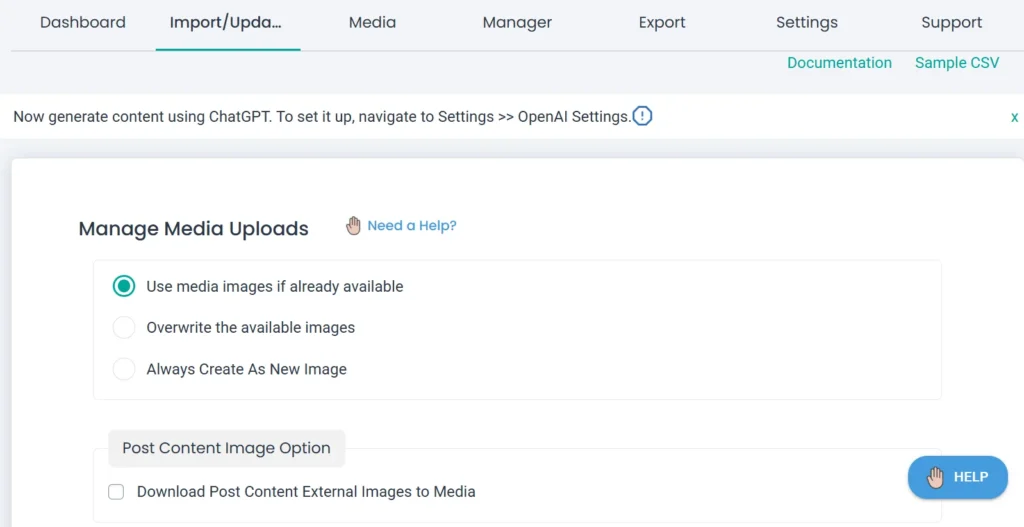
- In the Manage Media Uploads, choose one option for how you want to handle the media imports like always create new image or use image if already available(recommended).
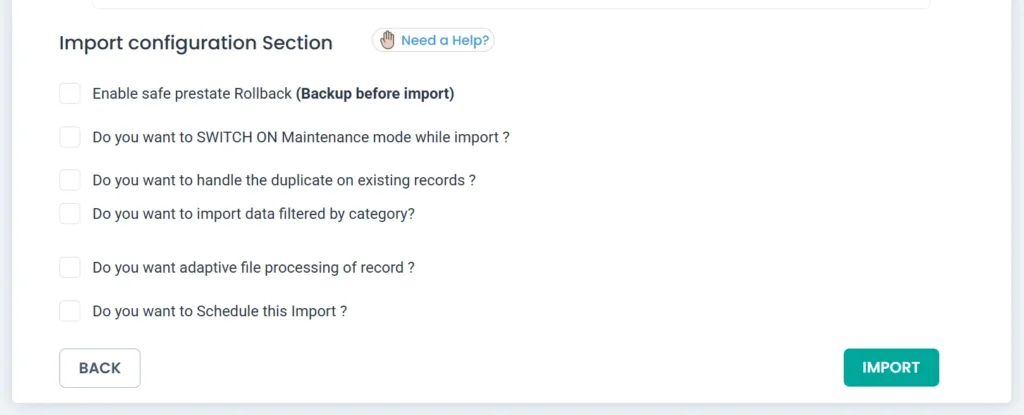
- Now configure the import settings. Configure duplicate handling option “Do you want to handle the duplicate on existing records?” and choose a field type to check for duplicates based on it.
- Configure rollback, and other settings too. If you have a large number of records, configure the iteration import option “Do you want adaptive file processing of record ?” and provide a number value to tell the importer, how many records to process in each iteration.
- You can also schedule the import here with “Do you want to Schedule this Import?”.
- Otherwise, click Import to start instant import.
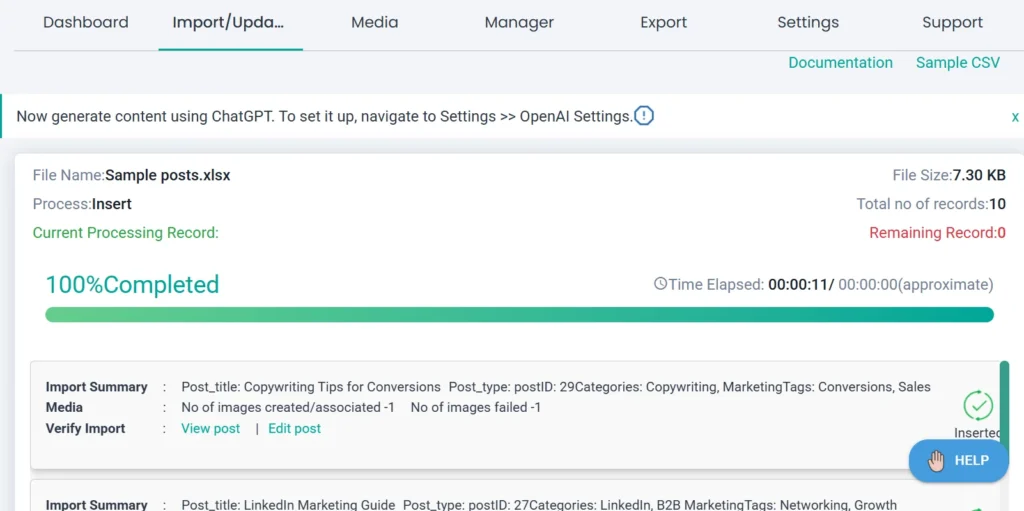
The import will start and complete. You’ll see the completed import message pop up after the importer completes the process. You can download the summary and failed logs from this screen.
Close the popup, to return to the import logs page where you can see the status of each record, check them in WordPress admin or front view.
Step 5: Verify the Results #
Now if you check the records in the post type you’ve imported. You’ll see the content and image generated by the AI added there.