Table of Contents
Setting a featured image from an external URL in WordPress is straightforward once you know which approach fits your situation, but WordPress doesn’t support it out of the box, and choosing the wrong method can create storage bloat, broken images, or long-term SEO instability.
There are three ways to make it work. The FIFU plugin is the fastest route for most sites; install it, paste a URL, and done. For developers who want images stored locally rather than referenced externally, the media_sideload_image() function downloads and attaches the image directly to your media library. And if you’re already building with Elementor Pro, it has its own built-in URL import that skips both.
This guide covers all three methods in plain steps, helps you choose between external and local hosting based on your actual use case, and includes a comparison table so you can make the right call before you start.
Key Takeaways
- WordPress does not support featured images from external URLs by default
- Plugins like FIFU let you reference external images without uploading them
- Programmatic methods download and attach images directly to your media library
- External images save storage but depend entirely on the availability of the host
- Always add alt text for both accessibility and search visibility
What Is the Featured Image from URL (FIFU) Plugin?
Featured Image from URL (FIFU) is a WordPress plugin that loads the post thumbnail directly from an external source instead of your WordPress media library. In simple terms, it lets you add URLs to featured images.
- The image is not uploaded to your server
- WordPress stores only the image URL
- The image is rendered dynamically from the external host
When Should You Use an External Featured Image?
External featured images are the right call in specific situations, and the wrong call in others. Choosing without knowing the difference creates problems that are frustrating to fix after the fact.
Use external featured images when:
- You manage large content volumes and want to avoid filling your server storage with media files
- Images are already hosted on a CDN or external asset server you control and maintain
- You are importing posts from another system that already references image URLs in bulk
- Publishing speed matters more than long-term image control for that specific content type
Avoid external featured images when:
- You don’t own or control the external image source, if that site goes down, your featured image disappears with it, leaving a broken image placeholder on every affected post
- Long-term availability is critical, external hosts can pull files, restructure URLs, or block hotlinking at any time without warning you
- The content is evergreen or SEO-critical, a missing featured image on a high-ranking post can hurt click-through rates in search results where the image appears in previews
- The external site may block hotlinking, some hosts actively prevent other sites from loading their images, which means your featured image loads for you but fails for every visitor
Method 1: How to Add External Image Links (URLs) to Featured Image in WordPress Posts, Pages & Products
The FIFU plugin adds a new field to the post editor, after it is installed and activated, for pasting an image URL. WordPress treats this image as the featured image without downloading it.
Install the WordPress Featured Image from URL(FIFU) plugin
The Featured Image from the URL plugin is available for free in WordPress. This plugin is easy to use and set up from your admin dashboard.
Visit dashboard → Plugins → Add new. Search for ‘fifu’ or ‘featured image from URL’ in the search box. The plugin will be listed. You can see that in the screenshot.

Install and activate the FIFU plugin.
You can now add external images as featured images for posts, pages, and custom post types.
How to Set a URL as Featured Image for WordPress Posts, Pages & Products
Before using images from other websites, just make sure you have the right permission or licensing to use them on your site.
To copy an external image URL:
- Visit the website where the image is located.
- Right-click the desired image and select ‘copy image address’.
- The image URL is now saved to your clipboard, and you can paste it wherever you need.
Keep in mind, you can only copy one image at a time.
Tip: If the image is from another WordPress site you own or manage, you can easily copy its URL directly from the media library.
Now, if you want to add external images as featured images for all your posts, you’ll need to copy and paste each URL into the featured image field of every post.
To add a featured image for WordPress Posts, Pages, or Custom Posts like Products:
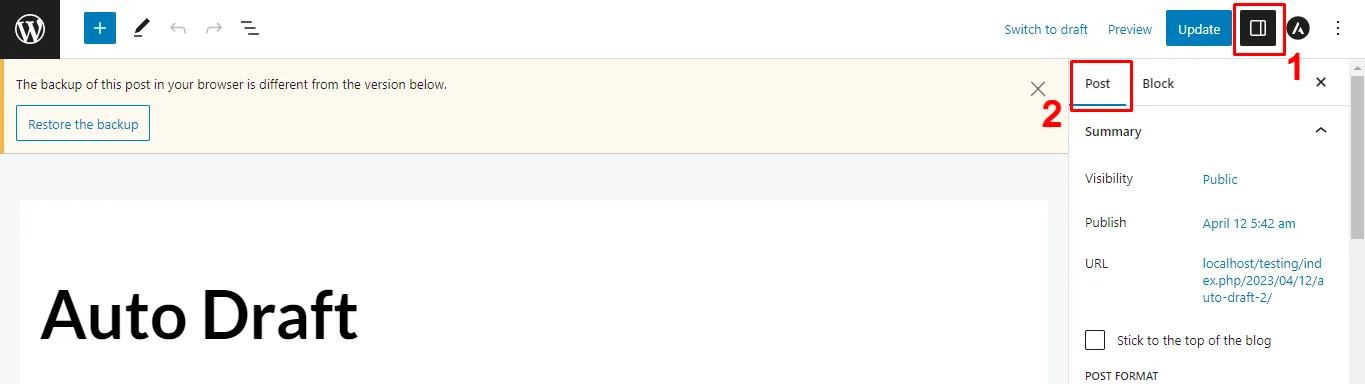
- Open the edit screen of any post type(either create a new one or edit an existing one).
- From the top bar, click the settings icon to open the sidebar. By default, this will display the Post settings.
- Scroll down to locate the ‘Featured Image’ field provided by the FIFU plugin (like in the screenshot below).
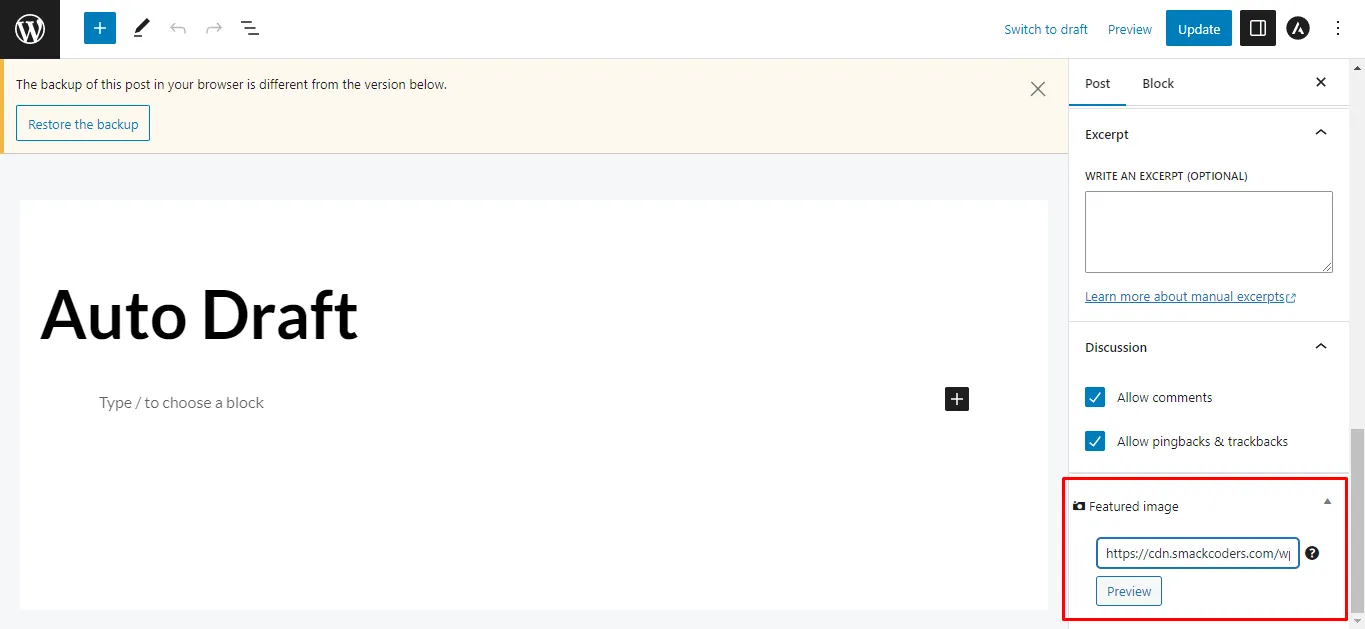
Now you can add your external image in two ways:
- Paste an image URL: Copy the external image link and paste it into the featured image text box.
- Search by keyword: Enter a keyword to get image suggestions, then choose one to use as your featured image.
Once you’ve added the image:
- Click Preview to see how it looks on your post.
- A new text box will appear where you can add Alt Text (recommended for SEO and accessibility).

- Finally, click Save/Update to apply the changes.
To replace the featured image URL:
If you’d like to replace the featured image, simply remove the existing URL and paste a new one, then click Update.
To remove the featured image URL:
To remove it entirely, select “Remove External Featured Image” and you’ll return to the default state, where you can add another image if needed.
The above steps are applicable to Posts and Pages. To add featured image URLs for Products,
- Visit Products and open a product in an edit view
- You’ll see a “Product image” metabox newly added
- Enter the image URL inside the box and click the Preview button to view the image.
- Add an alt text for the image in the alt text box
Alt text is not optional for accessibility or search visibility.
Best practices for adding alt text:
- Describe what the image shows, not what it “is”.
- Avoid keyword stuffing.
- Keep it under 125 characters.
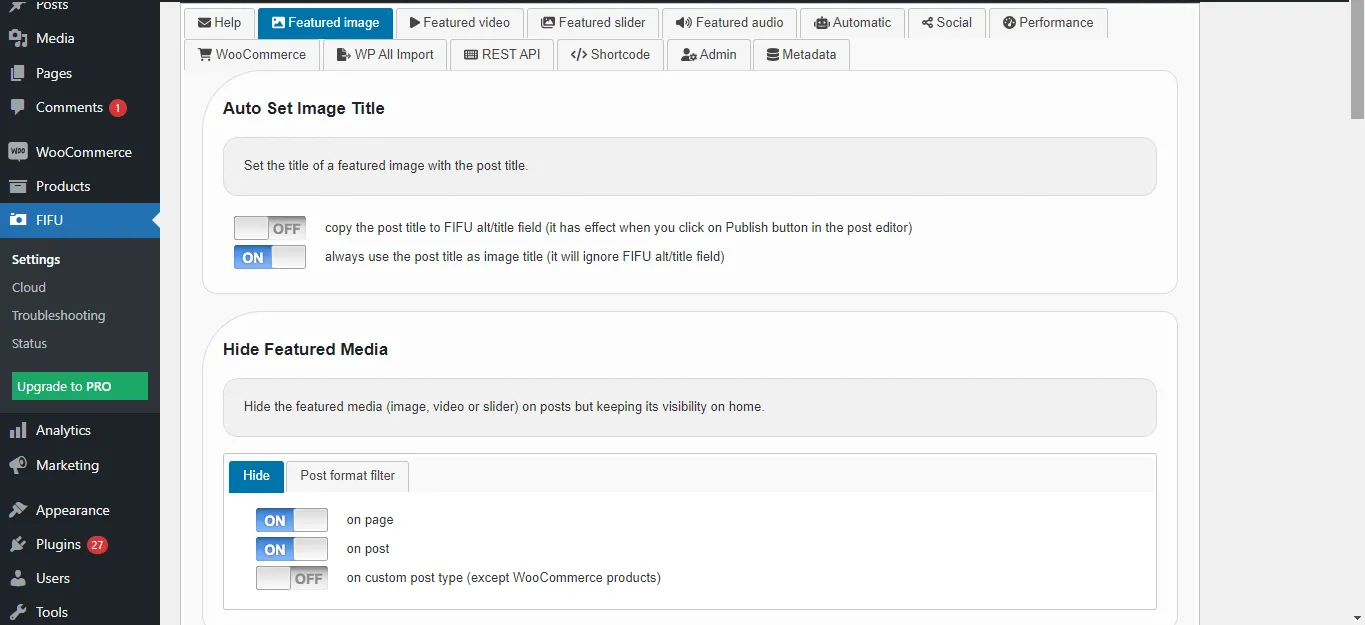
How to Hide the FIFU Featured Image Meta Box in WordPress
Sometimes, you may want to hide the featured image meta box by the FIFU plugin for specific post types like Posts, Pages, or Custom Post types like Products. This can be easily managed from the plugin’s settings.
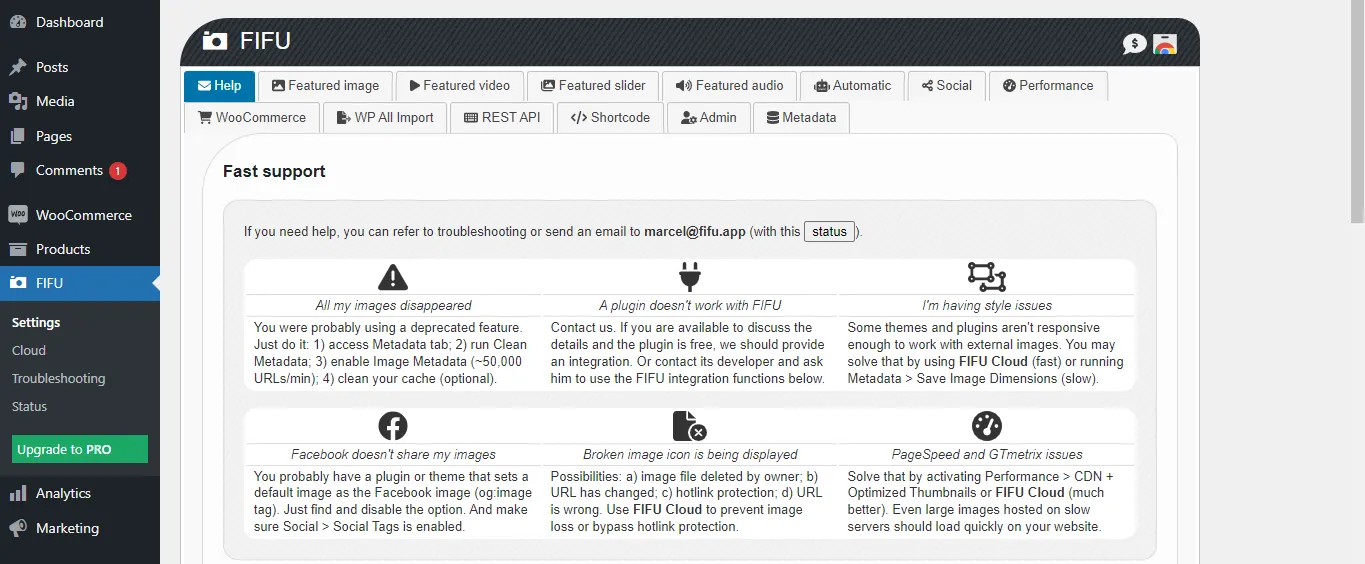
- Go to the FIFU → Settings menu in your WordPress dashboard.
- The Settings page has multiple tabs (like image, video, slider, audio, etc.). This plugin supports more than just images.
- Open the Image tab and scroll down to the “Hide Featured Media” section (just above the default featured image setting).
- Enable the Hide toggle and in the next post type filter tab, specify the post types like “page, post” you want to exclude.
- This will remove the meta box from those post types.
Note: Once you installed the FIFU plugin, the featured image meta box will automatically display inside the post types(posts, pages, and products).
How to Add a Default Featured Image for a Post
The Default Featured Image option is useful if you create or update a post, page, or custom post type without assigning a featured image. Instead of leaving it blank, the plugin will automatically use the default image you set.
To configure this:
- Go to the FIFU → Settings page.
- Scroll down to the Default Featured Image section.
- Enable the Default featured image toggle.
- Paste the URL of the image you want to use as the default into the Image URL field.
- (Optional) If you want this to apply only to specific post types, add their values in the Post Type filter field. Example: post, page. This ensures the default image is applied only to those post types.
- Once configured, the image will automatically be assigned as a featured image to any post type (post, page, product, etc.) that doesn’t have one.
Method 2: Set featured images from URL programmatically in WordPress
To set a featured image in WordPress programmatically from a URL, you can use the media_sideload_image() function along with the wp_insert_post() function. Here’s an example of how you can achieve this:
function set_featured_image_from_url($post_id, $image_url) {

$image_id = media_sideload_image($image_url, $post_id, ‘Image Description’);

// Set Featured Image

if (!is_wp_error($image_id)) {

     set_post_thumbnail($post_id, $image_id);

}

}

// Usage

$post_id = 123; // Replace with your post ID

$image_url = ‘https://example.com/image.jpg’; // Replace with the URL of the image

set_featured_image_from_url($post_id, $image_url);
In this example:
- Replace $post_id with the ID of the post to which you want to set the featured image.
- Replace $image_url with the URL of the image you want to set as the featured image.
This function downloads the image from the provided URL, attaches it to the specified post, and sets it as the featured image. The media_sideload_image() function downloads the image and returns the attachment ID, and then set_post_thumbnail() sets this attachment ID as the featured image for the specified post.
Ensure you add this code to your theme’s functions.php file or a custom plugin. Also, be aware that this method relies on the allow_url_fopen setting in your PHP configuration. If it’s disabled on your server, you might need to use alternative methods or enable this setting.
Method 3: Add Image from URL Using Elementor
If you’re already building your pages with Elementor Pro, you don’t need a separate plugin to insert images from external URLs. Elementor’s built-in image widget includes a direct URL import option that lets you pull any externally hosted image into your layout without going through the WordPress media library.
This method is best used when you’re working inside Elementor’s editor and want to place an image from an external source directly into a specific section of your page, not as a post thumbnail set from the post editor, but as a placed image element within the design itself.
Note: This method adds an image to your Elementor layout, not to the WordPress featured image field. If you need the image to appear as the featured image in search results, social shares, or archive pages, use Method 1 (FIFU) instead.
- Open your page in the Elementor editor and drag the Image widget to where you want the image to appear
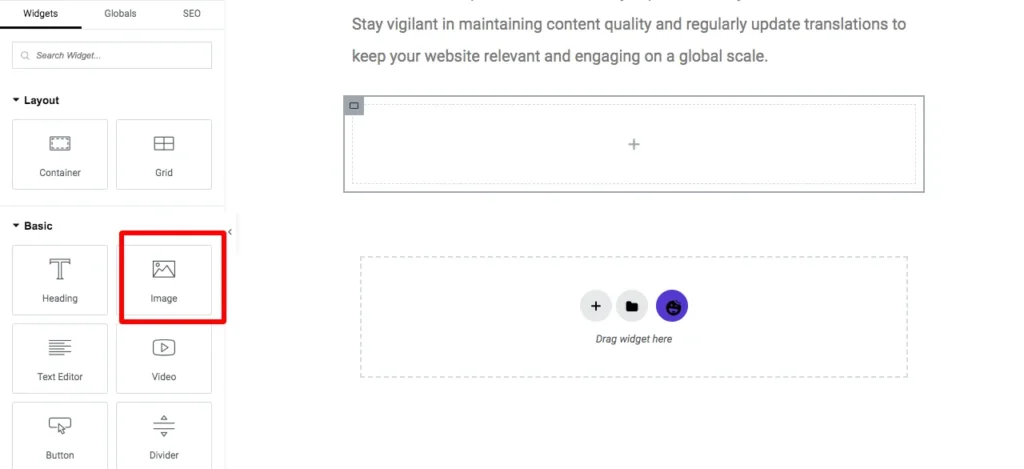
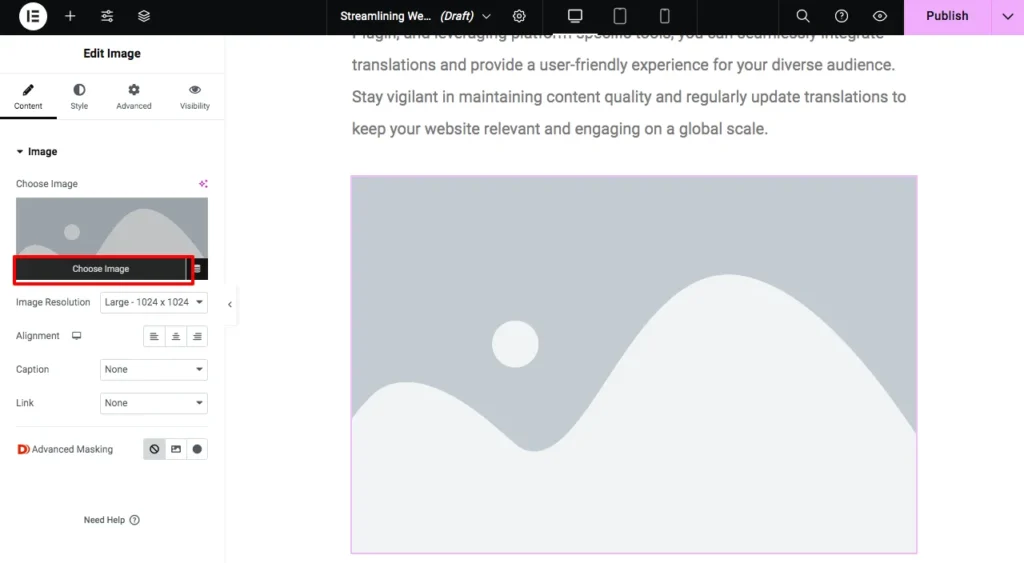
- Click Choose Image in the widget settings panel on the left
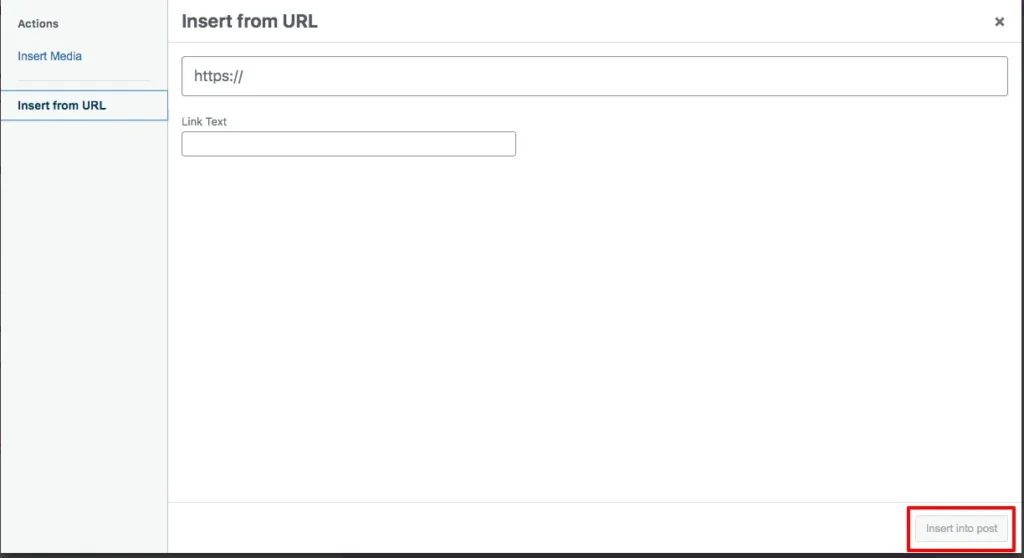
- Select the Upload Files tab, then click Insert from URL
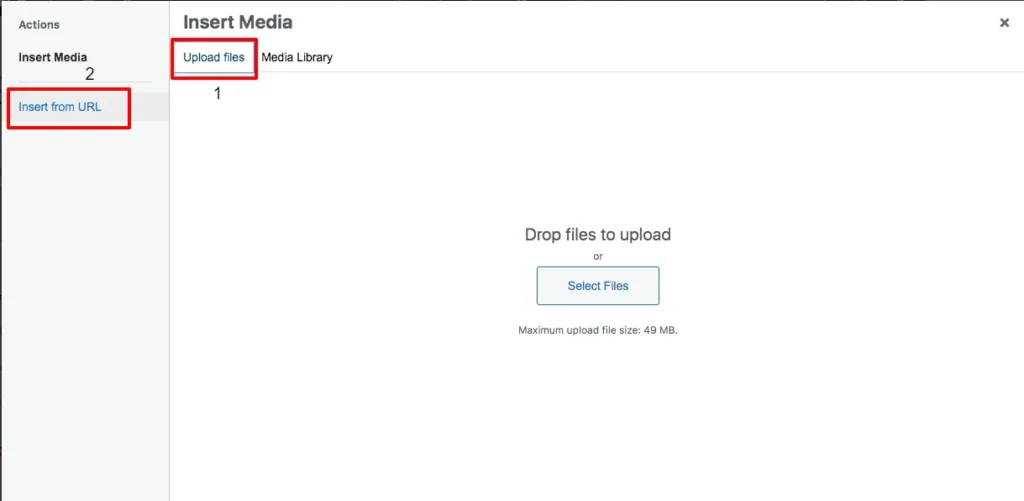
- Paste the external image URL into the field and add alt text in the Link Text box
- Click Insert into post, and the image loads directly from the external source into your Elementor layout
Now your images from the URL have been uploaded to your post successfully.
FIFU vs Downloading Images Locally: Which One Should You Use?
Both approaches get the job done, but they work differently and suit different situations. Here is a straightforward breakdown to help you decide which one fits your site.
| Factor | FIFU (External URL) | Downloading Locally |
| Storage Usage | No server storage used | Image saved to your media library |
| Setup Speed | Paste a URL and you’re done | Requires upload or programmatic download |
| Image Availability | It depends on external host | Fully under your control |
| SEO Stability | Vulnerable if external source changes | More stable and reliable long-term |
| Media Library | Stays clean, no new files added | The image becomes a permanent attachment |
| Hotlinking Risk | Yes, external host can block it | No risk, image is self-hosted |
| Best For | High-volume publishing, CDN-hosted images, bulk imports | Long-term content, SEO-critical pages, evergreen posts |
Use FIFU When:
You are running a content-heavy site, and storage is a concern. Your images are already sitting on a reliable CDN or external server you manage. You are doing bulk imports where manually uploading hundreds of images is not realistic. Speed of publishing matters more than long-term image control.
Download Images Locally When:
The content is evergreen and needs to stay intact for years from now. You are building pages where SEO performance is a top priority, and image availability cannot be left to chance. You do not own or manage the external source hosting the image. You want full control over image optimization, file names, and alt text from within your own media library.
The Bottom Line:
FIFU is the smarter choice for speed and scale. Local hosting is the smarter choice for stability and SEO. Many sites use both depending on the content type. No rule says you have to pick one and stick with it across every post.
Advanced Help Topics
The methods above work well for individual posts. If you’re managing a large WordPress site, hundreds or thousands of posts, a WooCommerce product catalog, or content migrated from another platform, manually adding external image URLs one post at a time isn’t realistic. The following workflows use WP Ultimate CSV Importer to handle featured image URLs at scale, including both bulk import and export.
How to Import External Image URLs as Featured Images in WordPress Posts, Pages, and Custom Posts
When you are dealing with a large number of records, manually adding external image URLs as featured images can be extremely time-consuming. The WP Ultimate CSV Importer plugin makes this process much easier by allowing you to bulk import external image URLs into WordPress Posts, Pages, and WooCommerce Products, complete with their alt texts.
Here’s how to import external image URLs step by step:
Note that the same import steps are followed for posts, pages, and products. The only difference is in configuring the post type.
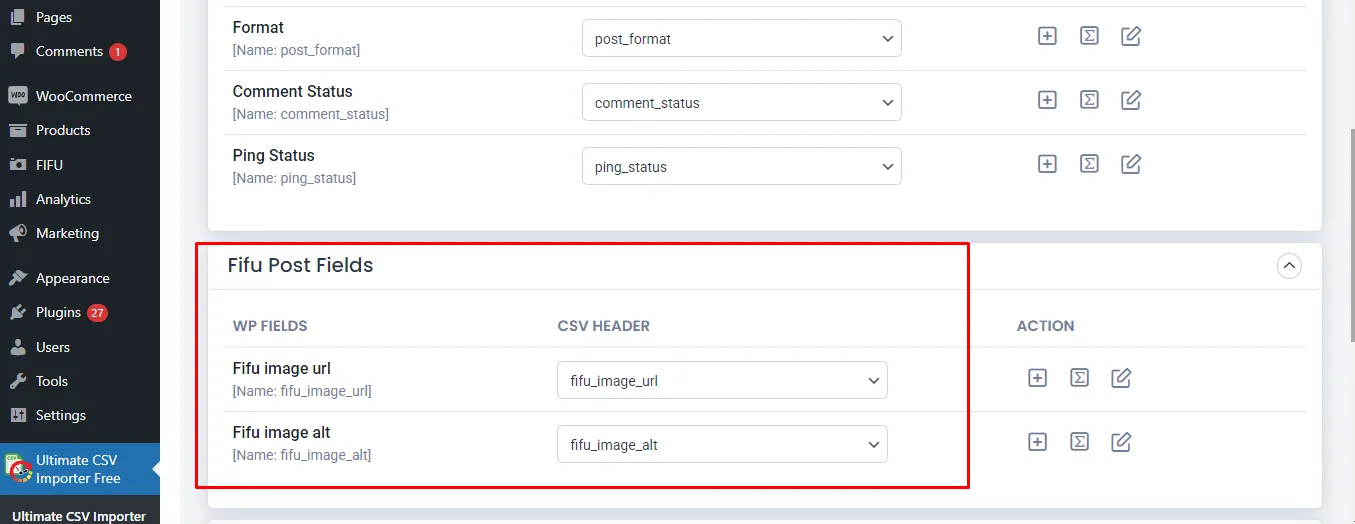
1. Prepare your import file: Create a file like a CSV, XML, Excel, or Google Sheet that includes the FIFU featured image URL and image alt text columns(as shown in the example screenshot below). The easier way is to export the records with WP Ultimate CSV Importer and add the image column and its values.

2. Upload your file: In your WordPress dashboard, go to the Ultimate CSV Importer plugin page. Browse and open your CSV file(or other type of file), or upload it using another available method.
3. Select the post type: Choose whether you want to import into Posts, Pages, or Products.
4. Map your fields: Match the columns in your import file with WordPress fields. Make sure to match the FIFU Post Fields for image url and alt text.
5. Run the Import: Click Import to begin. Once the process is complete, review the import log and verify the results both in the WordPress admin and on the front end.

WP Ultimate CSV Importer Pro
Get Ultimate CSV/XML Importer to import data on WordPress faster, quicker and safer.
How to Export FIFU featured image URLs and alt texts from WordPress
WP Ultimate CSV Importer also lets you export FIFU fields data from WordPress alongside posts, pages, custom posts, and products.
If you are using the free plugin, then we offer an export add-on to extract your FIFU fields.
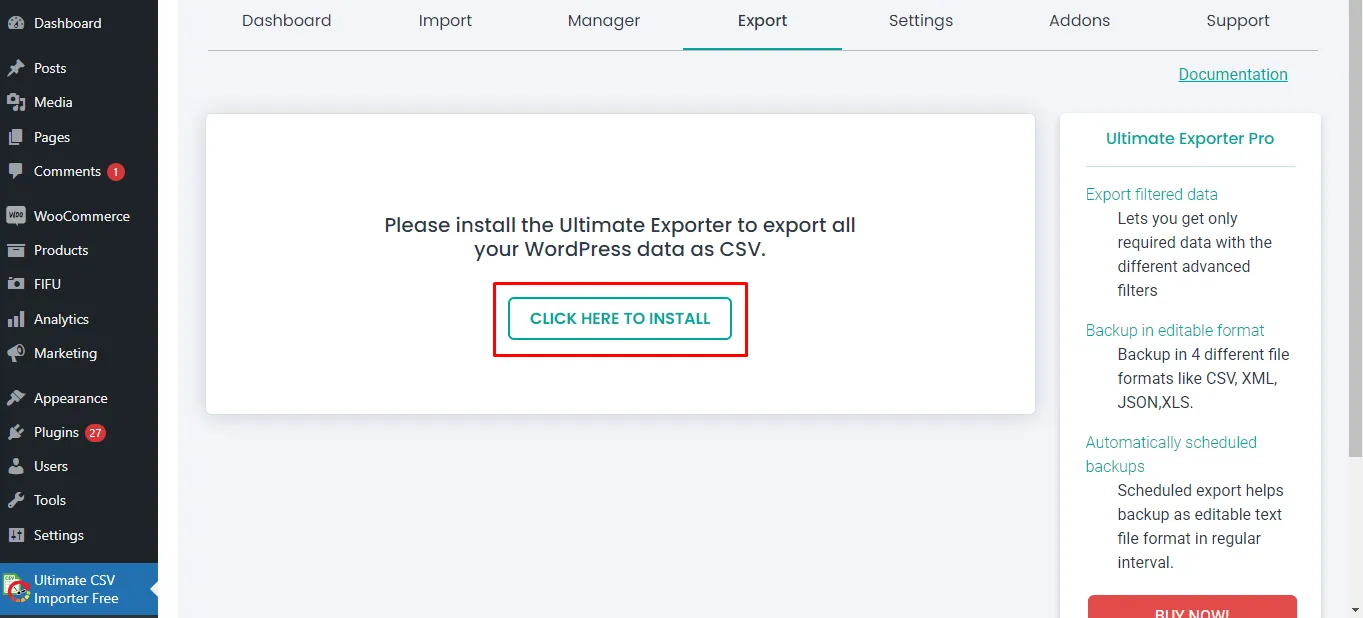
Move to the Export tab. The export page tells you to install the Ultimate Exporter plugin by providing a button link to install. The export plugin is also free to use.
This takes you to the manage add-ons page, where you can see all the supported add-ons listed.
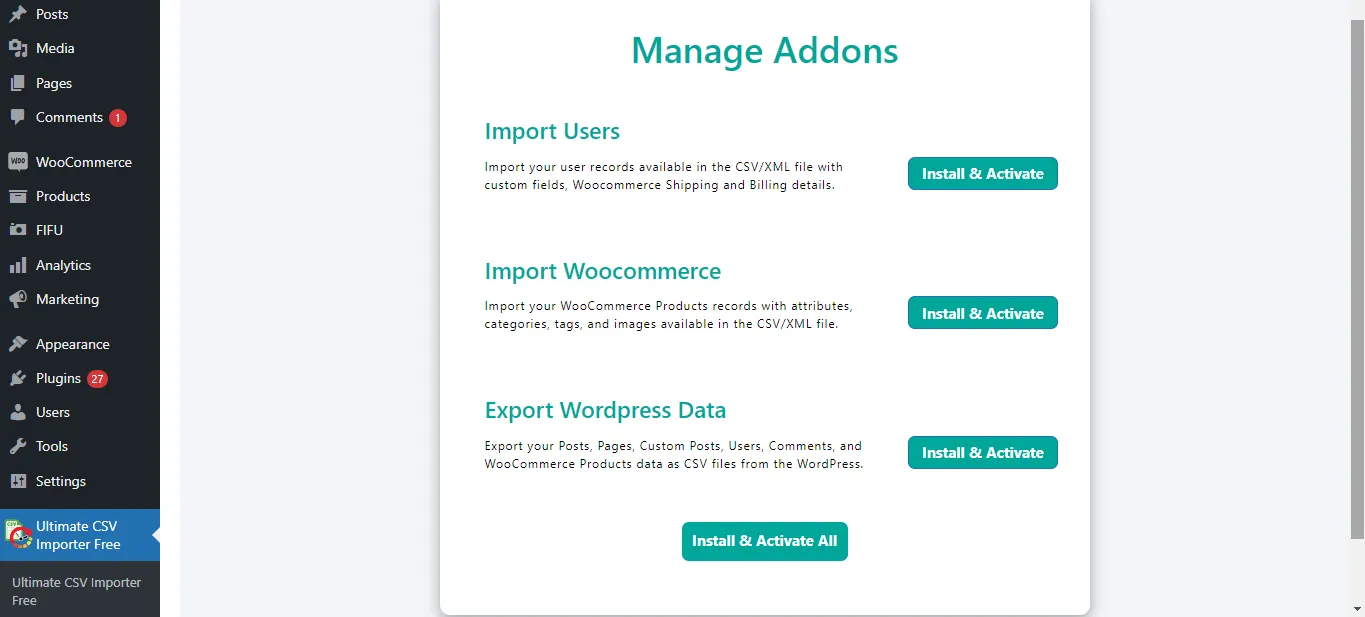
You can install and activate all the add-ons or specific add-ons you need.
When you activate the exporter addon, the export page will look like this.
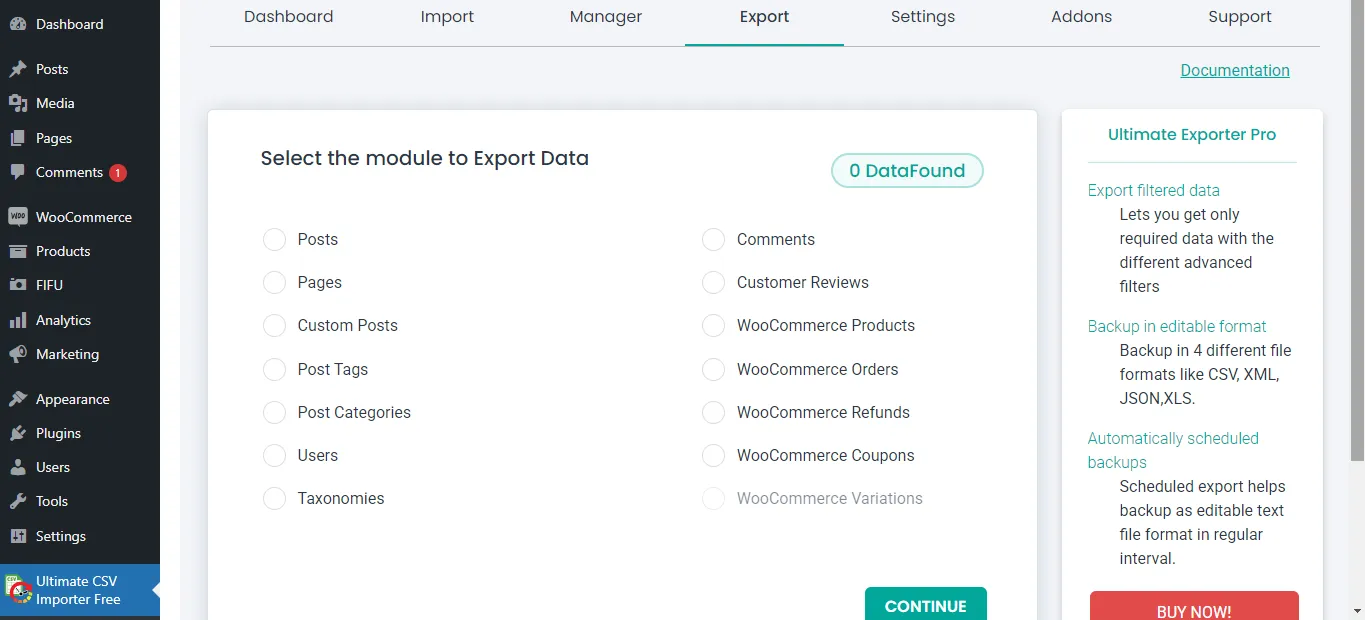
Select the post type here. Note that you can only export FIFU-featured image fields assigned to post types like Posts, Pages, Custom Posts, and WooCommerce Products.
On the next page, provide an export file name, then choose a file type.
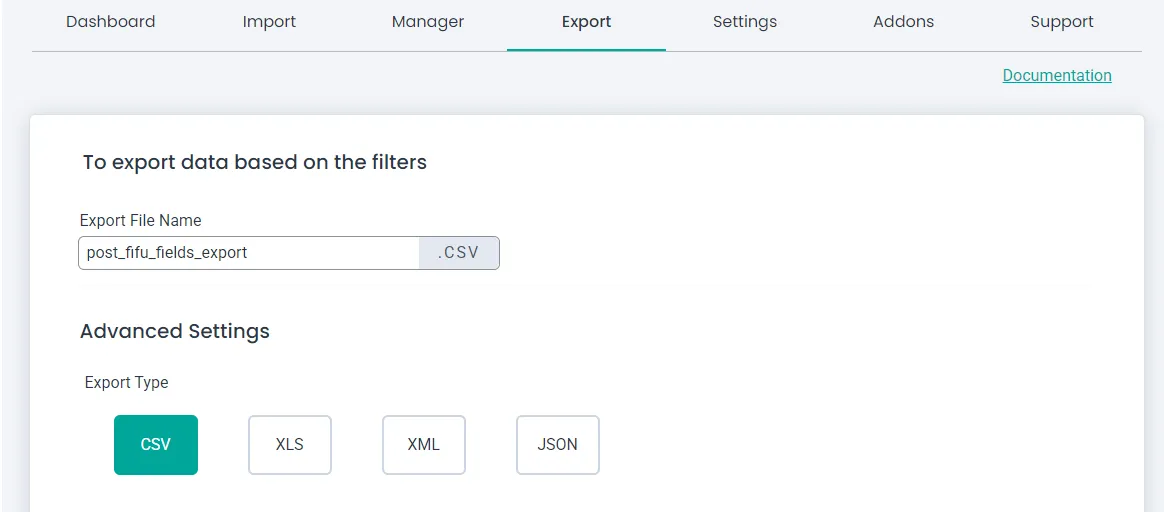
Configure filters like export for specific periods and export records of specific authors. If you don’t need filters and want to export all records of the chosen post type, just click Export without configuring the filters.
Finally, download the export file and verify the exported field data, including the FIFU Featured image and alt text columns, to confirm the successful export.
WP Ultimate CSV Importer Pro
Get Ultimate CSV/XML Importer to import data on WordPress faster, quicker and safer.
Frequently Asked Questions
1. How can I set a featured image from an external URL in WordPress?
WordPress keeps this locked by default, so you need either a plugin or a bit of custom code to make it happen. Most people go with the FIFU plugin since it is straightforward. You install it, open any post, and paste your image URL into the featured image field it adds. That is really all there is to it. If you are comfortable with PHP, the media_sideload_image() function is another route that downloads and stores the image directly on your server instead.
2. Can I use an image URL as a featured image without uploading it?
Yes, and that is exactly the problem FIFU was built to solve. Instead of downloading anything, it just saves the URL and pulls the image from wherever it is hosted. Your media library stays untouched, which is a genuine relief when you are managing a site with a lot of content.
3. Does using external images affect SEO?
It depends on how you handle them. Adding proper alt text keeps them indexable and visible in Google Image Search. What catches people off guard is availability. If the site hosting your image goes down or pulls the file, your featured image is just gone. For posts you really care about ranking, hosting the image yourself is worth the extra step.
4. How can I find and use a WordPress featured image URL?
If you are using FIFU, the URL is sitting right there in the featured image field of your post editor. For regular WordPress images, head to your media library, click the image you want, and the full URL shows up in the details panel on the right side of the screen. Developers can also pull it using get_the_post_thumbnail_url() directly in their theme or plugin code.
Conclusion
Setting featured images from external URLs in WordPress comes down to one decision: do you need speed and flexibility, or stability and long-term control?
For most content-heavy sites, FIFU handles the day-to-day, paste a URL, save, done. For evergreen content or SEO-critical pages where a broken image would cost you rankings and click-throughs, downloading the image locally gives you the reliability that external hosting can’t guarantee. And for sites managing content at scale, combining FIFU with a bulk import workflow through WP Ultimate CSV Importer removes the bottleneck entirely.
The method you choose today shapes how much maintenance you’re doing a year from now. Get the foundation right, use external images where speed matters, local hosting where permanence does, and your media management stays clean as your content library grows.
If you have questions about the import or export workflow, the WP Ultimate CSV Importer support team is available to help.
