Table of Contents
Running your WooCommerce store is easier than you might imagine. Our CSV Importer Pro is designed to streamline your e-commerce operations, enhancing your product management experience. This comprehensive guide provides a detailed walkthrough of the process.
Trial Offerings:
- Experience hands-on trial sessions with WooCommerce, complete with sample data.
- Break the language barrier and connect with your audience using WPML and Polylang.
- Engage and interact with your customers on forums via bbPress.
- Harness the power of efficient data management for your e-commerce website using the CSV Importer Pro plugin.
- Elevate your visibility on search engine results pages with leading SEO plugins like RankMath, Yoast, SEOPress, and All-in-One SEO plugins.
Our Focus:
Our primary focus lies in showcasing the immense utility of our CSV Importer Pro plugin in facilitating seamless e-commerce store management. With this tool, importing and exporting products becomes effortless. Whether you’re dealing with simple products, variable products, or grouped products, our plugin ensures smooth integration into your e-commerce store.
What sets this trial apart?
What truly distinguishes this trial is the pre-installed data provided through the Woo Booster theme. While you’re welcome to add your own data, this trial instance offers a head start with pre-existing content, allowing you to delve deeper into exploration during your trial period.
Installed Plugins:
- Theme: Woo Booster
- WooCommerce: For e-commerce store management
- ACF: For creating custom fields
- WP Job Manager: For job listings
- WC Booster: WooCommerce add-on
- Woocommerce Direct Checkout: Simplifies the checkout process in WooCommerce
- bbPress: Adds discussion forums to WordPress
- Ultimate CSV Importer Pro: For data management
- SEO Plugins: Rankmath SEO, Yoast SEO, All-in-One SEO, and SEOPress
How to Prepare a Trial?
- Start by looking at which plugins activated or deactivated. If a plugin of your choice is deactivated then activate it. We installed a number of plugins in each test to improve the user experience.
- Make sure all the sample data we have loaded has been checked. For example, verify the product data in this WooCommerce trial instance because the trial mainly focuses on the import and export of the WooCommerce product. Check it out twice.
- If you would like to experience our CSV importer with other plugins or need more information about the test sample, feel free to contact us. We would be happy to discuss this further.
Why WooCommerce?
WooCommerce stands out for its flexibility, allowing you to sell a wide range of products, including physical items, virtual goods, and downloadable products, through your e-commerce store. Moreover, it offers a plethora of pre-built features designed to streamline product management, payment processing, shipping, and more. Additionally, WooCommerce provides numerous add-ons that further enhance the ease of managing your online store.
How to Add a New Product:
Once you’ve installed the WooCommerce plugin on your WordPress website, it automatically generates two custom posts: products and analytics.
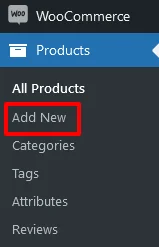
- Log in to your WordPress website. In the dashboard, navigate to the “Products” section and click “Add New.”
- Enter the product’s name and description.
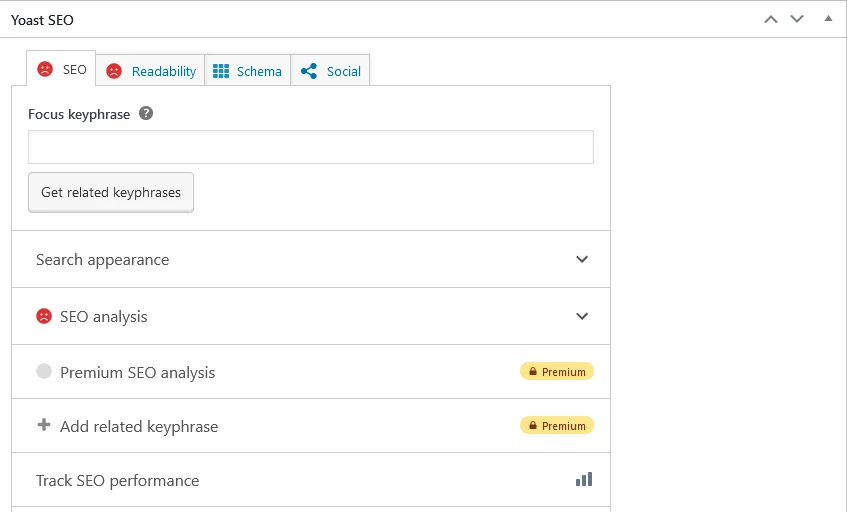
- Under the Yoast SEO section, add SEO metadata information, then scroll down.
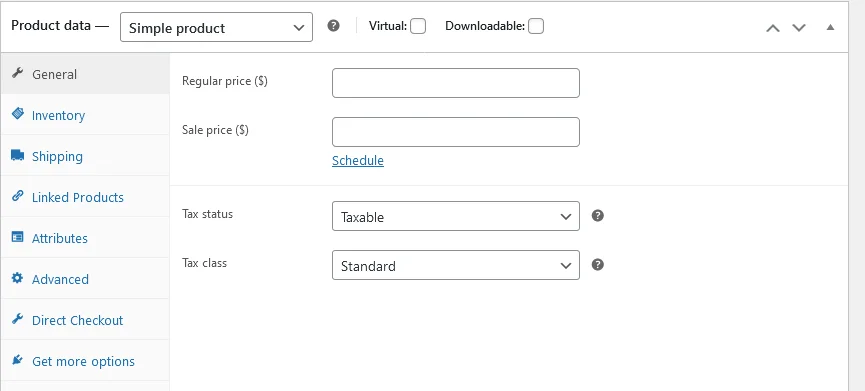
- You’ll encounter the product information wizard. Here, you can input details such as product type, price, stock information, shipping details, attributes, and more. Feel free to explore the options available.
- Before hitting “Publish,” double-check all the provided information. Once you’re satisfied, click “Publish” to make the product live on your website.
Note:
During the trial, one of the SEO plugins will be activated by default. If you wish to explore other SEO plugins, simply deactivate the currently activated plugin and then activate the desired SEO plugin of your choice.
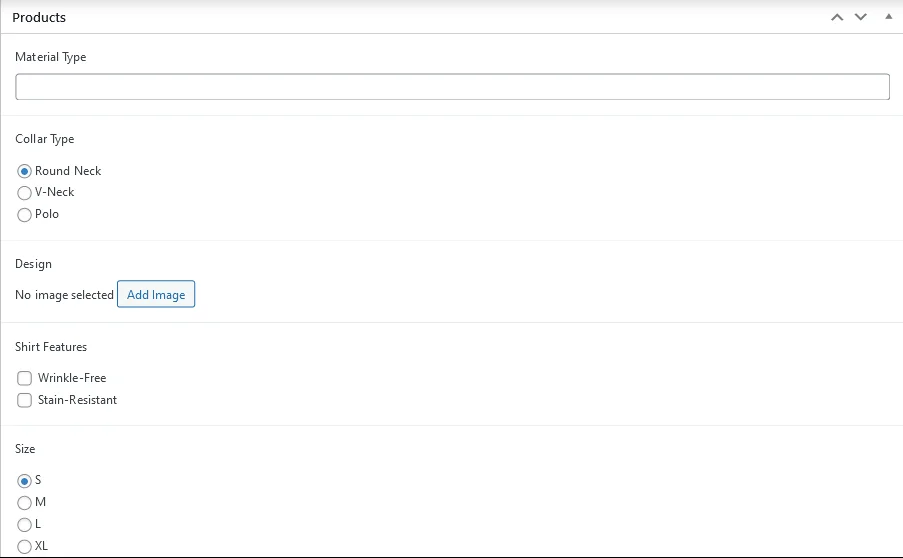
In this trial instance, we’ve implemented custom fields to provide additional information about the products. These fields allow you to include details such as material type, size, images, and more, tailoring your product listings to your specific needs. Here’s how you can create custom fields using the ACF plugin:
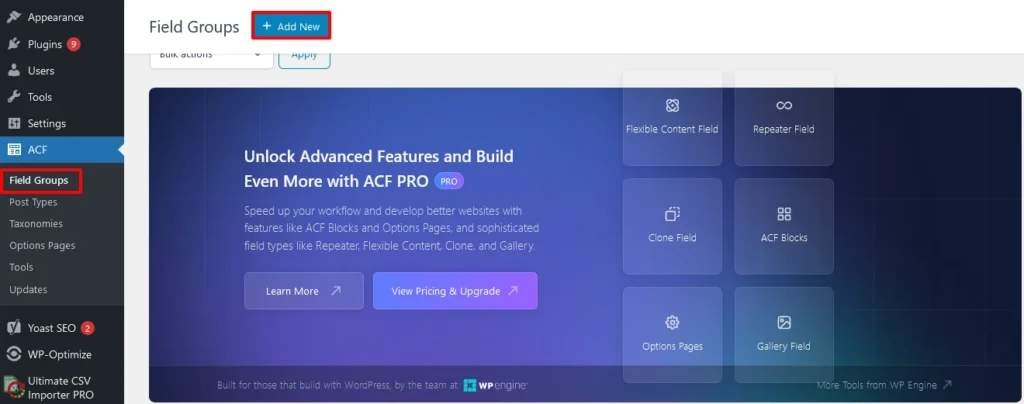
- Open your WordPress dashboard and locate ACF. Under ACF, click on “Fields Group,” then select “Add New.”
- Enter the name of the field group. Scroll down to the fields area, where you can add different field types based on your requirements.
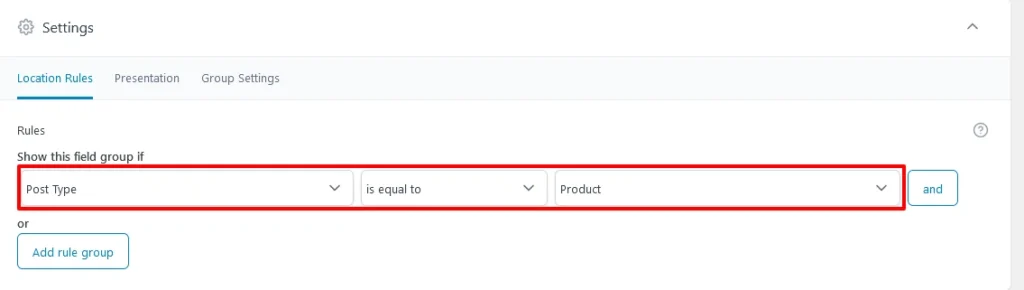
- It’s essential to configure settings for your custom field group. For instance, in our trial instance focused on WooCommerce products, ensure that the post type is set to ‘products.‘ This ensures that the custom fields are available specifically for product listings.
- Once you’ve configured all your settings, save your changes. You can now add information to the custom fields by going to the product section, clicking “Edit,” and scrolling down past the SEO section to find the custom fields. Input the relevant information into these fields.
- After filling in the custom field information, click “Update” to save your changes.
How to Add Product Categories:
Product categories help organize your products, making it easier for customers to navigate through your store. Here’s how you can add product categories:
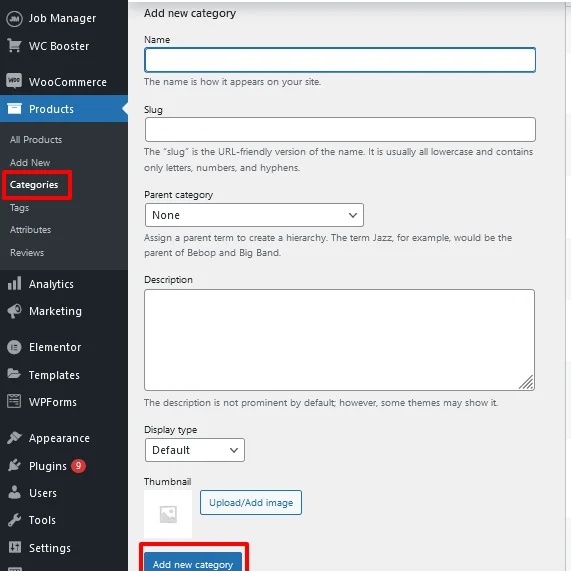
- Navigate to the “Products” section in your WordPress dashboard.
- Click on “Categories” to access the category management interface.
- Enter the name of the category and its slug (a URL-friendly version of the name). If the category needs to be a subcategory of another, select the parent category accordingly.
- Once you’ve filled in all the necessary details, click on “Add New Category” to create the category. Your new category is now added and ready to be assigned to products.
How to Add Attributes:
Attributes play a crucial role in providing detailed information about products, aiding customers in making informed purchasing decisions. Here’s how you can add attributes to your products:
- Navigate to the “Products” section in your WordPress dashboard.
- Click on “Attributes” to access the attribute management interface.
- Provide a name and slug for your attribute, such as “Size,” “Color,” “Material,” or “Sleeve Length.”
- Click on “Add Attribute” to create the attribute. Once created, you’ll need to configure the terms associated with the attribute.
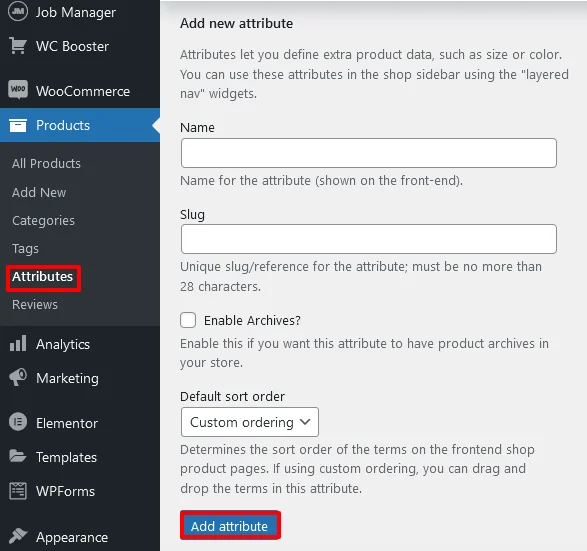
Remember, after creating the attributes, you’ll need to configure the specific terms within each attribute, such as “small,” “medium,” “large” for size, “red,” “blue,” “green” for color, and so on. This ensures that your products are properly categorized and provide comprehensive details for your customers.
Import and Export of WooCommerce Products:
Exporting WooCommerce Products:
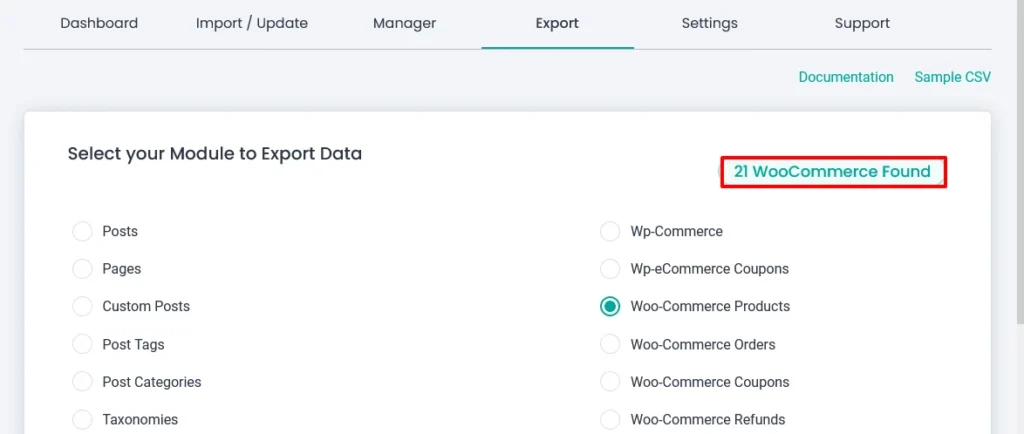
- Navigate to the Ultimate CSV Importer Pro plugin on your WordPress dashboard and click to open it.Select the “Export” section within the plugin wizard.
- Choose “WooCommerce Products” as the export option. On the right-hand side, the number of items in the selected option will be displayed. Click “Continue” to proceed.
- In the next step, provide a name for your file and select the desired file format.
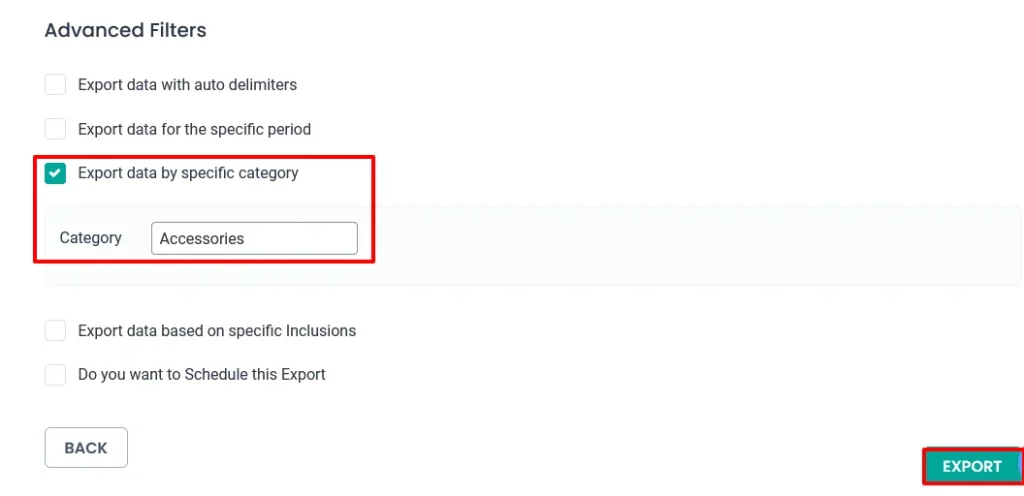
- Utilizing our CSV Importer plugin, you can further refine your export based on categories. Scroll down to find the advanced filters and select the checkbox labeled “Export data by specific category.” Type the name of the product category you wish to export. Then, click on the “Export” button to initiate the export process.
How to Import WooCommerce Products:
Before beginning the import process, ensure you have prepared a CSV file containing the product data.
Prepare the CSV file: View the exported data from your WooCommerce store. This step is important because it lets you see field names for simple products, variable products, and grouped products. Entering incorrect field names in your CSV file may result in failed imports.You can create a CSV file using software such as Microsoft Excel or Google Sheets.
Importing Products to Your WooCommerce Website:
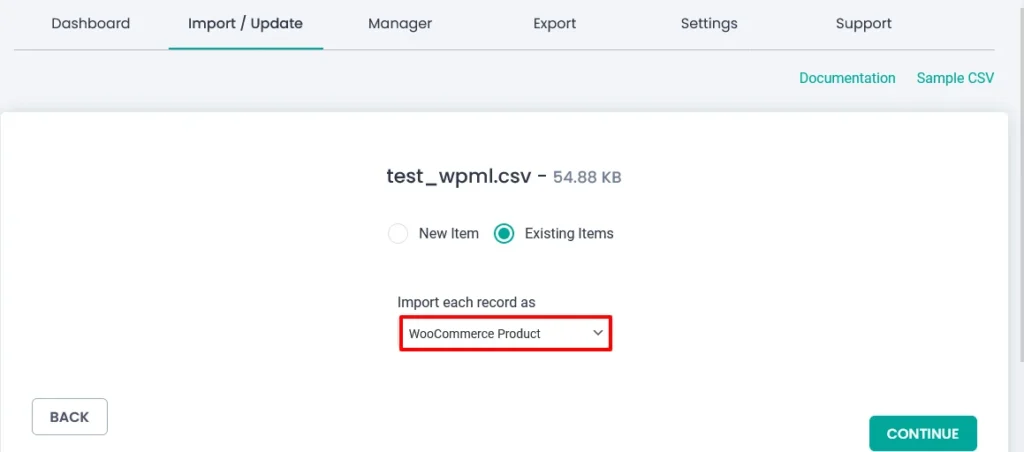
Navigate to the Ultimate CSV Importer Pro plugin on your WordPress dashboard and click on “Import.”
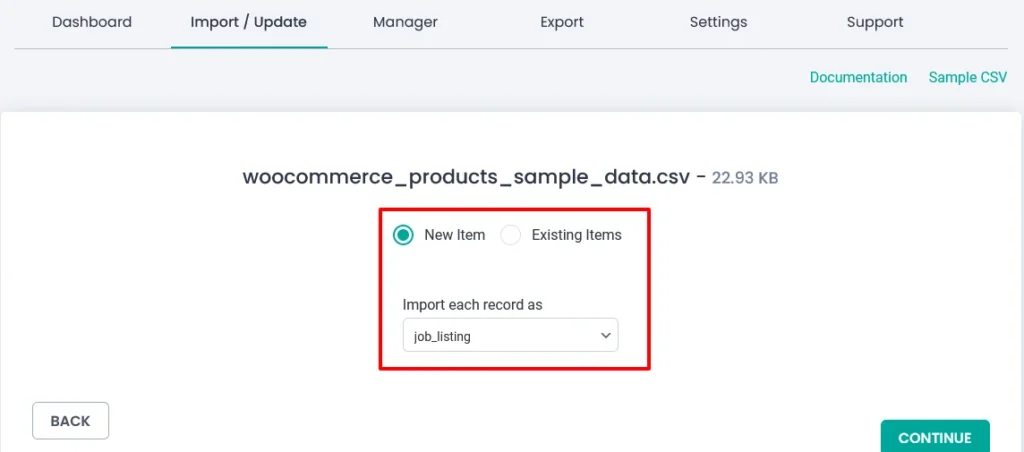
- Browse for the CSV file you’ve prepared for import. Choose whether you’re importing new items or updating existing items. If you’re updating existing product details, select “Existing Items”; if importing new products, select “New Item.” From the drop-down menu, choose “WooCommerce Product” as the import type. Then, click “Continue.”
- Verify that all fields are correctly matched. Ensure that each field in your CSV file corresponds accurately to the relevant fields in WooCommerce. If everything is matched correctly, proceed by clicking “Continue.”
- This section is dedicated to media handling. If you’re importing images along with product data, choose the appropriate option in this section. Then, click “Continue.”
- In the final step, you’ll need to configure the import settings according to your requirements. Once you’ve configured the settings, hit “Import” to initiate the import process. Additionally, you can schedule your import/update using the Ultimate CSV Importer plugin.
- After the import process is complete, you can view all the imported or updated data in the admin view of your WordPress dashboard.
Please refer WooCommerce CSV import documentation for additional assistance.
Sample CSV for WooCommerce product data.
WP Job Manager:
One of the top plugins for posting job openings and managing job applications. With the help of the CSV Importer Pro plugin, you can seamlessly import and export WP Job Manager data. Let’s delve into how to accomplish this task.
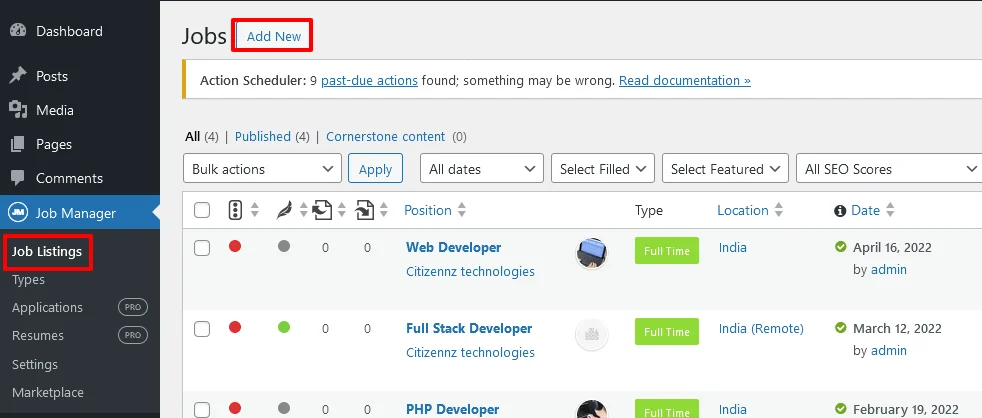
To create a job listing:
- Navigate to the WordPress dashboard and locate the “Job Manager” section. Click on “Job Listings” and then “Add New”.
- Fill in the necessary job opening information under the “Job Data” section. Additionally, you can add SEO information under the “Yoast SEO” section. Once all information is filled, click “Publish”.
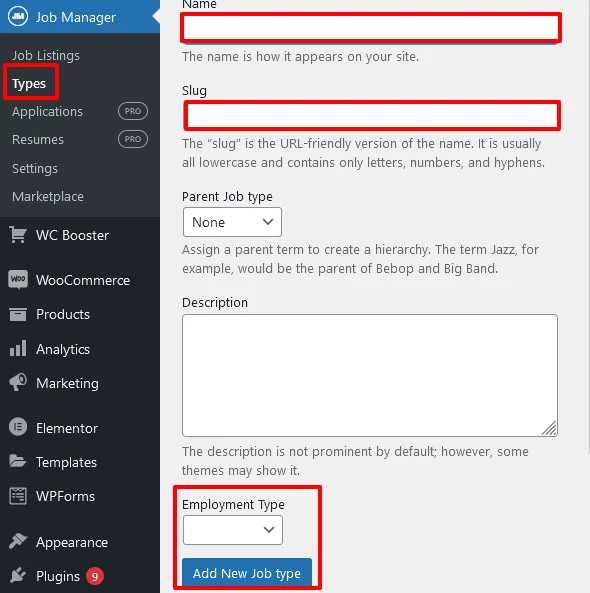
- To add the type of job opening, go to the WordPress dashboard and under the “Job Manager” section, select “Types”.
- Enter the name, slug, and employment type, then click “Add New Post Type”.
To export the created job listings:
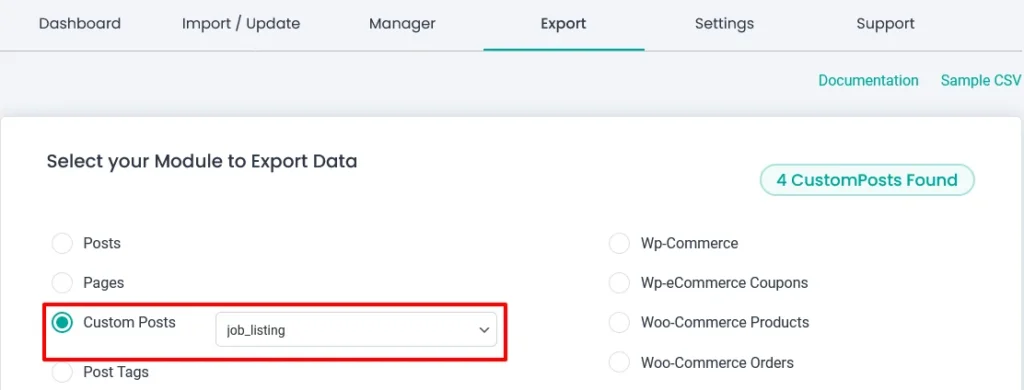
Open the CSV Importer plugin wizard.Select the “Export” tab.
- Since the created job listings are categorized under the custom post type, choose “Custom Post” in the plugin wizard and click “Continue”.
- Enter the desired file name and format.
- Hit the “Export” button to initiate the export process.
To import the created job listings:
Open the CSV Importer plugin wizard.
- Select the “Import/Update” tab. If you want to import new job listings, click on “New Item”. If you wish to update existing job listings, select “Existing Items”. Then, choose “Job Listings” from the dropdown menu and click “Continue”.
- Verify that all the fields are correctly mapped. If any fields are not mapped correctly, double-check your CSV file. You can refer to the exported CSV file to ensure correct field headings. Once verified, click “Continue”.
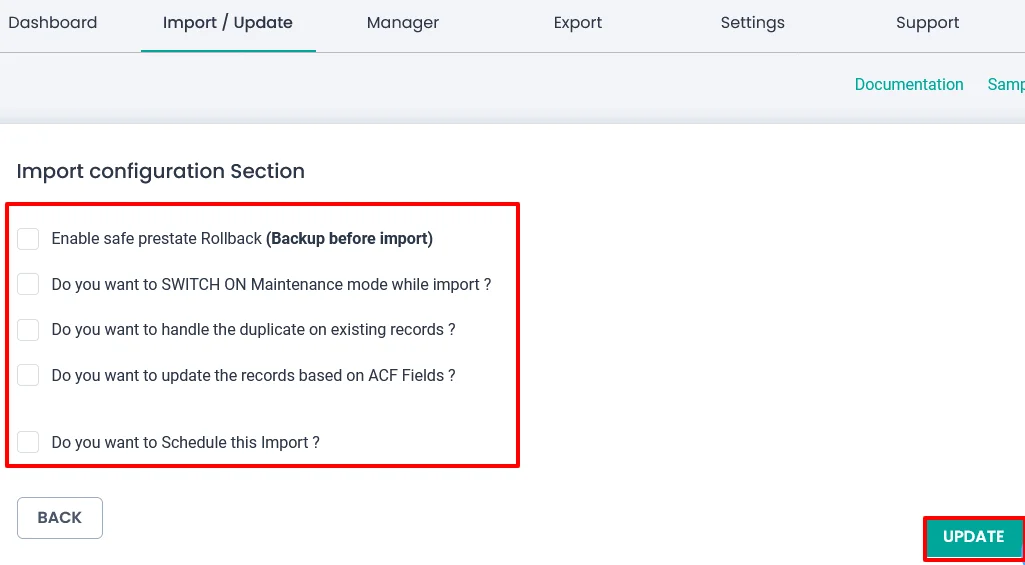
- If your file includes media, follow the instructions provided in this step to ensure proper handling.
- In the final step, the “Import Configuration” section allows you to schedule your import/update and configure other options to enhance your data import process.
Once everything is configured as desired, click the “Import” button. Your data will be imported or updated successfully.
Sample CSV for Job listing.
WooCommerce SEO Import and Export:
WooCommerce SEO Metadata Export:
If you’ve previously filled in SEO details for your products, you can easily export the SEO metadata of the product using the Ultimate CSV Importer plugin. Here’s how:
- Navigate to the Ultimate CSV Importer plugin wizard and click on “Export.”
- Select “WooCommerce Products.” This will display the total number of products
- Available on your website. Proceed by clicking “Continue.”
- Provide a file name and choose the desired format for your export file.
- To narrow down your export, you can utilize advanced filters if needed.
- Once you’ve configured the export settings, click “Export” to initiate the process.
Congratulations! Your WooCommerce SEO metadata has been successfully exported.
WooCommerce SEO Metadata Import:
To import WooCommerce SEO metadata, follow these steps:
- Go to your WordPress dashboard and open the Ultimate CSV Importer plugin. Then, navigate to the “Import/Update” tab.
- Browse for your CSV file containing the SEO metadata and select the appropriate category. If you’re importing SEO metadata for products, select “WooCommerce Products.” For pages, choose “Pages,” and for posts, select “Posts.” Click “Continue” to proceed.
- Verify that the fields in your CSV file are mapped correctly with the corresponding fields in WooCommerce. Ensure all fields are accurately matched before proceeding. Click “Continue” once verification is complete.
- In the final step, configure the import settings based on your preferences. You can choose the basis of import, such as post_title, ID, SKU, and more, depending on your requirements.
Once you’ve configured the import settings, proceed with the import process to import.
FAQs:
1. Can I only update WooCommerce SEO metadata?
No, you can update or import SEO metadata for all posts, pages, products, documentation, and more. Ensure that the SEO field headers in your CSV file are correctly typed.
2. Are there any other trial instances available?
Yes, Smackcoders offers several WordPress free trial instances, including Learnpress, JetEngine, and Toolset types, in addition to WooCommerce. Each trial instance comes with hands-on sample data. You can access the trials at https://trial.smackcoders.com.
3. What should I do if I have any doubts regarding this trial?
You can contact us via email. We are here to help you and address any questions or concerns you may have.
4. Does Ultimate CSV Importer only support the CSV file format?
No, Ultimate CSV Importer supports file formats including CSV, XML, XLS, and JSON.
5. For how many days is the trial active?
Typically, the trial lasts for 3 days, but it can be extended for an additional 4 days upon request. If you wish to extend your trial instance, please contact us for assistance.
Related post:
- Exploring LearnPress Trial with Sample Data and More
- Effortless Data Management: JetEngine and CSV Importer Pro with Sample Data.
- Effortlessly Import Your Data: Free Trial Guide to CSV Importer Pro + Toolset Types
Conclusion:
In summary, this post has outlined the process of efficiently managing your WooCommerce website. It begins with adding categories, attributes, and SEO metadata when adding new products. Custom fields, facilitated by ACF, allow for the inclusion of additional product details.
Moreover, the Ultimate CSV Importer Pro plugin simplifies e-commerce store management by enabling seamless import and export of product data. This comprehensive guide provides a clear and concise understanding of how to add a WooCommerce product and streamline store management using our CSV importer plugin.
Should you have any questions or require further assistance, please don’t hesitate to reach out to us. For those considering the purchase of our product, please visit our website for more information.