Table of Contents
Get hands-on experience with LearnPress in this trial and explore its features alongside sample data. We’ve implemented the Edupress theme, especially for LearnPress. This trial not only imports and exports LearnPress data but also provides preloaded courses, lessons, quizzes, and more. Also, you’ll learn to manage custom posts, fields, and SEO meta-data effortlessly. With hands-on experience using our Ultimate CSV Importer, you will gain valuable insight into streamlining data management processes. Join us on this educational journey and empower yourself to enhance your LearnPress experience.
List of installed plugins:
SEO Plugins: Yoast SEO, Rank Math SEO, SEOPress, and All-in-One SEO
CPT UI: for custom post creation
PODS: for custom field creation Elementor Pro
Ultimate CSV Importer Pro: for CSV/XML/XLS/JSON import and export
LEARNPRESS DATA IMPORT AND EXPORT with sample data
Installing Sample Course Data:
Do you feel overwhelmed? Don’t be afraid! We took the liberty of organizing five subjects, with over 250 subjects and 20 questions. If you’re interested in digging deeper with sample data, loading sample class data is a breeze.
For that,
Navigate to LearnPress -> Tools.

Here, under Course Data, you can effortlessly insert course samples with Lorem Ipsum content. Just click the install button.

Don’t hesitate to experiment with categories and course assignments. The settings provide many ways to stimulate your creativity and understanding.
Exporting LearnPress Data:
Now that you have LearnPress sample data installed, let’s delve deeper into the area of importing and exporting data.
Step 1: Start by opening the Ultimate CSV Importer Pro plugin.
Step 2: Click on export, select custom post, and select the desired data from the dropdown menu.
Remember, LearnPress data always starts with ‘lp’. For example, to export courses, select ‘lp_course’ from the drop-down list.
Step 3: Enter the file name and file type. Then click on Export.
Once the export process is complete, your data is ready to download. Our Ultimate CSV Importer offers four types of files to import and export: CSV, XLS, XML, and JSON.
Preparing for import:
Why emphasize exports before imports? It’s simple: once you’ve exported the data, you get to search for field names, an important step in a successful import. This knowledge is helpful in creating files; Just prepare an import file or copy and paste the field names into your file.
Importing LearnPress Data:
Once your CSV file is ready,
Step 1; Log in to your website.
Step 2: Open the Ultimate CSV Importer Pro plugin and click on import/Update. :
Step 3: Browse your prepared CSV file
Step 4: Select the LearnPress content type, noting that the LearnPress content is identified with the ‘lp’ prefix. Select the required content type (lp_course, lp_lesson, lp_quiz, etc.).
Step 5: Then, make sure the field matches properly before importing. Once you are sure, hit import.
Your import is complete. You can verify the imported data through the administration view or by accessing the LearnPress course/course/quiz area.
CPT UI FREE DEMO with sample data:
Are you ready to import or export the custom post data? Let’s go through the process step by step for a smooth experience. Don’t worry, if you follow it, you will avoid any potential issues.
To start, we installed the Custom Post Type UI (CPT UI) plugin, which is one of the greatest tools for creating custom post types. Creating a new custom post can seem daunting, but with this plugin, it’s just a few clicks away.
Here’s a simple guide:
Step 1: Click on “Add/Edit Post Types.”

Step 2: Fill in the required data.

Step 3: Add a post type.

Congrats! You have created another successful custom post. It’s that easy! If you don’t know, don’t worry; we have prepared some custom posts for you to work with.
Exporting Custom Posts:
Now, let’s explore how to export custom posts.
- Open the Ultimate CSV Importer plugin and go to the Export section.
- Select the custom post type and the specific custom posts you want to export. Once done, click the continue button and choose the file format of your choice.
- Fill in the information and download the file.
Preparing for import:
Ready to introduce custom posts? It is important to look at the exported file to understand how the field is named. Make sure the field names in your CSV are included in the exported file. Here’s a handy trick: You can copy field names from existing data and paste them into your CSV. Then, fill in the required fields, or, if you prefer, use the exported data as a template. Just change the title of the post/page to import the modified file.
Importing custom posts:
Once your import file is ready, find the Ultimate CSV Importer plugin and click Import, making sure all the fields match up perfectly. Then, hit import. Congratulations to you! You have successfully imported the data. You can verify it in the Custom Post field.
PODS FREE DEMO with sample data:
Let’s demystify the process of creating custom fields without having to create any nerdy jargon. We will break it down into three simple parts.
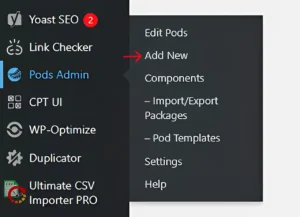
First, we will use the PODS plugin to create our custom fields. Here’s how to do it:
Step 1: Create a Custom Fields Group

Start by creating a group for your custom fields. In this group, define which fields you want to import into your pages or posts. These fields can be text, number fields, or any other format provided by PODS, depending on your data needs. Congratulations to you! Well done to your custom fields group!

Step 2: Create new category
Now, let’s create a new category in your post or page. In our demo, we focus on creating a new section under post.

Step 3: Assign a new category
Go to the templates section and create a new template. Assign this new template to the category you just created. This step shows significant improvement, completing approximately 75% of the implementation.

Step 4: Create and assign a new post
Once you’ve completed the foundational work, it’s time to create a new post and assign it to the category you just set up and click update.

Once done, go to the post, and you’ll see the custom fields now appear at the bottom.

Just fill in the field data and edit with Elementor, where you can call these fields dynamically.
That’s so easy! All your data will be dynamically populated into fields. Remember, these custom fields will only appear in the selected category, so keep that in mind as you work through your content creation process. If you follow these simple steps, you can create and maintain custom fields designed for your specific needs effortlessly.
SEO Meta Data Import and Export
Pre-installed SEO plugins:
We simplified your SEO process by pre-installing four powerful plugins: Yoast SEO, Rank Math SEO, All-in-One SEO, and SEOPress. These plugins come with pre-data, but you’re also welcome to make your own inputs that fit your SEO strategy.
Activating and customizing SEO plugins:
During your trial, one of these SEO plugins will be activated automatically. For instance, if Yoast SEO is activated but you prefer Rank Math SEO, simply deactivate Yoast and activate Rank Math. Each plugin is equipped with data that can enhance your experience. If you need to customize SEO meta-data such as titles, descriptions, and other information, you have full control over it.
SEO Data Export:
Ready to export your data? Switch to the Ultimate CSV Importer plugin. Then go to the Export section and select the post/pages/custom posts, or SEO data you want to export. Once you have made your selection, you will see how many items are available. Once everything looks good, proceed to export.
First, create a CSV file. You can easily do this with Microsoft Excel or Google Sheets. Make sure each column (or “field”) is entered correctly to avoid import errors. A description of the exported example file can help ensure accuracy. Once your CSV file is ready, go to your WordPress website and open the Ultimate CSV Importer plugin. Select the import option and choose the desired post type (post/page/documentation, etc.). Follow the instructions provided and click on import. This SEO import documentation will guide you if you’re facing any struggles during the import.
Conclusion:
Our demo provides a comprehensive understanding of LearnPress data management, empowering users to navigate effortlessly through course creation, custom post management, and SEO optimization. With the hands-on experience offered by the Ultimate CSV Importer, mastering data import and export becomes a seamless process. Additionally, we invite you to explore our trials for WooCommerce, Toolset Types, JetEngine, and Meta Box, extending your knowledge beyond LearnPress. Should you have any inquiries regarding these trials or need assistance with any aspect of the demo, please don’t hesitate to reach out.
