Table of Contents
Introduction:
Hey there, fellow enthusiasts! Welcome back to another one of our trusty “how-to” guides. Today, we’re diving deep into the realm of importing and exporting custom post and custom field data.
This trial offers:
- Easy creation of custom post types and custom fields with JetEngine.
- Seamless data import and export using CSV Importer Pro.
- Preloaded sample data for immediate testing (adding your own is optional!).
- Compatibility with popular SEO plugins like Rank Math SEO, All-in-One SEO, Yoast SEO, and SEOPress.
Our main tool of choice?
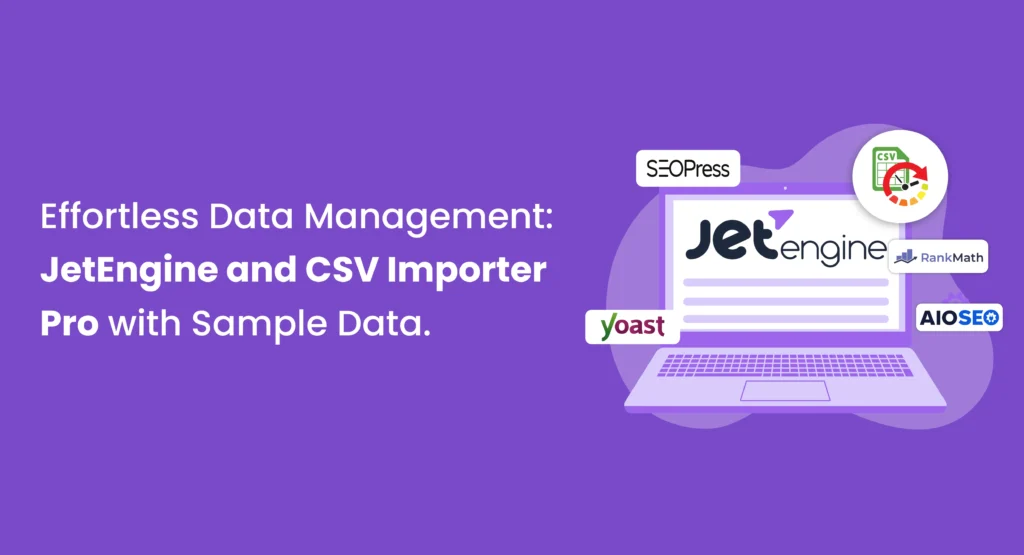
JetEngine makes creating and viewing custom posts and fields super easy. Plus, it feels delicious too! We have integrated four popular SEO plugins: Yoast SEO, RankMath SEO, SEOPress, and All-in-One SEO. In our trial, we used one of these plugins alongside JetEngine to manage our custom posts and fields, as well as their SEO.
What sets this trial apart?
We’ve pre-loaded it with enough data to keep your exploration smooth. Of course, feel free to add your twist to the mix!
Our focus?
Testing the compatibility of our trusty Ultimate CSV Importer Pro plugin with custom post and field imports and exports. Plus, we’re rocking the Winelly theme—a lightweight, Jet Plugins, and Elementor-friendly theme that sets the stage for our experiments. Let’s get started!
Installed Plugins:
- Elementor
- Jet Engine for creating custom posts and custom fields
- WP Ultimate CSV Importer Pro for data import and export
SEO Plugins:
- RankMath SEO
- All-in-One SEO
- SEOPress
- Yoast SEO
Why JetEngine?
JetEngine shines as the top choice for creating custom post types and fields, offering a seamless experience even for beginners. Its user-friendly interface eliminates the need for coding knowledge, while a diverse range of field types, including text, images, galleries, dates, and more, ensure flexibility in content creation. What truly sets JetEngine apart is its dynamic capabilities, allowing users to control field display dynamically using shortcodes, functions, conditional logic, and macros. Unlike other CPT plugins, JetEngine seamlessly integrates with popular page builders like Elementor and Gutenberg, streamlining the workflow without any additional integration efforts. In essence, JetEngine empowers users to craft dynamic, customizable content with ease, making it the ultimate solution for managing custom post types and fields efficiently.
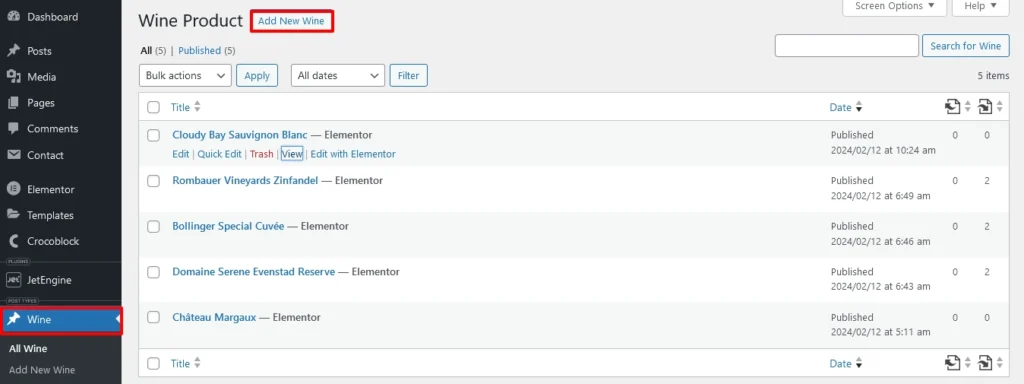
How to Create Custom Posts Using JetEngine:
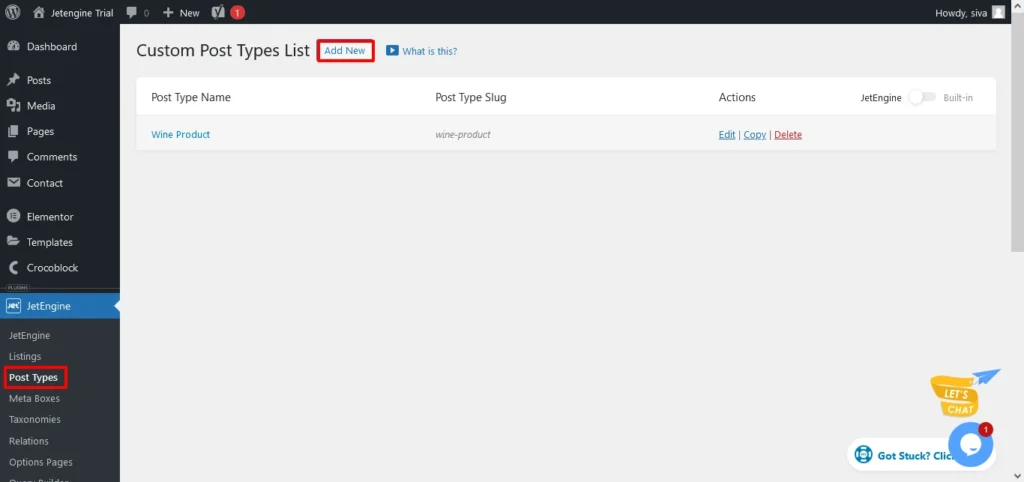
Step 1: Navigate to JetEngine Dashboard
Begin by navigating to the JetEngine plugin on your WordPress dashboard. Once there, click on “Post Types” and then select “Add New.”
Step 2: Fill General Settings
Under the general settings section, you’ll find fields to input essential information for your custom post. Fill in the required fields, such as the post type name, singular label, and plural label. While there are additional settings available for exploration, for this trial, let’s focus solely on the general settings.
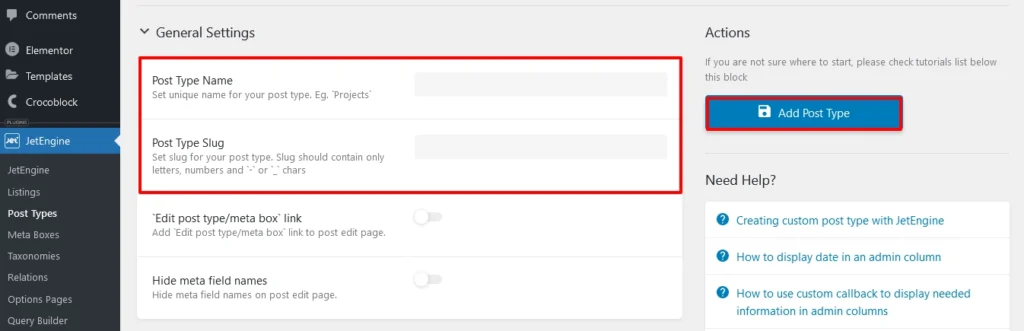
Once you’ve filled in the necessary information, click on “Add Post Type.” Your custom post will now be visible on the dashboard for further management and customization.
Creating a New Post:
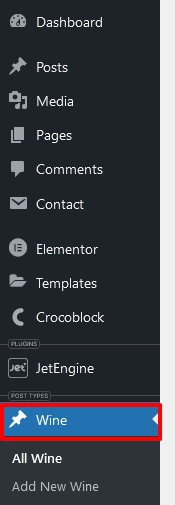
Step 1: Navigate to Custom Post
After successfully creating your custom post using JetEngine, it’s time to add posts to it. Head over to your WordPress dashboard and locate the custom post you’ve just created.
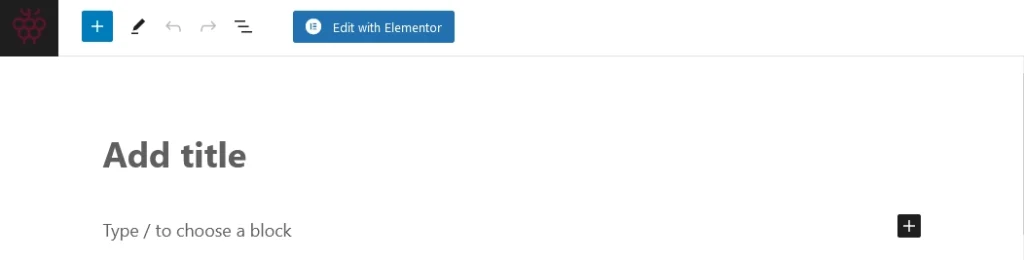
Step 2: Add a New Post
Click on the custom post you’ve created, and within its dashboard, look for the option labeled “Add New Post.” Click on it to initiate the creation of a new post within your custom post type.
Step 3: Post Creation
You’re now in the post-creation interface specific to your custom post type. Here, you can fill in the content, add media, and customize the post as needed. Repeat this process to add as many posts as required under your custom post.
Creating custom fields using JetEngine:
Creating JetEngine custom fields is a breeze, you don’t need another plugin for this task because JetEngine provides everything in one convenient package. Open the JetEngine wizard, which is your gateway to a plethora of customization options.
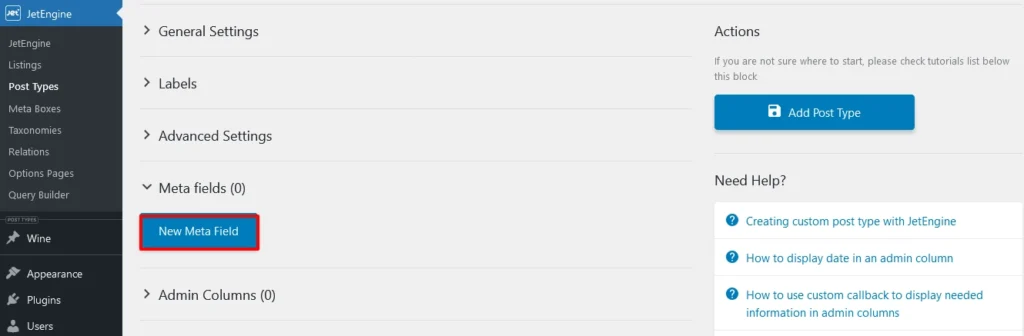
Add a new meta field:
- Since we already created a custom post type, just go to the “Add Post Types” section of the JetEngine wizard and select the appropriate custom post type. Under the settings for the selected custom post type, you will see a section called “Meta Fields.”.
- Click “Add New Meta Field” in the Meta Fields section. Here, you will be asked to enter the necessary information for your custom field.
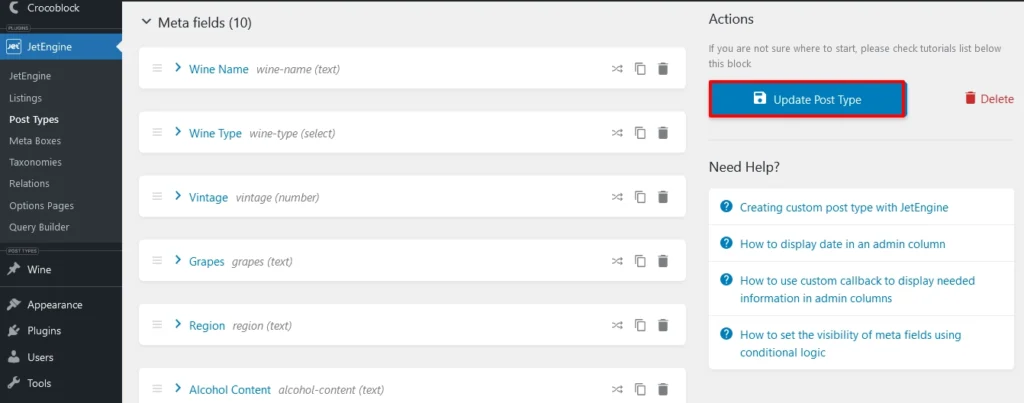
Update Post Type:
Enter the information:
- Fill in the required details for your custom field, such as the field name, type, label, etc. Take care to ensure accuracy, as any mistakes here could lead to issues later on.
- Once you’ve entered all the required information, click on “Update Post Type” to finalize the creation of your custom field. Remember to double-check that you’ve selected the correct post type, as custom fields will only appear within the specified post type.
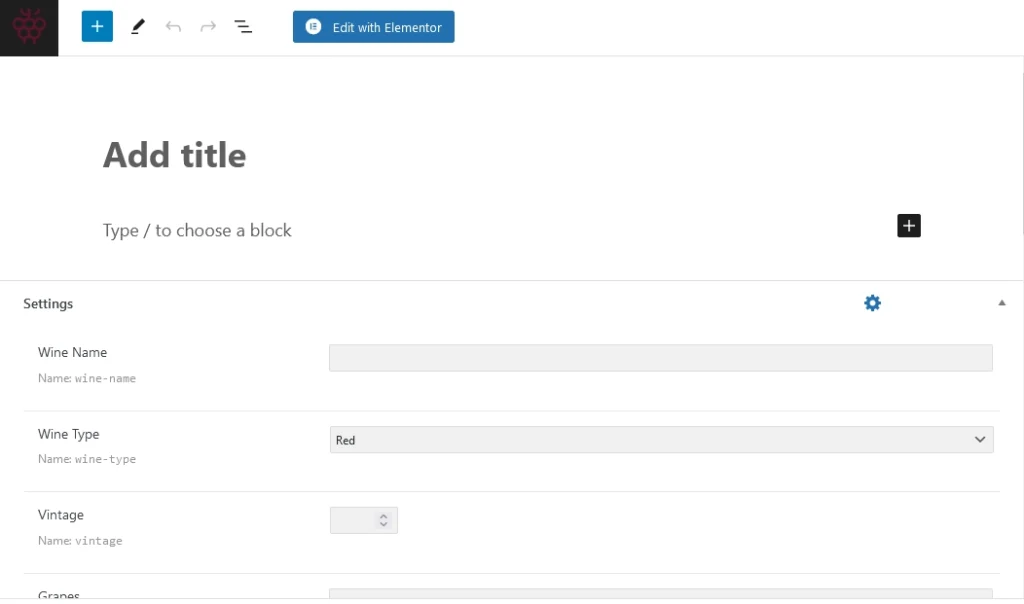
Editing custom fields:
Step 1: Accessing and Editing Custom Fields
Open the custom post type you created earlier and select the post you wish to edit. Scroll down to find the created custom fields displayed at the bottom of the editing screen. Click on the field you want to modify. Once you’ve accessed the custom field, proceed to fill in or adjust the details as needed. Ensure all information is accurate and reflects your requirements.
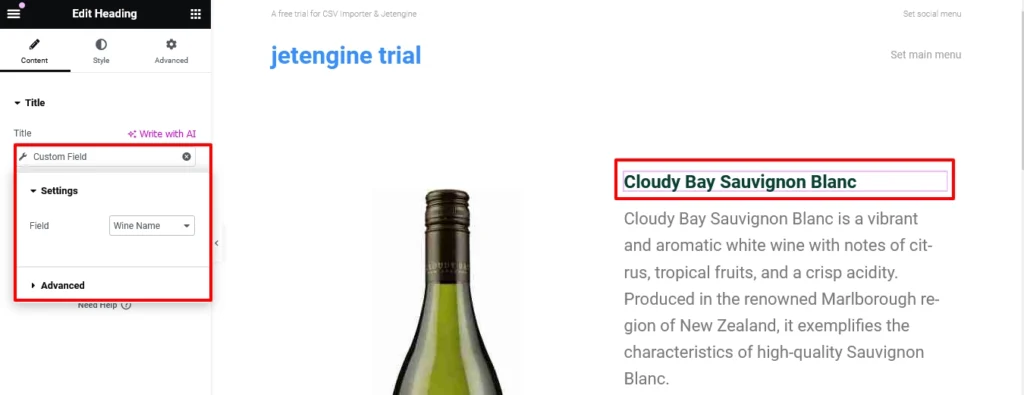
Step 2: Dynamic Usage with Elementor
After filling in the details, click on “Edit with Elementor.” Here, you can dynamically call the created custom fields. For example, if you want to display the name dynamically, select the created “Name Field.” This allows you to seamlessly integrate your custom fields into your post design, enhancing the overall user experience.

WP Ultimate CSV Importer Pro
Get Ultimate CSV/XML Importer to import data on WordPress faster, quicker and safer.
Exporting Custom Post and Custom Fields:
Simple Export Process:
Once your new post with custom fields is ready, exporting is a breeze with just two easy steps.
Step 1: Access Ultimate CSV Importer Pro Plugin
Head to the dashboard and find the Ultimate CSV Importer Pro plugin. Click “Export.”
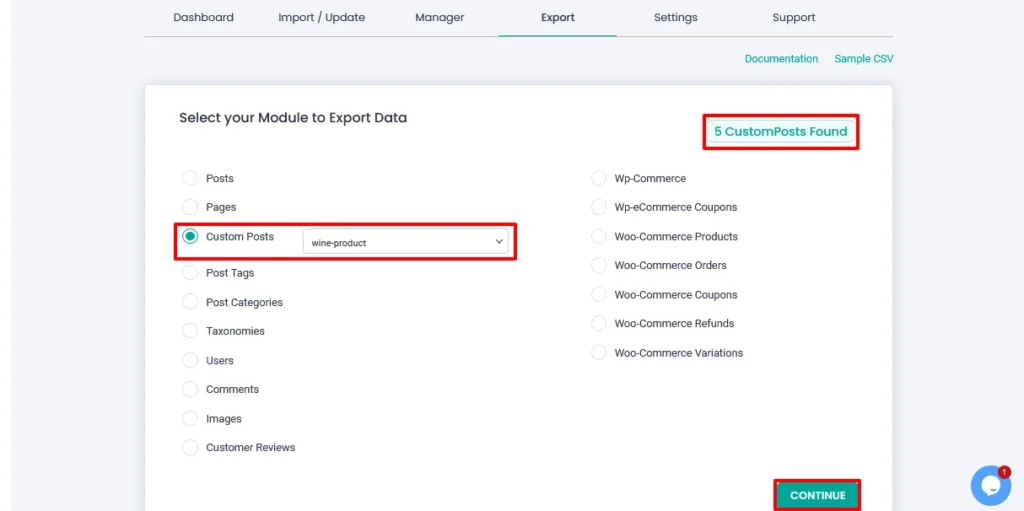
Step 2: Select and Export
Choose “Custom Post” from the dropdown. Click on your newly created custom post type. The total post count will be displayed on the right.
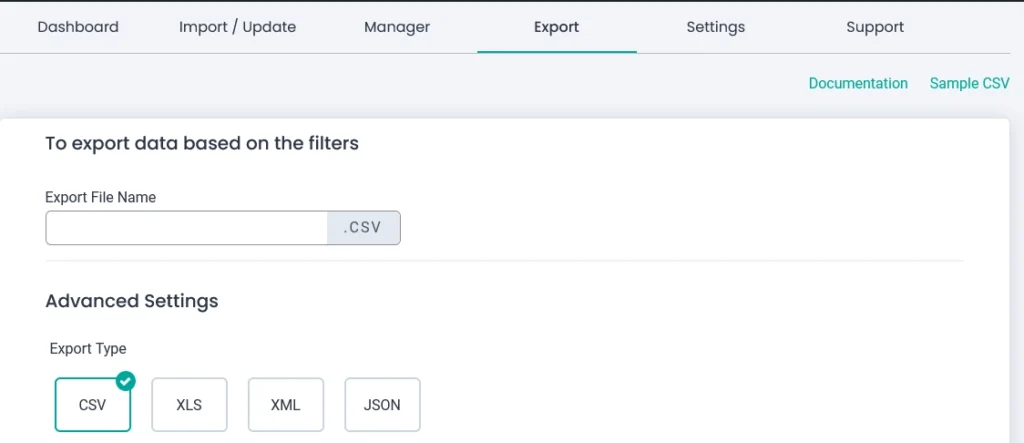
Select your desired file format (XML, CSV, XLS, or JSON), name your file, and then click “Export.”
Importing Custom Post and Custom Fields:
Prepare a CSV file:
Before starting the process, check the exported example file to understand the available field names. Use software such as Microsoft Excel or Google Sheets to prepare a CSV file with the same structure as the exported sample. Fill in the field names with the corresponding data, and download the file in CSV format.
Initiate Import and Upload a CSV File:
Navigate to the WordPress dashboard and access the Ultimate CSV Importer Pro plugin. Click on “Import” and upload the CSV file from your desktop.
Select Post Type and Verify Field Names:
Depending on your needs, choose a post type for new content or existing content. Since we have already created the required posts, choose the right one to import or update.
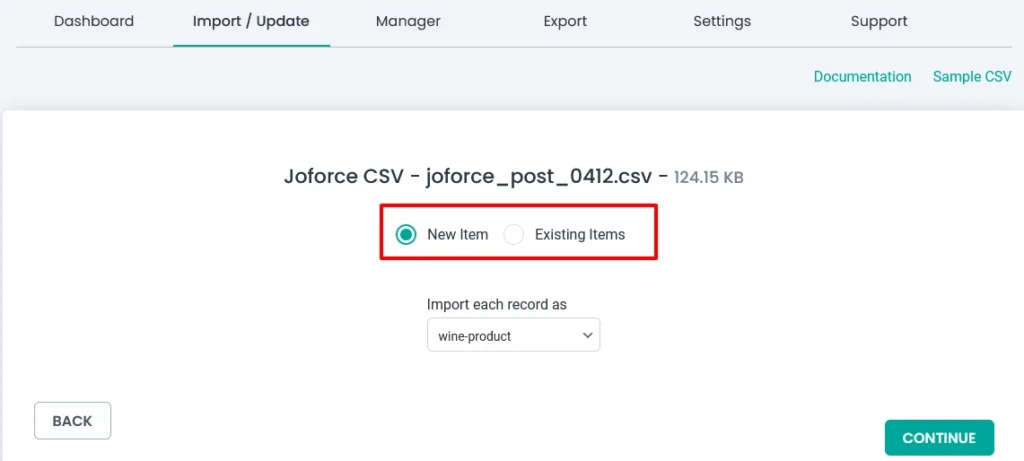
In the next step, verify that the field names match correctly with the data in your CSV file. Make any necessary adjustments for accuracy.
Continue and Finalize Import:
Proceed with the import process by following the further instructions provided. Once satisfied with the setup, click to import, and your data, including custom posts with custom fields, will be successfully imported to the designated destination.
SEO Meta Data Import and Export:
Installed SEO plugins: In this trial, we’ve installed four powerful SEO plugins: RankMath SEO, All-in-One SEO, SEOPress, and Yoast SEO.
Note:
- We’ve taken the extra step of importing SEO settings across these plugins, ensuring seamless integration and functionality. However, it’s essential to verify that your required plugin is activated.
- If your preferred SEO plugin isn’t currently activated, simply deactivate any active plugin and activate your desired one. For instance, if Yoast SEO is active but you wish to work with All-in-One SEO, deactivate Yoast SEO and activate All-in-One SEO instead.
Exporting SEO Meta Data:
To begin the export process, switch to the Ultimate CSV Importer plugin within your WordPress dashboard. Once in the plugin, navigate to the export section. Here, you’ll find options to select the specific data you want to export, including posts, pages, custom posts, or SEO data.
Select Data for Export:
Choose the SEO data you wish to export. You can select specific items or categories based on your preferences. The plugin will display the number of items available for export. Double-check your selection and proceed to export.
Importing SEO Meta Data:
Create a CSV file:
Begin by creating a CSV file using Microsoft Excel or Google Sheets. Ensure that each column, representing different fields, is accurately entered to prevent any import errors. Referring to the description of the exported example file can assist in maintaining accuracy. Next, log in to your WordPress website and open the Ultimate CSV Importer plugin.
Select the Import Option:
Within the plugin, select the import option. Choose the desired post type, whether it’s a post, page, documentation, etc., based on where your SEO metadata needs to be imported. Follow the next steps and enter the details in the required fields. Once everything is done, click to import. Your data is now delivered to the destination. You can verify the imported data via the admin view or simply open the post, page, or document where you want the SEO to appear. Open the source code of the post, page, or document, and you can see the metadata.
SEO Import Documentation:
If you encounter any difficulties during the import process, refer to the SEO import documentation for assistance and troubleshooting tips. This resource can help resolve any issues and ensure a smooth import of your SEO metadata.
FAQs:
1. Do I need to import any data into the demo?
Answer: The demo comes pre-filled with sample data, so you don’t need to import any of your own to get started. However, you are welcome to add your data if you’d like to test it with your specific content.
2. Can I download or update plugins in the trial instance?
Answer: Unfortunately, downloading and updating plugins is not available in the trial instance. This allows us to maintain a stable environment for everyone using it.
3. Do all trial instances have the same plugins?
Answer: No, each trial instance is designed for a specific purpose, so the bundled plugins may differ. However, all trials include popular SEO plugins for your convenience.
4. Are there other trial instances available?
Answer: Yes! We offer trial instances for Learnpress, JetEngine, WooCommerce, and Toolset types, all preloaded with sample data. You can explore them all at https://trial.smackcoders.com/.
5. I’m having trouble creating custom posts or custom fields. What should I do?
We’re happy to help! If you encounter any difficulties while setting up custom posts or fields, feel free to contact our support team directly
Conclusion:
This guide has demonstrated the simplicity of creating custom posts and fields with JetEngine, along with the seamless export and import capabilities facilitated by our CSV Importer Pro plugin. With just a few clicks, users can effortlessly manage their data, enhancing their website’s functionality and organization. Furthermore, we encourage further exploration with our trial instances, which include Learnpress, WooCommerce, and custom posts using Toolset types and WPML plugins exclusively. Experience these instances risk-free with a free trial from trial.smackcoders.com. As a bonus, we preloaded sample data into each trial instance. This saves your valuable time and effort! Just click to export and import data from your WordPress website itself. Please don’t hesitate to reach out with any inquiries or feedback; we’re here to assist you every step of the way.