Table of Contents
We’re thrilled to have you join us for another deep dive in our ‘how-to’ guide! Today, we’ll tackle website data management using CSV Importer Pro and the Toolset Types plugin.
What This Trial Offers:
- Effortless Customization: Seamlessly create custom posts and fields with ease using the Toolset Types Plugin.
- Multilingual Capabilities: Explore the world of multilingual export and import functionalities with WPML plugin integration.
- Smooth Data Management: Experience the seamless import and export of data with our trusty Ultimate CSV Importer Pro plugin.
- Preloaded Sample Data: Jumpstart your exploration with our preloaded sample data. And if you want to add your own data as a sample, feel free to add your data to this trial instance!
- SEO Metadata Management: Dive deep into SEO optimization with our arsenal of powerful SEO plugins, including Rank Math SEO, All-in-One SEO, SEOPress, and Yoast SEO. Please note: Only one SEO plugin will be activated in this trial instance. (You can easily switch between them by deactivating the activated plugin and activating your preferred one.)
Tool of Choice:
Our go-to tool for creating custom posts and fields is the Toolset Types Plugin. Paired with four SEO plugins and WPML for multilingual support, it’s a robust combination ready to take your website to new heights.
Our Focus:
We’re putting our trusty Ultimate CSV Importer Pro plugin to the test, ensuring its compatibility with custom post and field imports and exports. Let’s dive in and rock and roll through this exploration together!
Plugins installed:
- Ultimate CSV Importer Pro
- Toolset Types
- WPML
- SEO plugins: Rankmath SEO, SEOPress, All-in-One SEO, and Yoast SEO.
Why You Should Consider Using the Toolset Types Plugin to
Enhance Your WordPress Website: If you’re running a basic WordPress site with limited functionalities, you might find it challenging to expand beyond simple posts. This is where the Toolset Types plugin comes in handy.
Customize Your Website: With the Toolset Types plugin, you gain the ability to tailor WordPress to your specific requirements. Imagine being able to create dedicated sections for various content types, such as products, recipes, or real estate listings. You can include all the necessary information and details, providing a richer user experience.
Seamless Integration with the CSV Importer Pro Plugin: Combining Toolset with our CSV Importer Pro plugin can significantly streamline your workflow for importing and managing structured data. This integration allows for smoother data management, making it easier to handle large volumes of information effectively.
How to Create Custom Posts Using Toolset
Creating custom posts with Toolset is a straightforward process that requires just a few simple clicks. Follow these steps carefully:
Access your WordPress dashboard and locate the Toolset plugin.
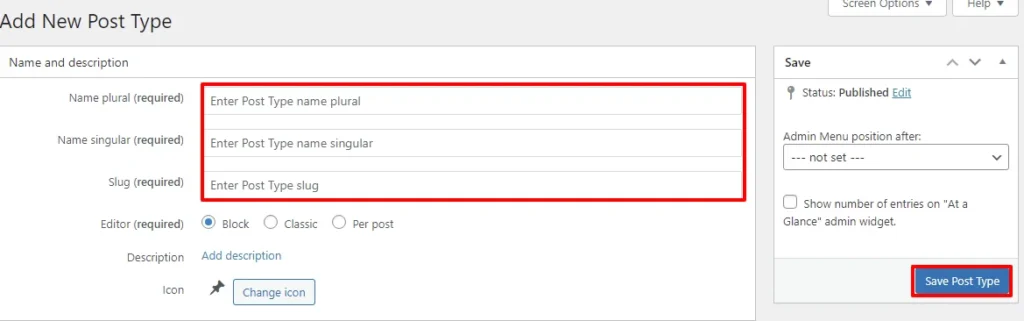
Select Post Types and Add New: Within the Toolset plugin, navigate to the “Post Types” section and click on “Add New.” Here, you’ll need to provide a name for your custom post type. Feel free to explore various settings options if you wish to customize further. Additionally, you can add taxonomies to your custom post type, which we’ll cover later in this guide. Once you’re satisfied, click “Save Post Type” to confirm.
Congratulations! You’ve successfully created your custom post type.
View Your Custom Post Type: After creation, you can view your newly created post type on your WordPress dashboard.
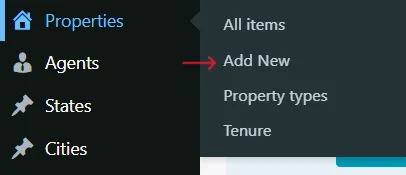
Adding Posts to Your Custom Post Type: Now, let’s learn how to add posts to your custom post type:
- Hover the created post type in your WordPress dashboard.
- Click on “Add New” to start creating a new post within your custom post type.
- Enter the post content as desired.
- Click “Publish” once you’re ready to make your post live.
- Your post is now successfully added to your custom post type.
How to Create Custom Fields Using the Toolset Types Plugin
Creating custom fields with the Toolset Types Plugin is simple. Just follow these steps: Log in to your WordPress dashboard and locate the Toolset plugin.
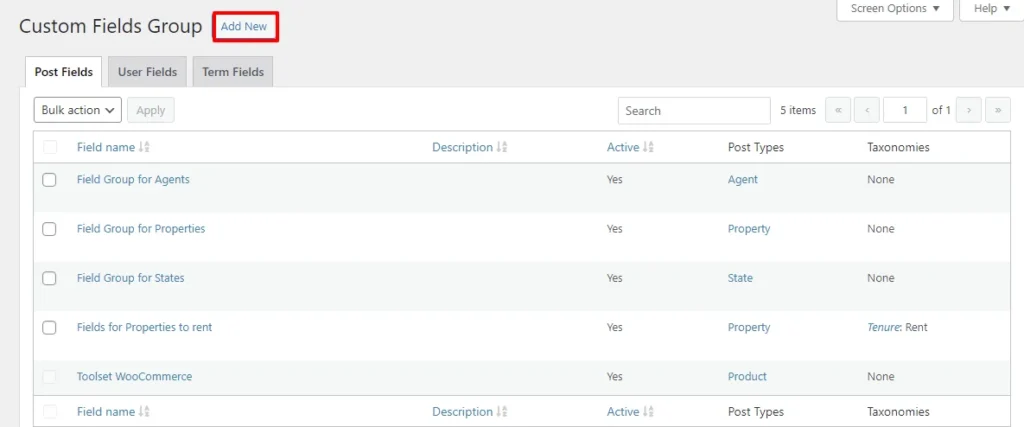
Select Custom Fields: Within the Toolset plugin, find the “Custom Fields” option and click on it. This will bring up the Custom Fields Group panel.
Add a New Custom Fields Group: Click on “Add New” to start creating a new custom fields group. You’ll be prompted to choose a custom field group type.
Enter a name for your field group, and then add the required fields with their respective field types. Once done, click “Save Field Group” to confirm.

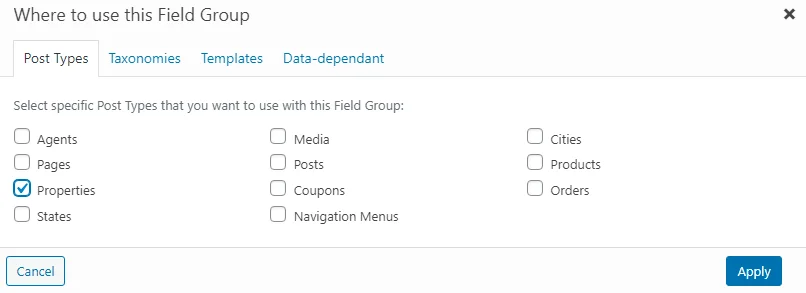
Choose Where the Custom Fields Appear: In the “Appears on” section, it’s crucial to select where the custom fields will appear. Here, you can choose the custom post type that you’ve previously created.
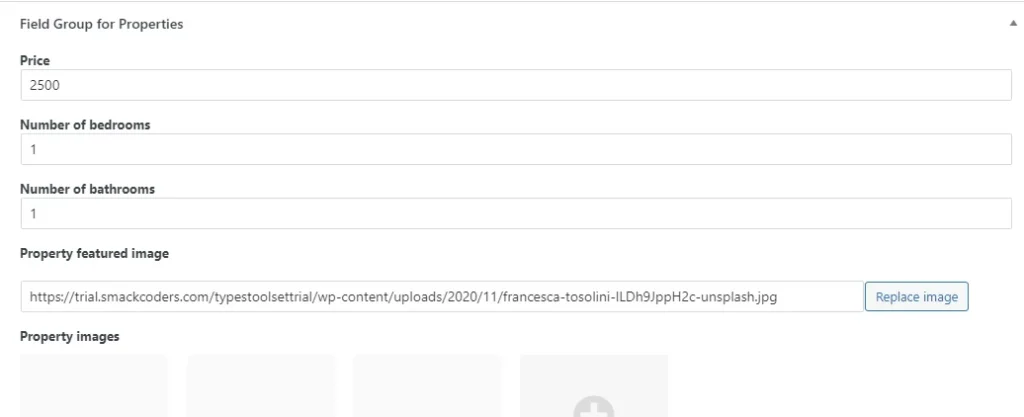
Navigate to Your Custom Post Type: Go to the custom post type that you created earlier. Open any post within that post type and click on “Edit.” You’ll notice that all of the custom fields you created will appear at the bottom of the post-editing screen. You can now easily fill in the necessary information for each custom field.
That’s it! You’ve successfully created and implemented custom fields using the Toolset Types Plugin.
Understanding Taxonomy in WordPress
Taxonomy is a method used to organize and categorize content on your website. In this real estate trial instance, we’ve incorporated taxonomies such as property types and tenure to efficiently classify the properties.
How to Add Taxonomies Using Toolset
Adding taxonomies using Toolset is a straightforward process. Here’s how:
Access the Toolset plugin from your WordPress dashboard. Within Toolset, locate the “Taxonomies” option and click on it.
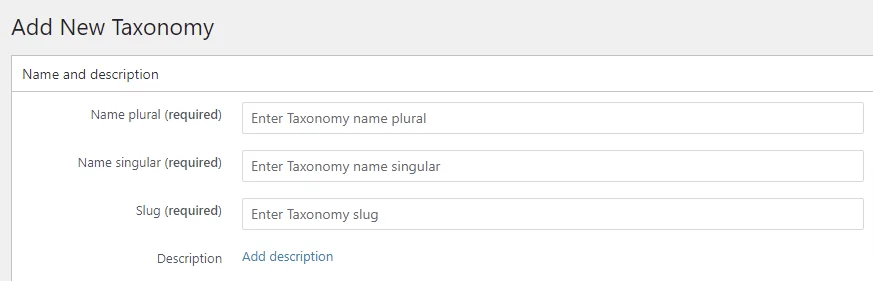
Add New Taxonomy: Click on “Add New” to create a new taxonomy. Fill in the name and description fields as desired.
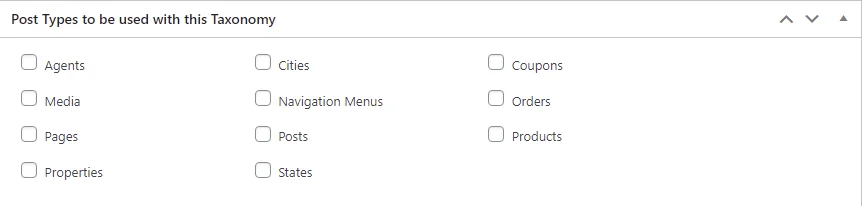
Assign Post Type: One crucial step is assigning the post type for the taxonomy. You should choose the post type that you created earlier. This ensures that the taxonomy is associated with the relevant content.
Save Changes: Once you’ve configured the taxonomy settings, don’t forget to click “Save” to confirm your changes.

WP Ultimate CSV Importer Pro
Get Ultimate CSV/XML Importer to import data on WordPress faster, quicker and safer.
How to Export Custom Posts and Custom Fields
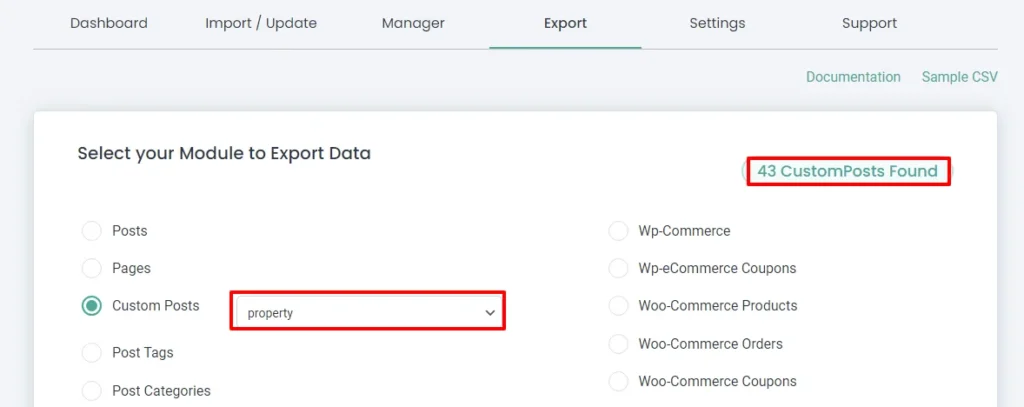
Log in to your WordPress dashboard and navigate to the “Ultimate CSV Importer Pro” plugin. Click on the “Export” option within the plugin. You’ll be presented with various export options.
Select Custom Post: Choose the type of content you wish to export. If you want to export a specific custom post type, select “Custom Posts”, from the dropdown menu select the custom post type you’ve created. Click continue.
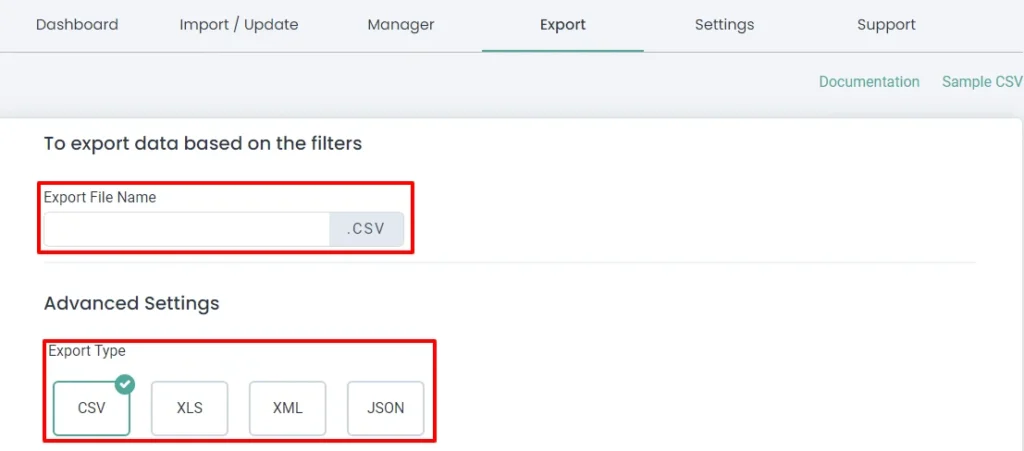
Specify the file name and format: Fill in the desired file name for your export and select the preferred format. The Ultimate CSV Importer Pro plugin supports formats such as CSV, XML, XLS, and JSON. Click on the “Export” button to begin the export process.
Your export is now ready. You can find the exported file with your custom posts and custom fields in the specified format.
How to Import Custom Posts and Custom Fields
Before importing, we need to prepare a file to import. Let’s see how to prepare a CSV file.
Prepare a CSV file for import
- You can create the CSV file using software like Microsoft Excel or Google Sheets. Simply input the data for each field according to your requirements. Ensure that the data is organized correctly and follows the format expected by the plugin.
- Incorrect field names may cause import errors. You can easily find the field names by referring to the exported file or by copying them directly from the exported file and pasting them into your new CSV file.
How to Import a CSV File:
Log in to your WordPress website and navigate to the CSV Importer Pro plugin.
Initiate Import/Update:
- Upload the CSV file containing the data you want to import into your website. Once uploaded, click “Continue” to proceed.
- Here, you’ll have the choice to update existing content or import new content. Select the appropriate option and proceed by clicking “Continue.”
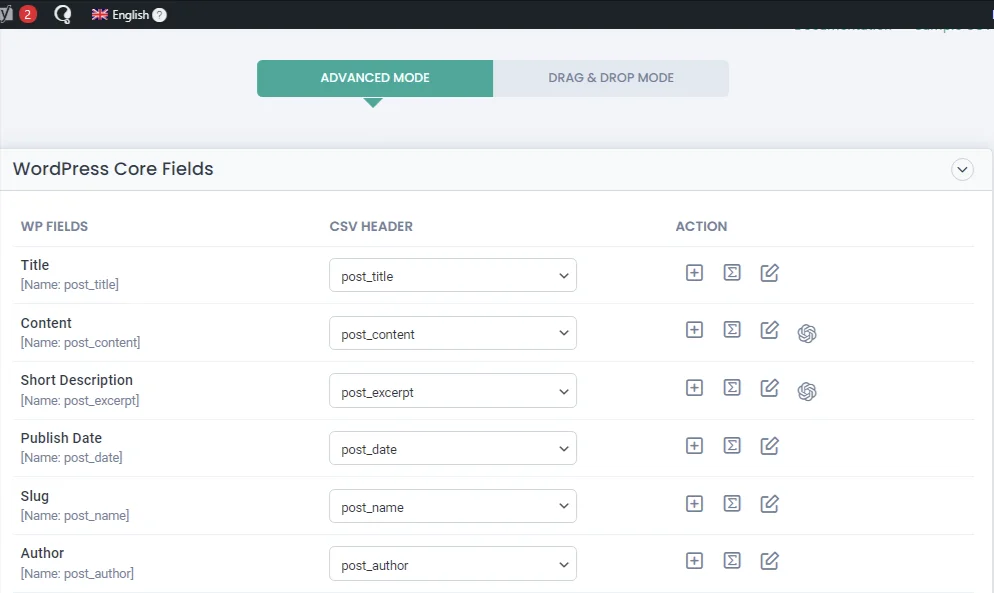
Verify field mapping:
Ensure that all fields from your CSV file are correctly mapped to the corresponding fields in your WordPress database. Review the field mapping carefully, and if everything looks accurate, click “Continue.”
Media handling and configuration of import settings:
- If your CSV file contains media files, follow the instructions provided in this step to handle them appropriately. Once done, click “Continue.”
- In the Import Configuration section, you have the option to schedule your import for a later time or proceed with the import immediately. Select your preferred option and click the “Import” button.
Congratulations! Your data has been successfully imported into your WordPress website. You can now view all the imported data from the admin view.
This documentation may clarify your questions regarding the types of toolset imports.
Sample CSV data for custom posts and custom fields.
WPML import and export
Notes:
- Translation Process: We’re not covering the translation process itself in this guide. You can either manually translate your content or opt for automated translation services provided by WPML. Keep in mind that automated translation may incur costs. For pricing details, please refer to WPML’s website.
- Pre-translated Content: In this trial instance, we’ve already translated the posts and custom posts into German and Spanish. This allows you to explore the functionality of WPML with pre-translated content.
Exporting WPML Data
Choose content to export:
Log in to your WordPress dashboard and navigate to the CSV Importer Pro plugin. Within the plugin, select the post or custom post type that you want to export. WPML manages translations for various content types, so you can choose any of these.
Initiate Export:
Once you’ve selected the content type, proceed to initiate the export process. Follow the on-screen prompts to complete the export.
- After the export is complete, you’ll receive a CSV file containing the exported data. Download this file and open it using software like Microsoft Excel or Google Sheets.
- In the CSV file, you’ll find all the translated content organized in columns. Each language may have its own column, allowing you to easily review and manage the translated content.
Finding Translated Content in the Exported File
You can easily identify the translated content within the exported CSV file. Here’s how:
- Identify language codes: Look for the field named ‘language_code’ in the CSV file. This field indicates the language of the content. For example, if the language code is ‘de’, it represents the content in German, while ‘es’ signifies content in Spanish.
- Review translated titles: Another way to verify the translation is by checking the ‘translated_post_title’ field in the CSV. This field displays the translated titles of posts or custom post types. By reviewing this field, you can ensure that all content has been accurately translated.
Importing WPML Data
Check field names:
- Before importing the data, ensure that the field names in your file are correct. This is crucial, as accurate field names prevent the majority of import issues.
- If needed, refer to the exported data from WPML or utilize a sample CSV provided for import purposes.
Initiate Import:
- Log in to your WordPress website and navigate to the CSV Importer Pro plugin.
- Click on the “Import” option within the plugin. Select the file you want to import and proceed by clicking “Continue.”
Verify field mapping:
- In this step, double-check that all fields are mapped correctly. Ensure that each field in your CSV. Follow any additional steps or instructions provided by the plugin to complete the import process.
- Once you’ve confirmed the field mapping, click on the “Import” button to begin the import process.
Take a deep breath, as the import process may take a minute or more, depending on the size of your data.
After the import is complete, navigate to the admin view of your WordPress website to verify that the imported data is visible.
For further details, you can check out this WPML documentation.
SEO Import and Export
SEO export:
Navigate to the export tab within the CSV Importer Pro plugin on your WordPress dashboard.
Select Content Type:
Choose the type of content you want to export SEO metadata for. This could include posts, custom posts, or pages. Ensure that these content items are filled with SEO metadata to ensure they get exported.
Choose File Format and Name:
In the next step, specify the file format and name for the exported file. This allows you to easily identify and manage the exported SEO metadata.
Initiate Export:
Once you’ve configured the export settings, click the “Export” button to initiate the export process. The CSV Importer Pro plugin will then export the SEO metadata associated with the selected content type successfully.
SEO import:
Before initiating the import process, ensure that the SEO fields in your CSV file are properly filled. This step is vital to ensure that the imported data appears correctly on your website.
Navigate to the import tab within the CSV Importer Pro plugin on your WordPress dashboard.
Select File:
Choose the CSV file containing the SEO metadata that you wish to import. If you’re updating metadata for existing posts, select the option for “existing items.”
Map Fields:
Review the field mapping to ensure that the SEO fields are correctly mapped to the corresponding fields in your WordPress database. This step ensures that the imported metadata is accurately applied to your content.
Initiate Import:
Once you’ve verified the field mapping, proceed with the import process by following the further steps provided by the plugin. Click the “Import” button to initiate the import process. Once successfully imported, you can access the data within the admin panel.
FAQs (Frequently Asked Questions)
1. What are the key benefits of using the trial instance featured in this blog post?
The trial instance offers several benefits, including streamlined customization of WordPress content with the Toolset Types Plugin, simplified import and management of structured data using the CSV Importer Pro Plugin, and enhanced multilingual capabilities through seamless compatibility with the WPML Multilingual Plugin.
2. For how long is the trial active?
The trial is active for 3 days initially. If you wish to extend the trial, you can contact us at [email protected], we’ll extend it for an additional four days.
3. Can I download or update installed plugins during the trial?
Unfortunately, no. You cannot download or update any plugins in the trial instance. However, if you require a trial for other plugins supported by Smackcoders, you can request it from https://trial.smackcoders.com.
4. Do I need to enter my card details to access the trial?
No, we do not require any card details from you. We offer a completely free trial; simply visit https://trial.smackcoders.com, choose the trial instance from the drop-down, enter your name and email, and we will send further trial details via email.
5. What should I do if I find the guide provided unclear?
If you find the guide difficult to understand, please reach out to us at [email protected]. We are here and happy to assist you.
Related post:
- Exploring LearnPress Trial with Sample Data and More
- Effortless Data Management: JetEngine and CSV Importer Pro with Sample Data.
Conclusion
This exploration into the creation of custom posts and fields using the Toolset Types Plugin, alongside WPML Multilingual import and export functionalities, has unveiled a plethora of possibilities for enhancing WordPress websites. With smooth data management facilitated by our Ultimate CSV Importer Pro plugin,. Additionally, our range of free trial instances, including WooCommerce, JetEngine, LearnPress, and Metabox, each preloaded with sample data, opens doors to further experimentation and customization. For inquiries or to acquire our CSV Importer Pro plugin, visit our website, and don’t hesitate to reach out to us for any questions or assistance.