EDD Orders stores payment and transaction details such as order totals, customer information, payment status, line items, and gateways. WP Ultimate CSV Importer supports EDD Orders (payments) import and export. Here, you know how to import order data and export order history for accounting and analysis. You can manage EDD Orders efficiently using structured files like CSV, Excel, XML, and more.
How to Import EDD Orders #
EDD Orders represent payment transactions made by customers.
Step 1: Prepare the CSV File
Your order CSV should include:
- Downloads (product) Id
- Order ID or Order Number
- Order Date
- Order Status
- Customer Email
- Billing First Name, Last Name
- Billing Address, City, State, ZIP, Country
- Order Subtotal
- Tax Amount
- Discount Amount
- Order Total
- Payment Gateway
- Transaction ID
- Line Items (Download IDs, Quantity, Price)
- Unlimited Downloads
Each order should be represented in a single row, with line items properly structured.
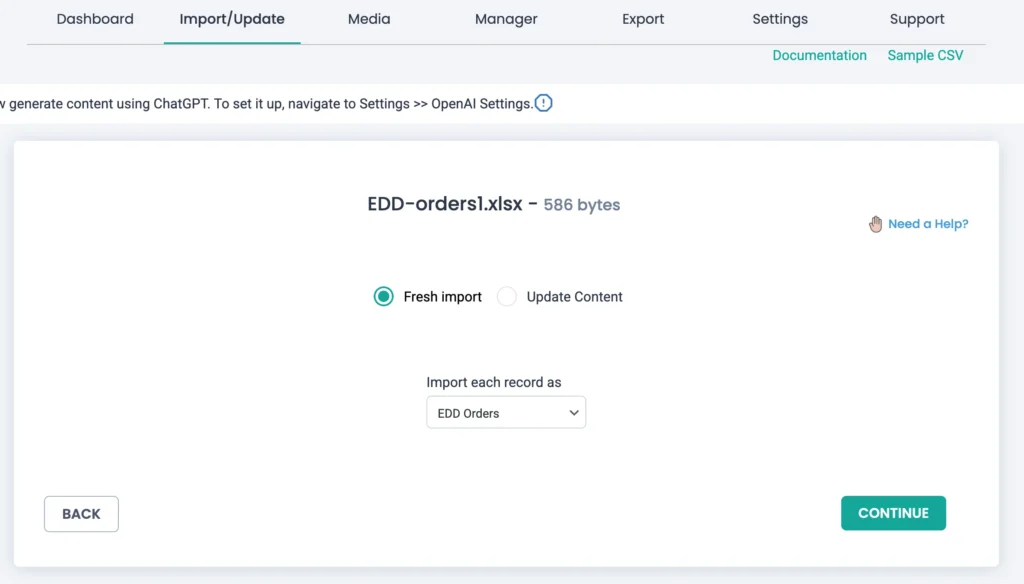
Step 2: Create a New Import
Go to WP Ultimate CSV Importer → Import/Update. Upload your import file (CSV, XML, Excel, or other). Select Fresh Import or Update Content. Choose EDD Orders from the post type dropdown. Click Continue.
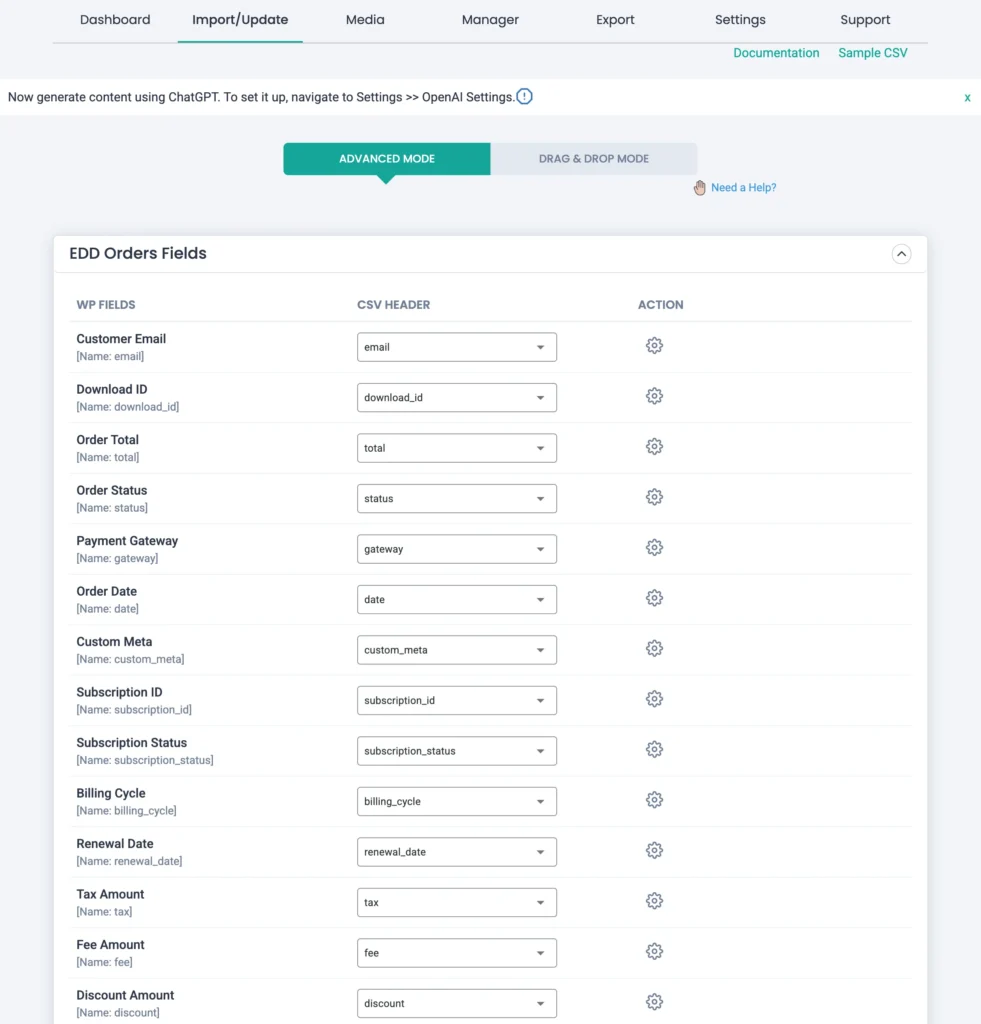
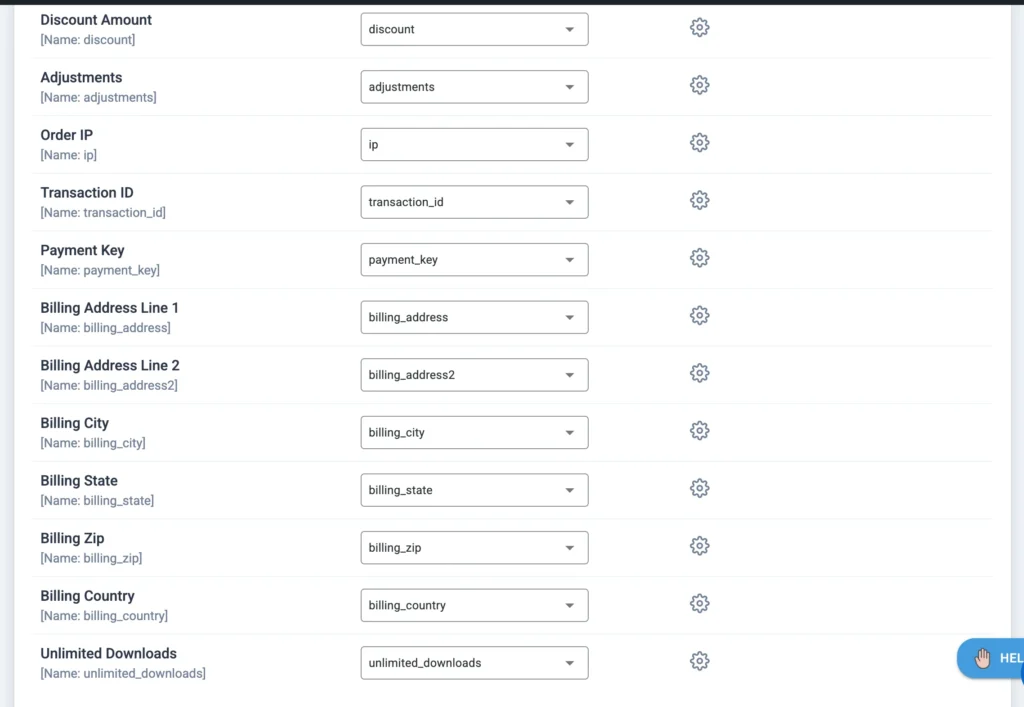
Step 3: Map Order Fields
Map order-level fields such as order date, status, and totals. Map customer-related fields carefully. Map line items to ensure products are linked correctly. If a customer’s email does not exist, a new customer will be created automatically.
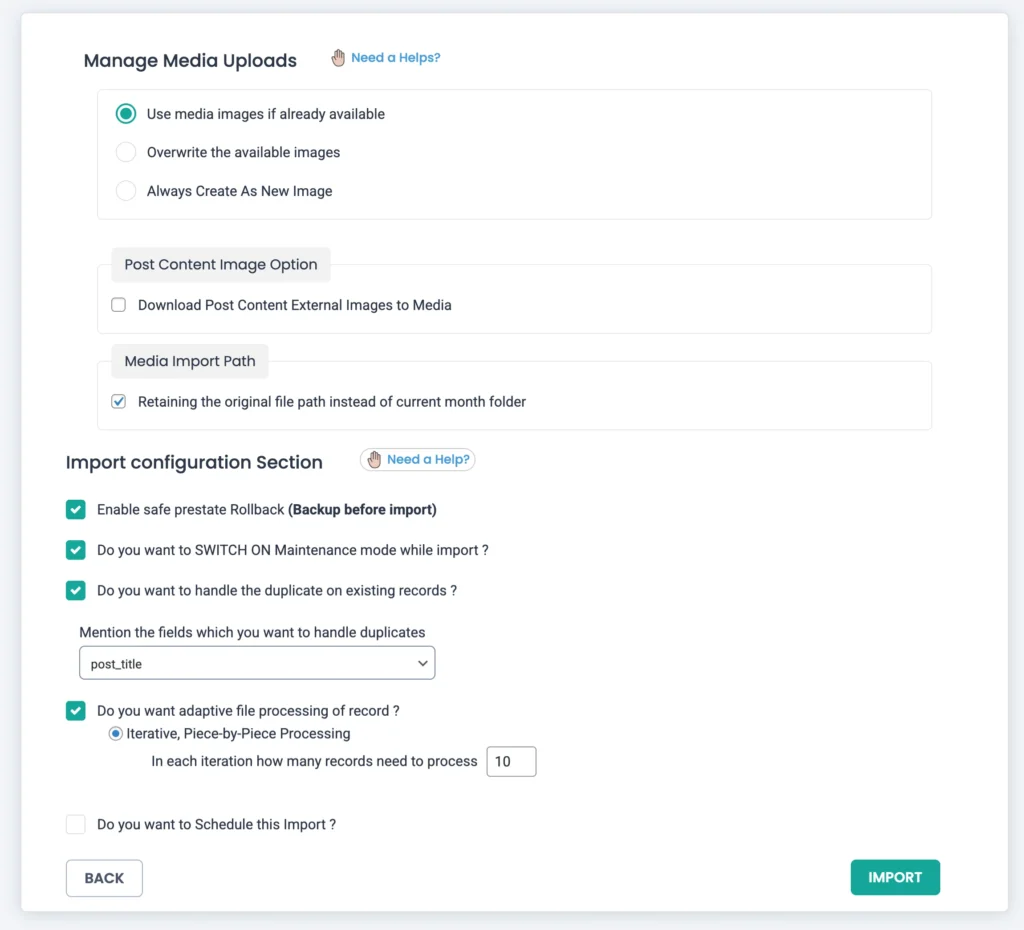
Step 4: Configure Import Settings & Run Import
Use Order ID to prevent duplicates. Enable rollback for safety. Start the import and monitor logs. Verify imported orders under Downloads → Orders.
How to Export EDD Orders (Payments) #
The EDD Orders export contains complete payment and transaction data, including:
- Order date and payment status
- Customer email
- Billing name and address details
- Order subtotal, tax, discounts, and total
- Payment gateway used
- Transaction ID
- Line item (download IDs)
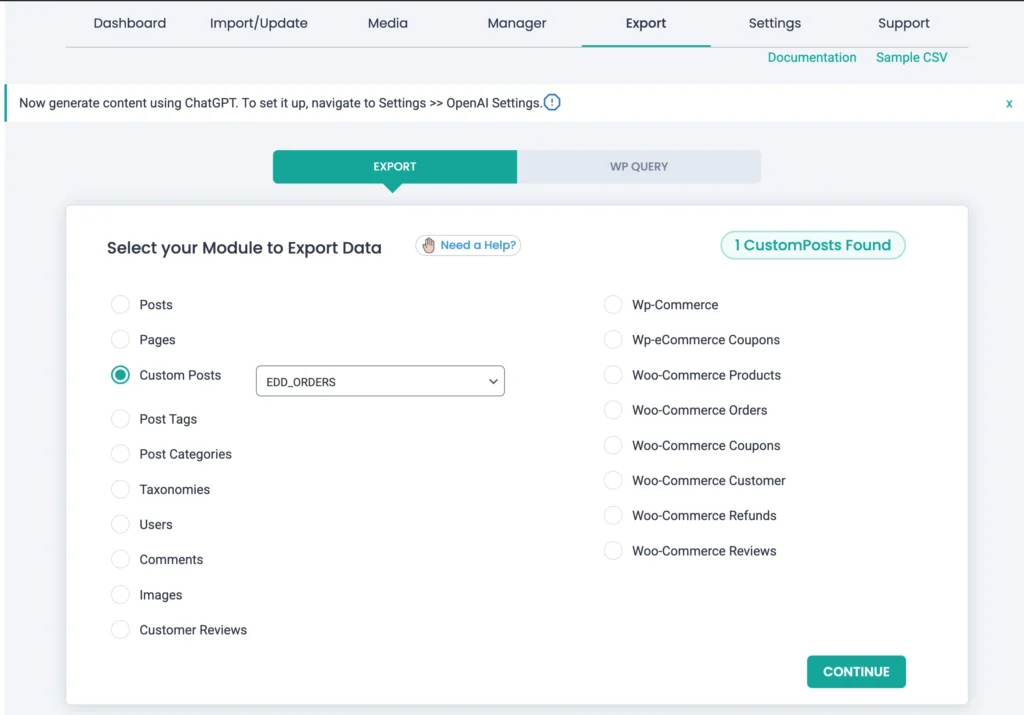
Step 1: Open the Orders Export
Navigate to WP Ultimate CSV Importer → Export. Select Custom Posts → then EDD Orders. Click Continue.
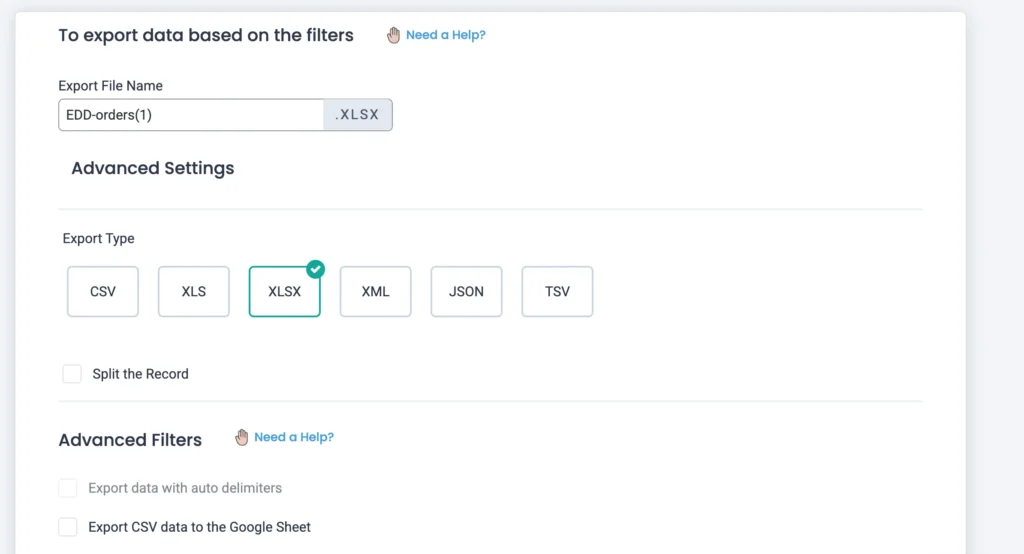
Step 2: Select File Format
Enter the file name first and choose your preferred export format (CSV, Excel, XML, or TSV). CSV and Excel are most commonly used for financial analysis and reconciliation.
Step 3: Configure the Export Scope
Before exporting, you can define what orders should be included:
- Export all orders
- Export orders within a specific date range
This allows you to generate targeted exports instead of pulling the entire order history.
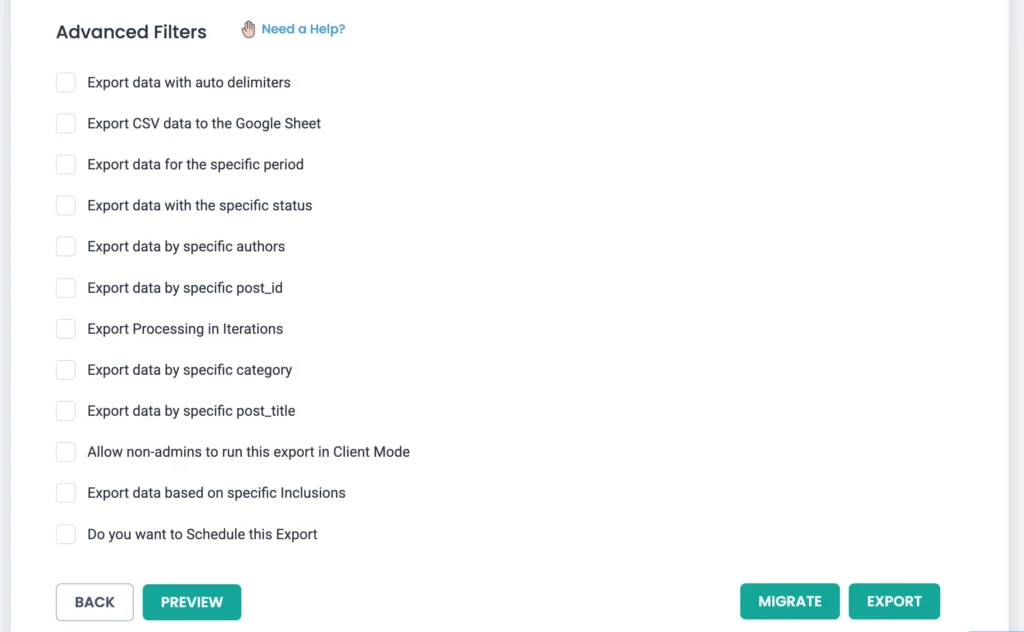
Step 4: Run the Export
Click Export to generate the order file. The exported file will include one row per order, along with structured line item data. If you want a recurring orders export, configure Schedule Export and provide essential information like schedule frequency, date, time, etc. You can either send the exported data to the connected Google Sheets account or the configured FTP/SFTP host.