With WP Ultimate CSV Importer, you can easily move your WooCommerce orders data from one store to another. The plugin is simple, reliable, and highly helpful when you are migrating your WooCommerce site data. You can import orders from CSV, XML, Excel, or other supported file formats without the risk of losing any key details. In just a few steps, you can bring in complete order details, including customer information, billing and shipping addresses, products purchased, payment methods, order statuses, and more.
| Important: Free plugin now required for all Pro packages. Starting from CSV Importer Pro 8.15, CF Pro 8.3, and WPML Pro 6.2, the free WP Ultimate CSV Importer plugin must be installed and active on your site before any Pro package will work.If the free plugin is not detected, the Pro package will auto-deactivate and display a setup notice in your WordPress admin. |
Follow the instructions below to learn how to import WooCommerce orders. You can also try it out in our free trial instance using this sample WooCommerce Orders CSV file.
Step-by-step instructions to import WooCommerce Orders #
Step 1: Prepare your import file with Order details
Create the import file with the necessary details of the WooCommerce orders. Ensure that your import file includes fields such as order ID, customer note, order status, order date, payment details, billing details, and shipping details.
Tip: If you’re migrating your store, simply export the order details with WP Ultimate CSV Importer from your old store and then import them into the new one using the steps outlined below. For detailed instructions on exporting WooCommerce orders, see the section below.

Step 2: Upload the Order Details File
If you have installed Ultimate CSV Importer, navigate to the plugin page from the WordPress dashboard. In the Import/Update tab, upload your prepared WooCommerce Orders file using one of the available options:
- To upload from your device, select ‘Upload from Desktop’. Click Browse, select the file, and click Open to upload it.
- To upload from the ftp/sftp server, select ‘Upload from FTP/SFTP’. Provide the host and file location details.
- To upload via a link, choose ‘Upload from URL’ and provide the Google Sheet url or Dropbox URL.
- To upload from the server, select ‘Choose File from Server’ and locate the file.
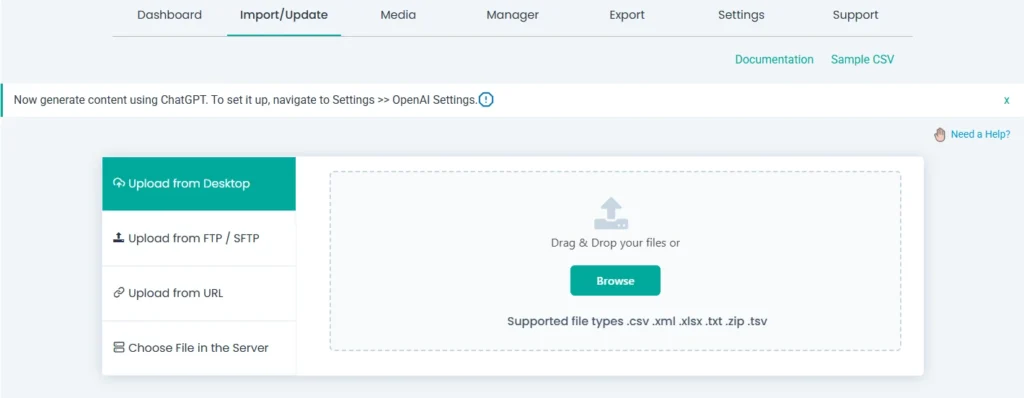
Your file will be uploaded.
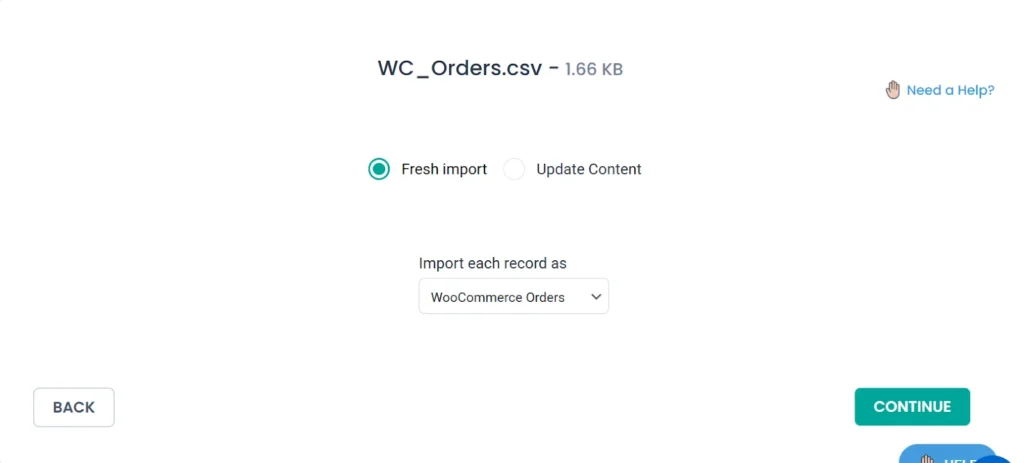
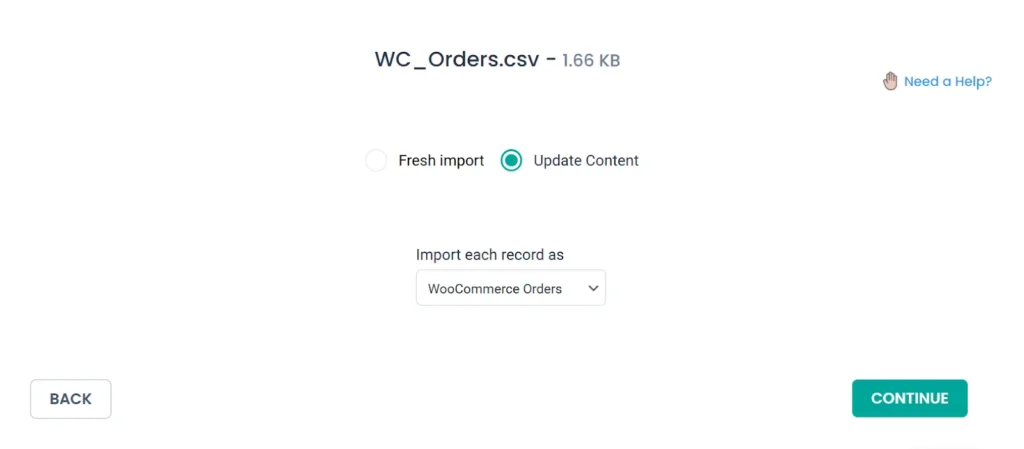
Post Type & Import Type selection
Choose ‘WooCommerce Orders’ as the post type from the “Import each record as” dropdown.
For the import type, select “Fresh Import” provided above to import new orders into WooCommerce; otherwise, select “Update Content” to update available order details.
Click ‘Continue’.
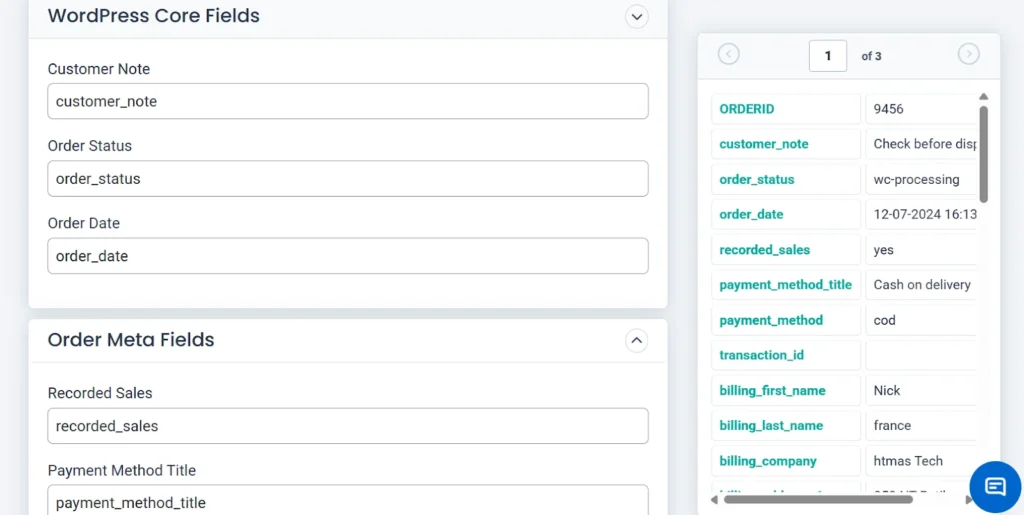
Step 3: Map the WooCommerce order fields
Next comes the mapping section. Map the file column headers with their corresponding WordPress core fields and Order meta fields.
For example, you should match the column header of your CSV or XML file containing order statuses such as completed, processing, or on hold, to the WordPress field ‘Order Status’.
The plugin will auto-map fields if the column headers exactly match the WordPress fields. You can also manually map fields using the drop-down menu in ‘Advanced Mode’.

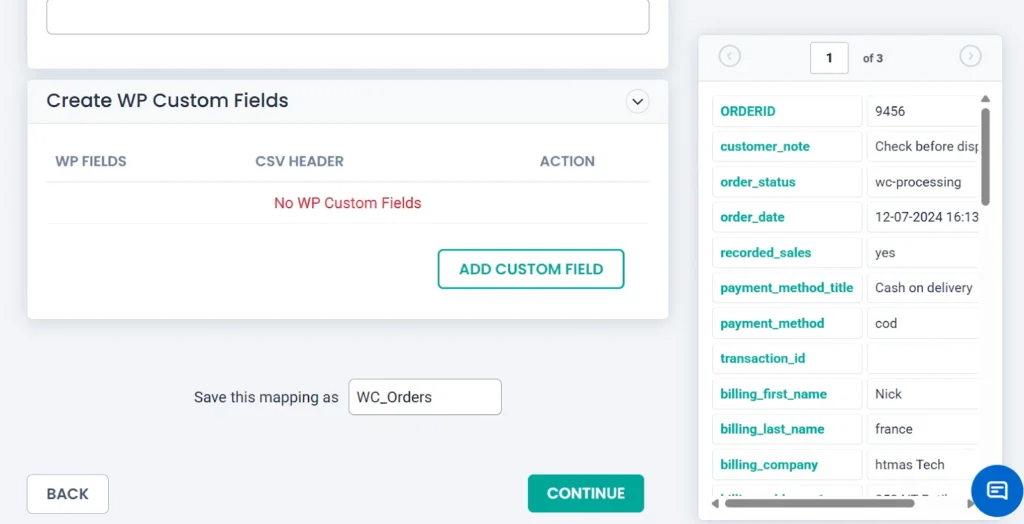
Or you can use the ‘Drag and Drop Mode’ field mapping mode to easily map fields from the right draggable mapping panel and drop them into the appropriate fields. The draggable mapping panel will show each record’s fields and their values in your file, so you can easily map them.
Save the mapping template for future use at the bottom of the page, then click ‘Continue’.
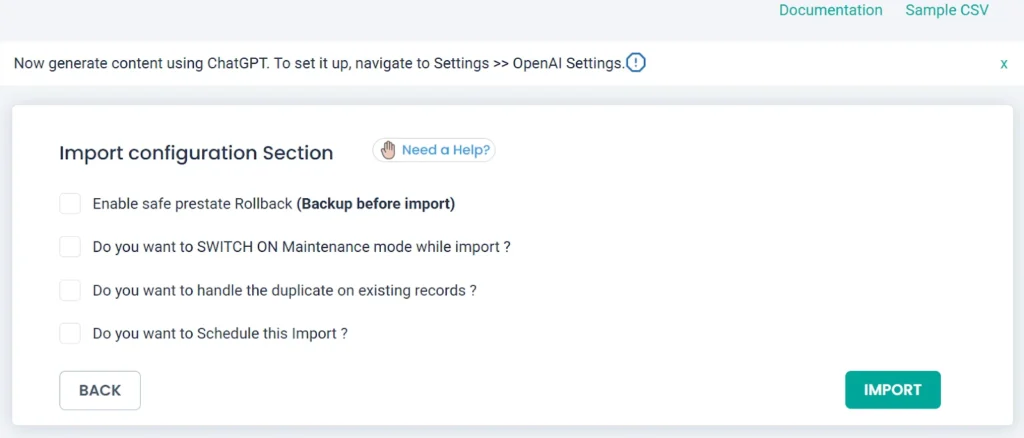
Step 4: Configure Import Settings
On this page, you will find options to configure essential settings before importing. For example,
- Enable safe prestate Rollback (Backup before import) – to restore (rollback) your website to its previous state in case of any faults during the import.
- Do you want to SWITCH ON Maintenance mode while import? – enable maintenance mode on your website while the import happens.
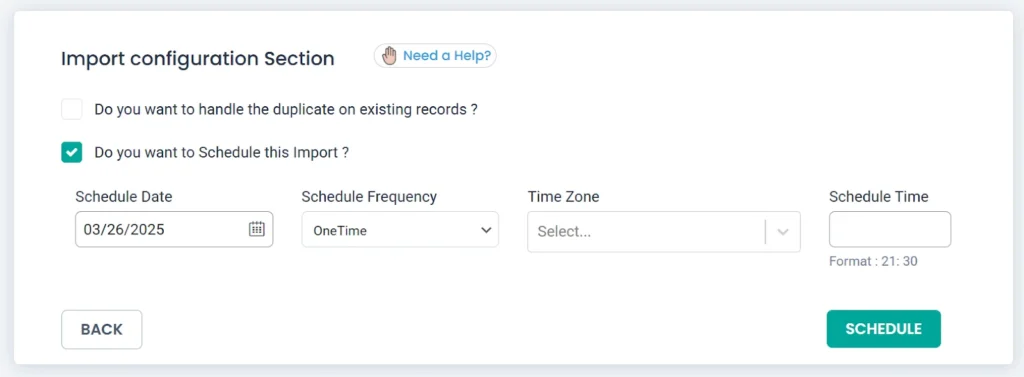
- Do you want to handle the duplicate on existing records? – It prevents importing duplicate records that already exist.
- Do you want adaptive file processing of record? – To import records in batches. Learn more about iteration import with WP Ultimate CSV Importer.
- Do you want to schedule this Import? – If you want to schedule your orders import, enable this option and provide schedule date, time, timezone, and frequency. Your orders import event will be scheduled.
Step 5: Run the import
Click ‘Import’ to start importing your orders into your WooCommerce site instantly. Once the import is complete, you will receive a notification message with a downloadable summary log and a failed media log for imports that include media records. Close the window. You can check the logs screen to verify the import status of each order.
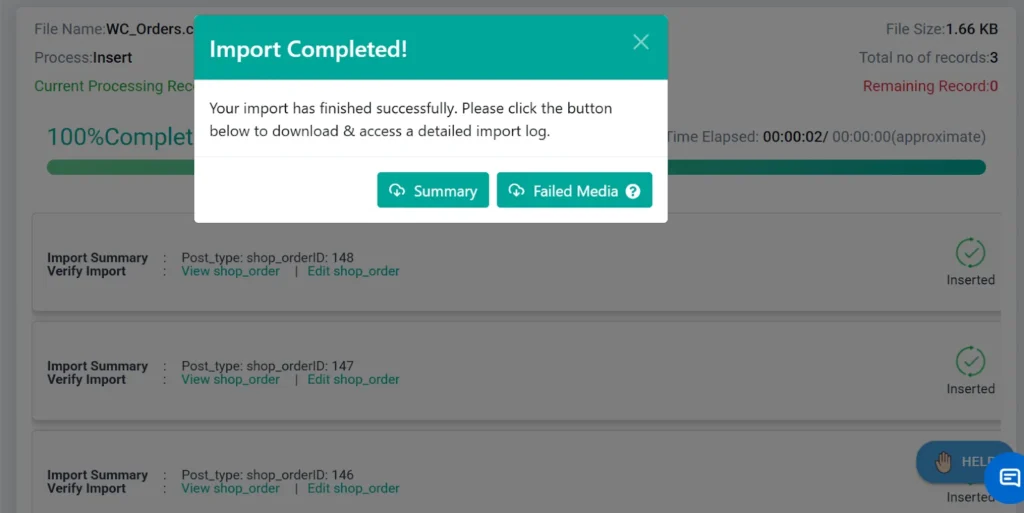
Otherwise, go to the WordPress dashboard > WooCommerce > Orders to view the imported orders.

WP Ultimate CSV Importer Pro
Get Ultimate CSV/XML Importer to import data on WordPress faster, quicker and safer.
Export WooCommerce Orders #
You can export WooCommerce Orders instantly whenever you want, or export recurring orders with scheduled export. Below, we have explained the methods to export your WooCommerce Orders from WordPress.
Step 1: Select the WooCommerce Orders as a module to Export
Open WP Ultimate CSV Importer and click on the ‘Export’ tab. Choose the export module as ‘WooCommerce Orders’. The total number of orders present in your WooCommerce store will be displayed in the top-right corner, as shown below.
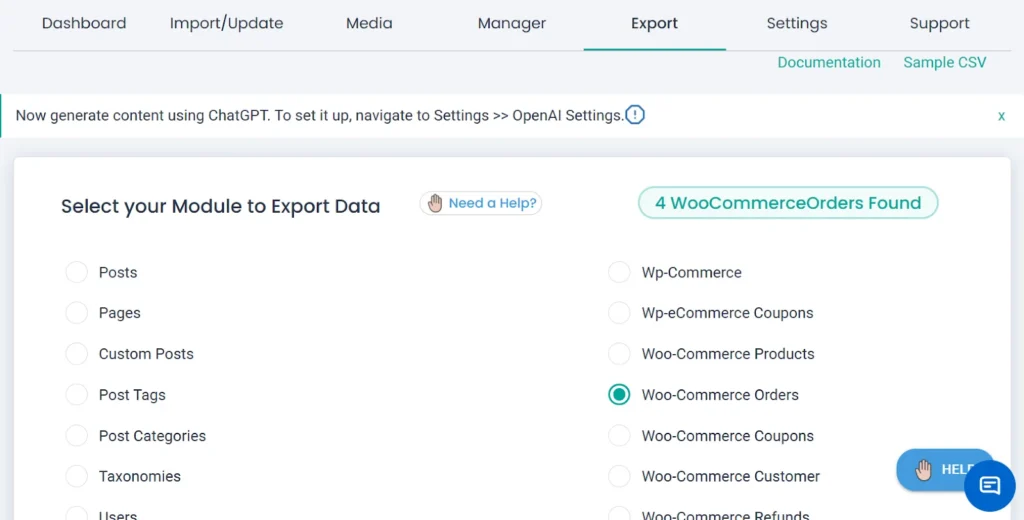
Click ‘Continue’.
Step 2: Configure Export Settings
Next, specify a name for the export file containing your WooCommerce orders and select your preferred file type under ‘Advanced settings’. The plugin allows you to export your data in CSV, XLS, XLSX, XML, or JSON formats. Choose one preferred file format here.
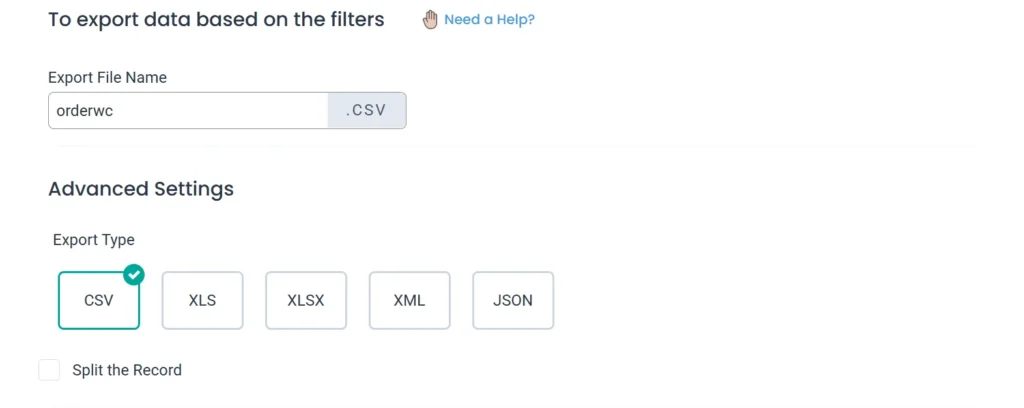
Enable the ‘Split the Record’ option for large dataset exports to divide the data into smaller files, which are then compressed into a ZIP file when downloading for easier management.
Step 3: Enable Advanced Filters for Orders Export
The plugin provides multiple filter options, allowing you to export only specific order data. You can enable the filters as per your requirements.
Here are three useful filters you can apply when exporting WooCommerce orders:
1. Export by Product Purchased
Use this filter to export only the orders that include specific products. This is useful if you want to track the performance of individual items or prepare product-specific sales reports.
Enable the checkbox for “Export Orders based on the Product that the order is placed.”.
Select one or more products from the dropdown list.
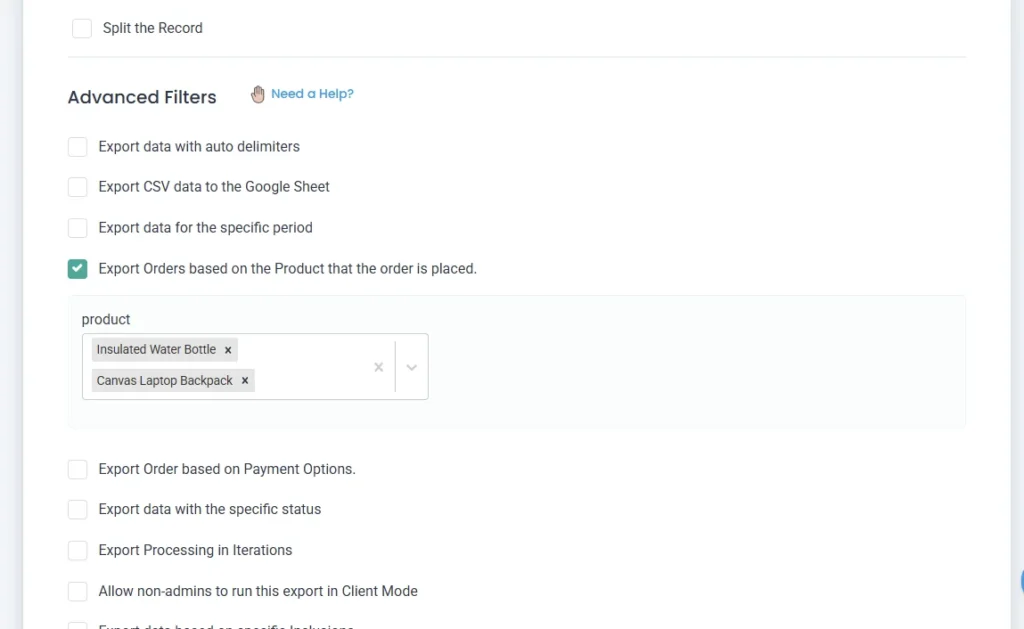
Only orders containing the selected products will be included in the export file.
2. Export by Payment Method
With this filter, you can isolate orders placed through a specific payment method, such as Cash on Delivery, Stripe, or PayPal.
Enable the checkbox of “Export Order based on Payment Options”.
Choose the desired payment method from the dropdown.
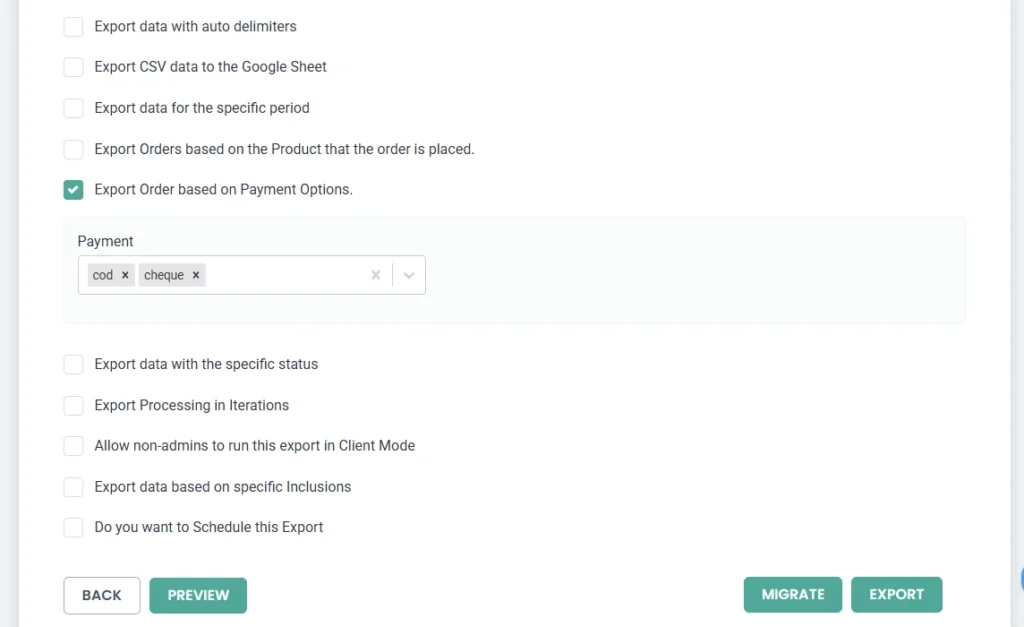
The export will contain only orders processed through the selected payment method.
3. Export by Order Status
This filter allows you to narrow down your export based on order statuses such as Completed, Processing, On Hold, Cancelled, etc.
Enable the checkbox of “Export data with the specific status”.
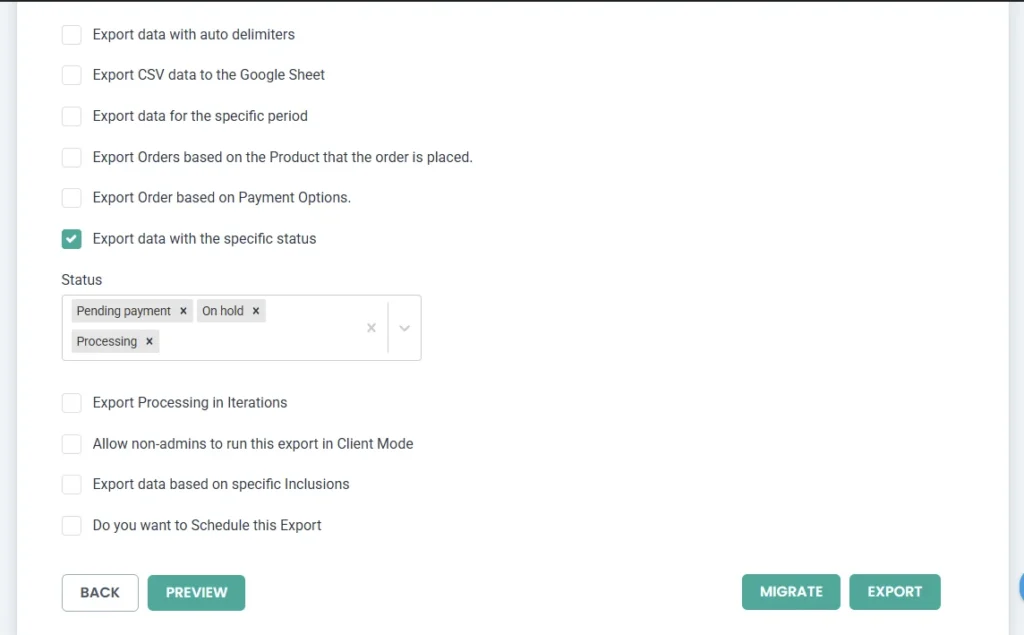
Select one or more statuses from the dropdown. Only orders that match the selected status will be exported.
Learn more about the other advanced export filters in WP Ultimate CSV Importer.
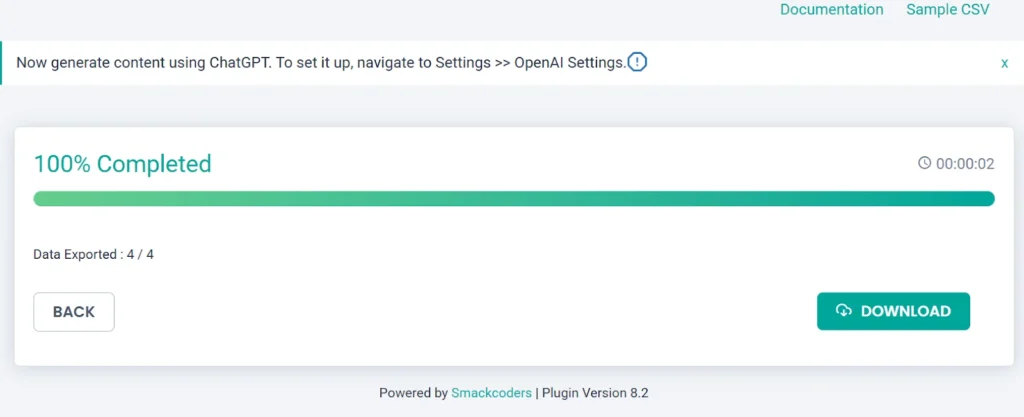
Step 4: Run the export
Click ‘Export’ to quickly download the selected WooCommerce orders in your preferred file format, based on the filters you applied. Then, click ‘Download’ to save the exported orders to your device.
Further Reading #
1. Updating Existing Orders in WooCommerce
To update or make changes in your existing orders, export the current WooCommerce orders using the WP Ultimate CSV Importer plugin. Update the changes in the exported file. Now, go to the Import/Update tab in WP Ultimate CSV Importer and re-upload the updated file.
On the next page, select ‘Update Content’ and proceed with the steps for importing. This method is faster and more efficient than updating orders manually.
2. Scheduling Order Imports
You can schedule order imports from the import configuration section. Select the ‘Do you want to schedule this import?’ option.
Note: Before scheduling, ensure that you have enabled the cron job in WordPress. For more details, review this guide on how to enable & Configure WP-Cron.
To schedule a weekly import, set the schedule frequency to ‘Weekly’ and specify the date, time, and time zone.
If you want to automate the import periodically, use external links (such as Google Sheets) or upload the file from the ftp/sftp server while creating a new import. Unlike static files uploaded from the desktop, these remain active, allowing the plugin to fetch updated data automatically.
Configure the schedule frequency (daily, weekly, monthly, etc.), set the preferred time and time zone, and click ‘Schedule.’ This ensures that any changes to your WooCommerce orders are automatically updated on your site in real-time from the data file.
WP Ultimate CSV Importer Pro
Get Ultimate CSV/XML Importer to import data on WordPress faster, quicker and safer.
FAQs related to WooCommerce Orders Import Export #
1. Can I link orders to existing customers and products automatically?
Yes. WP Ultimate CSV Importer automatically maps order records to the correct customers and products if they already exist in your WooCommerce store. You just need to ensure that your CSV/XML includes a unique identifier, such as the customer email or product name and ID. The plugin will then link the order to the right customer and purchased products without requiring manual edits. If the customer does not exist, it will create a new one.
2. How do I prevent duplicate orders from being imported?
The plugin includes a built-in Handle Duplicates option. While importing, you can configure it to check unique fields like the Order ID. If a duplicate is detected, the plugin will skip inserting the record or update the existing order (depending on the option you choose). This ensures you don’t end up with duplicate entries in your store.
3. Can I schedule automatic exports?
Absolutely. WP Ultimate CSV Importer supports scheduled imports and exports using WordPress cron jobs. You can set up recurring exports (daily, weekly, monthly) to automatically back up your order data or share it with external systems. Just make sure WordPress cron is enabled and properly configured on your server. In export settings, page enable the “Do you want to Schedule this Export” option and configure scheduling details. For more information, check out our exporter guide.