According to W3Tech, nearly 73.3% of WordPress sites are developed in CMS platforms . Are you one of them? I know you have frequently updating posts, pages, tags, taxonomies based on your needs. When you are having low records to publish you can update it manually, in other cases you may have thousands of data to import into WordPress. In this Guide, we’ll discuss for the one who asks, how do I easily import and export data into WordPress to simplify content transfer efficiently?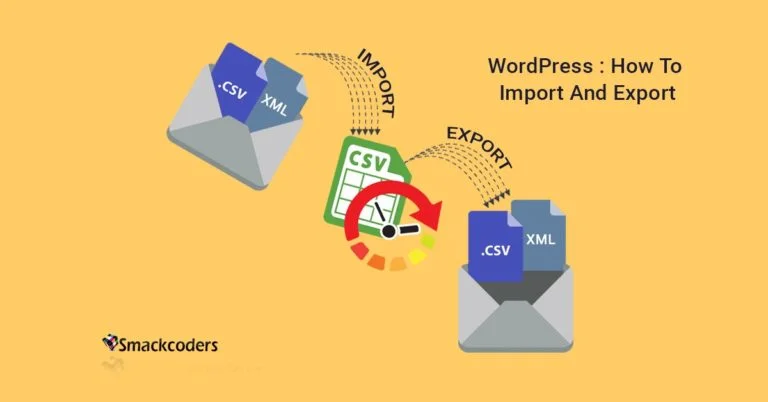
Table of Contents
WordPress.org and Plugin Directory
If you want to share your WordPress plugin with the WordPress directory, one of the best ways to do that is by submitting it to the WP Plugin Directory. This step-by-step guide will show you how to do that.
What is Import and Export in WordPress?
WordPress allows you to directly import the content from other blogging websites. Since WordPress is a blogging platform used by many beginners. As time changes WordPress platform is also used to create business websites where they have to upload many informations and maintain it. And later this period many website owners migrate their webpages to WordPress due to its catchy features. During this time, migration of websites happens and they can directly import the data into WordPress. Also export the files in wxr format.
By default, the WordPress platform has an import and export section but third-party plugins are the best choice for this. Since in default import, you can only import data from other websites such as blogger, LiveJournal, categories, and tags converter, etc. In the export session, you can only export XML files. That’s the main drawback of WordPress but it becomes a reason to Third Party plugin developers. There are many importers and exporters. WP Ultimate CSV Importer is a WordPress plugin used to import and export data in various formats like CSV, XML.
Before getting into detail get knowledge about what is important, and its purpose.
What does an importer do?
WordPress Importer plugin like CSV importer, lets user prepare their post, pages, categories, tags, and other data in the form of CSV file, XML, and allow them to upload it and imports the file data into the WordPress.
Features of WP Ultimate CSV Importer
- Import/update or schedule and Export your data
- Bulk products import for WooCommerce plugin
- Custom fields and custom taxonomy data import support.
- Bulk import of images into the media library
- External URLs file upload like google sheet and dropbox supported.
- Multilingual and other popular third party plugins are supported.
- Nested Categories import and export support.
And more flexible features like the update, delete already uploaded post on single click and duplicate detection, etc. Please refer to relevant posts for the detailed features of PRO Version of Ultimate CSV Importer.
How to install WP Ultimate CSV Importer plugin in WordPress
WP Ultimate CSV Importer is very easy to install like any other WordPress plugin. No need to edit or modify anything here. By the way it helps you to import and export all your WordPress data in few steps.
- Unzip the file ‘wp-ultimate-csv-importer.zip’.
- Upload the ‘ wp-ultimate-csv-importer ‘ directory to ‘/wp-content/plugins/’ directory using FTP client or upload and install.
- wp-ultimate-csv-importer.zip through plugin install wizard in wp-admin panel
- Activate the plugin through the ‘Plugins’ icon in WordPress.
- After activating, you will see an option for ‘WP Ultimate CSV Importer’ in the admin menu (left navigation) and you will import the CSV files to import the data.
A plugin that turns your offline data into WordPress post, page, or custom post data by a simple mapping feature as a CSV/XML file import. Let’s discuss How to import data from an existing CSV into WordPress as Page, Post, or any Custom Post Types using the WP Ultimate CSV Importer plugin in seconds. Try for Free wordpress.org
How to import Data into WordPress?
Import any CSV file as a post, page, or even as a custom post type into WordPress using WP Ultimate CSV importer. Convert your offline database maintained for years into your valuable website content. Also do periodical content changes, maintenance, content update, prices, offers, coupons, and inventory, etc.

WP Ultimate CSV Importer Pro
Get Ultimate CSV/XML Importer to import data on WordPress faster, quicker and safer.
Pre-Import Checklist
After the installation of the WP Ultimate CSV importer plugin in your WordPress, now check for the minimum requirements for file import. Click on the settings module in “Ultimate CSV Importer” and move to the ‘Security and Performance’ section.
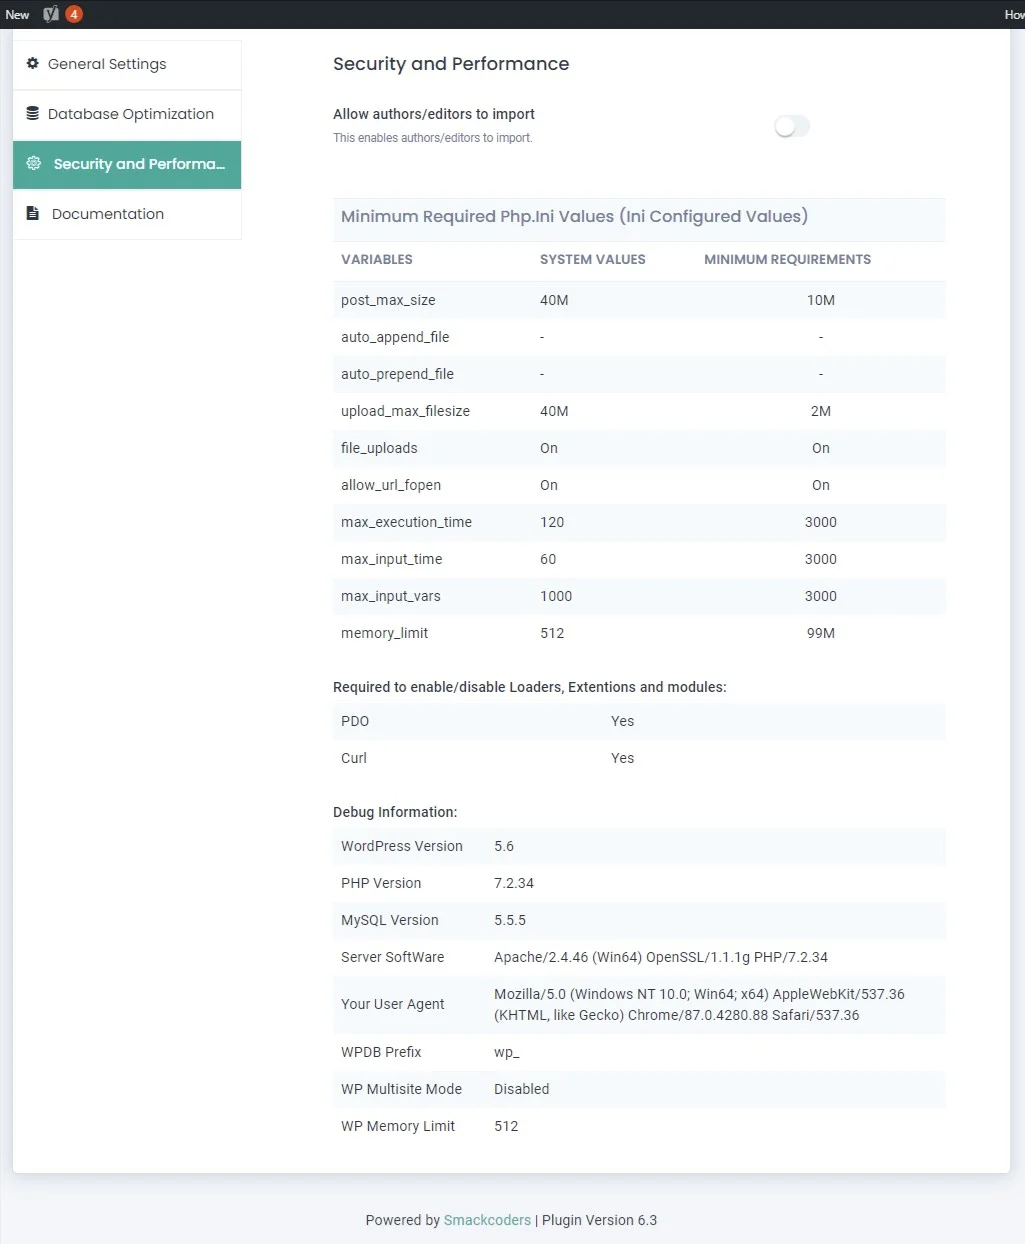
System Values – The storage limit of your website server. It varies based on the server. You can’t import files more than this value. If you want to increase your memory size for bulk import, then you need to change the values in your php.ini file.
Minimum Requirements- The values are the least data import requirement.
Types of Import File Format:
WP Ultimate CSV importer allows you to upload four different file formats.
- Comma Separated Values (.csv).
- Extensible Markup Language (.xml)
- Text Files (.txt)
- ZIP Files(.zip)
CSV importer support only supports five delimiters. They are comma(,), tab space( ), pipeline(|), semicolon(;) and colon(:).
In the Zip file, you can upload other file formats. For example, you can provide 4 CSV files, 2 XML files, and 3 text files. But you have to choose the exact file while importing.
Validate your CSV and XML file
To avoid cell alignment issues while importing, validate the CSV file using CSV LINT. If your file passes the validation, then you can import the file using csv importer.
Validate the XML file by XML Validator. Upload the file if it passes the validation.
Precaution
There are two methods we are suggesting before importing your files to WordPress using our plugin, you need to manually create a CSV or XML file and test import with our plugin.
Manual Creation: Before importing just update your post or page manually. When you are using custom field plugins, verify whether your data are updated on your website. If it gets updated then process the next step.
Test Import: In test import, just import a CSV file with respective columns since you can update columns in the existing template. For test import, upload your CSV file with 1 row. If it successfully uploaded, then process bulk import.
Modify Server settings to avoid these errors
Unsupported File Format:
If you upload other than these file formats an error message will appear as “Unsupported File Format”. When this bug arises, try changing your file format in the above-mentioned file types.
Unsupported Character Encode Type
WP Ultimate CSV importer doesn’t allow other encoding options, use UTF-8 without BOM. To avoid this error, try the below steps.
Notepad++ to Re-save Character:
Open the file in notepad++ → In the taskbar click on Encoding → Encode in UTF-8 Format → Save the file
Google Sheet to Solve: Upload the file in Google sheet and then download the file as CSV.
File Upload Error
When you upload the CSV or XML file in the WP Ultimate CSV file, it will perfectly import it. If any issues arise in uploading the file, in that case, go to php.ini file, search “file_upload” and turn it ON from OFF. Similarly, when the error occurs while uploading a ZIP file, “enable ZIP” extract in your server.
PHP Memory Limit Error
PHP allot a default memory for processing a website. When you upload more than this, it will display an error message. In that case, you have to increase the memory to fit this. To do this, go to the php.ini file and increase the memory limit.
Post Max Size Error
A common question some people ask, how do I increase the size in WordPress? Or got an issue as “Post Max Size Error”. In this case, understand that the post_max_size should be equal to or greater than upload_max_filesize. When you are uploading a CSV file if the cell value is more than post_max_size, an error will occur. In this case, try to increase the post_max_size in the php.ini file.
Upload file size error
Upload_file_size should be less than or equal to upload_max_filesize in the php.ini file. If this error occurs while uploading the file in WP ultimate CSV importer, resolve it by changing the value in the php.ini file.
Import Data into WordPress using Ultimate CSV Importer.
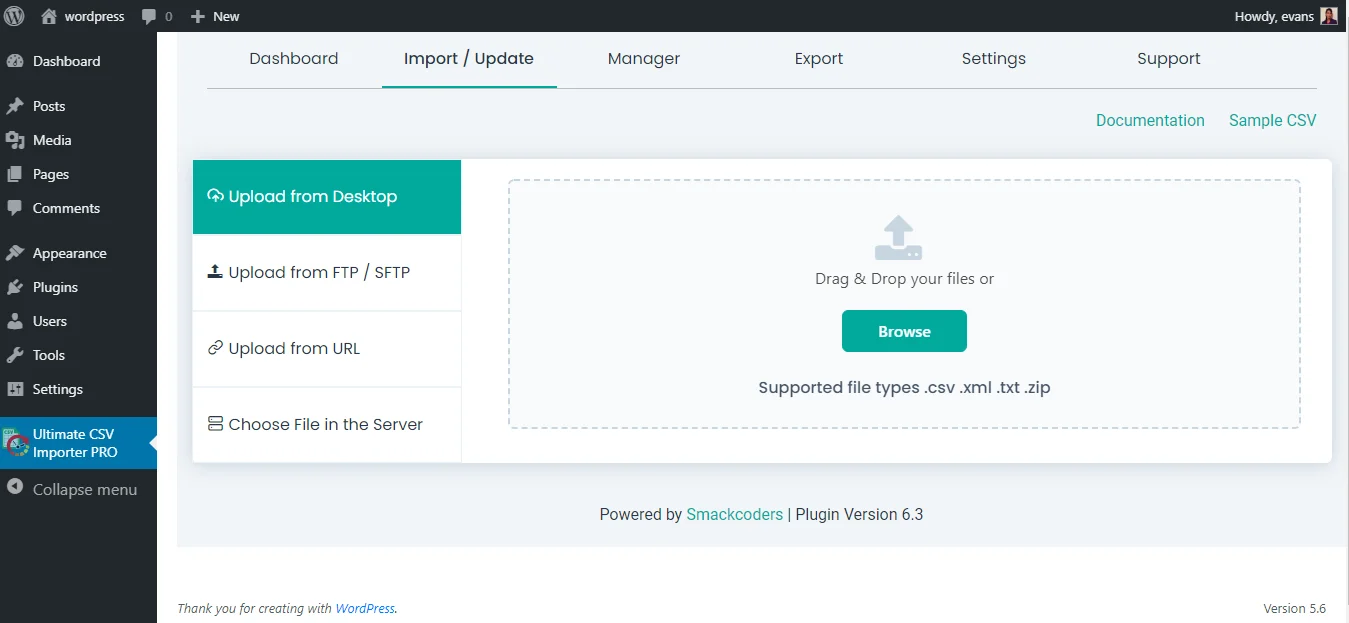
Step 1: Upload your file
You can upload your data in four standard formats ie.) CSV format, XML file, text format and zip file. You can upload it in 4 different location from desktop, FTP/ SFTP, using publicly accessible URL or from server- already exist in WordPress
Step 2: Automatically map headers
Auto mapping is a hands-free mapping feature introduced from version 3.0.0. Just replace the CSV headers with relevant auto map headers and save it to use as a template CSV file. WordPress Ultimate CSV Importer Plugin can identify these headers and automatically map your fields with relevant WordPress fields. This feature will almost eliminate the pain of mapping each and every time, in particular with many no. of fields. There are two types of mapping headers: Advanced Mapping and Drag and Drop
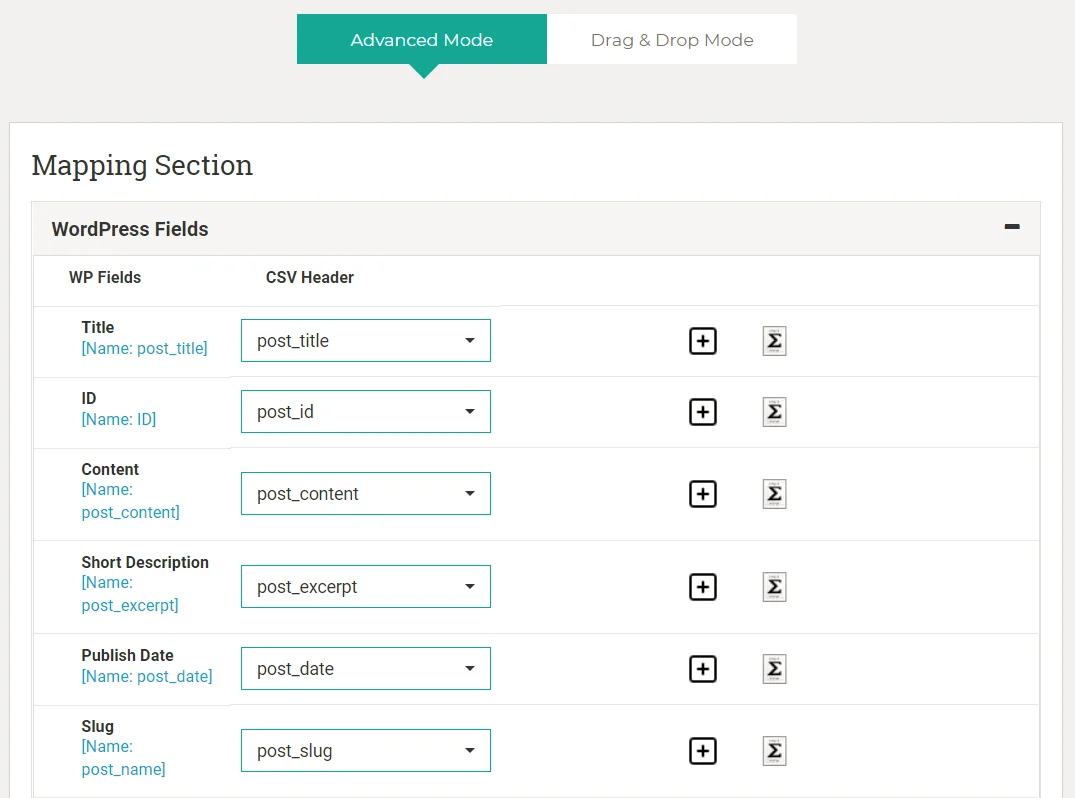
How to use advanced mapping features?
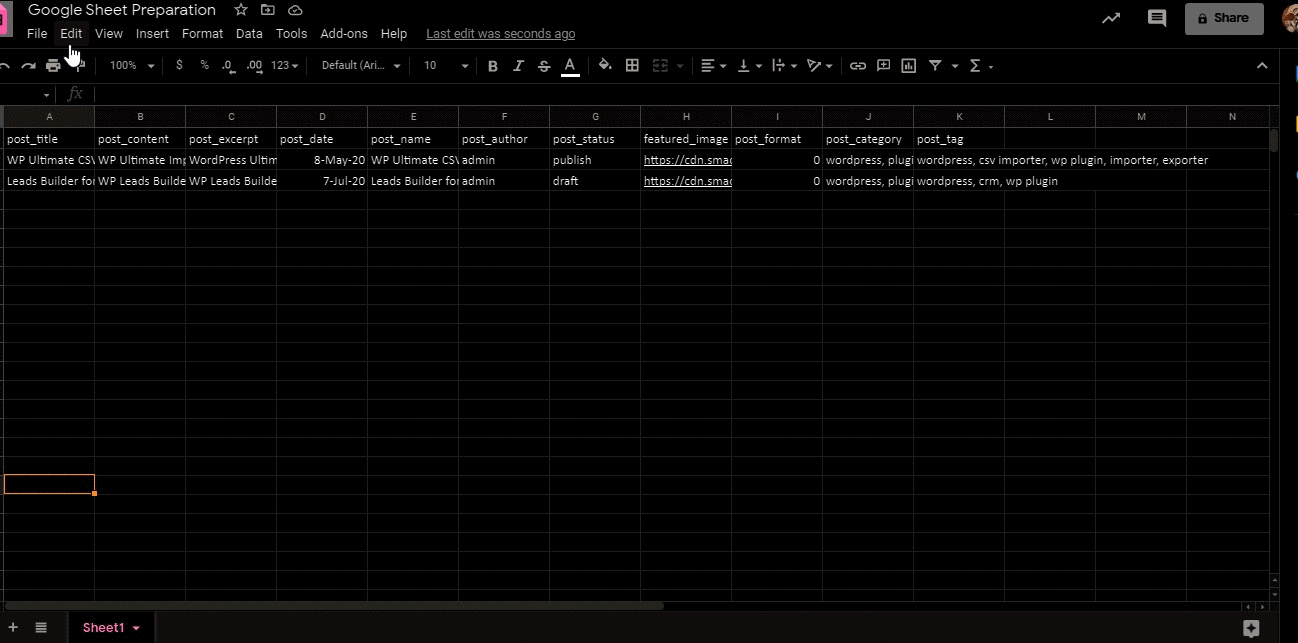
For a simple import post title and content is sufficient to create a successful import. All other fields are optional that set to default as in WordPress. To have more control over it, as in the above image you can add more fields in CSV as prescribed for WordPress Ultimate CSV Importer Plugin. You can add post_excerpt, post_status, post_author, etc as the below-listed format
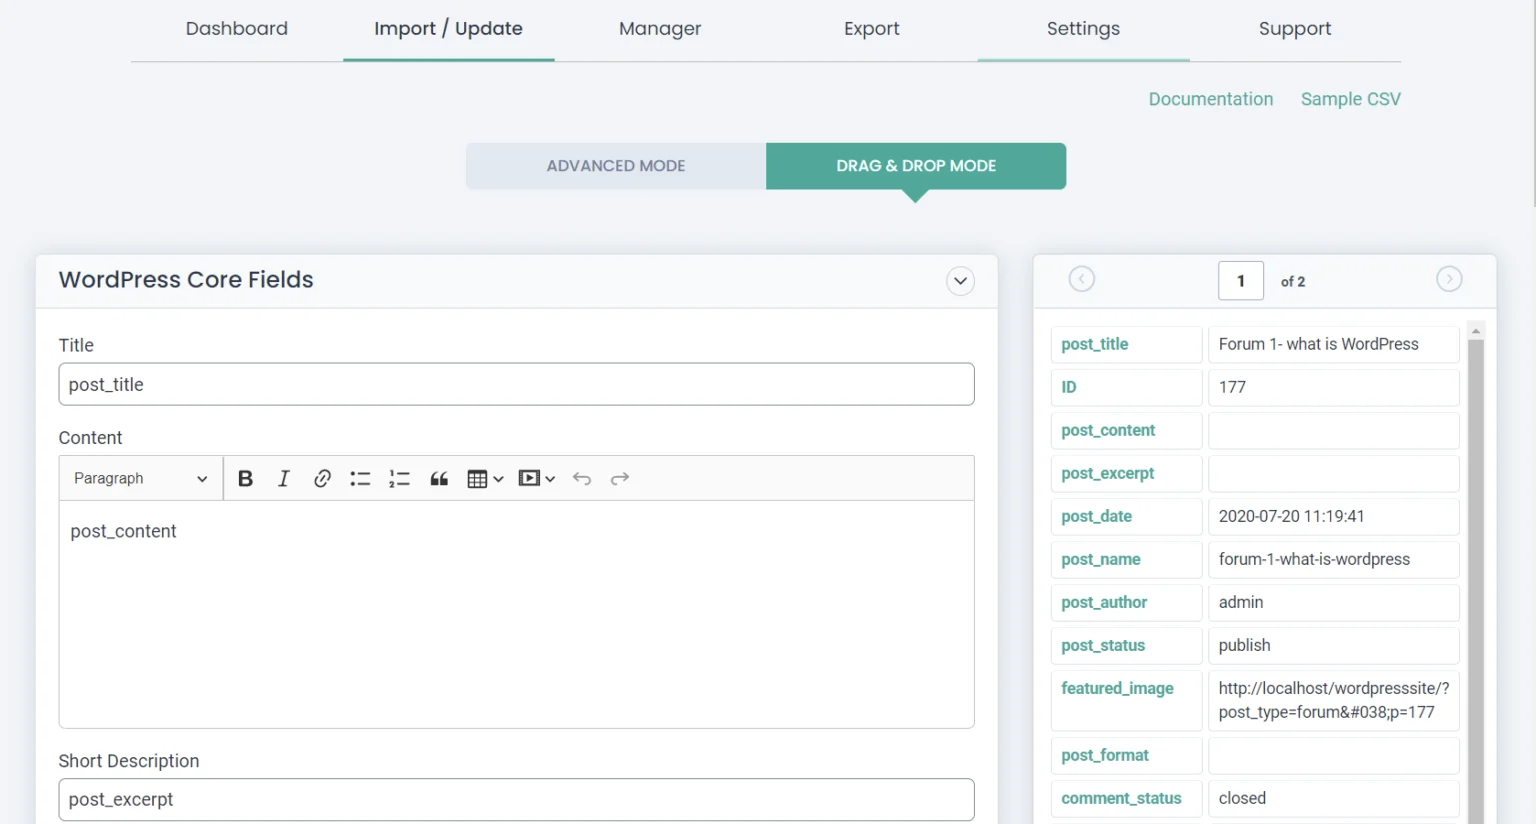
In the drag and drop mapping method, you have to drag the title and merge it with the WP header field like the image shown below.
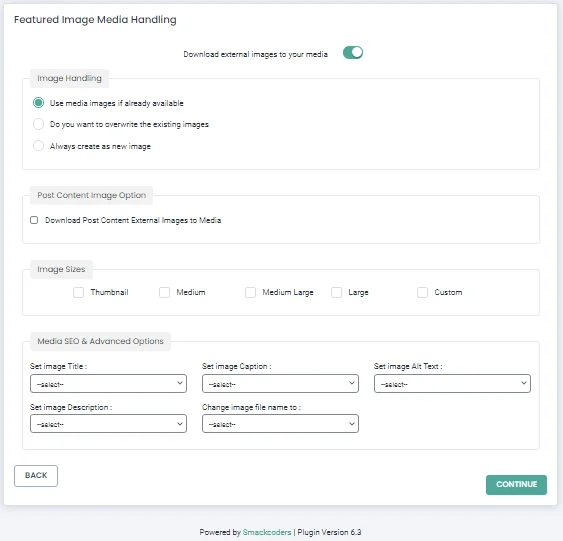
Step 3: Media Handling
In media handling, you can perform image optimization for SEO and you can download external images for your needs.
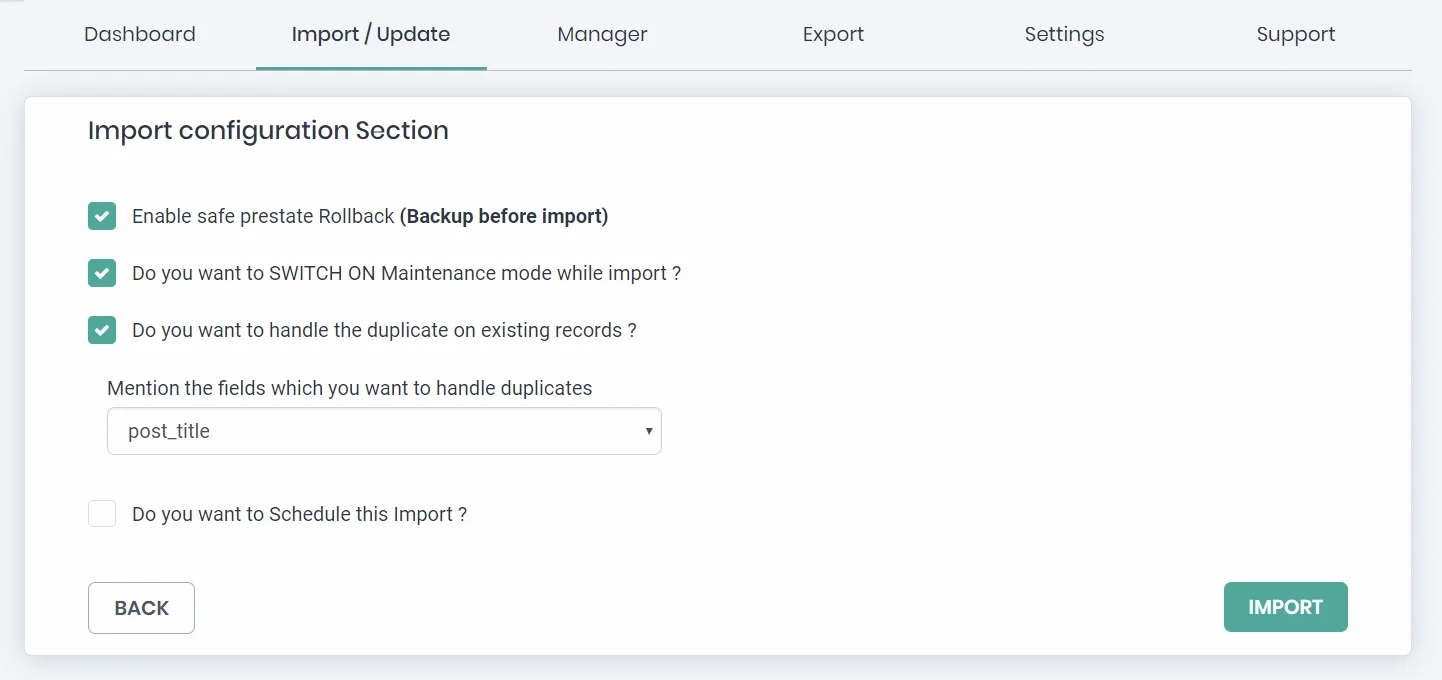
Step 4: Import Configuration
In the import configuration section, you have 4 different process
- Enable the rollback option, if an error occurs in the middle of the upload. You can commit and roll back to retrieve the data
- Enable maintenance mode if you have to let your visitors that you are undergoing some changes in your website
- Enable duplication, if you have to check that any duplication data in the file content.
- Enable schedule , when you have to update the content periodically from the FTP location or google sheets.
Scheduling
Scheduling is used when you are uploading 1,00,000+ records, as it takes a lot of time. In this period, you can just mention the time-stamp and date to upload the record. It will automatically upload the file at the time. You can also upload multiple documents at a time. At this time, the CSV importer uploads files based on the “Queue” format. The first uploaded file gets imported then the next and so on.
How to Export Data into WordPress?
You can export the CSV files using the export option in wp ultimate CSV importer plugin . If your CSV file was lost or deleted that you have already imported, then use this export option to regain your CSV file without any flaw. To export a CSV file select the “Export” option in the menu bar of WP ultimate CSV importer. On the export page, select any one of the options/modules that you want to export. Suppose, if you forget to choose any one of the options and clicking the proceed button, an alert message will be displayed.
“Custom post” and “Custom Taxonomy” options have a drop-down box nearer to them. Select any one of the options for a custom post or custom taxonomy that are listed in the drop down menu.
If you select “Custom Post” or “Custom Taxonomy” and you didn’t select any options that are listed in the drop-down menu then the downloaded CSV file will have only the headers. Click the “Proceed” button to continue.
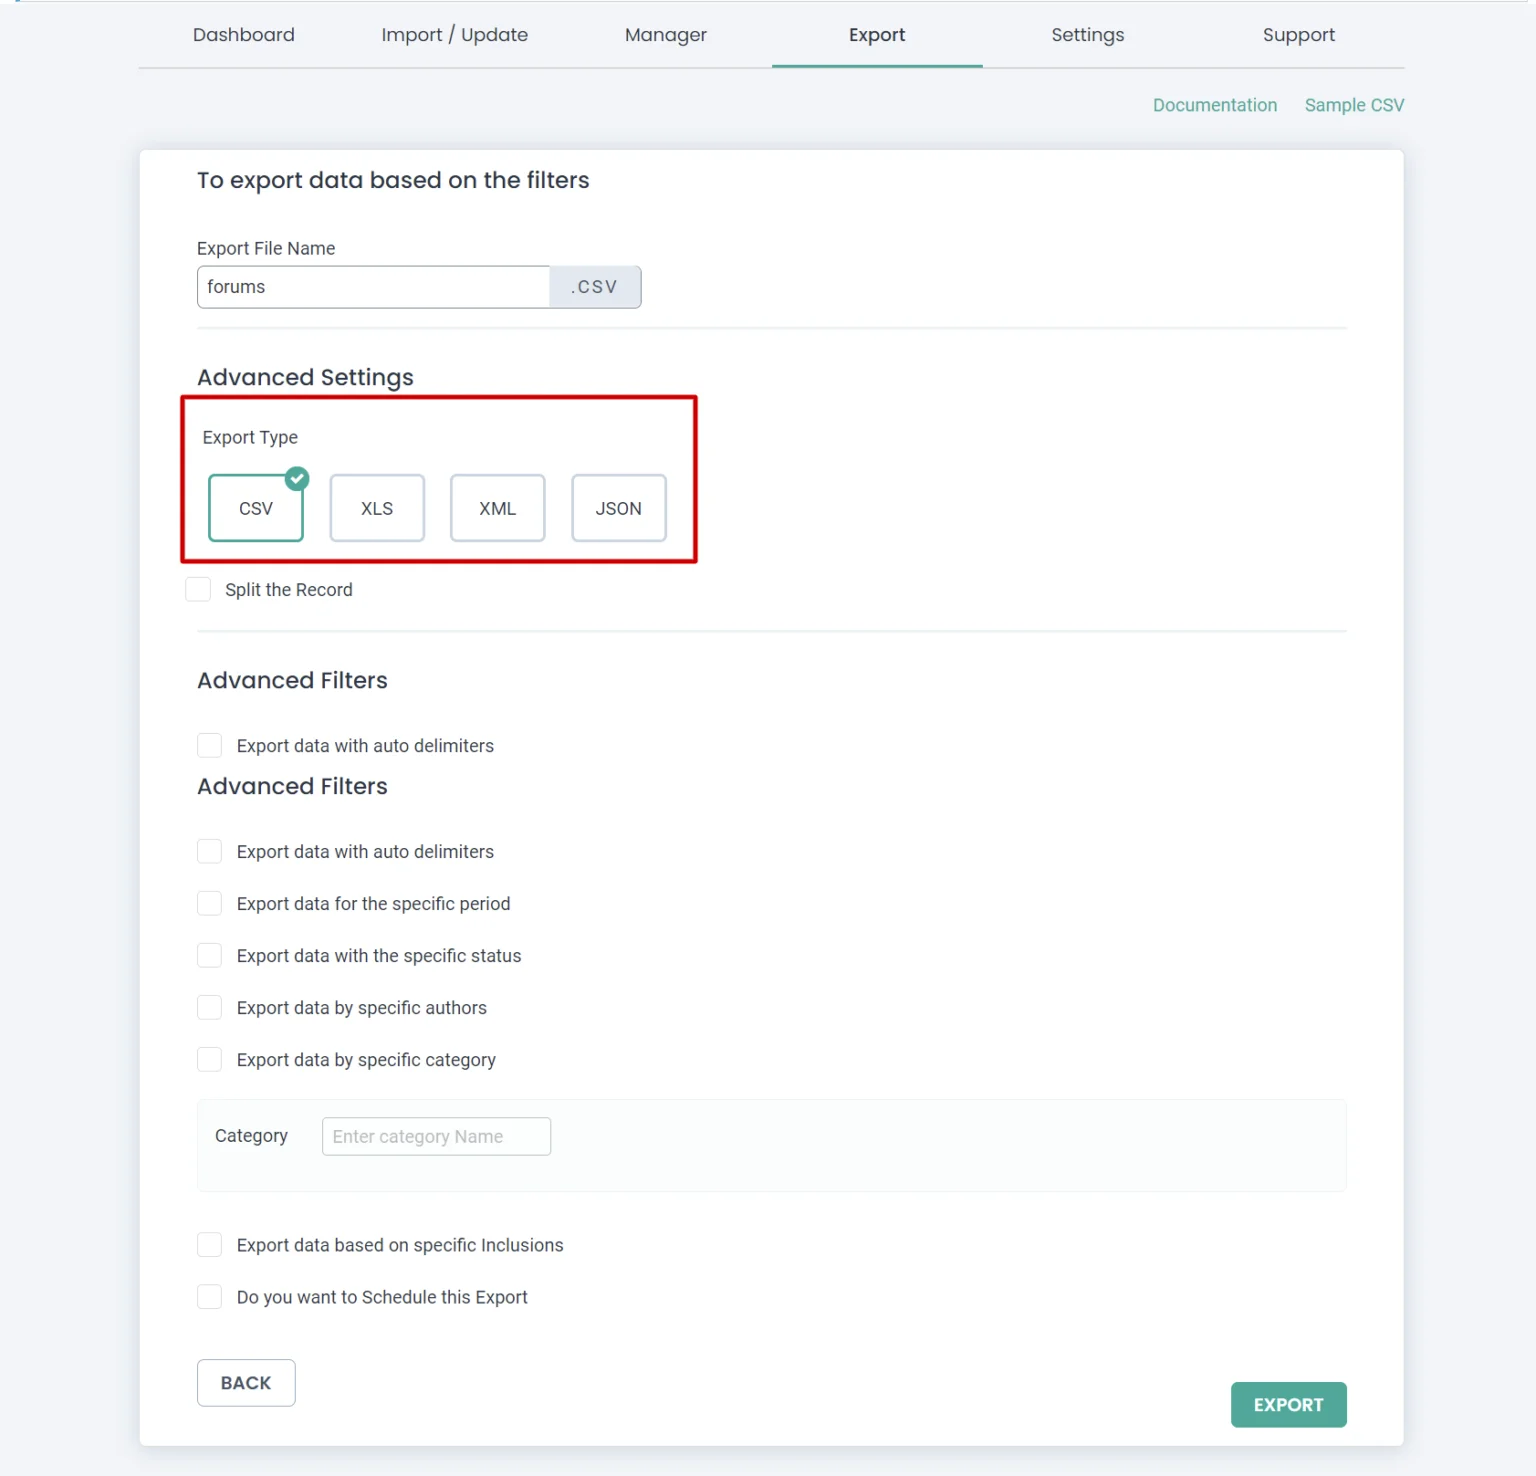
On the export filter page, we are providing five options to export the CSV file. Those options are:
- Export data with auto delimiters
- Export data for a specific period
- Export data with the specific status
- Export data by specific authors
- Export data based on specific exclusions
Export data with auto delimiters
To export the data based on the delimiters, enable this option. Some of the delimiters are listed. The listed delimiters are the colon (:), comma (,), semicolon (;), Tab, and Space. If you want to use additional delimiters then specify it in the “Other Delimiter” box.
Export data for the specific period
To export the CSV file that was imported in a particular period, use this option. Specify the start and end date in the particular boxes.
Export data with the specific status
This option will filter the data according to the status such as publish, sticky, private, protected, draft, pending. If you need data according to the authors. Choose the specific author in the “Authors” using the drop-down menu.
Export data based on specific exclusions
This option is used to filter data based on the particular headers of the CSV file. If you want the entire data without filtration then don’t enable any of the checkboxes. In the “File Name”, enter the name of the downloadable file.
Click “Export” to proceed. Wait until the file is downloaded successfully.
Wrapping Up
WP ultimate CSV importer allows you to import/update or export your post, page or custom post data from WordPress website. Get Ultimate CSV Importer pro version for scheduled import and update data and other features. For clarifications and support contact us.