Table of Contents
Our WP Ultimate CSV Importer team upgrades the plugins’ compatibility from time to time for WordPress and other third-party plugins when there is a change in development or added new functionality. Custom Post Type UI is one of the most active and popular plugins among WordPress users. It has 1+ million active installations. WP Ultimate CSV Importer supports importing and exporting data of the Custom Post Type UI(CPT UI) plugin. This article explains how to import Custom Posts in the CPT UI plugin as CSV using WP Ultimate CSV Importer.
To import the Custom Posts as a CSV file, you need to install and activate the CPT UI plugin in your WordPress. Then start to add a new Custom Post inside the CPT UI plugin.
Get Started to import the Custom Posts
The CPT UI Plugin only lets you create Custom Posts and Custom Taxonomies. If you have any need to include custom fields for the Custom Posts, use third-party plugins like ACF.
Create or prepare Custom Posts CSV
WP Ultimate CSV Importer imports values into WordPress only by processing the data prepared in CSV or XML files. So initially you need to start to prepare a CSV file. Prepare a CSV file in a proper format. Simply this tedious process with the export feature. Just create a record manually inside the Custom Posts in WordPress and export the Custom Post record with our plugin. Refer to the documentation to know how to export data with WP Ultimate CSV Importer. You will get a sample CSV file. Similar to the values added to that exported CSV file, add other records data inside it.
Prepare Custom Post CSV for upload
Before uploading the CSV inside the WP Ultimate CSV Importer plugin, verify the CSV file in https://csvlint.io/.
If you haven’t bought the WP Ultimate CSV Importer plugin, buy it in premium plugin bundle offer. Visit the plugin page inside your WordPress dashboard . Browse and upload your CSV file in the import/update section. The CSV Importer plugin offers multiple ways to upload CSV.
You can select any one of the following options:
- Upload from desktop
- Upload from FTP/SFTP
- Upload from URL
- Choose File in the Server
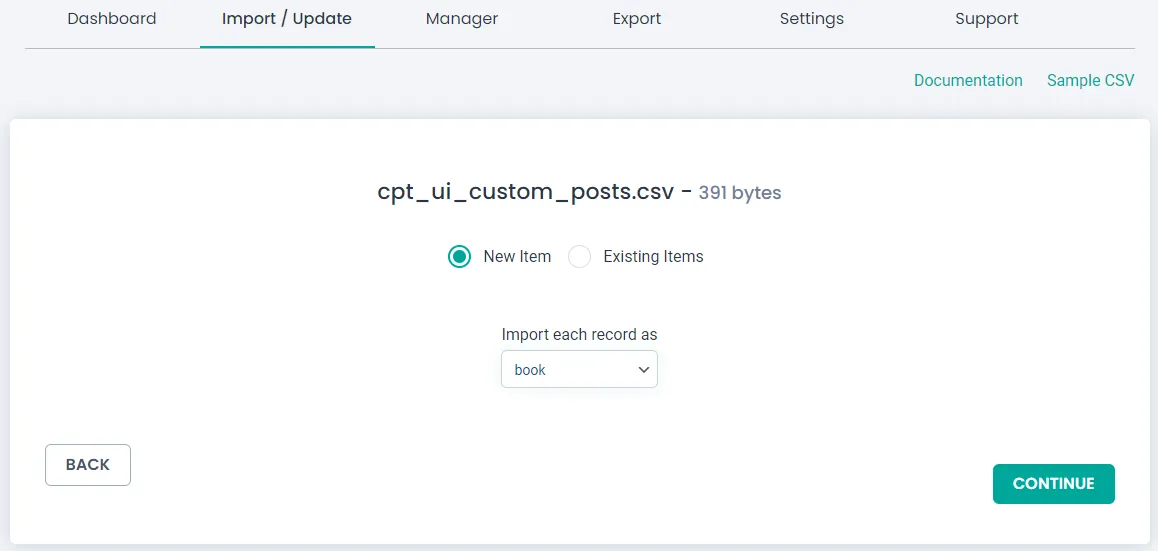
After that, pick ‘New items’ as you are gonna import new data. Choose the CPT UI custom post name from the ‘import each record as’ dropdown.
Configure mapping of the CSV fields
This is the most important step to configure in WP Ultimate CSV Importer. The fields data is imported based on the mapping. It lets map the fields in either of these two methods:
- 1. Advanced Mode: It’s a normal dropdown field mapping.
- 2. Drag & Drop Mode: Easy drag and drop type field mapping.
Make sure to map fields in all widgets. Then give a name for the mapping in the ‘Save mapping as’ textarea. It will be helpful to reuse the mapping template if you update the same Custom Post data in the future.

WP Ultimate CSV Importer Pro
Get Ultimate CSV/XML Importer to import data on WordPress faster, quicker and safer.
Effective image handling
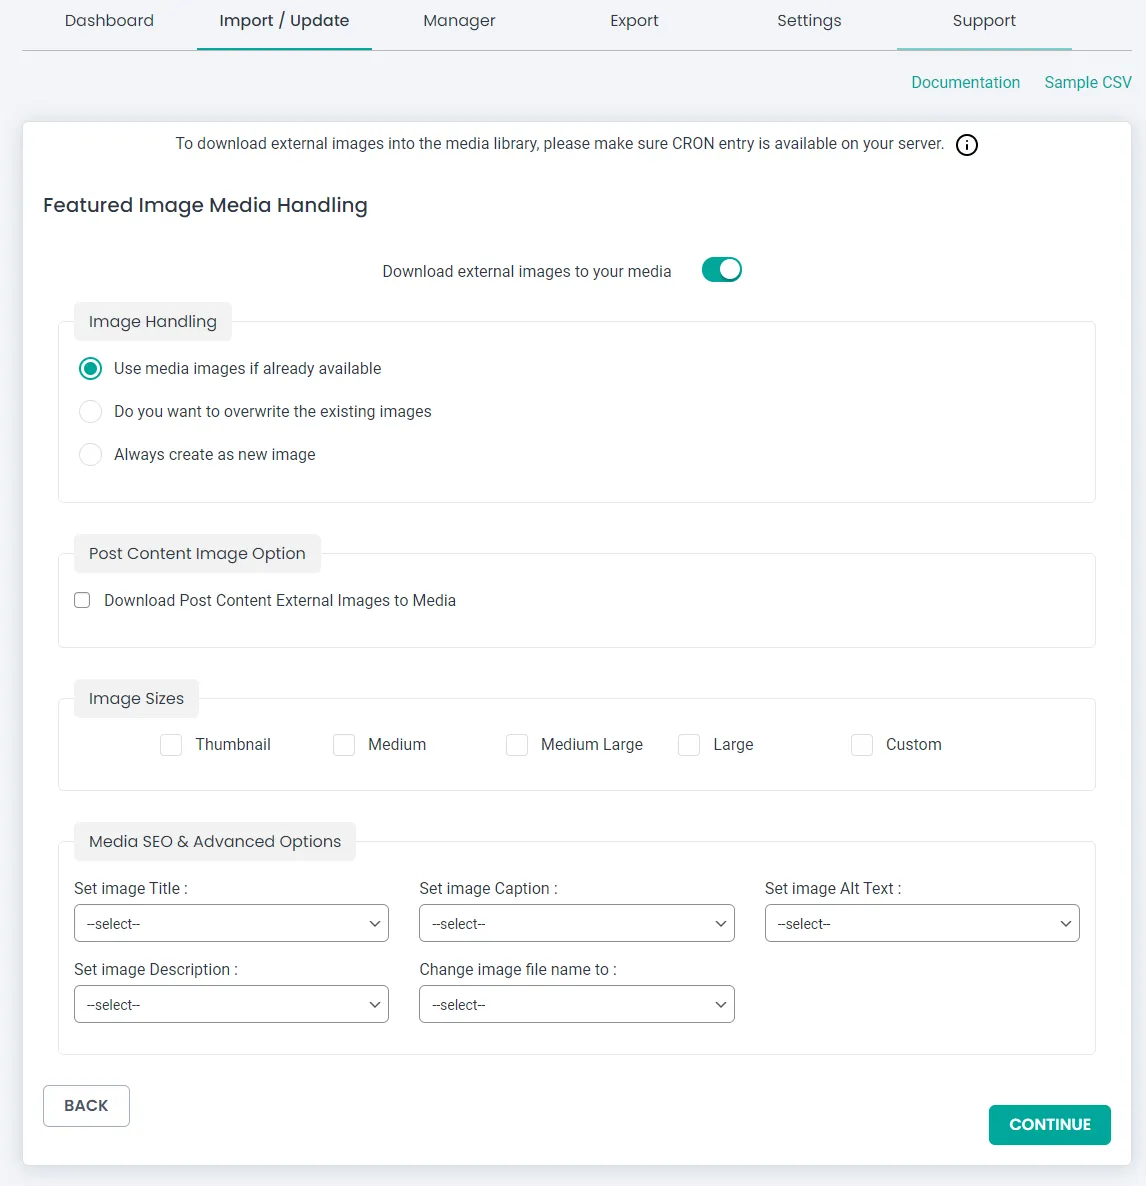
The other attractive feature of WP Ultimate CSV Importer is importing external URL images to WP media. The media handling section has various options to control the way of importing images inside WordPress. You can overwrite existing images, create new images while importing. It provides the settings to configure image sizes. Here you can map the media SEO fields like Image Title, Image Caption, Image Alt Text, and so on. Configure the media handling settings as per your requirement and step forward to the next step.
Finally, jump into import
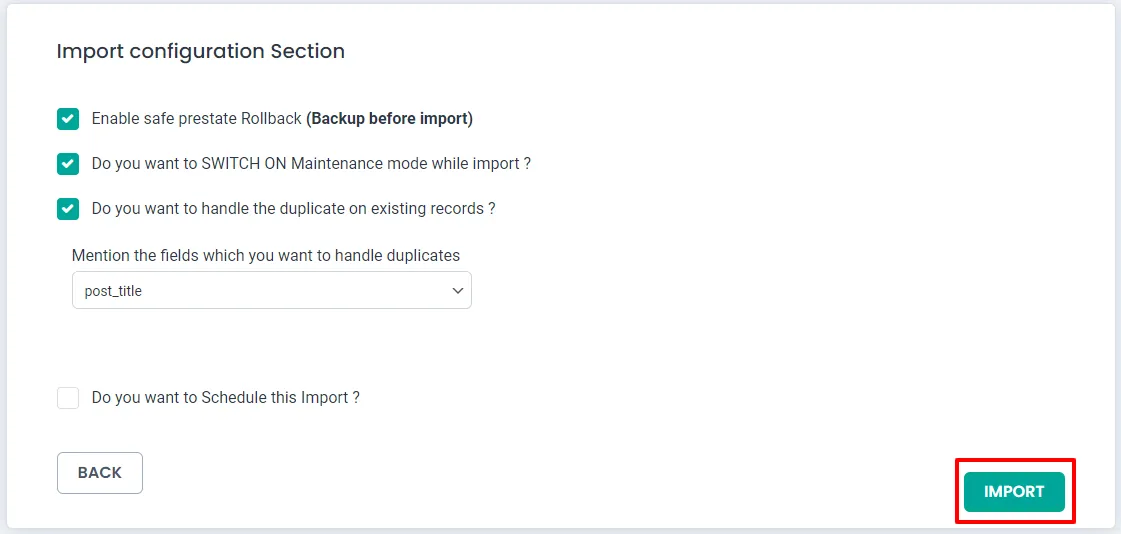
You are now ready to import CSV data. For safety measures, enable the rollback and maintenance mode option. If in case you lost some data, you can move back to the previous state (you’ll get the data that is on your website before importing).
To handle duplicates:
To skip duplicate records from importing, enable ‘Do you want to handle the duplicates on existing records?’. Select the field to check for duplicate records and skip it from importing.
Just hit ‘Import’ to import data in CSV instantly into WordPress . It may take some time to complete the import and it’s based on your server speed.
Import verification
Once the import is completed, verify by clicking ‘Web View’ and ‘Admin View’.
Steps to follow to schedule the data import
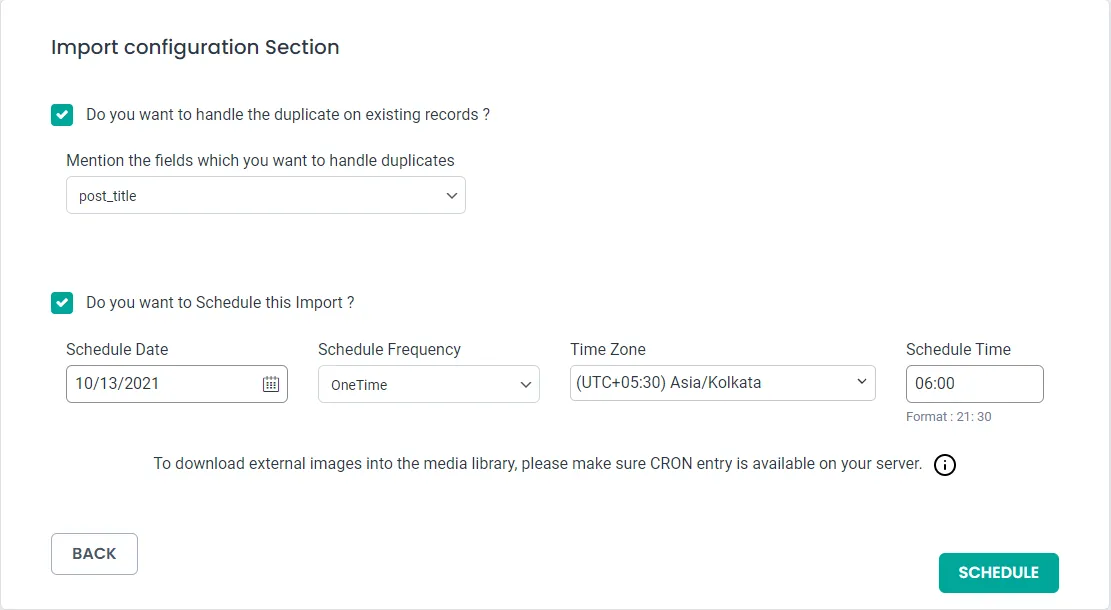
While you proceed with importing, configure the schedule option to run later. Just click the ‘ Do you want to Schedule this Import ?’ option to enable scheduling. It asks you for some data to set up scheduling like schedule date, schedule frequency, time zone, and schedule time. Provide the details and click ‘Schedule’. Your Custom Post data import is scheduled. When the particular time reaches, the plugin triggers scheduling, and the CSV file gets imported automatically.
That’s all. In this detailed step-by-step guide, you have learned how to import Custom Posts as CSV into WordPress with WP Ultimate CSV Importer. If you have queries related to this, email us at [email protected]