The WP Ultimate CSV Importer plugin makes it simple to import and export WordPress users in bulk whether you’re adding new users, updating existing profiles, or generating filtered user reports.
How to Import WordPress Users #
To import users, go to WP Ultimate CSV Importer > Import/Update. Prepare your user data in a CSV or Excel file and follow the steps below.
Step 1: Prepare Your Import File
Create a CSV or Excel or other supported type file containing the users data. Include mandatory fields like user_login, user_email, user_pass (for new users), user_nicename, first_name, last_name, and role. Also, any custom fields you’ve added using plugins like ACF or MetaBox.
Tip: If you’re updating existing users, include their ID or user_email for accurate matching.
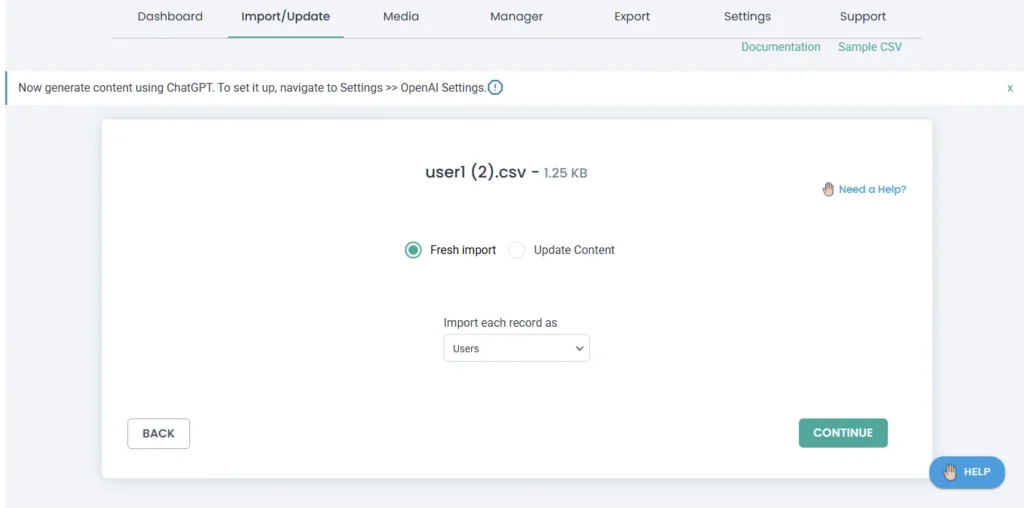
Step 2: Start a New Import
Navigate to Import/Update in the plugin.
Upload your file using one of the available sources: local desktop, FTP/SFTP, external URL, or server file.
Once the upload is complete, choose Users as the post type and proceed to the next step.
Step 3: Map User Fields
Map the file columns to WordPress user fields and any custom fields(if you’ve added in your file). The plugin will auto-match fields when possible.
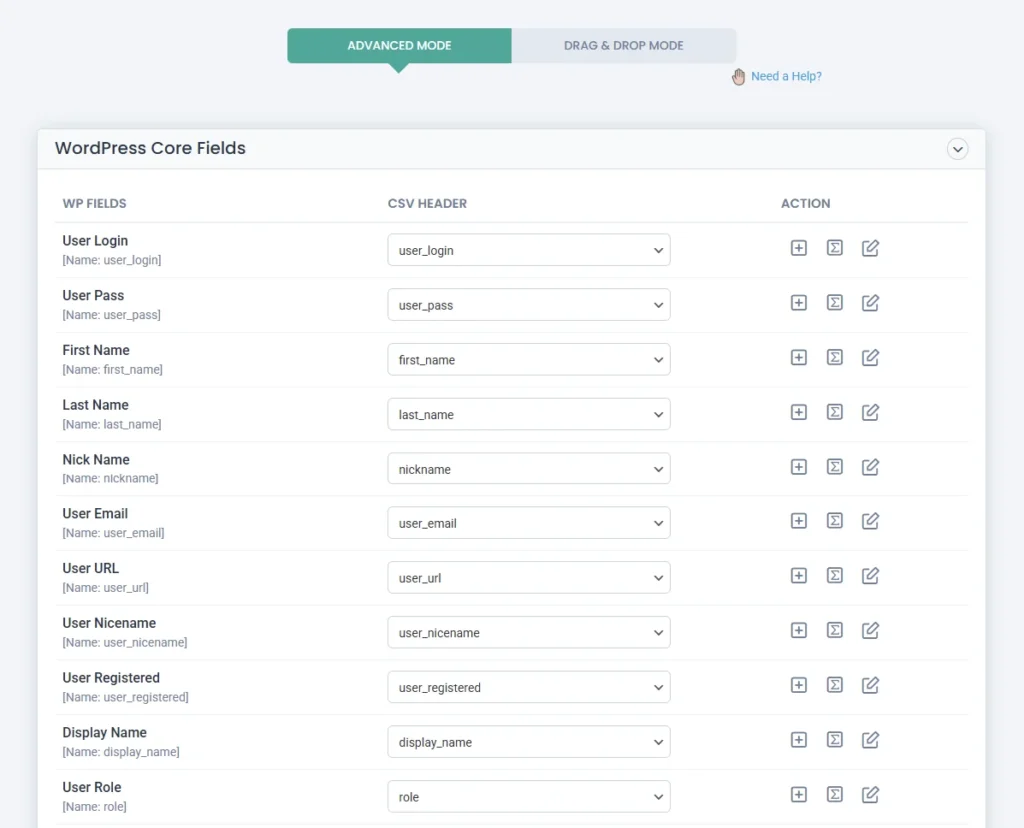
You can use Drag & Drop or Dropdown Mode for mapping.
Save your mapping configuration for reuse later.
Click Continue once the mapping is complete.
Step 4: Configure Import Settings
This screen lets you fine-tune how the import should behave. Key options include:
- Update Existing Users: Automatically update existing users based on their ID or email.
- Media Upload Options: Useful if importing profile pictures or custom user avatars.
- Rollback: To restore the site if something goes wrong after import.
- Maintenance Mode: Display a temporary message while imports are in progress.
- Duplicate Handling: Avoid duplicate user entries.
- Iteration-based Import: Import users in chunks (especially helpful for large files).
- Schedule Import (optional): Set up a time-based import for automated processing.
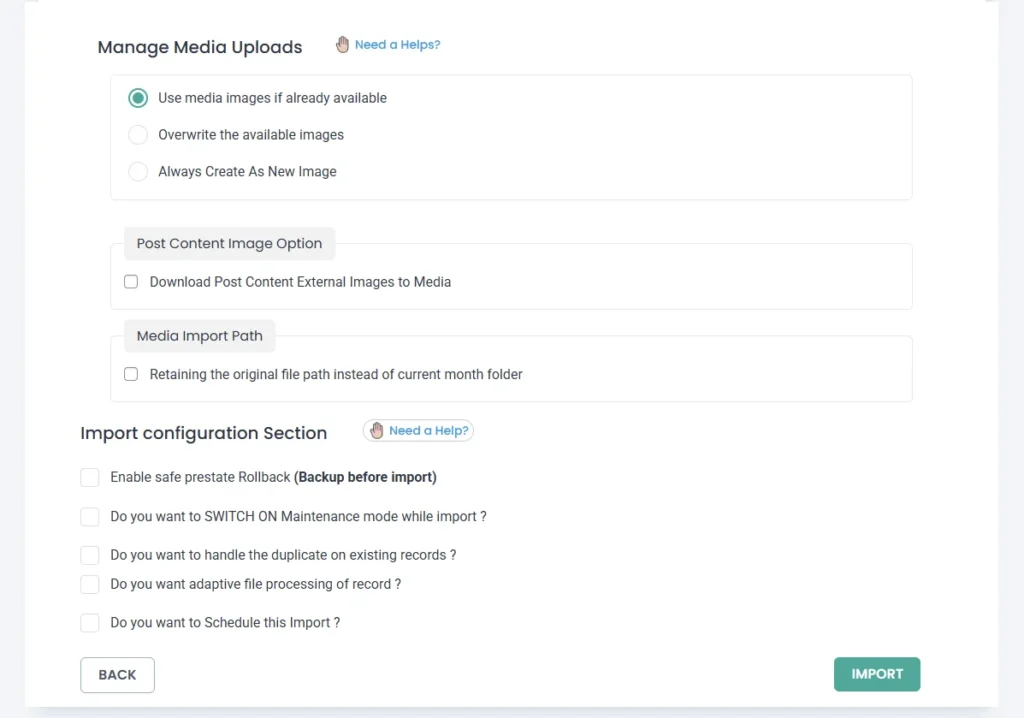
Click Import to start the process.
Step 5: View Import Results
Once the import finishes, a popup will display a success message, import summary, and optional media logs. Review the details or go to Users > All Users in your admin to verify the imported data.
How to Export WordPress Users #
Exporting users is just as simple. You also get filters for precise user selection.
Step 1: Select Post Type to Export
Go to WP Ultimate CSV Importer > Export, and select Users from the post type dropdown.
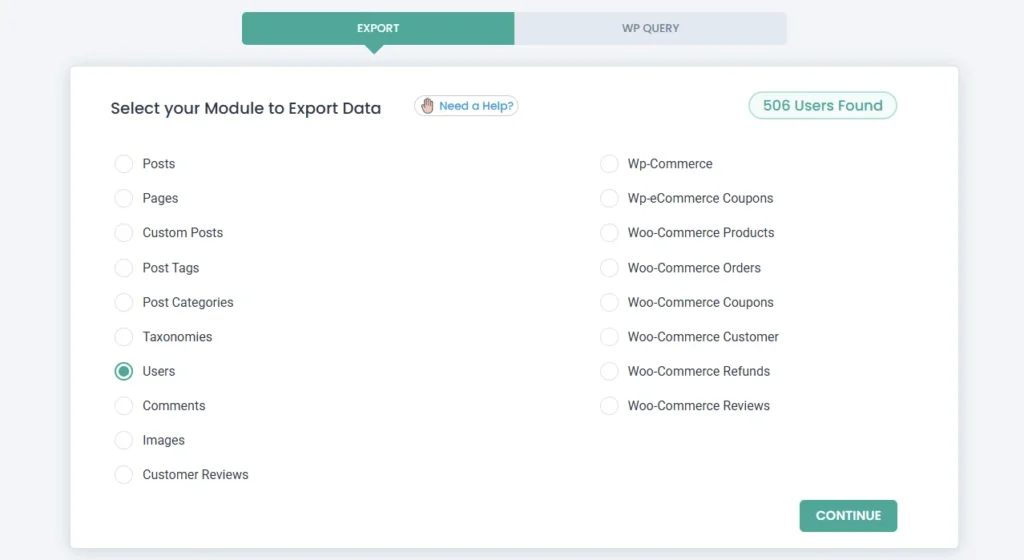
Click Continue.
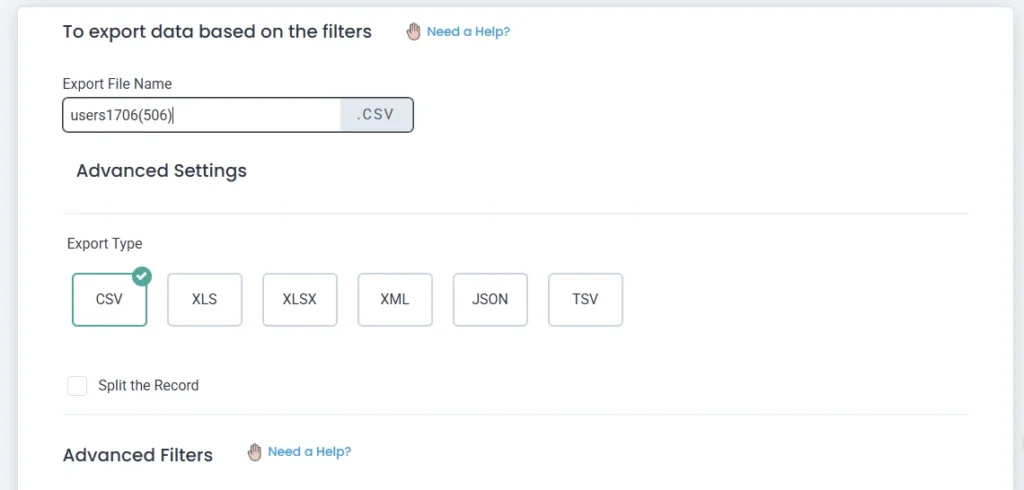
Step 2: Set Up Export Settings
On the export configuration screen, set up the following:
File Name: Name your export file.
File Format: Choose from CSV, Excel (XLS/XLSX), XML, JSON, or TSV.
Split the Record: For large exports, enter a number to split data into multiple files (delivered as a ZIP).
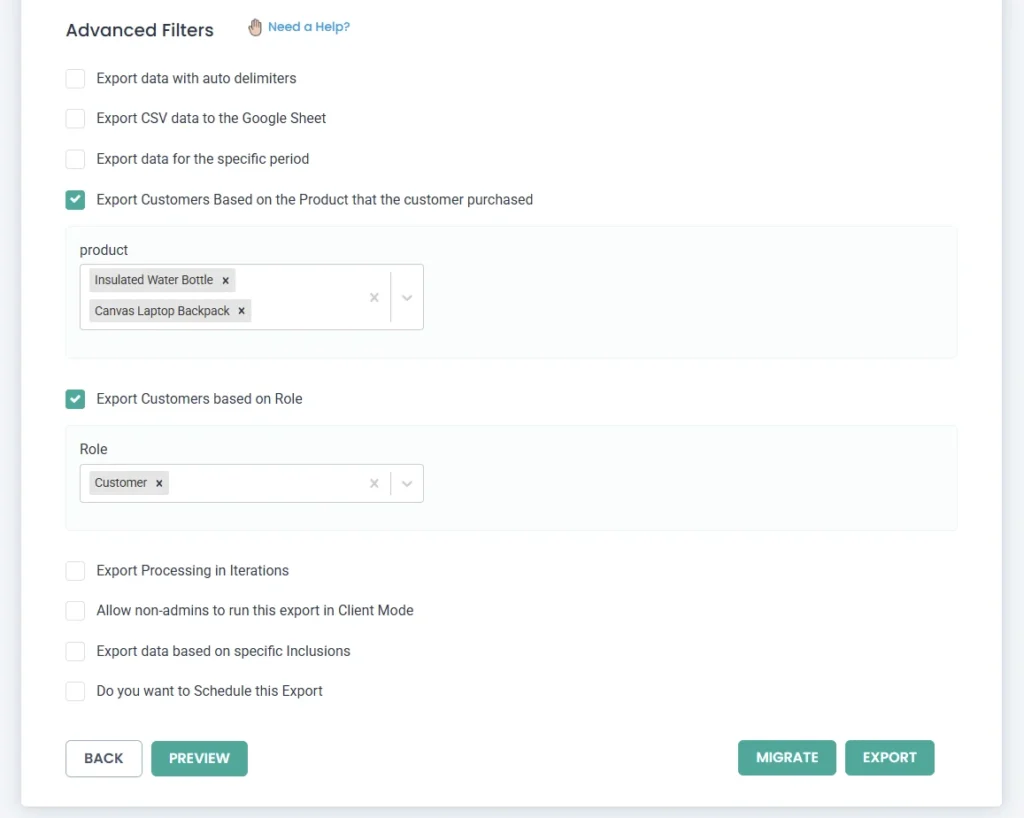
Step 3: Apply Filters
You can filter users before exporting using these options:
1. Filter by Product Purchased
Export only those users who have bought a specific WooCommerce product.
Enable this filter and choose one or more products from the dropdown.
Click Preview to confirm the filtered user list.
2. Filter by User Role
Export users belonging to a specific WordPress role, like Subscriber, Customer, or Shop Manager.
Select the role(s) from the dropdown.
Combine with other filters for refined exports.
Set a date range to export users who registered within a specific time period.
You can also schedule the export or send the file directly to a remote location using FTP/SFTP credentials.
Step 4: Start Export
Once your filters and settings are in place, click Export. The system will generate the export file based on your preferences.
A download link will appear once the process is complete.
Need to Export with Predefined Filters as Non-Admin?
Check out our Client Mode Export Documentation to give role-based export access to non-admin users.