SuiteCRM Asterisk Connector lets you make/ receive phone calls right from your SuiteCRM. Just a single click to start an outgoing call or answer your incoming calls. SuiteCRM Asterisk Connector, automatically record and log the calls with your prospects for future reference, making call management effortless and efficient.
Features: #
- Just click on the prospects phone number to communicate with them.
- Pop-out alerts on your window when you receive an incoming call from your clients.
- Single to attend/hang-up your incoming calls.
- Automatically records all your calls and maintains a history for efficient future analysis.
- You can easily define the users who can make/receive calls.
- Assign unique extensions to all your users.
Pre-Requisites: #
- Asterisk version – 11 or greater
- SuiteCRM version – 7.11
- Oracle Java – 1.8 or higher
Installation of SuiteCRM Asterisk Connector #
SuiteCRM Asterisk Connector #
- Take a back up of your current SuiteCRM for safe installation.
- Download the package from the MyAccount Page.
- To install it in your SuiteCRM, click on the Admin icon Admin Module Loader choose the downloaded Zip file click on Upload and then Install.
- Once done, install the Suite Asterisk Connector WebApp Linux.
Suite Asterisk Connector WebApp Linux #
- Download the connector from the MyAccount Page.
- Extract the zip file from your SuiteCRM root folder.
- Now navigate to that extracted Suite Asterisk Connector WebApp folder and run the following commands.
- sudo chmod u+x install.sh
- sudo ./install.sh
- To run the service
- sudo service suite-agi start
- sudo service suite-webapp start
- To stop the service
- sudo service suite-agi stop
- sudo service suite-webapp stop
SuiteCRM Configuration for Asterisk Connector #
To configure your SuiteCRM, click on the Admin icon Admin Scroll down to the bottom you can find the menu “PBX Suite Configuration Settings”
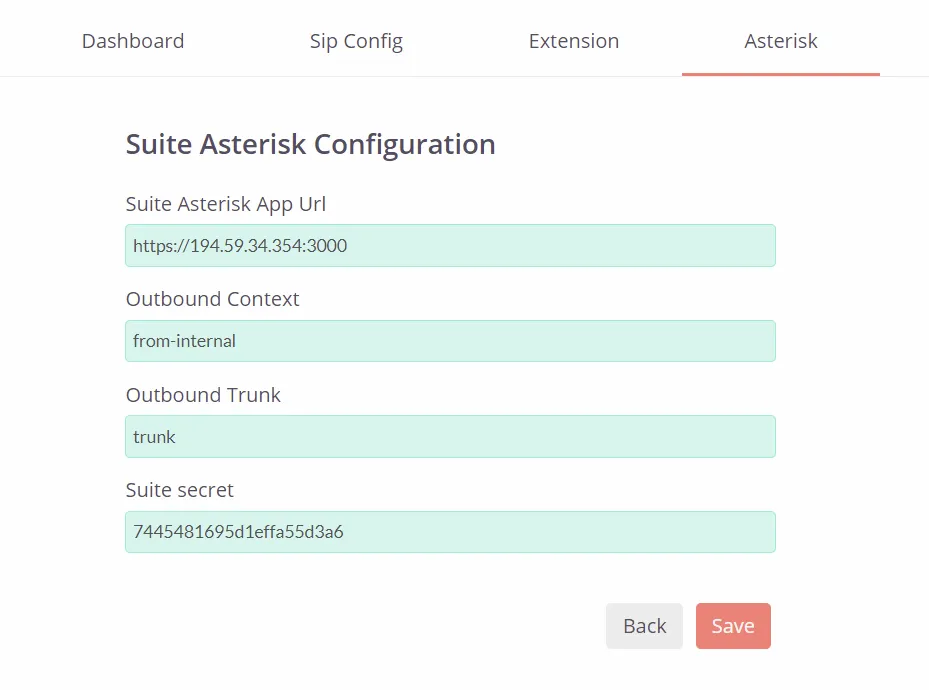
- Asterisk Tab
- Suite Asterisk URL – http://:4503
- Outbound Context – Context configured in asterisk
- Outbound Trunk -> Context configured in asterisk
- Suite Secret – Secret key to be used in the Webapp.
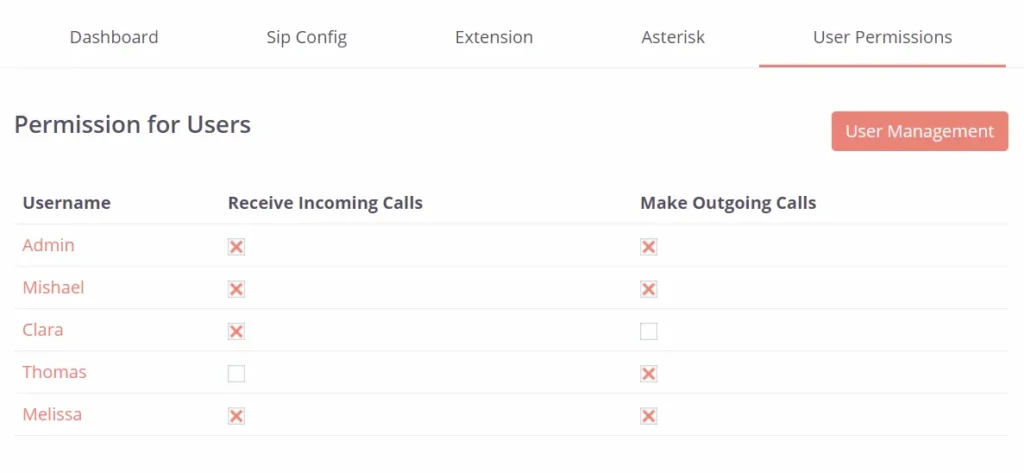
- User Permissions Tab – Define the list of users who can make/ receive calls.
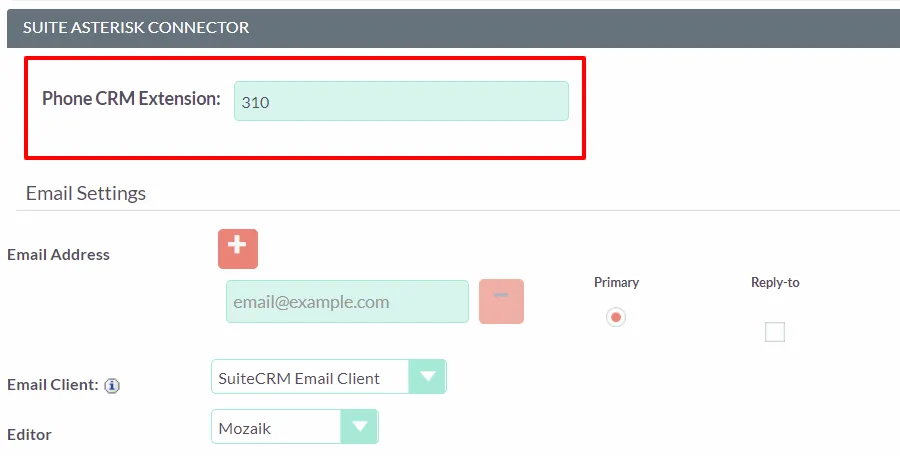
To assign an extension to a particular user, click on the Admin icon Profile in the edit view of individual user you can find PBX_Suite section, where you can easily assign an extension that is unique for individual users.
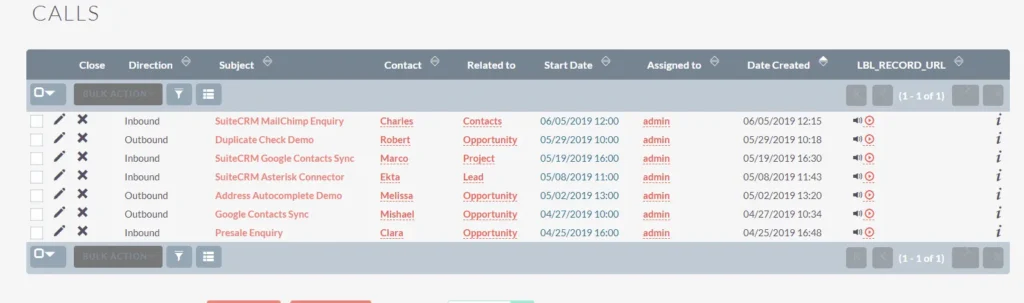
Call Logs #
Go to All Calls You can get the complete history of all your incoming and outgoing calls in one place.
Asterisk configuration for SuiteCRM #
To configure your Asterisk server, check the below mentioned configuration files and its code(these files are common to all service providers), and make changes if necessary.
Extension.conf #
Add the below mentioned line in your Extension.conf file
[default]
exten => 2000,1,Dial(SIP/2000)
exten => 2000,n,Hangup()
[from-internal]
exten => _[0-9].,1,NoOp(#### [from-internal] ####)
exten => _[0-9].,n,Agi(agi://192.168.1.79/incoming.agi)
exten => _[0-9].,n,Hangup()
[from-external]
exten => _[0-9].,1,NoOp(#### [from-external] ####)
exten => _[0-9].,n,Agi(agi://192.168.1.79/incoming.agi)
exten => _[0-9].,n,Hangup()
Cdr_manager.conf #
In this configuration file, check whether the enabled value is mentioned as no, if not change it to no.
[general] enabled = no
Http.conf #
Check the binary address field value. You can either use your Asterisk Address or 127.0.0.1
Manager.conf #
Check the Manager.conf whether all the values are correct as mentioned below.
[general] enabled = yes port = 5038 bindaddr = 0.0.0.0 [asterisk] secret=smackcoders deny=0.0.0.0/0.0.0.0 permit=ServerIP/255.255.255.0 read=all,system,call,log,verbose,agent,user,config,dtmf,reporting,cdr,dialplan write=all,system,call,agent,user,config,command,reporting,originate,message
Sip.conf #
This configuration file may vary based on different Asterisk Service Providers. Below weve listed a sample Sip.conf file for Gotrunk. Configure this based on your own Service Provider.
[general]
allowguest=yes
context=default
bindport=5060
udpenable=yes
tcpenable=yes
trunkname=asterisk
preferred_codec_only=yes
dtmfmode=rfc2833
autofallthrough=yes
disallow=all
allow=alaw
allow=ulaw
localnet=192.168.1.3/255.255.255.0
externaddr=192.168.1.3
rtcachefriends=yes
register => 46181:[email protected]

[trunk]
type=peer
host=amn.st.ssl7.net
context=from-trunk
qualify=yes
defaultuser=46181
remotesecret=yk$xS78Y

[1000]
type=friend
host=dynamic
context=from-internal
username=admin
dtmfmode=inband
call-limit=1
busylevel=1
password=smackcoders
qualify=yes
nat=force_rport,comedia

[2000]
type=friend
host=dynamic
context=from-external
username=admin
dtmfmode=inband
password=smackcoders
qualify=yes
nat=force_rport,comedia
call-limit=1
busylevel=1

[3000]
type=friend
host=dynamic
context=from-external
username=admin
dtmfmode=inband
password=smackcoders
qualify=yes
call-limit=1
busylevel=1
nat=force_rport,comedia
WebApp configuration #
Check the SmackcodersAsteriskConnector.properties in the following location: /etc/asterisk-suite-webapp/
// Location where this application server will be running.
WebAppIP = 127.0.0.1
WebAppPort = 4503
// Call Recordings storage path
StorageDir = /home//Asterisk/recording
// Enable(true) or Disable(false) call recordings Recording = true
// Location where the applications database files will be stored. DBPath = /home/theophilus/Asterisk/db
// Asterisk Server Details
AsteriskServerPublicIP =
AsteriskServerIP =
AsteriskServerPort =
AsteriskUsername =
AsteriskPassword =
// Suite CRM URL
SuiteURL = SuiteSecretKey = You can get this key from our SuiteCRM Asterisk Connector Module.
Softphone #
You can use your own preferred softphone to make/receive calls to your customers.
- Download and install your softphone.
- To activate the softphone add your Trunk Name and Password mentioned in the Sip.Conf file.