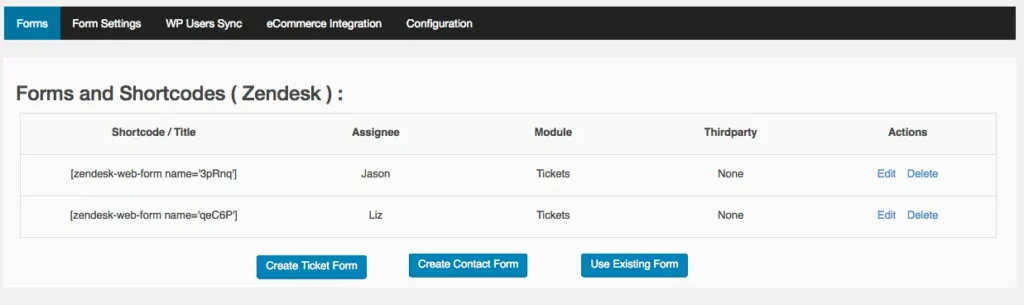
Forms is the form creation tab where you can choose the required fields to collect customer information.
- Click ‘Create Ticket Form’ to create form based on the fields in your Support portal.
- Click ‘Create Contact Form’ to create form based on the fields in your Support portal Contacts list.
- Click ‘Use Existing’ to capture contacts with the already embedded third party forms built with Gravity Form, Ninja Form and Contact Form 7.
- Click ‘edit’ in the Form list to update or modify existing forms.
- To delete the form from the Form list click ‘delete’ . The delete operation will delete the form permanently.
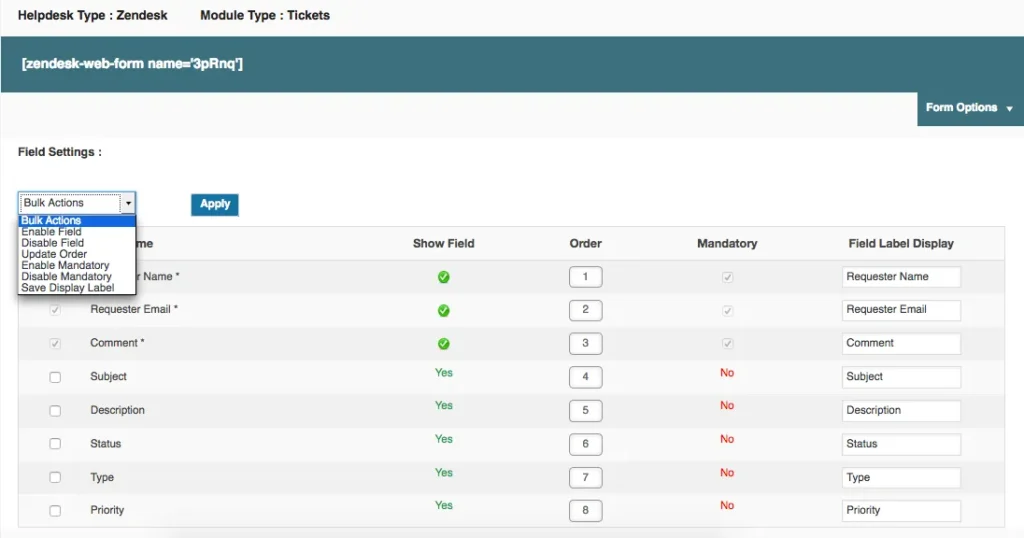
To Create / Edit Form #
When you click on the create or edit, the list of fields in the support portal will be listed. You can use to customize the list based on your need.
- Choose the list of fields which needs to be modified.
- The “Bulk Action” dropdown has option to enable /disable fields, renaming labels, change order of display and make fields mandatory.
The Form Options enables to customize individual form settings.
- Post Type: Specify where you want to embed the form – Post / Page / Widget using the drop down. Choose Post for Post & Pages and Widget for the Widget.
- Duplicate handling: You can create, update or skip the duplicate entries possibly generated from the form.
- Assign automatically : Choose the support agent to whom the captured tickets need to be assigned.
- Custom Messages : You can customize the messages you want to show to the customer on form submission.
- Success Page: Specify URL to redirect on successful form submission.
- Enable Google reCAPTCHA: Enable to prevent spam and abuse.
- Choose Thirdparty Form: Select the third party integrated Form from the list.
- Thirdparty Form Title: Add title to the the third party form.
Click on ‘Save Form Settings’ to save the settings.
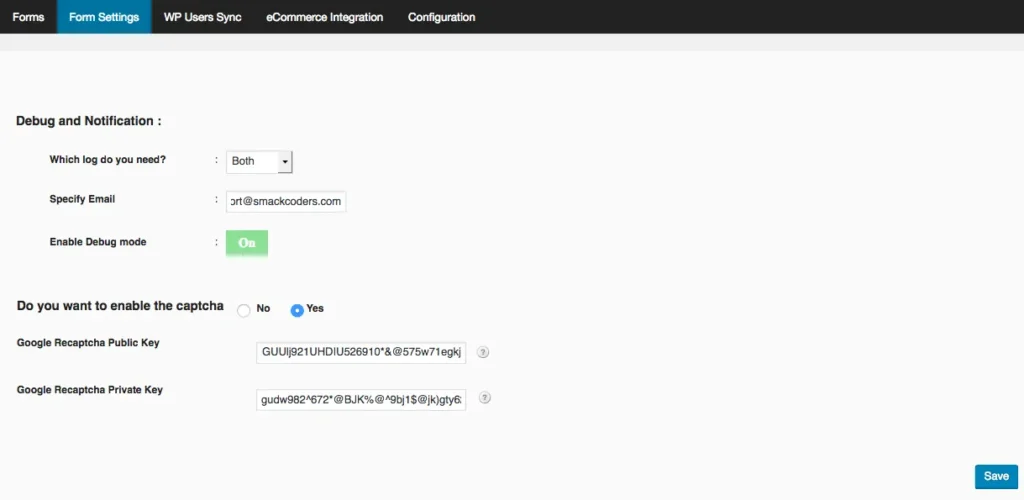
WP Form-settings #
- The debug and notification enables you get notifications on success and failure of your ticket submission and Contact sync.
- Specify email to receive the notifications.
- Enable debug mode to receive error notifications
- To prevent the spam enable ‘Captcha’ and set the Public and Private Key.
To create account, visit Google reCAPTCHA.
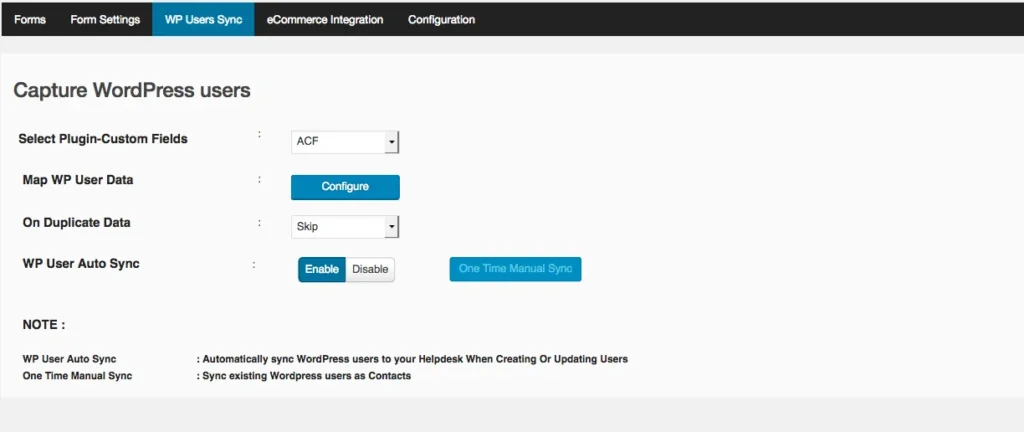
WordPress Users Sync #
In a eCommerce site, Users need to sign up to purchase the product or to add in shopping cart. You can use WP Users Sync to capture these users as contacts to your support portal automatically.
Select Plugin-Custom Fields: Choose MemberPress, ACF or WP-Members to get additional customer info along with default Users info fields.
Map WP User Data: Click on ‘Configure’ to map the support portal fields with the WordPress User fields. Click on Update to save the mapping.
On Duplicate Data: You can choose create, update or skip to handle repetitive User Sync.
Enable Auto Sync: Captures the WordPress Users as contacts to your support portal automatically.
One Time Manual Sync: Captures the existing users as Contacts to your support portal. We recommend you to use this option when you initially set this.
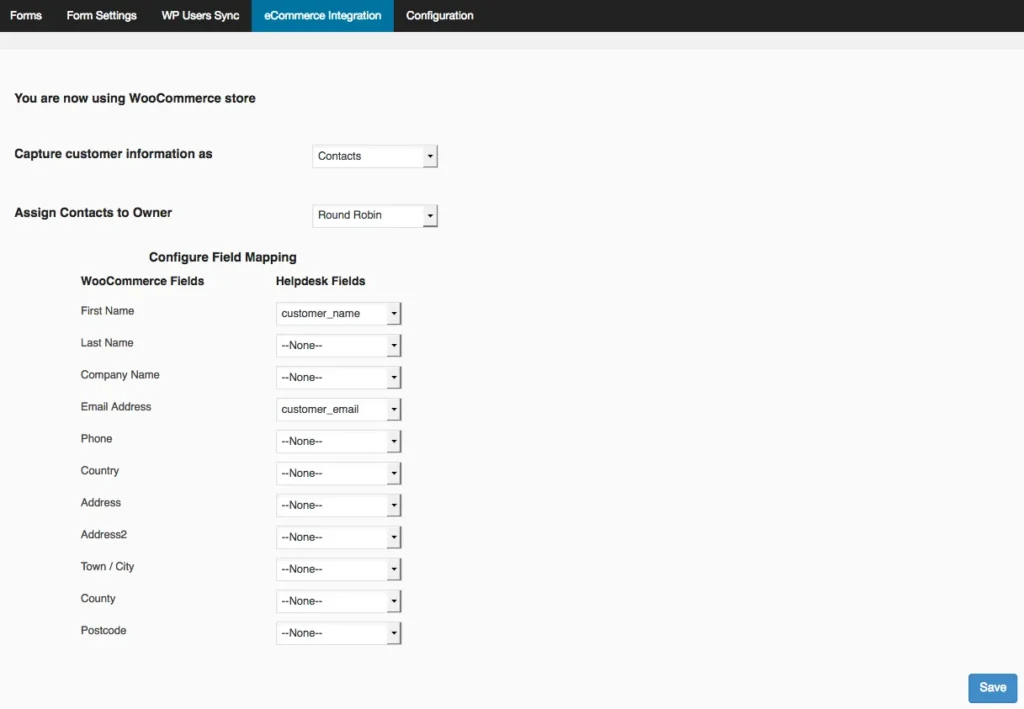
eCommerce Integration #
This tab helps you to sync your WooCommerce checkout field information to Zendesk, Zoho Support, Freshdesk and Vtiger Tickets.
Capture customer information as #
You can capture WooCommerce checkout field information as Contacts.
Assign Contacts to Owner #
You can choose sales agent to assign the created contact to follow-up. You can choose round robin to consecutively assign sales team agent one after the other.
Map the eCommerce fields with the contacts fields of your support portal.

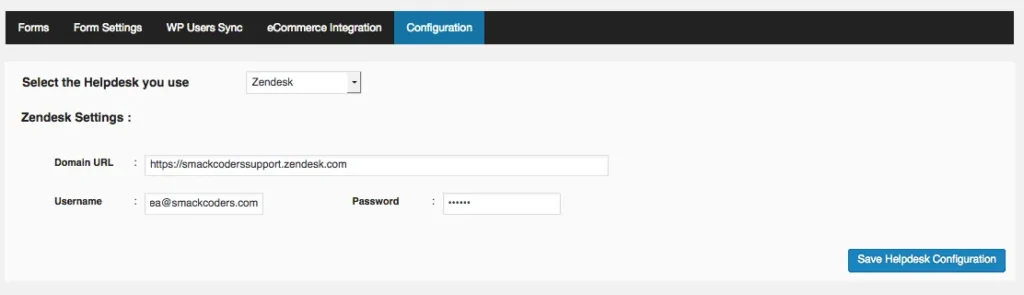
Support Portal Configuration #
This tab helps you choose the support portal you are using and where you want to push your ticket & contact info.
- Choose your required portal from the drop down.
- Provide domain URL, Username and Password.
- Register it by clicking on Save Helpdesk Configuration