WordPress is a popular content management system that many people use to power their websites. While it’s impressive that so many people use it, there are some drawbacks. WordPress has many plugins and themes that can conflict with each other if not configured correctly. The guide post will help you speed up your WordPress website to run more efficiently. Following the steps in this guide can improve your website’s performance and make it run faster. Thanks for reading! I hope this guide was helpful.
Table of Contents
Why is site speed critical?
Site speed is crucial because it’s one of the ranking factors that Google uses to determine how to rank your site in search results. In addition, people are more likely to abandon a slow-loading site than a fast one. If the site is slow, you’re likely losing potential customers and visitors. There are a few ways to improve your site’s speed, which we’ll cover in this guide. The sooner you can find a website, the higher your chances of achieving the top position in SERP.
How to speed up WordPress?
Speed is essential for a website’s users and search engine ranking. Pages that load quickly are more likely to keep a user’s attention and rank higher in search results. You can improve your website’s speed and provide a better user experience with the steps below. Google also recognizes speed as a ranking factor, so a faster site may improve search engine rankings.
- Step 1 : Choose a reliable host plan and provider
- Step 2 : Use a WordPress Hosting Provider that focuses on speed
- Step 3 : Upgrade to PHP 7.4 to 8+
- Step 4 : Select a Fast WordPress Theme
- Step 5 : Use a Caching Plugin
- Step 6 : Enable Gzip Compression
- Step 7 : Use a Content Delivery Network (CDN)
- Step 8 : Optimize Your Images
- Step 9 : Monitor Your Site’s Performance with Google PageSpeed Insights
- Step 10 : Minimize HTTP requests
- Step 11 : Optimize your scripts
- Step 12 : Leverage browser caching
- Step 13 : Minimize Plugins
Step 1 – Choose a reliable host
When choosing a reliable hosting plan for your WordPress website, there are many factors to consider. One of the most important is speed. A hosting provider that focuses on rate, such as WP Engine, can help your websites load faster and provide a better user experience. PHP 7.4 or 8+ can also help improve loading speed.
Step 2 – Choose a host that uses Nginx
Not all hosting providers are created equal. Some, such as WP Engine, specialize in speed and performance, making your WordPress website faster and providing a better user experience. Nginx Server is the best option as it is a powerful web server to handle high traffic volumes and is available with top hosting providers’ plans. When choosing a host of WordPress sites, consider speed and performance. A provider that uses Nginx, such as WP Engine, can help you make your website faster and provide a better user experience.
Enable Varnish for the Server Cache
You can enable Varnish-cache on your server if you want to speed up your website by caching static content. Doing so will reduce the load on your web server and improve the response time for your visitors.
You must install and configure the Varnish software to enable Varnish on your server.
Once you have Varnish installed and configured, you will need to enable it for your website. To do this, edit the .htaccess file for your website. In the .htaccess file, you will need to add the following lines of code:
RewriteEngine On
RewriteCond %{HTTP_HOST} ^www.yourdomain.com$
RewriteRule ^(.*)$ http://yourdomain.com/$1/varnish-enable-varnish-on-the-server$2
Step 3 – Upgrade to PHP 7.4 to 8+
In addition to choosing a hosting provider that focuses on speed, you can upgrade to PHP 7.4 to 8+. Apart from WP themes and plugins, even PHP is regularly updated to improve security, performance and speed loading pages. PHP 8.1 is the new stable release released in July 2022 that can handle 18.4% more requests per second than PHP 7.4. That can help improve your website’s loading speed by up to 30%.
Choose a server closest to your visitors
When you choose a hosting plan for WordPress websites, speed is one of the most critical factors. A hosting provider located close to your visitors can help improve loading times. For example, Google Analytics can help you track the location of your website visitors. Under “Audience,” you can see that over 97% of traffic originates within the United States. This information is vital to refine your data further if you’re a local firm. By installing WordPress on servers in the US, you can make your WordPress website faster and provide a better user experience.
Step 4 – Select a Fast, Lightweight WordPress Theme
When looking for a new WordPress theme, it is crucial to find one that is fast and lightweight. So, load the website quickly and perform better overall. Some of the best options for short, light WordPress themes include the ones from theme developers such as GeneratePress WordPress theme & Astra WordPress theme.
The benefits of having a fast, lightweight WordPress theme are numerous. For one, your website will load much faster for visitors. It is essential because people are generally impatient and will likely leave your site if it takes too long to load. Additionally, a fast website can help improve your search engine ranking. Since Google now considers page speed as one of its algorithm’s undeniable ranking factors.
Step 5 – Use a Caching Plugin in WordPress
If you’re looking to speed up any WordPress site, a caching plugin could be a good solution. Cache plugins work by creating static copies of your pages and posts, which then serve visitors instead of the dynamically generated versions. That can result in a notable performance boost, as it takes less time for the static versions of your pages to develop.
Many caching plugins are available for WordPress, so choosing one that will work well with your particular setup is essential. In general, you’ll want to look for a plugin compatible with your web server and database and offers features like page caching, object caching, and browser caching.
Once you’ve installed a caching plugin, you’ll need to configure it to work with your site. That can be tricky, so it’s essential to read the documentation carefully. In most cases, you’ll need to edit your .htaccess file to add the necessary rules for the plugin to work.
If you’re not good at doing it yourself, you can always hire a WordPress developer to help set up a cache plugin. However, it’s usually unnecessary if you use a well-supported plugin like W3 Total Cache or WP Super Cache.
Once your caching plugin is up and running, you should significantly improve your site’s performance. That will reduce Page load times, and your visitors will have a better experience overall.
Almost all free and premium cache plugins have these features.
- Enable Gzip Compression
- Minify CSS, HTML, and JavaScript
- Leverage browser caching: Use a CDN
- You should configure it from the cache plugin admin you installed.
Step 6 – Enable Gzip Compression
Enabling Gzip compression can speed up the loading of your pages by as much as 50%. To help it, add the following line to your .htaccess file:
# Compress HTML, CSS, JavaScript, Text, XML and fonts
AddOutputFilter DEFLATE application/javascript
AddOutputFilter DEFLATE application/rss+xml
AddOutputFilter DEFLATE application/vnd.ms-fontobject
AddOutputFilter DEFLATE application/x-font
AddOutputFilter DEFLATE application/x-font-opentype
AddOutputFilter DEFLATE application/x-font-otf
AddOutputFilter DEFLATE application/x-font-truetype
AddOutputFilter DEFLATE application/x-font-ttf
AddOutputFilter DEFLATE application/x-javascript
AddOutputFilter DEFLATE application/xhtml+xml
AddOutputFilter DEFLATE application/xml
AddOutputFilter DEFLATE font/opentype
AddOutputFilter DEFLATE font/otf
AddOutputFilter DEFLATE font/ttf
AddOutputFilter DEFLATE image/svg+xml
AddOutputFilter DEFLATE image/x-icon
AddOutputFilter DEFLATE text/css
AddOutputFilter DEFLATE text/html
AddOutputFilter DEFLATE text/javascript
AddOutputFilter DEFLATE text/plain
AddOutputFilter DEFLATE text/xml
Replace “application/javascript” with the appropriate content type for your files.
If you are using Apache 2.2, you will also need to add the following line to your .htaccess file:
Header append Vary: Accept-Encoding
It will ensure that the right content type gets pushed to the browser.
If you are using IIS, you can enable Gzip compression by adding to your web.config file:
Replace “text/*” and “message/*” with the appropriate content-types for your files. You can find a complete list of content types here: http://www.iana.org/assignments/media-types/index.html
If you are using Nginx, you can enable Gzip compression by adding the following to your nginx.conf file.
Replace “text/plain” and “text/HTML” with the appropriate content-types for your files. You can find a complete list of content types here.
You can also enable the gzip compression option using the cache plugin.
http {
gzip on;
gzip_comp_level 2;
gzip_proxied any;
gzip_types text/plain text/html text/css application/x-javascript text/xml application/xml
application/rss+xml text/javascript image/svg+xml application/atom_xml;
}WP Ultimate CSV Importer Pro
Get Ultimate CSV/XML Importer to import data on WordPress faster, quicker and safer.
Minify CSS, HTML, and JavaScript
Minifying your CSS, HTML, and JavaScript can improve your website’s performance. That is because the files are smaller, meaning they take less time to download. In addition, minified files are less likely to cause errors. Several tools can help you minify your files, such as YUI Compressor and Closure Compiler. The cache plugin should have this option. If not, follow the steps below.
You must download a minified to minify your CSS, HTML, and JavaScript files. Once you have downloaded a minified, open the file and select the files you wish to minify. After selecting the files, click on the “Minify” button. You will save minified files in a new location. You can then upload these files to your website. Minifying your CSS, HTML, and JavaScript files can improve your website’s performance. That is because the files are smaller, meaning they take less time to download. In addition, minified files are less likely to cause errors.
Leverage browser caching
Browser caching is a technique used to speed up the loading of pages by storing static files and assets, such as images and scripts, on the user’s computer. When the user visits the page next time, the browser can load pages from the user’s computer cache instead of the web server. That is how it speeds up the entire page’s loading with no delay.
One way to leverage browser caching is using a content delivery network (CDN). That can ensure the static files get delivered to users from a server close to them.
Have Problems with Website Loading?
Speed Them Up with Our Expert Help
Step 7 – Use a CDN in WordPress
A content delivery network, or CDN, is a computer system that works together to deliver content to users. Using a CDN in WordPress helps speed up the delivery of your website’s files, including images, CSS, and JavaScript. That is because the CDN will store a copy of your website’s files on its servers spread across the globe while users try to access your website. The CDN will deliver content from the closest server to help improve loading times. There are many different CDNs that you can use in WordPress, but some of the most popular options include Cloudflare, MaxCDN, and StackPath. In most cases, you can easily set up a CDN by signing up for an account with one of these providers and following their instructions.
Step 8 – Optimize Your Images
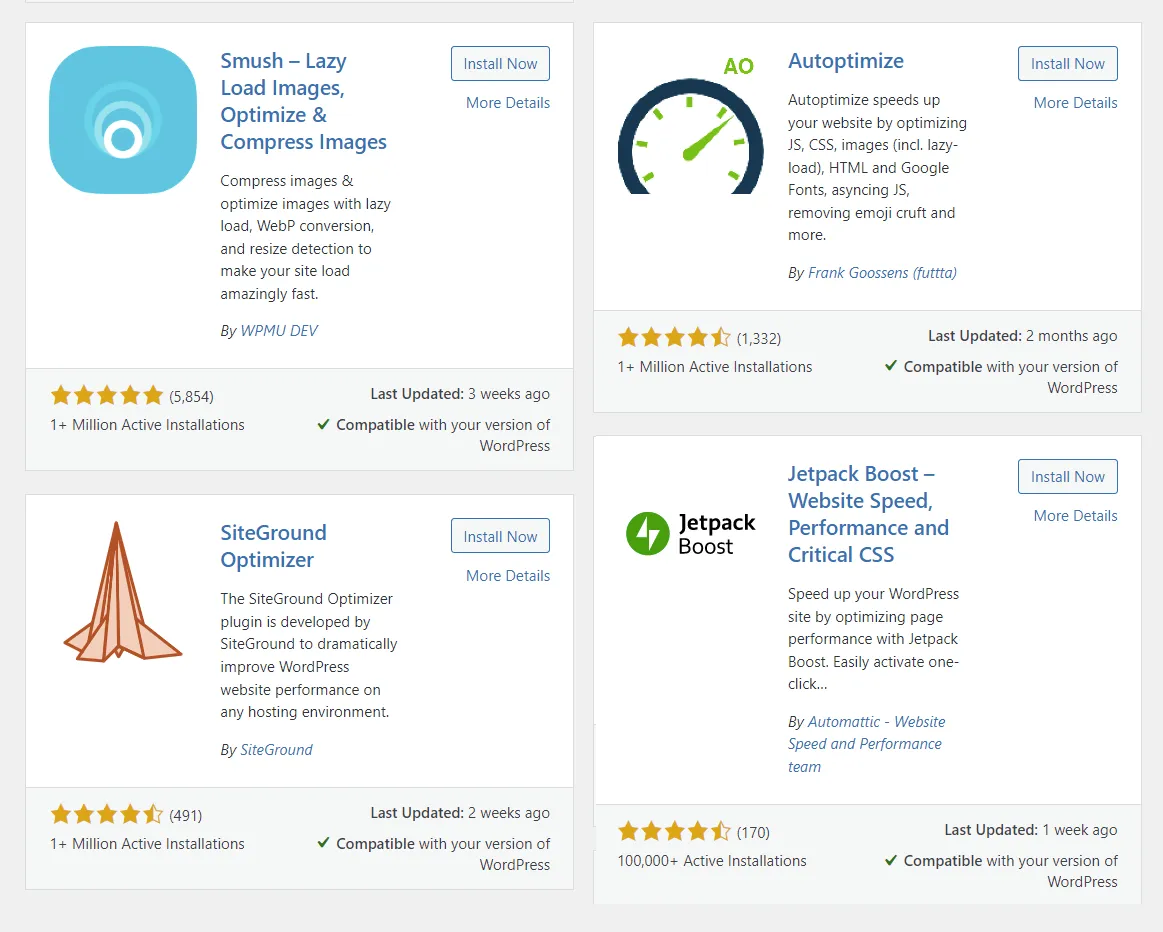
Optimizing your images is excellent for speeding up your web pages. Reducing image file size will make it easier for users to browse through your graphics and cannot even notice the difference! You can start with Photoshop or other image compression tools. Still, some great plugins are specifically designed for image optimization, like Smush & EWWW Image Optimizer. Give it a try to see the difference they make!
Tinypng image Compress tool
The Tinypng image compression tool is a great way to optimize your images for the web. It can reduce the file size of your pictures by up to 50%, leading to faster page load times and less data usage. The tool is free to use, and it’s easy to get started. Upload your images to the website and then download the compressed versions. You can also choose to have the tool compress your images automatically when you upload them to your website. That saves you time and effort by reducing the file size of your images.
Step 9 – Monitor Your Site’s Performance with Google PageSpeed Insights
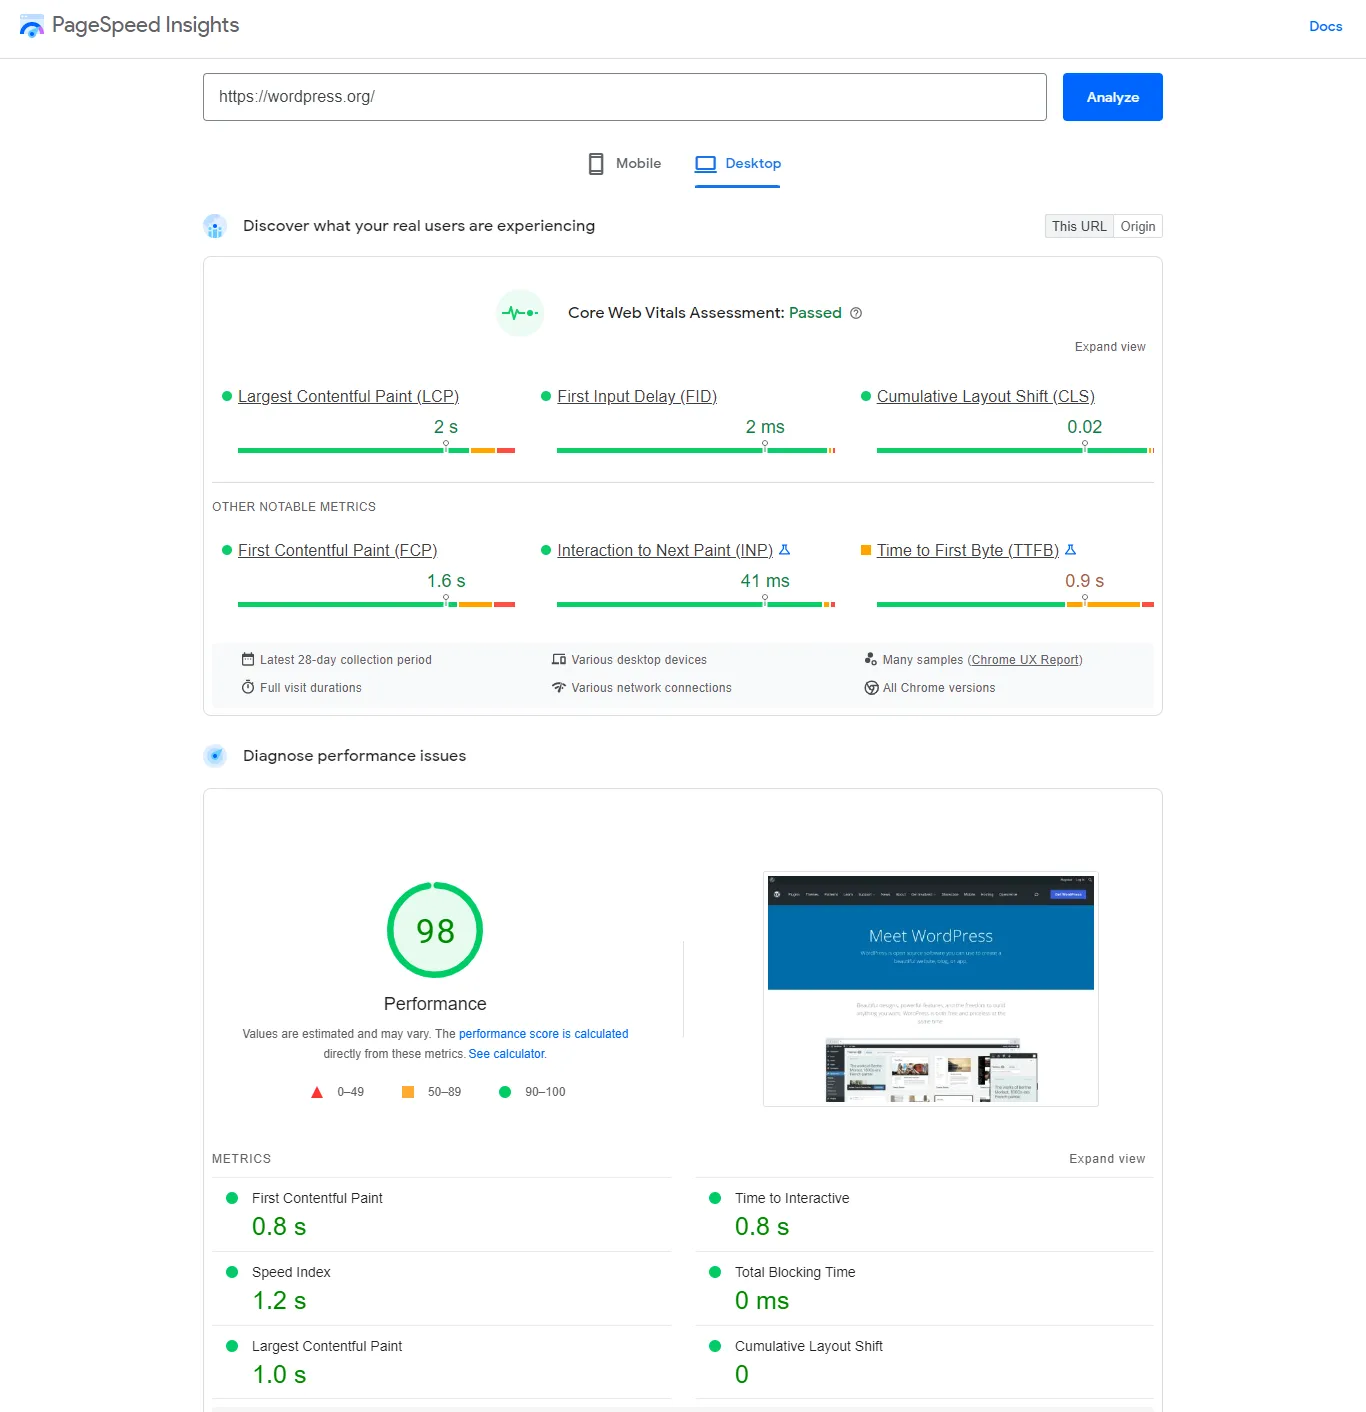
Monitoring your website’s performance is essential to keeping visitors happy and engaged with your content. Google PageSpeed Insights is a free tool that can help you do that.
PageSpeed Insights measures the performance of a web page and provides advice on how to improve it. You can use PageSpeed Insights to get an idea of how your website performs on mobile devices and desktops and get tips on improving your site’s performance.
To use PageSpeed Insights, enter the web page URL you want to check and click “Analyze.”
PageSpeed Insights will then provide a report on the page’s performance and advice on improving it.
How fast should a site load?
How fast a site should load is a question asked for years; the answer is, of course, it depends. Some factors that can affect how fast a site loads include the size of the page. The type of content, the number of images and videos, and the number of external scripts and stylesheets will add to the page size.
Google strongly suggests keeping your load times at a minimum of 3 seconds. Keeping your website’s load times to a minimum of three seconds is essential for keeping your visitors engaged. Researchers have found that if a webpage takes longer than five seconds to load, the bounce rate will increase to 92%. To keep visitors engaged on your website and prevent them from bouncing out, aim to have an average load time of under three seconds. If your site is taking longer than that to load, you may want to consider making some changes to improve its speed.
Step 10 – Remove rendering-blocking Javascript and CSS
When optimizing your website for performance, one of the first things you can do is remove any rendering-blocking Javascript and CSS. That will ensure that the content of your pages is loaded as quickly as possible. And without having to wait for all accompanying scripts and stylesheets to load. Fortunately, there are known ways to deal with this, depending on your particular setup.
One standard method is to inline all of your critical CSS into theof your page and loads all other CSS asynchronously. This way, the browser can begin loading and rendering the page immediately, without waiting for any external files to download. Another approach is simply loading all CSS files using media types that prevent them from blocking the page rendering. This approach is for non-critical CSS, such as those used for print stylesheets or mobile devices.
The best approach varies depending on your specific situation. However, removing render-blocking Javascript and CSS is a great way to improve the overall performance of your website.
Step 11 – Cloudflare for WordPress performance
Cloudflare can help WordPress performance in a few ways:
- Cloudflare caches static files like images and CSS stylesheets.
- That speed up the loading of your website for your visitors.
- Cloudflare helps protect your website from DDoS attacks, which can overload your server and take your website offline.
- Cloudflare can optimize your website’s HTML and CSS, improving your website’s loading speed.
Cloudflare is a free service, and it’s easy to set up. You can find more information about using Cloudflare with WordPress on the Cloudflare website.
Simplify your website design and content
If you’re looking to simplify your website design and content, there are a few things to keep in mind. First, ensure your website navigation is easy to navigate and that all of the most critical information is easy to find. You may also consider using a simple, streamlined design that doesn’t include too many bells and whistles. Finally, make sure your content is clear and concise. Visitors should understand what you’re trying to say without getting lost in a sea of text.
Try lazy loading your content
Lazy loading your content can be a great way to speed up your site while still providing your users with all the content. By delaying loading images and other media files until they are needed, you can keep the initial page load time to a minimum. That is especially important on mobile devices, where slower network connections can mean longer load times.
Lazy loading can also help to improve your site’s performance by reducing the number of data downloads. That can save time and bandwidth, especially on sites with extensive content. If you’re looking to lazy load your content, there are a few things you need to keep in mind:
- You must ensure that your content is well-structured and organized to be loaded efficiently
- You must ensure that your server configuration allows lazy loading.
- You need to test your site to ensure everything is working as expected.
If you’re unsure how to lazy load your content, a few resources can help. The WordPress Rocket Lazy Load plugin is an excellent option for sites running on the WordPress platform. And if you’re looking for a more general solution, use the jQuery Lazy Load plugin on any site. And finally, if you’re unsure whether lazy loading is suitable for your site.
Step 12 – Optimizing WordPress WP Admin setup for speed
WordPress is a robust CMS platform with many options and settings. In some cases, these can slow your website down. Optimizing your WordPress installation speed is critical for a smooth and fast user experience.
One crucial step is to configure your WP Admin setup for best performance. You can delete unused or unwanted files from the WordPress media library, turn off pingbacks and trackbacks, limit post revisions, and clean up your database to improve performance.
Here are a few tips. Following these tips can speed up the WordPress website.
- Delete Unused Plugins and Themes
- Clean up your WordPress database
- Turn off pingbacks and trackbacks
- Limit or disable post revisions
- Avoid redirects
- Update everything
- Clean up your media library
- Reduce post revisions
Step 13 – Delete Unused Plugins and Themes
While using plugins and themes correctly is essential, another critical step for optimizing your WordPress site is deleting unwanted items. You can disable an application if you want to delete it. However, be careful when doing so, as it may affect the loading time of your website. If you have any new plugins, try removing those that aren’t necessary first. You can also deactivate all plugins and software you’re no longer using. Doing so may help improve your site’s performance.
If you want to delete a plugin or theme, you can do so from the Appearance > Themes section. When it comes to plugins, it’s often better to have fewer, high-quality plugins than a lot of low-performing ones. If a plugin you’re using isn’t necessary, try to find a lighter alternative.
Clean up your WordPress database
Unless checked, a cluttered WordPress database can cause a big issue with performance. When Frequently cleaning the database, the size gets reduced, and the page load speed will increase. To clean up your database, you can do it manually through phpMyAdmin or install a plugin to help with the task. Installing a plugin is the safest option if you’re not skilled in working with databases.
Over time, websites tend to accumulate comments and data from old unused themes and plugins. That can slow down your site and take up valuable storage space. WP-Optimize is a plugin that helps you clean up your WordPress database, deleting unnecessary files and freeing up disk space. You can also delete unused media files from the WordPress library.
Turn off pingbacks and trackbacks
Pingbacks and trackbacks can be disabled in WordPress by disabling the plugin that enables them. However, this could cause web pages to load more slowly. Although pingbacks and trackbacks have benefits, most WordPress experts agree they are not worth the potential drawbacks. Therefore, in general, it is recommended to disable the feature.
Limit or disable post revisions
WordPress automatically saves post revision for each edit to the DB rather than deleting. So it is possible to go back to your previous version when required. Posting revisions are helpful, but they may accumulate in your database, causing a slowdown on your website. By default, WordPress saves an entire page if an edit gets deleted. Still, you can reduce or eliminate post updates by modifying them
You can limit the number of post revisions or disable post revisions altogether. To do this, you must add a code line to your wp-config.php file. If you want to limit the number of post revisions, you can add this line of code to your wp-config.php file:
define(‘WP_POST_REVISIONS’, 3);
That will limit the WordPress plugin to saving three post revisions for each post or page. You can change the number 3 to any number you want.
Avoid redirects:
The best way to avoid 404 errors is to add temporary redirects for any removed or moved the content. It can help reduce the load time on your WordPress website. Redirecting a visitor from one site to another can sometimes be challenging. Still, it is worth it to avoid any errors.
Update everything:
Always ensure you run the latest software versions to get your site’s best performance and security. Keep the WordPress, the core theme, and plugins up to date for optimal results.
Clean up your media library:
If you have media that you no longer want, or if you have incomplete or unattended files, you can remove them from your media library.
Also, it is easy to use Media Cleaner, a free WordPress plugin. It helps you clean your Media Library by removing unused and broken media entries. It uses intelligent analysis to determine which files are no longer needed and then allows you to delete them permanently. It is a necessary step before using the plugin, as you cannot trust any tools modifying or deleting your files without first making a backup.
Conclusion
There are standard methods available to speed up WordPress websites. This article looked at optimizing WordPress speed by leveraging our result-oriented solutions and leveraging caching, minification, CDN, and lazy load. Refer to other similar online resources if you are still looking for more ways to speed up your website. And have questions? Feel free to contact us at [email protected]