Table of Contents
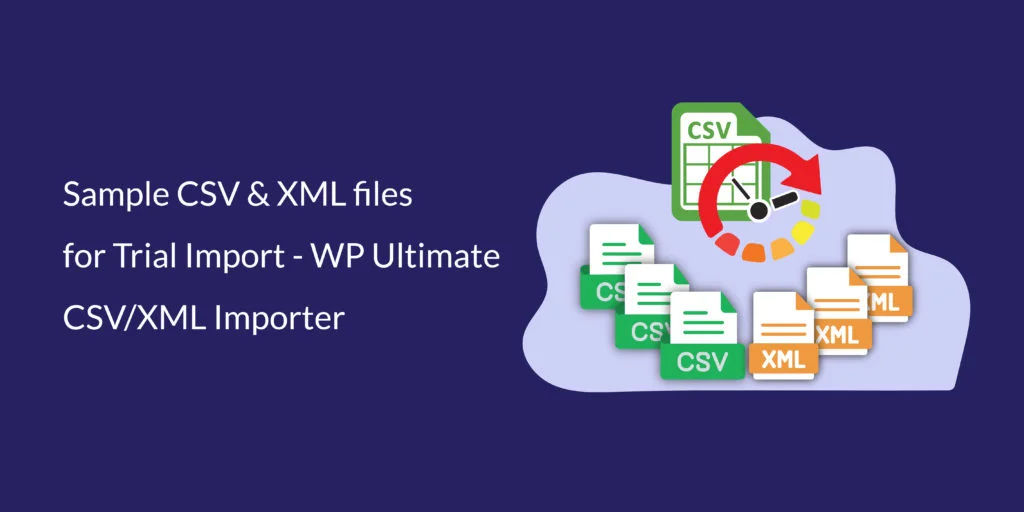
When you’re exploring a new import tool, the first step is often figuring out how your data should be structured. That’s why we’ve prepared sample CSV and XML files for most of your use cases, so you can use them to try out in WP Ultimate CSV/XML Importer.
These files give you a ready-made starting point, so you can test the plugin’s features without having to prepare your own data from scratch. Whether you want to import posts, pages, custom fields, WooCommerce products, or users, our sample files help you understand the required format and import process.
In this article, we’ll share the sample files you can download, explain what’s inside them, and show you how to do the import with our plugin.
WordPress CSV Import
The plugin supports CSV file types to import data into WordPress. You can create a CSV file with records of any post type, like posts, pages, products, orders, users, coupons, and more. When preparing your CSV:
- Ensure the values in each column are in proper format.
- Refer to the sample CSVs provided in this blog for guidance on how to add values in the proper format for specific field types like ACF repeater, JetEngine CCT fields, etc..
- After preparing your CSV file, validate it with a tool like CSV lint.
- Always save your file in UTF-8 format to avoid encoding issues during import.
Please note that not only CSV files, our plugin also supports other formats like TSV, Excel, and Google Sheets.
Steps to import a CSV file to WordPress with WP Ultimate CSV Importer
WP Ultimate CSV Importer offers simple ways to bring in your CSV file data into WordPress. By following these 3 simple steps, you can successfully import CSV into WordPress:
- Step 1: Upload the prepared CSV file inside the plugin’s ‘import/update’ area. The plugin supports multiple upload options: upload from desktop, ftp/sftp file upload, external file url, and locate a file from your server. Once the file is uploaded, configure the post type(posts, pages, or any custom post type) you want to import the CSV records. You’ll also need to select the import type, whether it is a fresh import or an update to available content.
- Step 2: Match the columns in your CSV with the corresponding WordPress fields. You can use either the drag and drop or the advanced(dropdown) method to complete your field mapping. The advanced field mapping area provides many options to customize your import, like field data merging, custom functions, and AI prompts for content generation. Configure the import filters at the end of mapping page to extract and import only the records you want. You can refer to the documentation for more details on using the import filters. Once done, save the mapping with a name for future use and proceed.
- Step 3: Configure how you want to handle your media files when importing in the first section of the page. Then scroll down to configure import settings. WP Ultimate CSV Importer gives you the flexibility to make your imports smoother, faster, and safer with features like rollback, maintenance mode, and iteration processing(chunk imports). Once everything is configured, hit import, and your CSV records will be successfully imported into WordPress. Learn more about importing a CSV File into WordPress with WP Ultimate CSV Importer here.
WordPress XML import
When you export content from WordPress using the default export tool, the data is saved in an XML(WXR) file. This file contains structured information about your site, including posts, pages, comments, categories, tags, and more. Each piece of content is enclosed in specific XML tags, which makes the data organized but not always easy to work with. With WP Ultimate CSV Importer, you are not limited to the default export. The plugin allows you to export any type of WordPress content with advanced filtering options, so you can export exactly what you want, not everything at once.
To help you get started, we’ve provided sample XML files below. You can download them and try importing them into the plugin to see how it works.
How to export XML with the WP Ultimate CSV Importer
Follow these steps to export XML with WP Ultimate CSV Importer:
- Navigate to the export tab in the WP Ultimate CSV Importer plugin.
- Choose a post type from the lists. If you want to export Products, select WooCommerce Products, or if you want to export any custom posts, choose Custom posts and select a custom post name from the dropdown.
- Insert a file name and select the file type here as XML.
- Configure advanced export settings like filters, records split, and scheduling features(optional).
- Hit export and click download to save the post type data as an XML file.
In this way, you’ll get the XML file. Both the import and export steps are the same for CSV and XML types, but the only difference is the file type.
Quick Tip: If you didn’t find a sample file here for your post type, just follow this. Create a record in that post type, export it using our plugin, and you’ll have a ready-made sample file to use for testing the imports.
How to Import an XML file into WordPress
The import steps are common for all the file formats. To import an XML file:
- Upload the file to WP Ultimate CSV Importer.
- Configure the post type and import type.
- Match the XML columns with the appropriate WordPress fields.
- Configure media and import settings.
- And finally Import.
It’s that simple.
WP Ultimate CSV Importer Supported Plugins
WP Ultimate CSV Importer supports many of the most popular WordPress plugins, making it easier to migrate their data. Some of the supported WordPress plugins are:
- JetEngine
- Toolset Types
- MetaBox
- ACF (Free & Pro)
- WooCommerce
- WPML
- Polylang
- YOAST SEO
- RANKMATH SEO
- AIOSEO
- Pods
- CFS
- SCF
- CMB2
- Events Manager
- NextGEN Gallery
- WP Job Manager
- And much more on the list.
Get to know all the supported plugins lists here, or contact us for any details.
Sample Files for WordPress CSV/XML Import
WP Ultimate CSV/XML Importer Pro makes it simple to transfer WordPress data. To help you get started, we’ve prepared sample CSV and XML files for the most common use cases. Below you can download them. Each file contains properly structured data, so you can easily test imports and understand the formatting requirements.
Use these samples to test and practice importing with WP Ultimate CSV Importer.
You can try the test import in any of the following sources we offer:
– WP Ultimate CSV Importer Pro Demo(test in a public WordPress instance, used by our users)
– WP Ultimate CSV Importer Trial(test in private WordPress demo instance, created only for you)

WP Ultimate CSV Importer Pro
Get Ultimate CSV/XML Importer to import data on WordPress faster, quicker and safer.
WooCommerce Import Samples
Moving data to your new WordPress store is easy. WordPress Ultimate CSV/XML Importer Pro plugin supports WooCommerce data import, including Products, Coupons, Orders, and Reviews. Below are the sample files for WooCommerce. (CSV sample file)
Click on the links and download the sample CSV files you want.
- WooCommerce Products Import CSV (Woocommerce Sample product CSV file download – contains product details like title, description, price, SKU, categories, stocks, attributes, etc.,)
- WooCommerce Variations Import CSV (variable product details with parent and child(variations) products)
- WooCommerce Product Bundles Import CSV(Example of bundled product setup)
- WooCommerce Group Products Import CSV(Shows how to group multiple products together)
- WooCommerce Order Import CSV(Sample customer order records.)
- WooCommerce Coupons Import CSV(Contains coupon codes with discount rules.)
- WooCommerce Reviews Import CSV(Example customer reviews with ratings.)
- WooCommerce Customers Import CSV(Sample customer profile and billing/shipping data)
Third-Party WooCommerce Extensions
- Yith WooCommerce Order Tracking Import(Sample data for adding order tracking codes)
- PPOM WooCommerce Order Import CSV(Sample orders with PPOM fields)
Download the Sample XML files below:
- WooCommerce Variations Import XML(sample variable products data in XML format)
- WooCommerce Product Bundles Import XML(Sample bundled product data)
Events Manager Import
The WordPress Ultimate CSV/XML Importer Pro plugin supports the Events Manager Plugin. You can import the custom post-types like events, locations, recurring events, and bookings. Also, you can import events manager categories and tags.
- Events Import CSV(example event records with title, description, date, time, day, location, and other details)
- Events Import XML(example event records in xml format)
- Recurring Events CSV(sample recurring events in csv)
- Recurring Events XML(sample recurring events in xml)
- Event Location CSV(example venue/location details in csv)
- Event Location XML(example venue/location details in xml)
- Event Categories Import CSV(categorization samples for events in csv)
- Event Categories Import XML(categorization samples for events in xml)
- Event Tags Import XML(sample tags for events in xml)
Multilingual Pages, Posts, and Products Import Samples
If you’ve built a multilingual website using any of the plugins like WPML, qTranslateX, and Polylang, then our importer supports importing data into them. Import translated data in many languages via CSV or XML. Engage the audience worldwide and get more visits to your website. WP CSV/XML importer supports importing translated data of posts, pages, custom post types, and WooCommerce.
Sample CSV and XML files are given below
- WPML Sample CSV(csv with language and translated post fields)
- WPML Sample XML(xml with language and translated post fields)
- Polylang with WooCommerce Product CSV(sample multilingual product records)
Sample CSV & XML for SEO fields Import
Millions of websites created using WordPress are getting higher ranks in search results with the help of smart WordPress SEO plugins. Due to the increased demand to boost the rankings of websites, they are used by many WordPress administrators across the globe. Smart SEO WordPress plugins are available for free at WordPress.org.
WP Ultimate CSV/XML Importer integrates with these SEO plugins, so importing the SEO meta fields’ data becomes easier. The plugin supports the top 3 SEO plugins such as Yoast SEO, RankMath SEO, and All in One SEO plugin. You can import these plugin fields and their metafield data using WordPress CSV/XML Importer Pro.
Download sample files for data import to SEO fields.
- Yoast SEO Import Sample CSV(Contains yoast fields like meta titles, descriptions, focus keywords, etc.,)
- Yoast SEO Import Sample XML(contains meta titles, descriptions, and focus keywords, etc., in xml format)
- All In One SEO Import CSV(sample AIOSEO meta fields)
- All In One SEO Import XML(sample AIOSEO meta fields in xml)
- RankMath SEO Import CSV(example RankMath fields like focus keyword, schema, etc.,)
NextGEN Gallery Import Samples
The CSV/XML Importer offers support for the free version of NextGEN Gallery. If you have existing galleries in the NextGEN Gallery plugin, you can import new images into that gallery using the WordPress CSV/XML Import plugin. You can import images along with the post metadata and relate those images to the corresponding Post, Page, or Custom Posts.
Download the below sample files for NextGEN Gallery import.
- NextGEN Gallery Import CSV(example post fields with gallery IDs)
- NextGEN Gallery Import XML(example post fields with gallery IDs in xml)
WP Ultimate CSV Importer Pro
Get Ultimate CSV/XML Importer to import data on WordPress faster, quicker and safer.
Custom Fields Import CSV & XML Samples
Add custom fields to extend your default WordPress post type or include them inside the Custom Post Type. WP Ultimate CSV Importer supports importing data for the default custom fields and custom fields created with other plugins. It supports custom field plugins like JetEngine, ACF(Free & Pro), Pods, Toolset Types, CMB2, CCTM, and default WordPress custom fields. Custom Fields assigned for the Posts, Pages, Custom Posts, WooCommerce Products, Users, Categories, Tags, and Custom Taxonomies can be imported.
Get samples below,
- ACF Custom Fields Import CSV (sample post with acf meta fields)
- ACF Custom Fields Import XML (sample post with acf meta fields in xml)
- ACF Repeater Fields CSV (example repeater field structures)
- ACF Repeater Fields XML (example repeater field structures in xml)
- ACF Flexible Content Import CSV (sample flexible layouts with content blocks)
- Toolset Types Import CSV (basic Types custom fields)
- Toolset Types Import XML (basic Types custom fields in xml)
- Toolset Types Repeater Field Sample CSV (example repeater field and values)
- Toolset Types Repeater Field Sample XML (example repeater fields and values in xml)
- Toolset Types Intermediate Sample CSV (example intermediate posts csv)
- Toolset Types Intermediate Sample XML (example intermediate posts xml)
- Toolset Types One to One Relationship CSV (example one-to-one relationship fields csv)
- Toolset Types One to One Relationship XML (example one-to-one relationship fields xml)
- Toolset Types Two to One Relationship CSV (example two-to-one relationship fields csv)
- Toolset Types Two to One Relationship XML (example two-to-one relationship fields xml)
- Toolset Types One to Many Relationship CSV (example one-to-many relationship fields csv)
- Toolset Types One to Many Relationship XML (example one-to-many relationship fields xml)
- Toolset Types Many to Many Relationships Import CSV (example many-to-many relationship fields csv)
- Toolset Types Many to Many Relationships Import XML (example many-to-many relationship fields xml)
- JetEngine Meta Box Import Sample CSV (sample meta box fields)
- JetEngine 1 to 1 Relation Import Sample CSV (sample jetengine one-one relation fields)
- JetEngine 1 to many Relation sample CSV (sample jetengine 1 to many relation fields)
- JetEngine Many to Many Relation sample CSV data (sample jetengine many to many relation fields)
- Pods Import CSV (sample pods fields)
- CFS Import CSV (sample cfs fields)
- Meta Box Custom Fields CSV (sample meta box custom fields)
- Meta Box Group CSV (sample meta box group fields)
- Meta Box Field Clone CSV (sample meta box clone fields)
- Meta Box Group Subfield Clone CSV (sample meta box group subfield clone fields and values)
Custom Post Import Samples
WP Ultimate CSV Importer supports all types of custom posts created with default WordPress fields and custom posts created using plugins like Custom Post Type UI, Types, Jet Engine, BuddyPress, LearnPress, Pods, CCTM, CustomPress & default WordPress custom posts.
Get the samples for custom posts below,
- Custom Post Import XML(example of a custom post with title, content, taxonomy, and metadata)
Post & Page Import
WP Ultimate CSV & XML Importer/Exporter plugin offers complete support for the Posts and Pages import export. You can bulk import Posts and Pages with core content and all the attributes to WordPress. WP Import XML plugin lets you import all the important fields data, including images, categories, tags, taxonomies, page attributes, menu orders, featured images, post dates, post status, and more.
Sample data is available for you to download in the form of CSV or XML. (WordPress XML file download)
Download the posts and pages samples below.
- Post Import CSV (All post fields with sample data)
- Post Import XML (All post fields with sample data in xml)
- Page Import CSV (All page fields with sample data)
- Page Import XML (All page fields with sample data in xml)
WP Ultimate CSV Importer Pro
Get Ultimate CSV/XML Importer to import data on WordPress faster, quicker and safer.
Comments Import
WordPress Ultimate CSV Importer Pro Plugin lets you export comments from your old site and import them into the new one. If you have already imported all your post titles in WordPress, the CSV Importer plugin will use the matching title and import all the comments under the individual posts.
You can download the comments sample below,
- Comments Import CSV sample (example comments with author, email, and post references)
(Note: Replace sample post titles with your own site’s post titles before importing to ensure correct mapping)
WP Customer Reviews Import Samples
The WordPress Ultimate CSV/XML Importer plugin supports WP Customer Reviews field data import and export. You can import bulk user reviews with meta field information like review content, rating, business name, review format, address data, and more.
- WP Customer Reviews Import CSV Sample (example reviews with rating, reviewer details, and meta fields)
Users Import CSV & XML samples
Import or update all the default User fields data in bulk with ease. WordPress CSV/XML Import plugin supports import & export for the WooCommerce plugin generated fields (billing and shipping information fields) data along with default wp user fields. It also supports third-party custom field plugins like WP-Members. So you can import data into the member meta fields.
Below are the CSV & XML sample file downloads.
- Users Import CSV (example user records)
- Users Import XML (example user records in xml)
- Users with WooCommerce billing & shipping data CSV (sample WooCommerce customer profiles)
CSV & XML for Categories, Tags & Taxonomies Import
Using Ultimate CSV & XML Importer, import/update, and export your Categories, Tags, and Custom Taxonomies. You can import and update Meta fields data like slug, description, image, and more.
Support for import/export of the categories, tags, and taxonomies, along with custom field data created using plugins like JetEngine, Toolset, Pods, and ACF.
Sample content is available to download in the CSV & WordPress XML formats below.
- Category Import CSV (example categories with name slug, and description)
- Category Import XML (example categories with name slug, and description in xml)
- Tags Import CSV (sample tags data)
- Tags Import XML (sample tags data in xml)
- Taxonomies Import XML (sample custom taxonomy structures)
If you are using the other importer and exporter plugins, the above CSV, and XML files might not help you with the evaluation. All the sample files are prepared to test only with the WP Ultimate CSV Importer plugin.
If the CSV or XML header names are the same as the WordPress field names, then the WordPress CSV Importer Plugin will auto-map fields during import. You can also create with any header names, but make sure to map correctly during import configuration.
BBPress Import Samples
- BBPress Forum Import CSV (example forum records)
- BBPress Topic Import CSV (sample topics under forums)
MemberPress User Import Samples
- MemberPress User Import CSV (example membership user data)
LearnPress Import Samples
- LearnPress Courses Import CSV (sample course structure)
- LearnPress Quizzes Import CSV (example quiz data)
- LearnPress Lessons Import CSV (lesson content samples)
- LearnPress Orders Import CSV (sample course orders)
- LearnPress Questions Import CSV (example quiz questions)
Navigation Menu Import Samples
Import menus to your website using CSV/XML Importer. Simply export them with our plugin to move menu items to the new website.
Download the sample below for import testing:
Sample CSV for Navigation Menu(example WordPress menu structure)
Basic requirements for CSV
- The CSV file needs to be in UTF-8 format.
- Any delimiters can be used but each cell needs to be properly escaped.
- The Importer can handle any large CSV files based on your server configuration.
- The headers can be of your choice. To automate mapping(relating the CSV headers with their corresponding WordPress fields), keep the CSV file headers the same as WordPress field names.
Basic XML Files requirements
- The XML file needs to be in a valid format. You can do the xml validation here.
- The plugin can handle any large XML files based on your server configuration.
- The headers can be of your choice, but you have to map the right header with WordPress fields in the mapping section. If you keep the XML file headers the same as the WordPress field slug name, the fields will get auto-mapped on the mapping page.
Frequently Asked Questions (FAQ)
1. What should a CSV file look like?
CSV ((Comma Separated Value) files are commonly used for storing tabular data in plain text format with a list of data separated by commas. It generally stores tables and spreadsheet information of larger databases. The list of data in the plain text file will be organized in the spreadsheets. CSV files can easily be exported and imported to store/retrieve data from/to the tables.
For example,
Name, Mailid, DOB, Address
Tanny, [email protected], 12/03/1978, Sample Address
Benno, [email protected], 11/09/1972, Example Address
The CSV files can be opened in any text editor, but most of them use the Microsoft Excel sheet.
2. How do I create a CSV file format?
Creating a CSV (Comma-Separated Values) file format is relatively simple. The CSV file contains the column header and subsequent rows for the data to import. Every column header explains what the data files are all about. Every row is represented by a new line and provides the values corresponding to each column header. Each field of the row is separated by commas.
Follow these steps to create a CSV file:
1. Open a Text Editor: You can use any text editor, such as Notepad (Windows), TextEdit (Mac), or any code editor like Visual Studio Code, Sublime Text, etc.
2. Enter Data: Input your data in a tabular format, with each cell separated by a comma and each row separated by a new line.
For example,
Name, Age, City
John, 25, New York
Alice, 30, London
Bob, 28, Paris
Save as CSV: Save the file with a .csv extension. For example, data.csv.
Below are some basic guidelines for creating a CSV file:
Specify Delimiter (Optional): By default, the comma is used as a delimiter. However, if you want to use a different delimiter (e.g., semicolon), you can do so. Ensure that you’re consistent with the delimiter throughout the file.
Quoting Values (Optional): If your data contains special characters (like commas) or whitespace, you might need to quote the values. Usually, quotes (“) are used to enclose such values. That is, if your file already had a comma or space in your data, then you can use the double Quotes to differentiate them.
For example,
Lead, Email, Notes
Henry, [email protected], “Received email, but No reply”
William, [email protected], “Replied to email, and said interested in the project”.
Headers (Optional): Include headers at the beginning of your CSV file to describe each column. Headers make it easier to understand the data. Ensure that each header corresponds to the appropriate column.
Save and Close: Once you have entered your data, save the file and close the text editor.
That’s it! You have created a CSV file. You can now open it with spreadsheet software like Microsoft Excel, or Google Sheets, or use it in your programming environment for data analysis or processing.
3. How do I format a CSV file to import?
Formatting a CSV file for import typically involves ensuring that the data is structured correctly and follows specific guidelines to be successfully imported into the target system, such as WordPress. Each CSV file should have a specific structure depending on what you’re importing (users, posts, etc.). Ensure that column headers match the fields in WordPress.
Here’s a general guide on formatting a CSV file for import:
– Headers: Include headers at the top of the CSV file to define each column’s content. These headers should accurately describe the data contained in each column.
– Delimiter: Choose a delimiter to separate the values within each row. The comma (,) is the most common delimiter, but other options like semicolon (;) or tab (\t) can be used depending on your requirements.
– Quoting Values: If your data contains special characters (like the delimiter itself), whitespace, or line breaks, you may need to enclose values within quotes (“). This helps the importer distinguish between actual data and separators within the data.
– Consistent Structure: Ensure that each row of data has the same number of columns and that the data in each column adheres to the expected format. Inconsistent structure can cause errors during the import process.
– Encoding: Save the CSV file with an appropriate character encoding to support special characters and ensure compatibility with the import tool. UTF-8 encoding is commonly used and recommended.
– Clean Data: Remove any unnecessary whitespace, special characters, or formatting from the CSV file to prevent errors during import.
– Handle Empty Values: If a column doesn’t have data for a particular row, leave it empty or use a placeholder value as needed. Ensure that the CSV file handles empty values consistently throughout.
Following these guidelines will help ensure your CSV file is properly formatted for import into WordPress.
4. How do I import a CSV file into WordPress?
1. Format the CSV File: Ensure that your CSV file is properly formatted with the required data for import. WordPress supports importing various data types, including users, posts, and custom post types.
2. Access the Import Tool: In your WordPress admin dashboard, go to Tools > Import.
3. Choose CSV Importer: If you haven’t installed the WP CSV Importer plugin yet, you may need to install it.
4. Run the Importer: Navigate to the WP CSV importer plugin, and browse the desired CSV file. Follow the prompts to select your CSV file and map the CSV columns to the corresponding WordPress fields. Then, run the import process.
All the user data provided in the CSV file
5. How do I import users from a CSV file into WordPress?
– Prepare a CSV file with user data, including usernames, emails, and other required fields.
– Install the WP CSV Ultimate Importer plugin.
– Browse the prepared CSV with User details
– Select the content type as Users from the drop-down
– Map the field columns and follow the on-screen instructions
– Finally, click on Import
6. How do I import custom post type CSV in WordPress?
Importing a custom post type is the same as importing posts, pages, etc with the WP CSV importer plugin. To import custom post-type data from a CSV file into WordPress, you can follow these general steps:
– Prepare the CSV for your custom post type. Ensure that the CSV file includes all the necessary data fields for each custom post type entry.
Head on to the WP CSV importer plugin -> Import/Update
– Browse the CSV for custom post type, and choose the content type as your desired custom post type that was listed in the drop-down.
– Follow the on-screen instructions and click on Import.
Now the custom post type csv has been imported into your WordPress site.
7. Can I create a CSV file without Excel?
– Use a text editor like Notepad or code editor to create and edit CSV files.
– Provide the column headers and subsequent rows for the data corresponding to columns
– Separate data with commas (,), and use new lines for each row.
– Ensure you have saved the file with the .csv extension. For example (Lead.csv)
Now your CSV file has been created in NotePad.
8. How Do I fix CSV formatting?
Fixing CSV formatting involves identifying and resolving any issues with the structure or content of the CSV file. Here are some common steps to fix CSV formatting issues:
– Check for missing or extra commas.
– Ensure consistency in quoting values if necessary.
– Verify that the CSV structure matches the import requirements of your target system.
– Confirm that the headers at the top of the CSV file accurately describe the data in each column. Headers should be clear, concise, and correctly spelled to avoid confusion during import.
– If your data contains special characters (like commas), whitespace, or line breaks, ensure that values are properly enclosed within quotes (“). This prevents the importer from misinterpreting the data structure.
9. How do I import an XML file into WordPress?
You can import an XML file into WordPress Using the WordPress built-in tools and Using WP CSV importer Plugin.
Using WordPress Built-in Tool
Importing an XML File into WordPress involves the below simple steps:
– Use the WordPress Importer tool to import XML files.
– Access it via Tools -> Import in the WordPress admin dashboard.
– Here click on Install WordPress -> Run Importer
– Browse the XML file you want to import and click on Upload File and Import.
Using CSV Importer Plugin
– Install and activate the CSV importer plugin
– Browse the XML file of your post, page, custom posts, etc
– Choose the content type, Map the fields, and configure the import process
– Finally click on Import. Your XML file has been successfully imported into your WordPress site.
10. How do I create an import file in WordPress?
You can create import files manually using text editors or export data from other systems in CSV or XML format.
11. What is an XML file in WordPress?
XML files are structured data files often used for exporting and importing content in WordPress.
They contain data in a hierarchical format.
12. How do I download an XML file from WordPress?
You can download an XML file from WordPress in two ways.
With WordPress’s Built-in Export tool
– You can export content from WordPress into an XML file using the Export tool located in Tools > Export.
– Choose the content type you want to export and click on Export File.
– The selected content type(posts, pages, etc.,) has been exported as an XML file in your downloads.
With WP Exporter Plugin
– Install and Activate the WP Exporter plugin
– Access the plugin and navigate to Export
– Choose the content type that you want to export such as posts, pages, Woocommerce products, etc.,
– Provide the file name and choose the file type as XML
– You can also use advanced filters to export the data that meets your business needs.
– Once done click on Export.
13. How do I manually import media into WordPress?
– Media files (images, videos, etc.) can be manually uploaded through the Media Library in the WordPress dashboard.
To import media files from one site to another manually, follow the below steps
– Usually, the media files of wordpress are saved in the wp-content folder.
– Head on to the folder in your local computer where your wordpress root file
– For example
– Local Disk C:-> Xampp-> htdocs->wordpress->wp-content
– On the wp-content folder, select uploads.
– In the uploads folder, the media files are saved as separate folders with their respective years.
– To import the media files of 2024, then select the 2024 folder.
– Choose the sub-folder in which your desired media file is located.
– Now copy the respective folder.
– On the New WordPress site, head on to the wp-content folder as before
– Navigate to the uploads folder and paste the media folder (copied from the old wordpress site).
– Now your media files have been successfully uploaded in your new site flawlessly. You can also use an FTP client like File Zille to download the file and import it into the new site.
14. What is the difference between XML File and XML Document:
An XML file is a physical file stored on a filesystem, containing XML markup.
An XML document refers to the contents of an XML file, including the structured data it represents.
Final Note
All sample CSV/XML files provided here are tested with WP Ultimate CSV Importer. They are designed for evaluation and may not work with other importer/exporter plugins. To learn how to import these sample files, visit our WordPress Ultimate CSV/XML Importer documentation and try our Live demo.
If you want a sample CSV or XML for any other use cases or if your add-on is not in the list of supported 3rd party add-ons of WordPress Ultimate CSV/XML Importer, you can write to us at [email protected] for customization.
WP Ultimate CSV Importer Pro
Get Ultimate CSV/XML Importer to import data on WordPress faster, quicker and safer.