Product synchronization is the core feature of WooCommerce to Shopify Sync. It ensures that your product data remains consistent across WooCommerce and Shopify stores, eliminating the need for manual updates, repeated imports, or data mismatches.
With flexible sync directions, support for multiple product types, and detailed control over what gets synced, W2S lets you confidently manage one store or both while keeping your product catalog aligned at all times.
Product Sync Overview #
Product sync works through secure, API-based communication between WooCommerce and Shopify. Once configured, the plugin compares products on both platforms and performs create, update, or delete actions based on the rules you define.
You can use product sync for your initial product migration, ongoing catalog updates, inventory and price synchronization, and managing products across multiple sales channels.
Supported Product Types #
Free Version
The W2S Sync free version supports the most commonly used product types and is ideal for basic synchronization needs.
It supports:
- Simple products with a single price and inventory
- Variable products with attributes and variations
Pro Version
The Pro version extends product sync for more complex and large-scale catalogs. In addition to all free features, it supports:
- Full grouped product sync with parent–child relationships
Product Data Sync #
When products are synced, W2S transfers all essential data needed to keep both platforms consistent.
Basic Product Information
This includes product name, short and long descriptions, SKU, and publication status. The SKU is especially important, as it’s the primary identifier used to match products across platforms.
Pricing and Inventory
Pricing and stock levels are synced accurately to prevent mismatches and overselling. This includes regular and sale prices, stock quantity and stock status, backorder settings, and inventory management options.
Product Media
Product images (featured images) are synced in the correct order. You can sync variable products with this plugin.
Product Organization
Categories and tags help maintain structure and discoverability:
- WooCommerce categories are mapped to Shopify collections
- Product tags are synced to keep filtering and search behavior consistent
Attributes and Variations
For variable products, attributes and variations are synced completely. Each WooCommerce variation becomes a Shopify variant, including its price, SKU, stock level, and image.
Additional Product Data
Where available, W2S also syncs:
- Weight and dimensions
- Vendor information
- Barcode identifiers such as EAN, UPC, and GTIN
Sync Directions #
- WooCommerce → Shopify
This mode pushes products from WooCommerce to Shopify. It’s commonly used when WooCommerce is your primary store or when migrating products to Shopify while continuing to manage them in WooCommerce. You can control whether products are created, updated, or deleted on Shopify based on changes in WooCommerce.
- Shopify → WooCommerce
This mode pulls products from Shopify into WooCommerce. It’s useful when Shopify is the source of truth or when importing products into a WooCommerce-based site. As with other sync modes, you can choose which actions are allowed.
- Bidirectional Product Sync
Bidirectional sync keeps products aligned in both directions automatically. Changes made in WooCommerce are reflected in Shopify, and updates in Shopify sync back to WooCommerce. This mode is ideal for stores that actively manage products on both platforms.

Variable Products #
How Variable Products Sync
WooCommerce variable products are converted into Shopify products with multiple variants. Each WooCommerce variation is mapped to a Shopify variant using attributes such as size, color, or material. This ensures pricing, inventory, and options behave consistently across both platforms.
SKU Requirements #
Why SKUs Are Required
SKUs are mandatory for product synchronization and act as the primary identifier for matching products between WooCommerce and Shopify. They prevent duplicates, ensure accurate updates, and allow inventory to sync reliably.
Handling Products Without SKUs
- Free version: Products without SKUs must be updated manually before syncing
- Pro version: If you are using the pro version, W2S can automatically generate unique SKUs using the product name, reducing manual work and preparation errors
Sync Operations #
Here, we define what actions you can perform when syncing Products between your stores.
Create
Creates new products in the destination store. This is typically used during initial migrations or when adding new products.
Update
Updates existing products when changes are detected. This keeps pricing, inventory, and content aligned during ongoing operations.
Delete
Removes products from the destination store when they’re deleted on the source store. This option should be used carefully, especially on live production stores.

Product Mapping #
How Products Are Matched
Products are primarily matched using SKUs. For previously synced products, stored product IDs are used. Product titles are used only as a fallback when no stronger match is available.
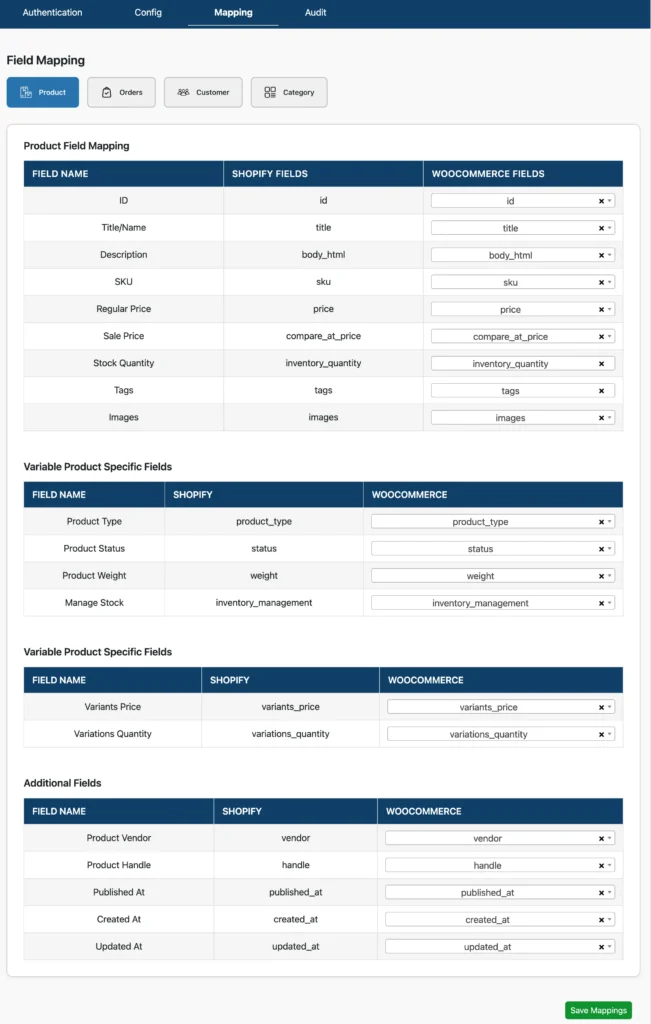
Viewing Product Mappings
You can view product fields mapping under the Mapping tab, where each WooCommerce product field is linked automatically to its corresponding Shopify product field. As the fields are auto-mapped, you don’t have to change anything unless needed.
How to Sync Products from WooCommerce to Shopify #
This section walks you through the exact steps to sync products from WooCommerce to Shopify using WooCommerce to Shopify Sync.
Step 1: Complete Authentication
Before syncing products, make sure both platforms are connected:
- WooCommerce shows a Connected status using REST API credentials
- Shopify shows a Connected status using the Admin API access token
If authentication is not complete, product sync will not run. Follow this guide to know how to authenticate both WooCommerce and Shopify in the W2S Sync plugin.
Step 2: Choose the Sync Direction
Go to Woo-Shopify → Config. Under the ‘Choose Sync direction’, select WooCommerce to Shopify. This sets WooCommerce as the source store and Shopify as the destination. Any product changes detected in WooCommerce will be pushed to Shopify based on your configuration.
Step 3: Select Sync Timing
Under Select Timing for Auto Sync, choose when the product sync should run.
- On Save Sync
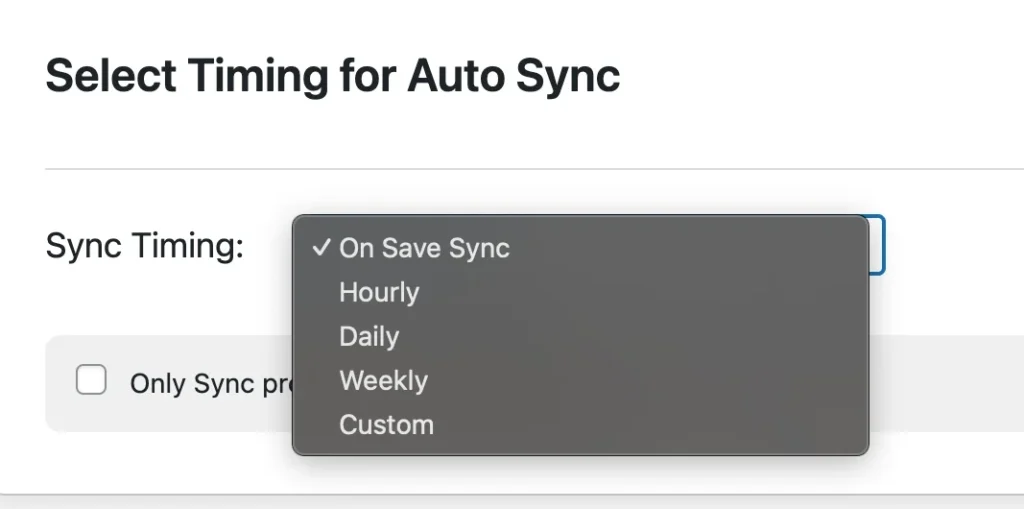
Products are synced instantly or at the time you click the Save Configuration button. - Schedule Sync
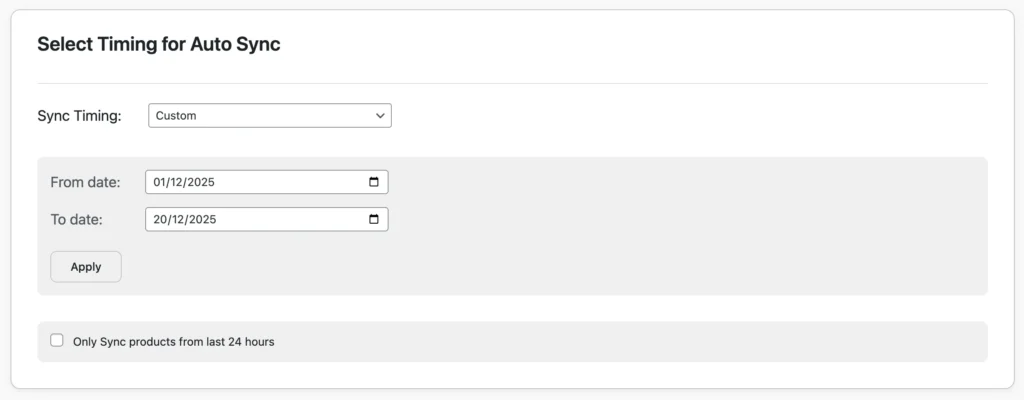
Choose other sync timings like hourly, weekly, and daily to schedule the sync to run periodically. - Custom Sync
Configure from and to dates here to sync products created only during that particular period.
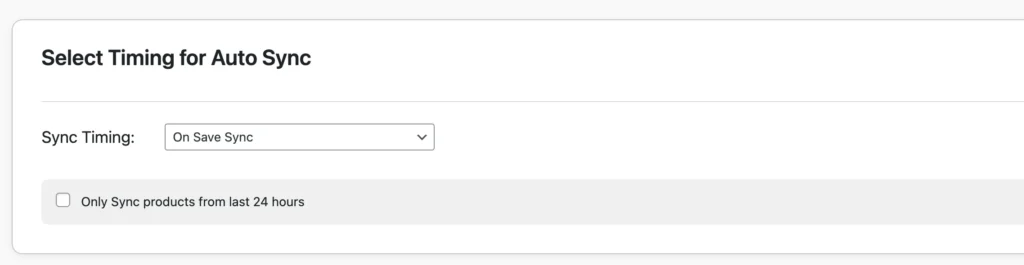
(Optional)
- Enable only syncing products from the last 24 hours if you want to limit syncing to recently modified products. This is useful for testing or controlled updates.
Note: Before sync, make sure you have added a cron entry in your WordPress.
Step 4: Enable Product Sync Actions
Under Select Modules to Sync, locate the Products module and enable it.
Choose the actions you want to allow:
- Create – Creates new products in Shopify when they exist only in WooCommerce
- Update – Updates existing Shopify products when WooCommerce product data changes
- Delete – Deletes products in Shopify when they are removed from WooCommerce
You can enable one action depending on your use case. For first-time syncs, Create is typically enabled. For ongoing syncs, Update is commonly used.
Step 5: (PRO feature) Configure Advanced Product Sync
Click Advanced Sync under the Products module if you want finer control.
This may include filter options such as:
- Product categories
- Stock status
- Product tags
- Product Status

You can choose one filter option or many with multiple selections, depending on your use case.
If you don’t need advanced rules, you can skip this step.
Step 6: Save Configuration
After selecting the sync direction, timing, and product actions, click Save Configuration. The configuration is now active. From this point onward, product sync will run automatically based on the selected timing and rules.
Step 7: Monitor Product Sync Activity
To verify what happens during sync, go to the Audit tab. Review logs for created products, updated products, skipped products, and errors or warnings (such as missing SKUs).
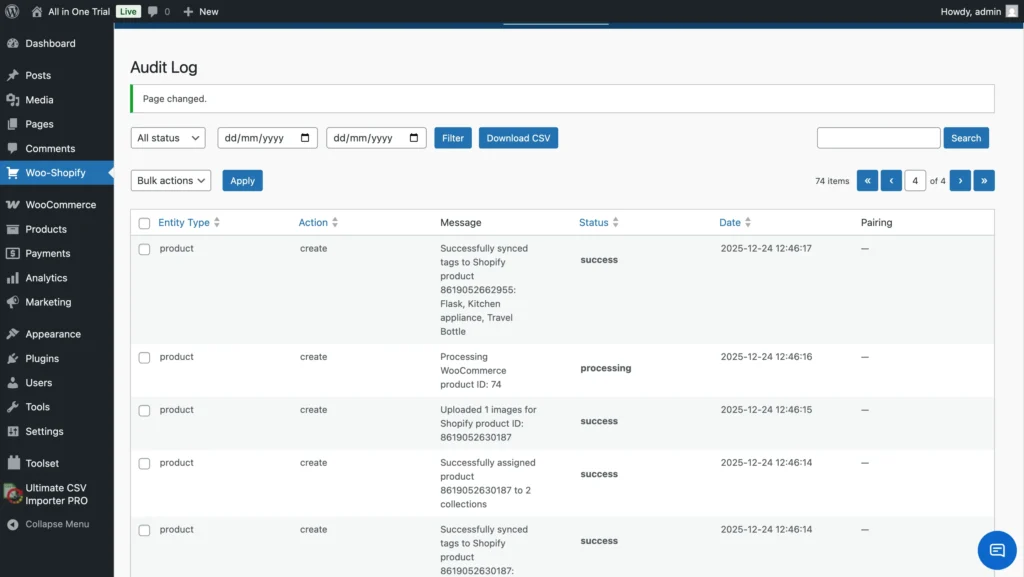
The Audit section is the primary place to understand sync results.
Important Notes
- SKUs are required to match products correctly between WooCommerce and Shopify.
- Products without SKUs will be skipped in the free version
- In the Pro version, SKUs can be generated automatically based on the product name
- Product sync works automatically after configuration
Best Practices #
Before Syncing
- Ensure all products have SKUs
- Back up both stores
- Start with a small test batch before syncing large catalogs
During Sync
- Avoid interrupting active sync processes
- Monitor audit logs
- Watch for warnings or errors
After Sync
- Review product pages on both platforms
- Verify images, prices, variations, and inventory
- Confirm everything matches expectations
Troubleshooting #
Products Not Syncing
Common causes include missing SKUs, incorrect API credentials, unpublished products, or incorrect sync direction settings.
Duplicate Products
Duplicates usually occur when SKUs are not unique or when Create is used instead of Update for existing products.
Missing Images or Variations
Check image formats, file sizes, variation SKUs, and audit logs for detailed error messages.
Related Documentation #
- Order Synchronization
- Customer Synchronization
- Sync Configuration
- Field Mapping
- Frequently Asked Questions
Support #
If you need help with product synchronization, refer to the FAQ, review the troubleshooting guide, or contact the Smackcoders support team for assistance.