Order synchronization in WooCommerce to Shopify Sync (W2S) lets you copy orders between WooCommerce and Shopify in a controlled and predictable way. This guide explains how order sync works, what order data is transferred, supported sync directions, available filters, limitations, and best practices to ensure accurate results.
W2S is designed to safely create orders without altering existing financial records. To avoid conflicts, duplicate updates, or accounting issues, order sync is intentionally limited in scope and behavior.
How Order Synchronization Works #
Order synchronization in W2S Sync is creation-based. This means the plugin creates new orders on the destination store based on orders created on the source store.
Once order sync is enabled and configured:
- W2S listens for new orders based on the selected sync direction and timing
- When a new order is detected, the plugin prepares the order data
- The order is then created on the destination platform using API-based communication
To keep order history accurate and safe, W2S follows these rules:
- Orders are synced only once, at the time of creation
- Existing orders are never updated
- Payment, fulfillment, and financial data are not overwritten
- Sync behavior is safe for live production stores
This approach ensures that historical order records remain intact and prevents accidental changes to completed or paid orders.
Supported Sync Directions #
1. WooCommerce → Shopify
Orders created in WooCommerce can be synced to Shopify. This is commonly used when WooCommerce is the primary checkout platform, and Shopify is used for order visibility, reporting, or fulfillment workflows.
Common use cases
- Migrating historical WooCommerce orders to Shopify
- Keeping Shopify aware of WooCommerce sales
- Using WooCommerce as the main checkout system
How Sync Orders from WooCommerce to Shopify (Step by Step)
This section explains how orders created in WooCommerce are synced to Shopify using WooCommerce to Shopify Sync.
Step 1: Choose the Sync Direction
Go to Woo-Shopify → Config and under Choose Sync direction, select WooCommerce → Shopify. Only orders created in WooCommerce will be considered for syncing.

Step 2: Select Sync Timing
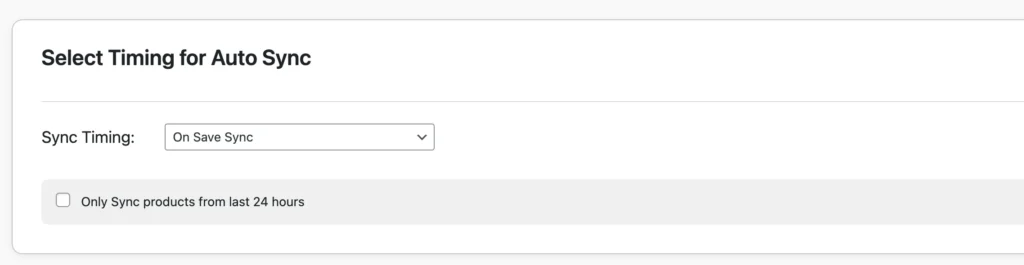
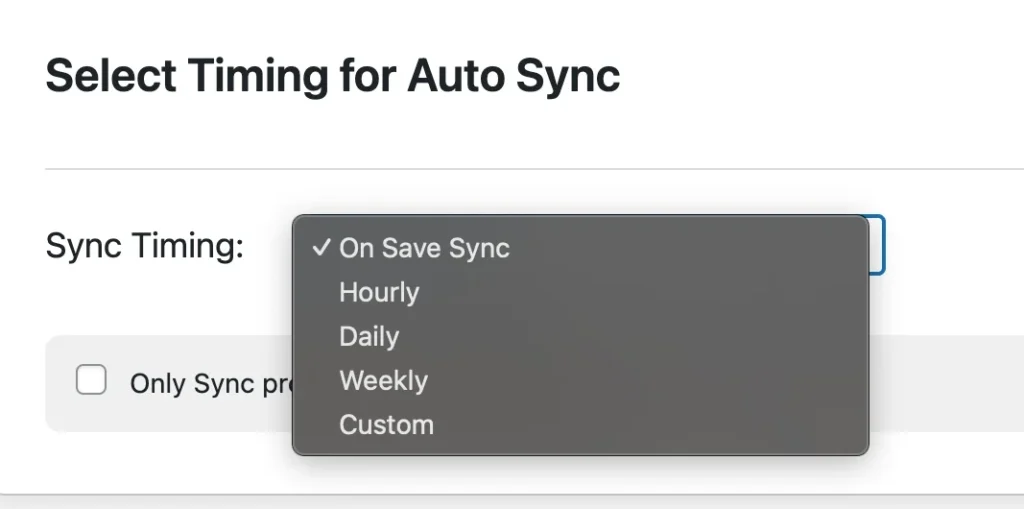
Under Select Timing for Auto Sync, choose when order sync should run:
- On Save Sync
Orders are synced when the configuration is saved. - Scheduled Sync
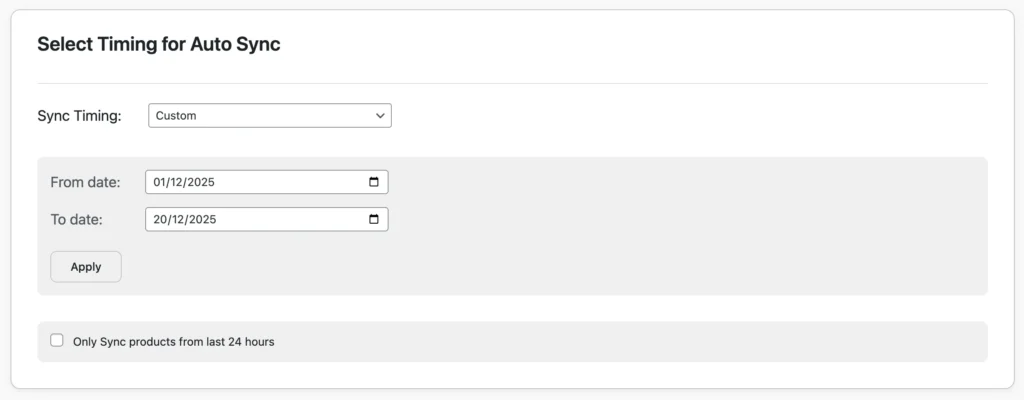
Choose hourly, daily, or weekly to sync orders periodically. - Custom Sync
Set a specific date range to sync orders created during that period. This is useful for historical order migration.
Note: Ensure a cron entry is configured in your WordPress setup before sync.
Step 3: Enable Orders Module and Actions
Under Select Modules to Sync, locate the Orders module and enable it.
Choose one action, such as Create or Delete.
- Create – Creates new orders in Shopify when they are created in WooCommerce. Order sync in W2S is creation-only.

Step 4: (PRO Feature) Apply Order Filters
Click Advanced Sync under the Orders module to apply filters. Currently, you can sync orders based on their status.
- Enable WooCommerce Status.
- Select one or multiple statuses from the dropdown
- Click Apply

This controls which orders are transferred and avoids syncing unnecessary or unwanted records.
Fulfillment Service Mapping
When syncing orders from WooCommerce to Shopify, W2S can automatically assign a fulfillment service to each order at the moment of sync. This eliminates the need to manually route orders to a fulfillment provider in Shopify after each sync run.
In the Orders Filters panel, scroll to the Fulfillment Settings section. Select your fulfillment provider from the Fulfillment service dropdown:
| Option | What It Does | When to Use It |
| manual | No automated fulfillment assignment | If you fulfill orders yourself or manage routing separately in Shopify |
| shopify | Assigns to Shopify Fulfillment Network | If you use Shopify’s own fulfillment network (SFN) |
| contrado | Routes to Contrado | If you use Contrado for print-on-demand fulfillment |
| Custom | Enter your own fulfillment service handle | For any third-party logistics provider (3PL) or custom fulfillment service registered in Shopify |
If you select Custom, a Custom handle field appears. Enter the handle of your fulfillment service exactly as it is registered in your Shopify account.
Click Save fulfillment settings before closing the panel.
Once saved, W2S automatically sets two Shopify fields on every subsequent order sync:
- fulfillment_service – Set on each line item. Tells Shopify which provider handles that product.
- requested_fulfillment_service_id – Set on the shipping line. Tells Shopify which fulfillment location or service to route the whole order to.
Important: Fulfillment service mapping applies to all order syncs that run after it is configured. Orders that were synced before this setting was saved are not retroactively updated.This feature is available in W2S Pro only.
Step 5: Save Configuration
After selecting the sync direction, timing, and order options, click Save Configuration. The configuration becomes active immediately.
From this point onward, any new WooCommerce orders that match your configuration will be created in Shopify automatically.
Step 6: Monitor Order Sync Activity
To verify and track order sync results:
- Go to the Audit tab
- Review logs for successfully created orders, skipped orders,
Or warnings or errors (such as missing customers or products).

The Audit section shows information like entity (order), action (create), message, status, and date.
JSON Audit Log Viewer (Pro)
The Audit tab now includes a Payload column alongside the standard log fields. When debug logging is enabled, a View button appears in the Payload column for each synced order. Clicking it opens a read-only modal titled ‘JSON payload’, showing the complete JSON object W2S sent to Shopify for that order.
The payload includes:
- line_items with title, quantity, price, SKU, variant_id, and fulfillment_service per item
- financial_status
- note (shows ‘Synced from WooCommerce Order #[number]’ by default)
- tags (such as woocommerce-sync)
- total_price, subtotal_price, and total_tax
A Copy button in the modal header copies the full JSON to your clipboard. This is useful for sharing with a developer, cross-referencing against what Shopify received, or pasting into a JSON viewer for closer inspection.
How to enable the JSON payload view
Go to the Audit tab and check the ‘Enable Debug Logging’ checkbox at the top of the page, then click Save.
Once enabled, W2S captures and stores the full JSON payload for every subsequent order sync. The Payload column will display a View button for each logged record.
Important: Debug logging only captures payloads for syncs that run after it is enabled. Existing log entries will not have payload data. This feature is available in W2S Pro only.
2. Shopify → WooCommerce
Orders created in Shopify can be synced to WooCommerce. This is useful when Shopify is used for checkout, and WooCommerce is used for centralized order management, reporting, or accounting.
How to Sync Orders from Shopify to WooCommerce (Step by Step)

Step 1: Choose the Sync Direction
Go to the Config tab and choose the sync direction: Shopify → WooCommerce. Only orders created in Shopify will be considered for syncing.
Step 2: Select Sync Timing
Choose when your order sync should run:
- On Save Sync
- Scheduled Sync
Choose hourly, daily, or weekly to sync orders automatically at regular intervals. - Custom Sync
Select a from and to date to sync orders created during that period.
Note: All sync types require a valid cron setup in WordPress.
Step 3: Enable Orders Module and Action
Enable the Orders module from the modules list and choose an action (Create / Delete)
Step 4: (PRO Feature) Apply Order Status Filter
If you’re using the Pro version:
- Click Advanced Sync under the Orders module
- Apply order status filters such as completed, pending, or processing.
Step 5: Save Sync Configuration
After configuring the sync direction, timing, and order options:
- Click Save Configuration
Step 6: Monitor Order Sync Activity
Go to the Audit tab to see the sync status and message if any errors occur.
Note on Audit Log and payload view: The JSON Audit Log Viewer described in the WooCommerce to Shopify section above is available for all sync directions. Enable debug logging in the Audit tab to capture and review the full payload for any order sync.
3. Bidirectional Order Sync
W2S supports bidirectional order creation, allowing orders from both platforms to sync independently. This means:
- Orders created in WooCommerce sync to Shopify
- Orders created in Shopify sync to WooCommerce

Important notes
- Orders are synced only once, at creation time
- Order updates are not synced back and forth
Bidirectional sync is best suited for stores that use both platforms actively but want to keep order records aligned without modifying existing data.
To configure bidirectional sync, visit the Config menu and select Bidirectional Sync from the sync direction.
Order Data That Is Synced #
Order-Level Information
The following order-level details are transferred during sync:
- Order ID (internally mapped for reference)
- Order total
- Currency (synced as-is, no conversion applied)
- Order creation date
- Financial status
Order Items
Each order includes detailed line item information:
- Product name
- SKU (used for matching when available)
- Quantity
- Item price
- Line total
If a product does not exist in the destination store, the order will still sync with the product name and pricing preserved.
Fulfillment Data (Pro)
When Fulfillment Service Mapping is configured in the Orders Filters panel, W2S includes fulfillment routing data in the synced payload for each order:
| Shopify Field | Description |
| fulfillment_service | Set on each line item. Identifies the fulfillment provider responsible for that product. |
| requested_fulfillment_service_id | Set on the shipping line. Routes the entire order to the specified fulfillment location or service in Shopify. |
This data is set automatically at sync time based on your configured fulfillment service. No manual assignment in Shopify is required after the sync runs.
Customer Information
The following customer details are included with each synced order:
- Customer email (primary identifier)
- First name and last name
- Billing address
- Shipping address
Important:
Customer synchronization must be completed before order synchronization. This ensures orders are linked to the correct customer records on the destination platform.
Order Filtering (Pro Feature) #
Filter by Order Status
W2S Pro allows you to filter which orders should be synced based on their order status.
Examples:
- Sync only Processing orders
- Sync only completed orders
- Exclude Cancelled or Refunded orders
Date-Based Order Sync (Custom Sync)
Using Custom Sync, you can sync orders based on a specific date or date range.
You can:
- Sync orders created on a specific date
- Migrate historical orders in batches
- Run controlled, one-time sync operations
This is especially useful during store migrations or phased rollouts.
Fulfillment Service Mapping (Pro)
The Fulfillment Settings section in the Orders Filters panel lets you configure which fulfillment provider is assigned when WooCommerce orders sync to Shopify. Options include manual, shopify (SFN), contrado, and Custom (with a free-text handle field for any 3PL or provider registered in Shopify).
See Step 4 in the WooCommerce to Shopify section above for full configuration instructions.
Order Deletion Sync #
W2S supports order deletion synchronization. If an order is deleted on the source platform, the corresponding order is deleted on the destination platform.
Important
Order deletion is permanent and should be used carefully.
Recommended only for:
- Test or staging environments
- Cleaning up test orders
- Controlled migration scenarios
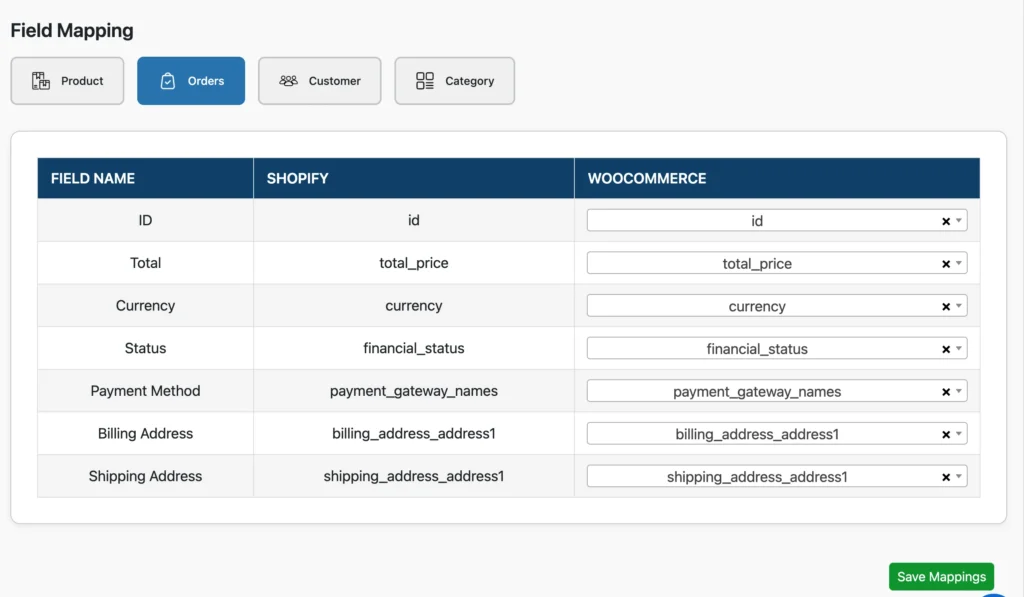
Order Mapping #
W2S maintains internal order mappings. These field mappings are built-in so you don’t have to make any adjustments. You can view order mappings under Mapping → Orders.
Prerequisites for Order Sync #
Before enabling order synchronization, make sure the following steps are completed:
- Products are synced first
- Customers are synced first
- Products have SKUs for better matching
- API connections are verified
- An initial test sync is completed
Skipping these steps may result in incomplete or unlinked orders.
Best Practices #
Before Sync
- Back up both WooCommerce and Shopify stores
- Sync customers and products first
- Test with a small number of orders
- Use filters to limit the sync scope
During Sync
- Monitor the Audit Log
- Avoid interrupting the sync process
- Review logs after each sync run
After Sync
- Verify order totals
- Confirm currency values
- Check customer linkage
- Review synced orders manually
Common Issues and Solutions #
Orders Not Syncing
Possible causes:
- The Orders module is not enabled
- Order status filters exclude the orders
- Customer sync is not completed
- API or permission issues
Check the Audit Log for detailed error information.
Diagnosing Sync Issues with the JSON Payload Viewer (Pro)
If an order syncs but the data in Shopify looks incorrect (wrong line items, missing fields, unexpected financial status), the JSON payload view in the Audit tab shows exactly what W2S sent to Shopify for that order.
To use it:
- Go to the Audit tab
- Find the order entry in the log
- Click the View button in the Payload column
- Review the raw JSON object that was sent to Shopify
- Use the Copy button to share the payload with a developer or compare it against the Shopify order record
Prerequisite: Debug logging must be enabled before the sync runs. Go to the Audit tab, check ‘Enable Debug Logging’, and click Save. The Payload column will show a View button for all subsequent syncs.
Orders Created Without Customers
Cause
- Customer sync was not completed
- Customer email mismatch between platforms
Solution
Sync customers before syncing orders.
Missing Products in Orders
Cause
- The product does not exist in the destination store
- SKU mismatch or missing SKU
Solution
Sync products first and verify SKUs.
Orders Not Routed to the Correct Fulfillment Provider
Cause: Fulfillment Service Mapping is not configured, or the Custom handle entered does not match the fulfillment service handle registered in Shopify.
Solution: Open the Orders Filters panel via Advanced Sync on the Orders module. Select the correct fulfillment service from the dropdown, or enter the exact custom handle as it appears in your Shopify fulfillment service settings. Click Save fulfillment settings, then run the sync again.
Related Documentation #
- Product Synchronization Guide
- Customer Synchronization Guide
- Sync Configuration
- Field Mapping
- Frequently Asked Questions
Support #
If you need help with order synchronization:
- Review the FAQ
- Check the Audit Log
- Contact the Smackcoders support team