Table of Contents
Introduction
In the dynamic world of e-commerce, businesses strive to reach a global audience by offering products and services in multiple languages. WordPress, with its powerful WooCommerce plugin, is a popular choice for building online stores. When it comes to managing multilingual content, Polylang emerges as a versatile solution. However, migrating translations for WooCommerce products using Polylang can be a challenging task. In this blog post, we’ll explore a systematic approach for Polylang Import Products, Variations, Orders, and export them using the Polylang plugin and a CSV importer.
Understanding the Challenge
Polylang is a robust multilingual plugin for WordPress, seamlessly integrating with WooCommerce. It allows users to create translations for pages, posts, and products, making it an ideal choice for businesses with a global reach. However, migrating translations can become cumbersome, especially when dealing with a large number of products.
Prerequisites:
- Install Required Plugins:
- Install and activate the WooCommerce plugin.
- Install and activate the Polylang plugin, and Polylang for WooCommerce
- Install and activate the WP Ultimate CSV Importer.
Steps for Efficient Migration- Import WooCommerce Products with Polylang Translations
- Prepare Your Data: CSV for WooCommerce Products
- Make sure you have a CSV file containing your product data. That is the original content and the translated content of the product.
- Include columns for product details such as title, description, price, SKU, etc.
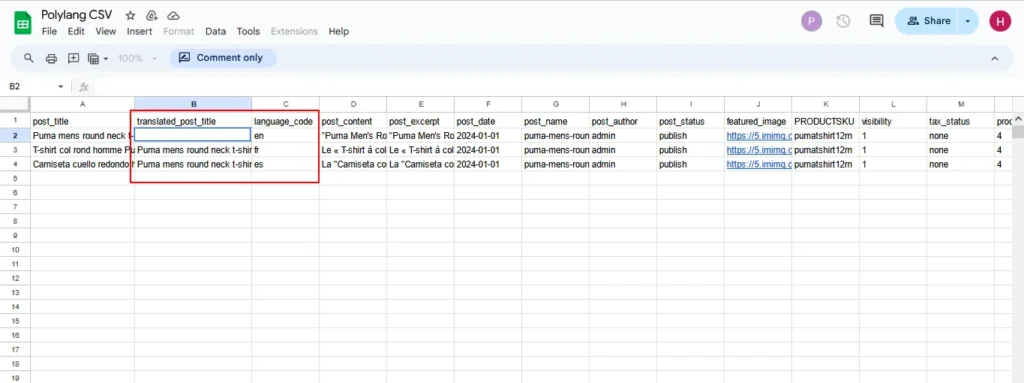
- Add additional columns for translations such as language_code and translated_post_title.
- Enter the language code like en for English, fr for French, etc., in the respective columns of the product.
- Copy the product title and paste it into the translated_post_title field of all translated products.
- Ensure that the translated_post_title column of the original content is empty which indicates that it was original content.
- Now your CSV is ready to import your Woocommerce product into Multilingual websites
- Install CSV Importer Plugin:
To facilitate smooth migration, install a CSV importer. Activate the plugin and navigate to the import settings.
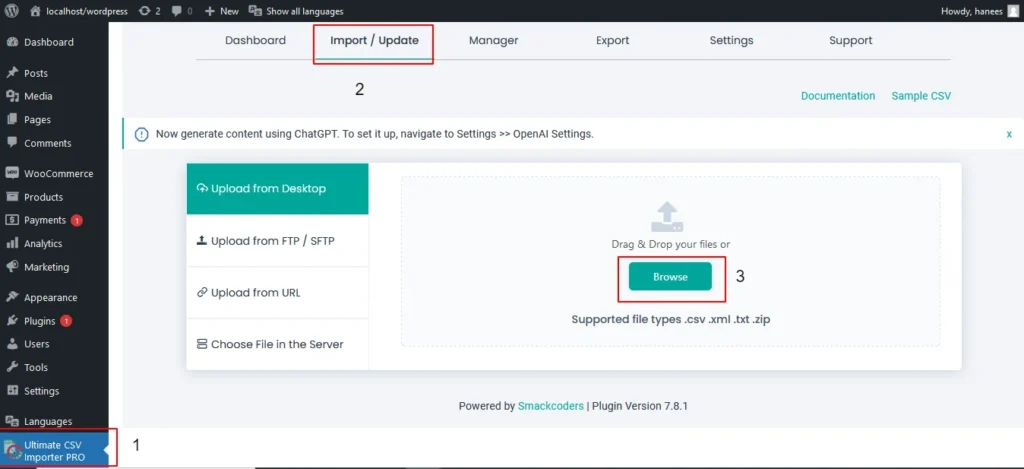
Navigate to WP Ultimate CSV Importer PRO from the left side menu and select Import/Update from the top sidebar
Browse the Woocommerce Product CSV that you have prepared with the translated content, language code, and translated post title.
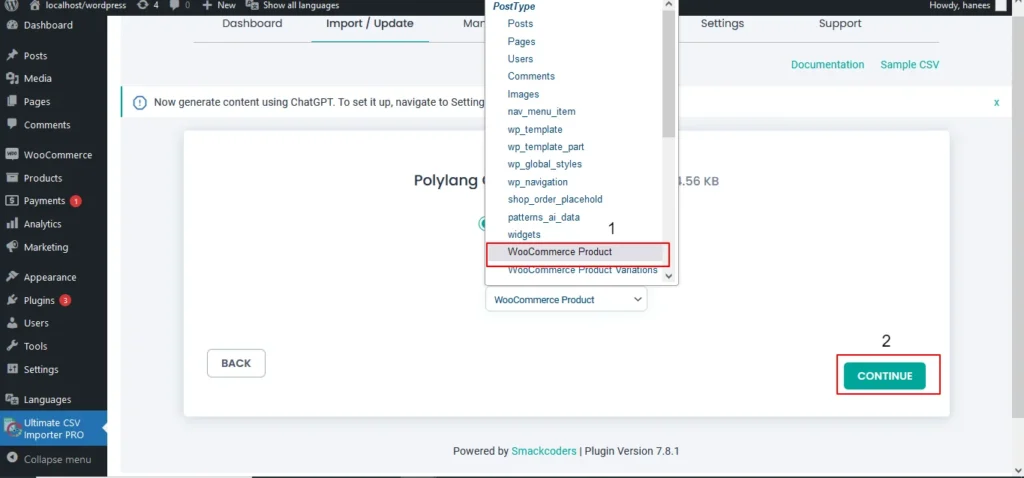
Select the Content type (“Import each record as”) as Woocommerce Products from the drop-down menu.
- Mapping Fields
Map the fields in your CSV file to the corresponding fields in WooCommerce. This step is crucial to ensure that the data is correctly imported. Common fields include product ID, SKU, language code, and translated content. Map Polylang settings field and WooCommerce Product meta fields. Map all the desired fields based on your business needs.
If you have variations, make sure to set the product type to “Variable product” and map the variation data accordingly.
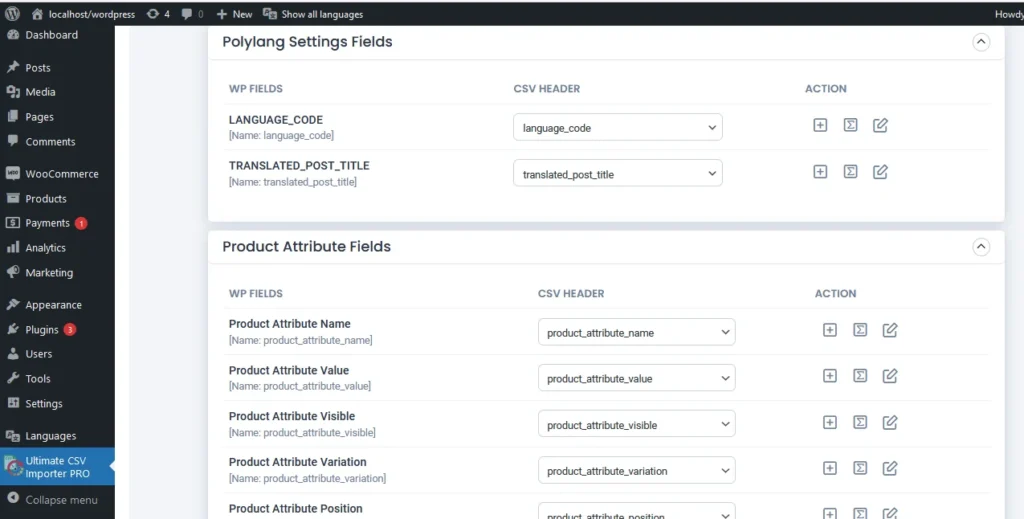
Once done with the mapping save the Mapping template and click on Continue for the featured image media handling.

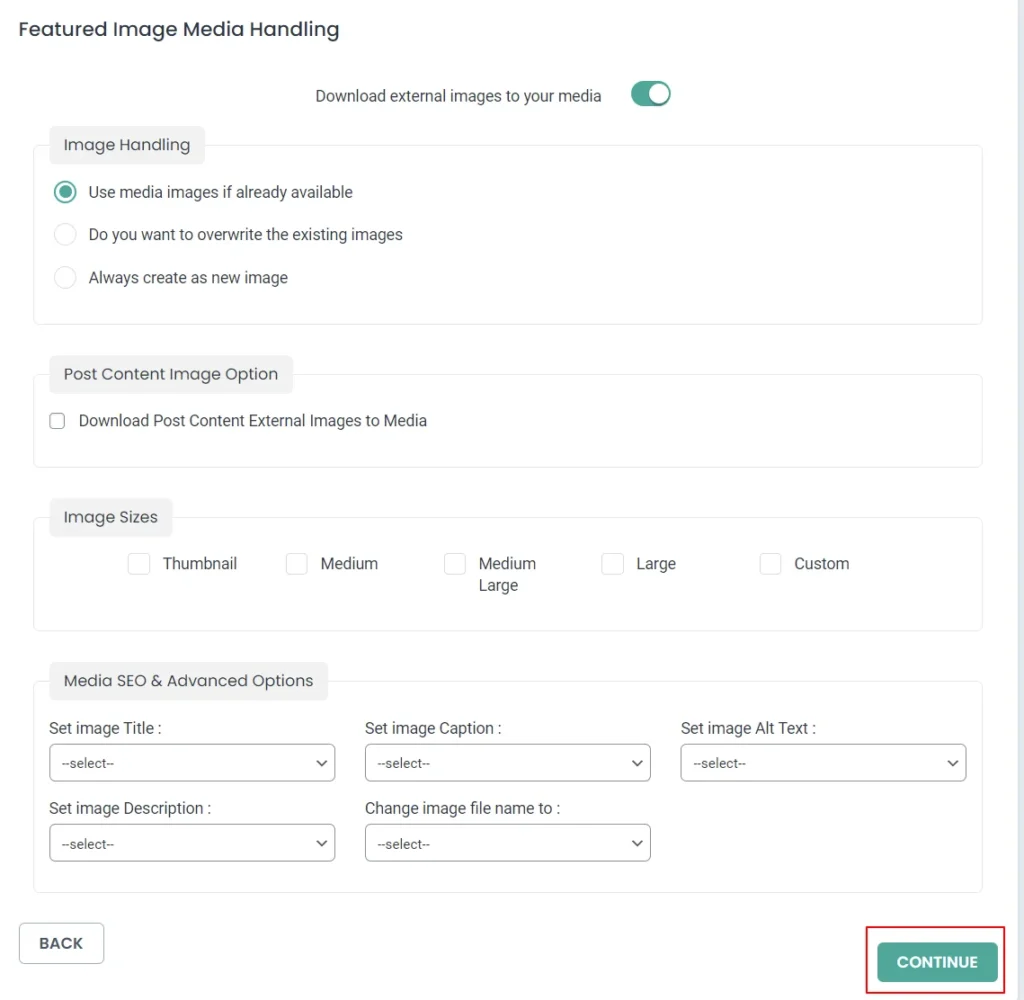
- Feature image media handling
You can configure this setting based on your business needs to handle your media files like featured images, product images, etc efficiently.
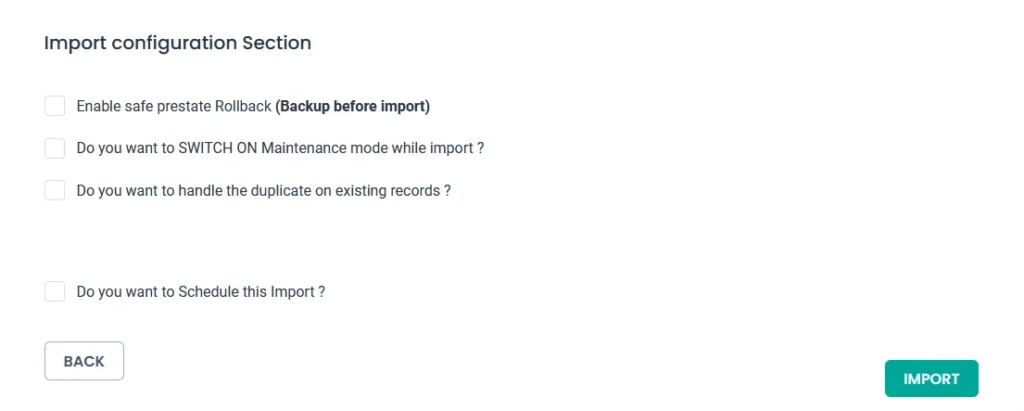
- Import Translations
Configure the Import settings and Initiate the import process by clicking on the Import Process. Depending on the size of your dataset, this may take some time.
Now all your WooCommerce Products will be imported with its polylang translations effectively and effortlessly.
Once imported, you can view the log for the imported product by clicking on the admin view.

WP Ultimate CSV Importer Pro
Get Ultimate CSV/XML Importer to import data on WordPress faster, quicker and safer.
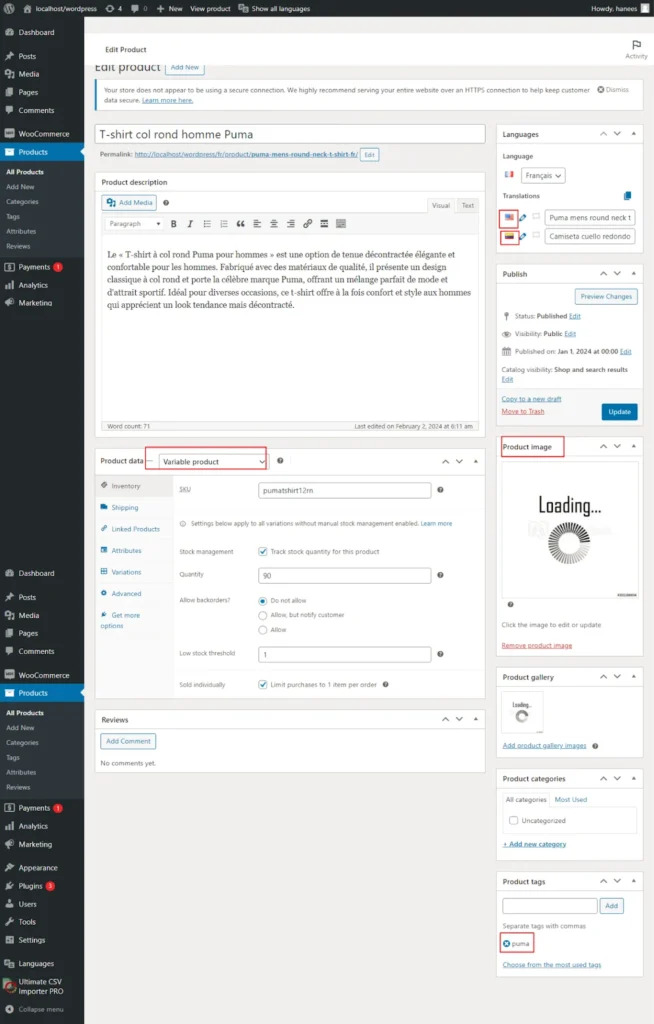
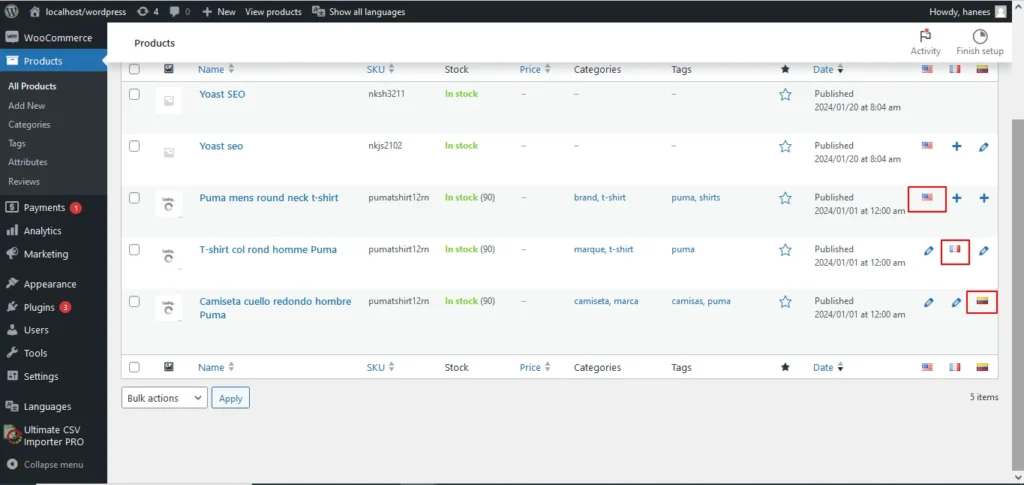
Detailed View
The Multilingual product import includes the Product image or Featured image, Product categories, Product tags, WooCommerce Variations, Attributes, etc.
List view:
You can also verify the imported products by navigating to Woocommerce-> Products-> All products
Thus the single import of your WooCommerce product will make it easy to import all the related fields with their translations. With WP CSV importer, you can smartly import WooCommerce Variations and attributes related to your Woocommerce products in Multiple languages.
How to Import Translated WooCommerce Variations using CSV importer?
Your WooCommerce Product Import with Polylang translation will include all the WooCommerce Product-related details such as Woocommerce variations. However, you have an additional option on the WP CSV importer to import your Woocommerce Variations separately for the already imported WooCommerce Products.
Why CSV Importer?
CSV importers offer a structured and efficient way to manage large sets of data, making them an ideal tool for handling WooCommerce product variations. The ability to import data in bulk saves time and minimizes the margin for error, especially when dealing with complex product structures like variations.
Enhancing Your Store’s International Presence
To provide a localized shopping experience for every visitor, create a CSV file with your original content and its translated version. Add language_code and translated_post_title columns, ensuring the language code matches the content language. With this prepared CSV, you can easily import WooCommerce variations, enhancing your online store’s international presence.
Things to remember while Preparing a CSV
When importing WooCommerce variations with Polylang translations using a CSV importer, you’ll need to include specific terms and columns in your CSV file to ensure accurate and comprehensive data import. Here are the essential terms and columns of Woocommerce that you need to include in your CSV file:
- Product ID or SKU:
- Identify each product by its unique identifier or SKU (Stock Keeping Unit). This ensures that variations are correctly associated with the respective products.
- Attributes:
- Include columns for product attributes such as size, color, or any custom attributes you’ve defined. These attributes play a crucial role in creating variations.
- Variation ID:
- Assign a unique identifier to each variation. This helps in mapping variations correctly during the import process.
- Variation Details:
- Columns for specific details of each variation, including prices, stock levels, and any other relevant information.
- Translation Columns:
- For each translatable field, include columns for different languages using the appropriate Polylang language codes. Common translation columns include:
- Title: Product variation name.
- Description: A detailed description of the variation.
- Short Description: A concise description is displayed on the product page.
- Attributes: If attribute names or values need translation.
- For each translatable field, include columns for different languages using the appropriate Polylang language codes. Common translation columns include:
- Language Code:
- Include a column for language codes to specify the language of each translation. Use Polylang language codes (e.g., ‘en’ for English, ‘es’ for Spanish).
- Parent ID or Parent SKU:
- Specify the parent product ID or SKU for each variation. This associates the variation with its corresponding product.
- Image URLs:
- If you want to assign specific images to your variations, include columns with image URLs. Ensure these images are accessible and hosted online.
- Taxonomy Columns:
- If you’re using custom taxonomies for your variations, include columns for the taxonomy terms.
- Stock Status:
- Indicate the stock status of each variation (e.g., “In stock,” “Out of stock”).
- Visibility:
- Specify the visibility of each variation (e.g., “visible,” “hidden”).
- Downloadable and Virtual:
- If applicable, include columns for downloadable and virtual properties of variations.
- Weight, Dimensions, and Shipping Class:
- Include columns for weight, dimensions, and shipping class if these parameters vary among variations.
- Other Custom Fields:
- If you have additional custom fields or metadata associated with your variations, include columns for those fields.
Ensure that your CSV file is well-organized, with each row representing a unique variation and each column corresponding to a specific attribute or detail. Mapping these columns correctly during the import process ensures a smooth and accurate import of WooCommerce variations with Polylang translations.
Step-by-Step Guide: Importing WooCommerce Variations with Polylang Translations
1. Prepare Your CSV File to import
- Include all necessary data for your product variations, such as attributes, prices, stock levels, and translations.
- Make sure to have separate columns for each language, following Polylang conventions.
- Ensure you have two additional columns such as language code and translated post title
- Enter the language code corresponding to the desired content. E.g., en for English, es for Spanish.
- For the translated_post_title field:
Original Content- Leave the translated_post_title field empty.
Translated Content- Enter the post title of the desired product- custom attributes.
Here in this csv, I have to import the variations for the Product whose post title is Puma men’s round-neck t-shirt- where its custom attribute is color|size.
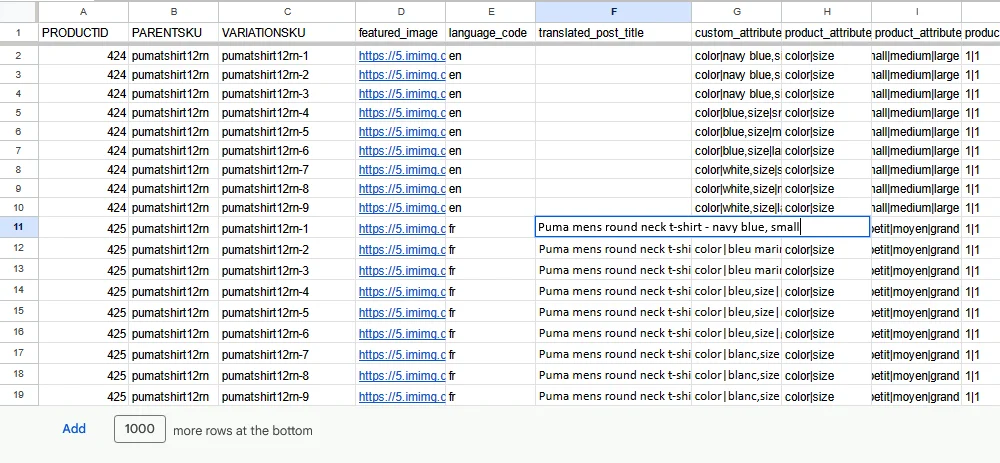
That is in the desired Woocommerce Variations, you have to enter its appropriate color and its size.
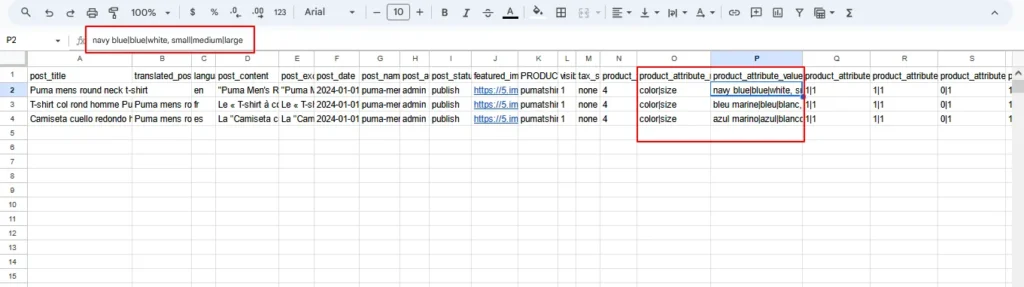
CSV for WooCommerce Variations:
Here in the first line, I have entered the translated post title for French content as puma mens round- navy blue, small( as its custom attribute is color|bleu marine, size|petit)
2. Create a Variation Template
- Set up a sample product with variations in your WooCommerce store. This will serve as a template for the CSV file.
3. Export Sample Data
- Export the sample product data using the built-in WooCommerce CSV exporter. This will give you a template that matches the structure required for import.
4. Add Translations to CSV
- Add translation columns to your CSV file, including all necessary details like product names, descriptions, and attributes in each language.
5. Use Polylang Language Codes
- Ensure that you use the Polylang language codes for each language in your CSV file. For example, ‘en’ for English and ‘es’ for Spanish.
6. Set Up the WP Ultimate CSV Importer Plugin
- Install a WP CSV importer plugin compatible with WooCommerce.
- Log in to WordPress.
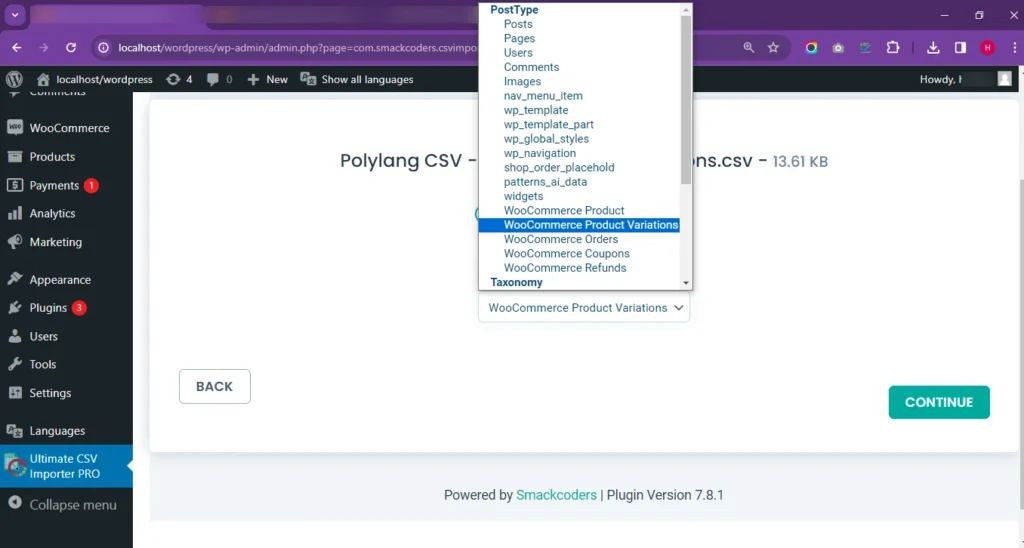
- Navigate to the WP Ultimate CSV importer Plugin-> Import/Export
- Upload your prepared CSV file. Choose the Content type as Woocommerce Variations. Click on Continue for Mapping.
- Map the columns to match the WooCommerce product variation fields.
7. Configure Polylang Settings
- In the Polylang settings, make sure that you have enabled the translation support for products and variations. Once done with the mapping, save the mapping template.
8. Run the Import
- Initiate the import process by configuring the Import settings and clicking on Import.
Now your WooCommerce Variations have been imported into their desired products in a Multi-lingual website.
By using the WP CSV Importer plugin in conjunction with Polylang translations, you can efficiently import and manage variations, providing a seamless and localized shopping experience for your global customers. Follow the outlined steps to enhance your online store’s international presence and cater to a diverse audience with ease.
WP Ultimate CSV Importer Pro
Get Ultimate CSV/XML Importer to import data on WordPress faster, quicker and safer.
How to import Woocommerce orders with Polylang translations?
Importing WooCommerce orders with Polylang translations using the WP CSV Importer involves carefully preparing your CSV file with the necessary columns and data. Here is a step-by-step guide to help you through the process:
1. Prepare Your CSV File
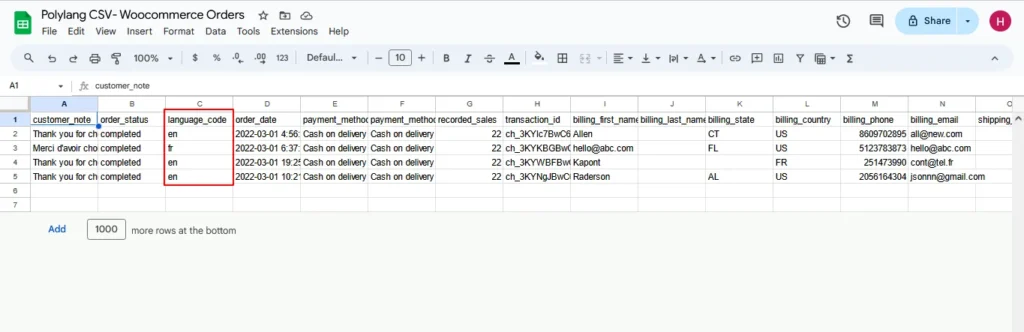
Create a CSV file containing the order data, including columns for the translated information. Essential columns for WooCommerce orders include:
- Order ID
- Order Status
- Customer IDBilling First Name
- Billing Last Name
- Billing Address
- Billing City
- Billing Postcode
- Billing Country
- Billing Email
- Billing Phone
- Order Items (with details like Product ID, Quantity, Variation ID, etc.)
2. Add Translation Columns
Include columns for each language in your CSV file, using Polylang language codes. Common translation columns may include:
- Billing First Name (e.g., billing_first_name_en, billing_first_name_es)
- Billing Last Name
- Billing Address
- Billing City
- Billing Country
- Billing Email
3. Configure Polylang Language Codes:
In your CSV file, use Polylang language codes (e.g., ‘en’ for English, ‘es’ for Spanish) for each language column.
Note: On preparing a CSV file for importing Woocommerce Orders, you need to add only one additional column Language_code. There is no need to include the translated_post_title field in the CSV.
4. Order Items and Product Variations:
If your orders include variations, make sure to include columns for Product ID, Quantity, and Variation ID under the Order Items column.
5. Map Columns in WP CSV Importer:
In your WordPress dashboard, go to WP CSV Importer and upload your CSV file. Select the content type as WooCommerce Orders.
Map the CSV columns to the corresponding fields in WooCommerce. Ensure that you map the translated columns correctly.
Follow the on-screen instructions and continue to the Import Process
6. Run the Import:
Configure the import settings and Start the import process. The WP CSV Importer will process the data and create orders with Polylang translations.
By following these steps, you can efficiently import WooCommerce orders with Polylang translations using the WP CSV Importer.
Conclusion
Effectively migrating Polylang translations for WooCommerce products requires careful planning and the right tools.
Verify Translations: After the import is complete, meticulously review the translations in your WooCommerce product pages. Ensure that each product has the correct translations associated with it. Polylang makes it easy to switch between languages for verification.
Test and Optimize: Conduct thorough testing to guarantee that the migrated translations function seamlessly. Check product pages in different languages for accuracy and formatting.
By leveraging the capabilities of Polylang alongside a reliable CSV importer, businesses can ensure a streamlined process that facilitates a seamless multilingual e-commerce experience. With Polylang Translation and CSV importer, you can also easily import and export posts, custom, posts, pages, and Image import.
Refer to our user guide for step-by-step instruction to migrate polylang translation of post, custom post and Pages.
This approach not only saves time and effort but also paves the way for a more efficient and scalable international online presence.
