The WooCommerce to Shopify Integration Plugin allows you to seamlessly sync your WooCommerce and Shopify stores in real-time. With a user-friendly interface and simple setup process, this plugin is designed to make managing your e-commerce platforms easier and more efficient. This documentation provides a complete overview of all functionalities available in the plugin.
Key Features #
- Quickly integrate your Shopify and WooCommerce stores with minimal effort.
- Migrate orders, products, and customers between Shopify and WooCommerce
- Set up real-time or periodic sync between Shopify and WooCommerce.
How to Use the Plugin #
Using the plugin is simple and requires just two main steps to configure data sync and migration between your stores.
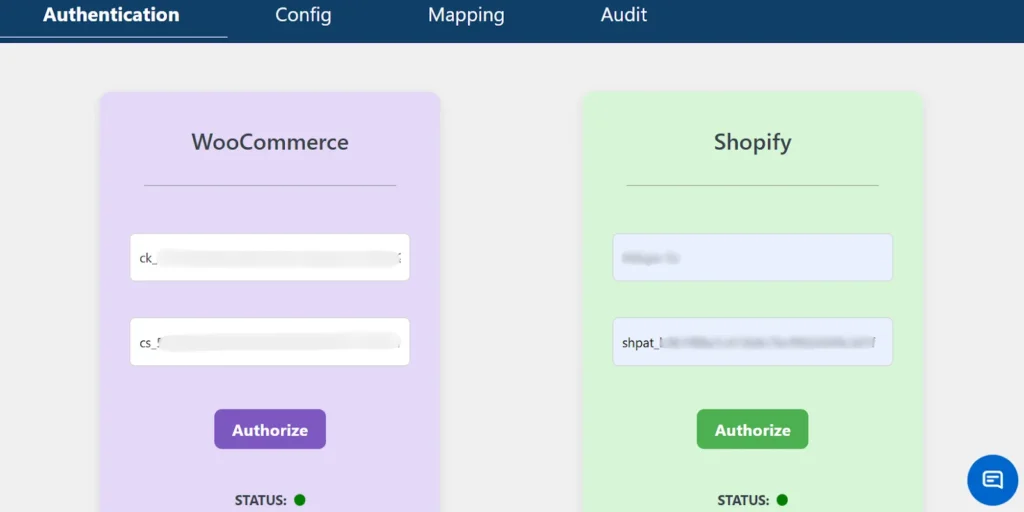
Step 1: Authenticate Shopify and WooCommerce Stores
To begin syncing, both stores must be authenticated.
WooCommerce Authentication
- Enter your WooCommerce Consumer Key and Consumer Secret.
- Click Authorize.
Shopify Authentication
- Enter your Store Name and Access Token.
- Click Authorize.
For detailed, step-by-step instructions on generating keys and tokens, refer to this documentation Authentication Setup WooCommerce to Shopify Integration.
When the connection is successfully established, the status indicators in both the WooCommerce and Shopify tabs will turn green.
If the indicator shows yellow, it means the authentication is being processed, so you must wait until it turns green.
If the indicators turn red, it indicates that the authentication has failed. Ensure that you have entered the correct consumer key and consumer secret, your Shopify store name, and the right access token, and try again.
Step 2: Configure Sync Settings
Once authenticated, you can configure how and what data is synced between the platforms. To configure, click on Config from the top menu.
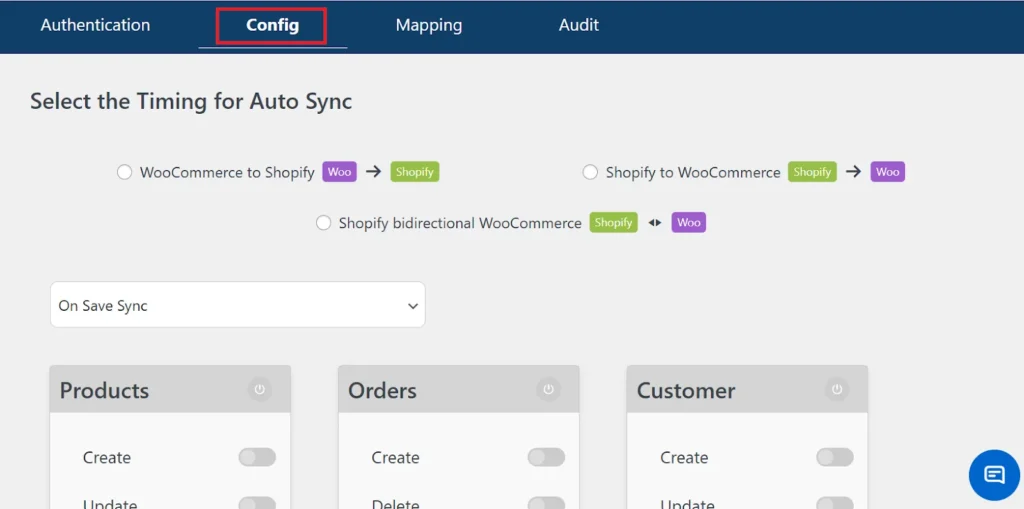
Choose Sync Direction:
- WooCommerce to Shopify
- Shopify to WooCommerce
- Bidirectional Sync (Shopify ↔ WooCommerce)
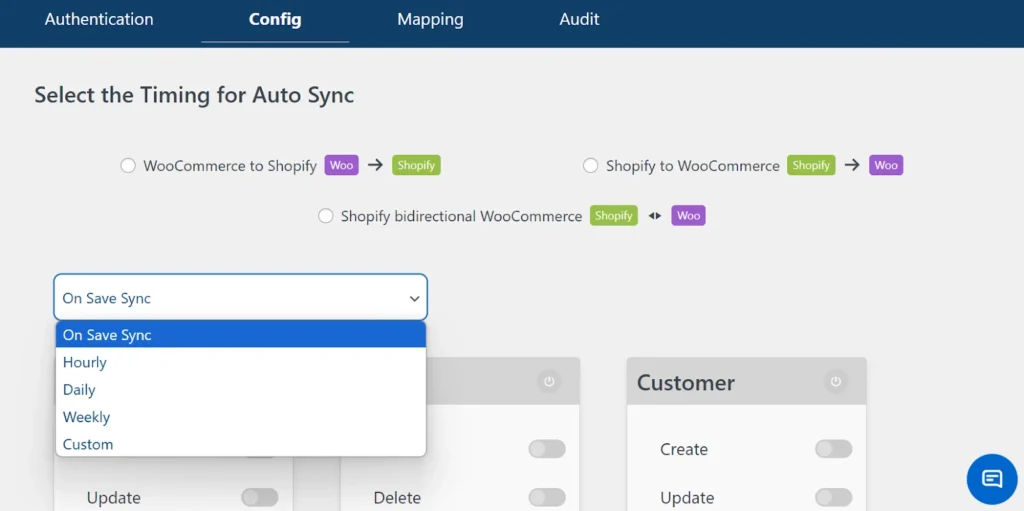
Schedule Sync Timing:
Select how often the sync should occur. You can choose real-time sync, periodic intervals, or a sync limited to a specific duration. From the drop-down menu, you can choose any of the following sync frequencies:
- On Save Sync – Real-time sync is triggered immediately upon saving the configuration
- Hourly – Sync every hour
- Daily – Sync once a day
- Weekly – Sync once a week
- Custom – Select a start and end date; real-time synchronization will occur during this period based on your selected sync direction
Once configured, the sync will occur automatically according to the selected schedule, requiring no further action unless modifications are needed.
Note: Ensure WordPress Cron is enabled to allow for scheduled synchronization. For guidance on enabling cron jobs, please refer to this documentation on how to enable cron jobs.
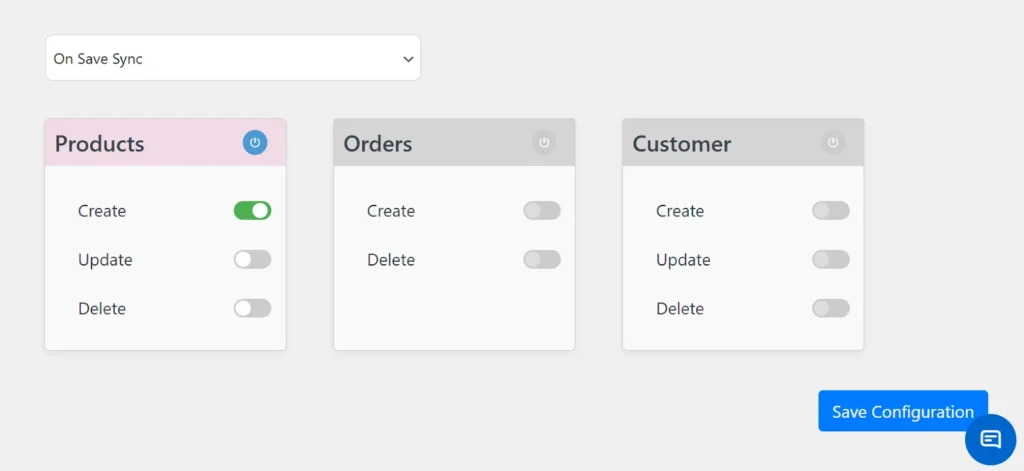
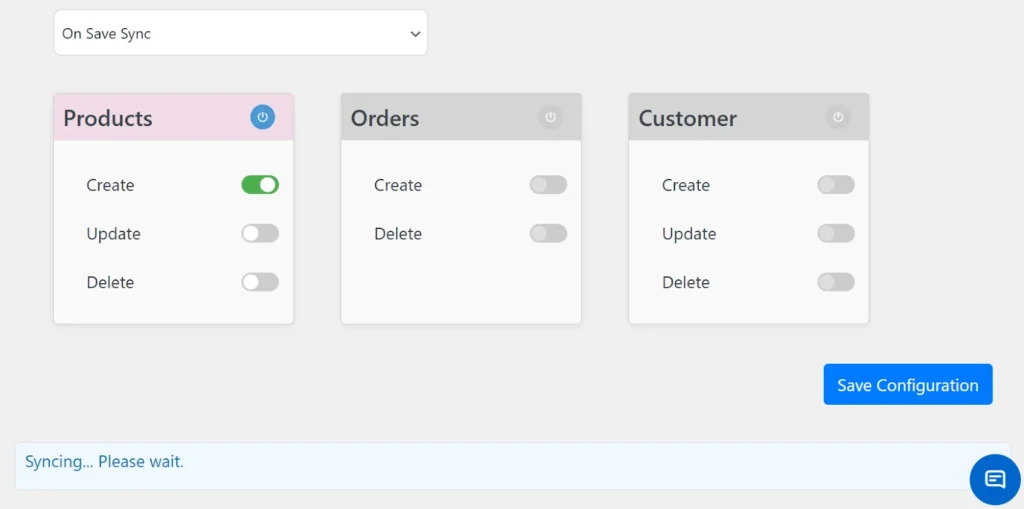
Select Data Types to Sync:
You will see three tabs:
- Products
- Orders
- Customers
To begin configuring, select one or more of the above tabs by clicking on the respective power icon on each tab. The corresponding permission toggles will become active once you select a data type. These include:
- Create
- Update (only for products and customers)
- Delete
The toggles will be activated only after you select a data type tab (Products, Orders, or Customers).
Example:
For syncing Shopify products with WooCommerce:
- Select the power icon on the Products tab
- Enable Create to add new products
- Enable Update to modify existing products based on the latest changes
- Enable Delete to remove products not available in the source store at the time of sync
Similarly, you can sync your orders and customers between Shopify and WooCommerce platforms by following the same steps mentioned above.
Note: Under the Orders tab, you can only find the options to create and delete data during the sync. The update option is unavailable due to some restrictions in Shopify regarding order editing.
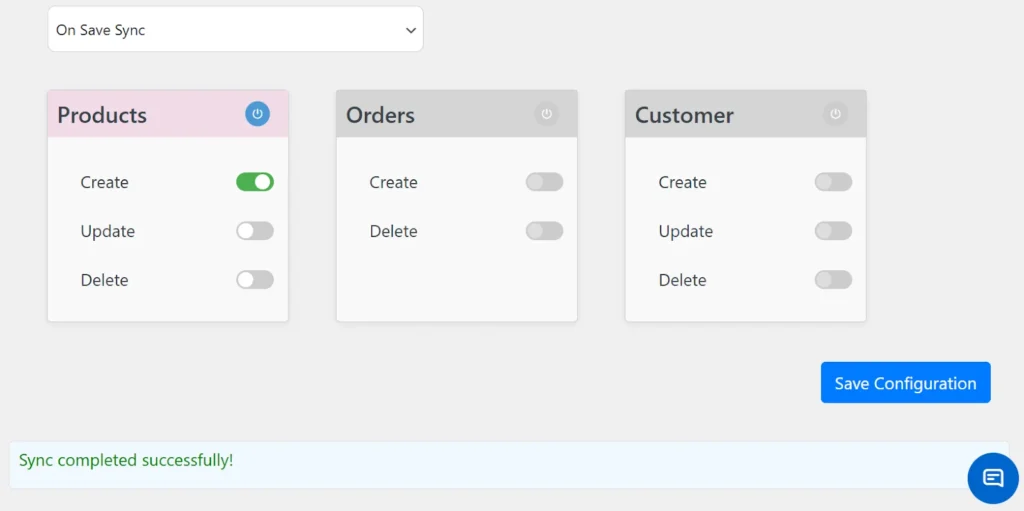
Once your selections are complete, click Save Configuration to initiate the sync process. A progress message will appear displaying the status of the synchronization, and once syncing is complete, a final message will indicate that the sync was successful.
Mapping Section #
Use the Mapping Section to view how Shopify fields are auto-mapped with WooCommerce fields. This allows for a transparent understanding of how data is aligned across platforms.

Audit Log #
The Audit Log tracks and displays the history of all actions executed by the plugin. Each entry includes the type of action performed, description of the activity, status, and timestamp of the action completed.
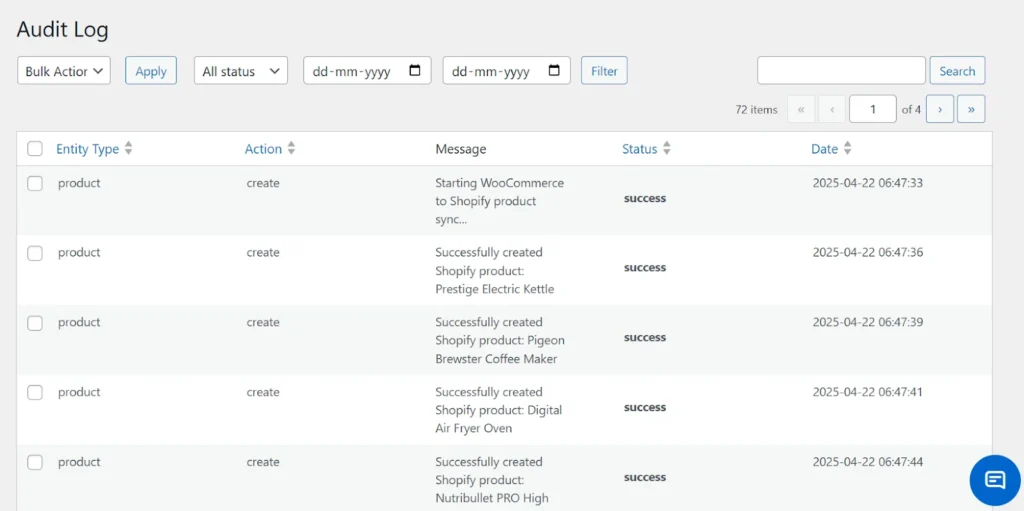
This helps in tracking sync activities and troubleshooting issues if they arise.