Table of Contents
What Makes a WordPress Site Dynamic?
If you’ve ever felt your WordPress site looks too “static,” you’re not alone. Most sites rely on Posts and Pages, which are fine for blogs or simple websites, but limiting when you need something more structured.
That’s where Custom Post Types (CPTs) come in. They allow you to organize content beyond the default setup. Want to showcase your projects, display team members, list real estate properties, or run a course library? All that becomes effortless once you use CPTs.
In short, Custom Post Types transform WordPress from a blogging platform into a true Content Management System (CMS). They help you manage different kinds of data independently, each with its own fields, taxonomies, and templates.
When you start using CPTs, you move from “just another website” to a dynamic WordPress site that’s organized, scalable, and easy to maintain.
Before we jump into the technical parts, here’s what this guide will walk you through step by step, in plain English. Whether you’re a developer or someone who just wants a more flexible website, you’ll find clear answers and practical examples.
By the end, you’ll know exactly how to build a dynamic WordPress site that’s flexible, scalable, and SEO-friendly.
How to Create a Custom Post Type in WordPress
Creating a Custom Post Type (CPT) in WordPress isn’t complicated; you just need the right approach for your skill level. There are proven methods, and both can deliver powerful results depending on how comfortable you are with code.
Creating Custom Post Types with Plugins (No-Code Method)
If you want to build a dynamic WordPress site without diving into code, you’re going to love this part. Plugins like JetEngine, Meta Box, and Advanced Custom Fields (ACF) can do all the heavy lifting; you just point, click, and create.
Think of it like adding new sections to your website’s “content library.” Instead of forcing everything into Posts or Pages, you can have a section just for Projects, Testimonials, or Courses. It’s cleaner, faster, and much easier to manage.
Let’s walk through it together step by step.
Step 1: Install and Activate the Plugin
For this instance, let’s use the Meta Box AIO plugin. This plugin lets you create and manage Custom Post Types through your WordPress dashboard, no coding, no confusion.
- In your WordPress, go to Plugins → Add New.
- Upload the Meta Box AIO plugin zip and hit Upload. Then install and activate.
- Once activated, a new menu item called “Meta Box” appears on your sidebar.
Creating a new custom post type ‘Projects’ using the Meta Box plugin, a simple, no-code approach to organize and display structured content in WordPress.
Step 2: Create Your First Custom Post Type
Now, let’s actually make your CPT.
- Go to Meta Box → Post Types → Add New Post Type.
- Fill in the key details like name, labels, advanced settings, taxonomies, etc.
- Click Publish.
- Select the link ‘Add custom fields to the post type’ from the notification bar or Meta Box → Custom Fields to create a new field group.
- Click ‘Add new field group’ and start to add new fields. Once created, assign it to the post type using the location fields and click Save.
- Your field group will be assigned to the custom post Projects.
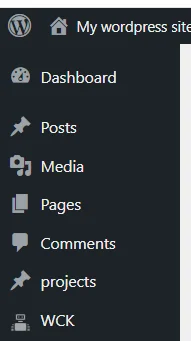
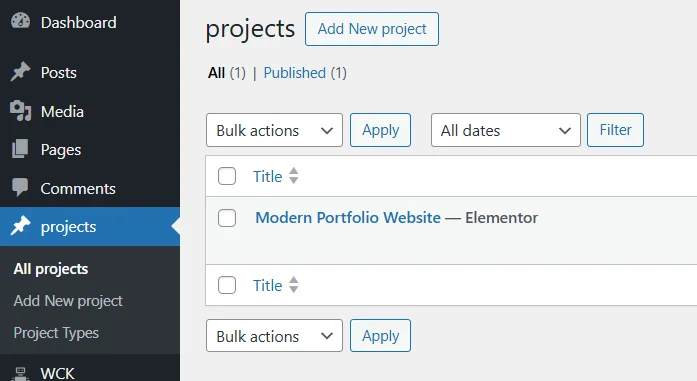
You’ll instantly see a new Projects section in your sidebar, just like “Posts” or “Pages”.
Quick Check: If you click “Projects,” it opens a familiar editor where you can start adding new entries right away.
Creating Custom Post Types Without Plugins (Manual Dashboard Method)
If you’re someone who prefers a little more control but still wants to avoid plugins, this method is for you. You’ll be doing everything manually within your WordPress setup, lightweight, plugin-free, and ideal for performance-focused users.
This approach works great if you don’t want to rely on extra tools or if you’re developing client sites where fewer plugins mean fewer compatibility issues.
Let’s break it down step by step.
Step 1: Create a Small Custom Plugin for Your CPT
Instead of editing your theme’s functions.php file (which can break during updates), you’ll create a lightweight plugin just for your Custom Post Types.
- Open your WordPress installation folder via File Manager or FTP.
Navigate to:
wp-content → plugins
- Create a new folder called my-custom-post-types.
- Inside it, create a file named my-custom-post-types.php.
Add this starter code at the top:
| <?php /*** Plugin Name: My Custom Post Types * Description: Registers custom post types for your website. * Version: 1.0 * Author: [Your Name] */ |
- Save the file, go to Dashboard → Plugins, and activate My Custom Post Types.
You now have a clean foundation for your CPT’s future-proof and update-safe.
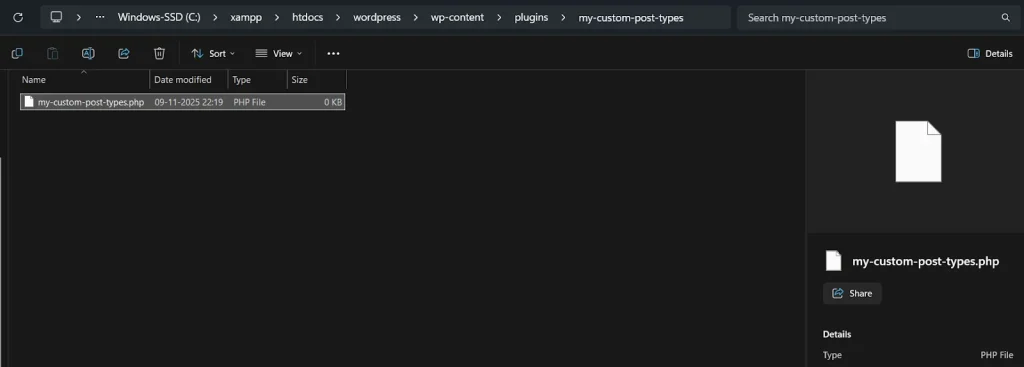
Custom plugin folder created inside wp-content/plugins containing the PHP file for registering custom post types in WordPress.
Step 2: Register Your Custom Post Type
Now, let’s add code to register your CPT (like “Projects”). Open your my-custom-post-types.php file again and paste this below the header:
| function create_project_post_type() { register_post_type(‘project’, array( ‘labels’ => array( ‘name’ => __(‘Projects’), ‘singular_name’ => __(‘Project’) ), ‘public’ => true, ‘has_archive’ => true, ‘show_in_rest’ => true, ‘menu_icon’ => ‘dashicons-portfolio’, ‘supports’ => array(‘title’, ‘editor’, ‘thumbnail’, ‘excerpt’), ‘rewrite’ => array(‘slug’ => ‘projects’), )); } add_action(‘init’, ‘create_project_post_type’); |
This function tells WordPress everything it needs to know about your new post type.
After saving, refresh your Dashboard, and you’ll see “Projects” appear in the sidebar!
Tip: Go to Settings → Permalinks → Save Changes once to flush rewrite rules. This ensures your new CPT’s URLs work properly.
Step 3: Create Custom Taxonomies (Optional)
If you want categories or filters for your new CPT, register a taxonomy.
Add this below your CPT code:
| function create_project_taxonomy() { register_taxonomy(‘project-type’, ‘project’, array( ‘label’ => __(‘Project Type’), ‘hierarchical’ => true, ‘rewrite’ => array(‘slug’ => ‘project-type’), )); } add_action(‘init’, ‘create_project_taxonomy’); |
This adds a Project Type taxonomy under your CPT menu.
You can now group your projects by type (like Web Design, Branding, etc.).
Step 4: Create Template Files to Display Your CPT
Finally, let’s make it visible on the front end.
Inside your active theme folder, create two files:
- single-project.php displays a single project post
- archive-project.php lists all your projects
In archive-project.php, you can start with:
| In archive-project.php, you can start with: <?php get_header(); ?> <h1>Our Projects</h1> <?php if ( have_posts() ) : while ( have_posts() ) : the_post(); the_title(‘<h2>’, ‘</h2>’); the_excerpt(); endwhile; endif; ?> <?php get_footer(); ?> |
Save and visit yourdomain.com/projects. Your new archive will appear automatically.

Active theme folder (Twenty Twenty-Four) showing custom template files, archive-project.php and single-project.php, added to display project archives and single project pages.”
Why Go Plugin-Free?
- No dependency on third-party plugins.
- Faster performance and fewer security risks.
- Easy to move between themes or servers.
This method is best for developers or agencies managing multiple WordPress projects, simple, clean, and efficient.
WP Ultimate CSV Importer Pro
Get Ultimate CSV/XML Importer to import data on WordPress faster, quicker and safer.
Creating Custom Post Types Programmatically (for Developers)
If you love full control over your WordPress environment, this one’s for you.
Creating Custom Post Types programmatically means writing your own code, registering post types, fields, and templates exactly how you want them. It’s cleaner, faster, and avoids plugin overhead.
This is the method professional WordPress developers prefer when performance, security, and flexibility matter most. Let’s walk through how to do it right.
Step 1: Register a Custom Post Type with Code
To create your own Custom Post Type, open your functions.php file (or your small plugin file, as explained earlier) and paste this code:
| function create_portfolio_post_type() { $labels = array( ‘name’ => ‘Portfolios’, ‘singular_name’ => ‘Portfolio’, ‘menu_name’ => ‘Portfolios’, ‘add_new’ => ‘Add New Portfolio’, ‘add_new_item’ => ‘Add New Portfolio’, ‘edit_item’ => ‘Edit Portfolio’, ‘new_item’ => ‘New Portfolio’, ‘view_item’ => ‘View Portfolio’, ‘search_items’ => ‘Search Portfolios’, ‘not_found’ => ‘No portfolios found’, ); $args = array( ‘labels’ => $labels, ‘public’ => true, ‘has_archive’ => true, ‘rewrite’ => array(‘slug’ => ‘portfolio’), ‘menu_icon’ => ‘dashicons-portfolio’, ‘show_in_rest’ => true, ‘supports’ => array(‘title’, ‘editor’, ‘thumbnail’, ‘excerpt’, ‘custom-fields’), ); register_post_type(‘portfolio’, $args); } add_action(‘init’, ‘create_portfolio_post_type’); |
This snippet does everything from naming your CPT to enabling Gutenberg and archives.
Once saved, refresh your WordPress Dashboard, and you’ll see a new menu item called Portfolios.
Tip: After adding new CPTs, always go to Settings → Permalinks → Save Changes to refresh URL structures.

Step 2: Add Custom Taxonomies (Categories or Tags)
Custom taxonomies let you categorize your CPT items just like blog posts. Add this below your CPT registration code in the same file: my-custom-type.php
| function create_portfolio_taxonomy() {. register_taxonomy ( ‘portfolio-category’, ‘portfolio’, array ( ‘label’ => ‘Portfolio Categories’, ‘hierarchical’ => true, ‘rewrite’ => array (‘slug’ => ‘portfolio-category’), ‘show_in_rest’ => true, )); } add_action(‘init’, ‘create_portfolio_taxonomy’); |
Now your “Portfolios” will have categories, too, perfect for filtering or SEO-friendly content grouping.

WordPress dashboard showing the custom ‘Portfolio Categories’ taxonomy listed under the Portfolios menu for organized content management.
Step 3: Add Custom Fields Programmatically (Optional)
For advanced users, you can register meta boxes or use custom field functions without plugins. Example:
| function portfolio_meta_box() { add_meta_box( ‘portfolio_details’, ‘Portfolio Details’, ‘portfolio_meta_callback’, ‘portfolio’, ‘normal’, ‘high’ ); } add_action(‘add_meta_boxes’, ‘portfolio_meta_box’); function portfolio_meta_callback($post) { $client = get_post_meta($post->ID, ‘client_name’, true); echo ‘<label>Client Name:</label>’; echo ‘<input type=”text” name=”client_name” value=”‘ . esc_attr($client) . ‘” class=”widefat”>’; } function save_portfolio_meta($post_id) { if (array_key_exists(‘client_name’, $_POST)) { update_post_meta($post_id, ‘client_name’, $_POST[‘client_name’]); } } add_action(‘save_post’, ‘save_portfolio_meta’); |
This adds a Client Name input box inside the Portfolio edit screen.
You can repeat this logic for other fields like “Project URL” or “Completion Date.”
WordPress Portfolio post editor showing a custom “Client Name” field added through Advanced Custom Fields for better project data management.
Step 4: Create Templates for Your CPT
Programmatic setup isn’t complete until you design how your CPT looks on the frontend.
In your active theme folder, create:
- single-portfolio.php → Displays single Portfolio posts
- archive-portfolio.php → Lists all portfolio entries
Add this to archive-portfolio.php as a starter:
| <?php get_header(); ?> <h1>Our Portfolio</h1> <?php if ( have_posts() ) : while ( have_posts() ) : the_post(); ?> <article> <h2><?php the_title(); ?></h2> <?php the_post_thumbnail(‘medium’); ?> <?php the_excerpt(); ?> </article> <?php endwhile; endif; ?> <?php get_footer(); ?> |
This template loops through all Portfolio posts and displays the title, image, and excerpt.
Step 5: Test and Refine
Now, head to your dashboard, create a few Portfolio entries, and test them on the frontend. Adjust your template and field display until it fits your site’s style.
When done right, your CPT will behave like any native part of WordPress, only more powerful.
Developer Insight: This method ensures zero plugin bloat and maximum performance. It’s how professional WordPress agencies handle custom content for high-traffic websites.
Why Go Programmatic?
- Speed: No unnecessary plugin overhead.
- Security: You control every line of code.
- Scalability: Perfect for large, custom WordPress builds.
Advanced Setup Custom Post Types with Categories, Tags, and Relationships
You’ve got your Custom Post Types up and running, great job.
Now it’s time to make them truly dynamic by connecting them with categories, tags, and relationships. This is where your site becomes structured, interactive, and scalable like a real content database instead of just a collection of posts.
Step 1: Add Categories or Tags to Your Custom Post Type
By default, your new CPTs don’t have Categories or Tags attached, but WordPress lets you add them easily.
If you registered your CPT via code, just modify your arguments and include this line inside the $args array:
‘taxonomies’ => array(‘category’, ‘post_tag’),
If you used Custom Post Type UI, open your post type and check “Attach existing taxonomies” → Category and Tag.
Now your custom post type will support all existing blog categories and tags, helping both users and search engines understand your content better.
Tip: For more control, create custom taxonomies (like “Project Type” or “Course Level”). They make your site organization cleaner and more SEO-friendly.
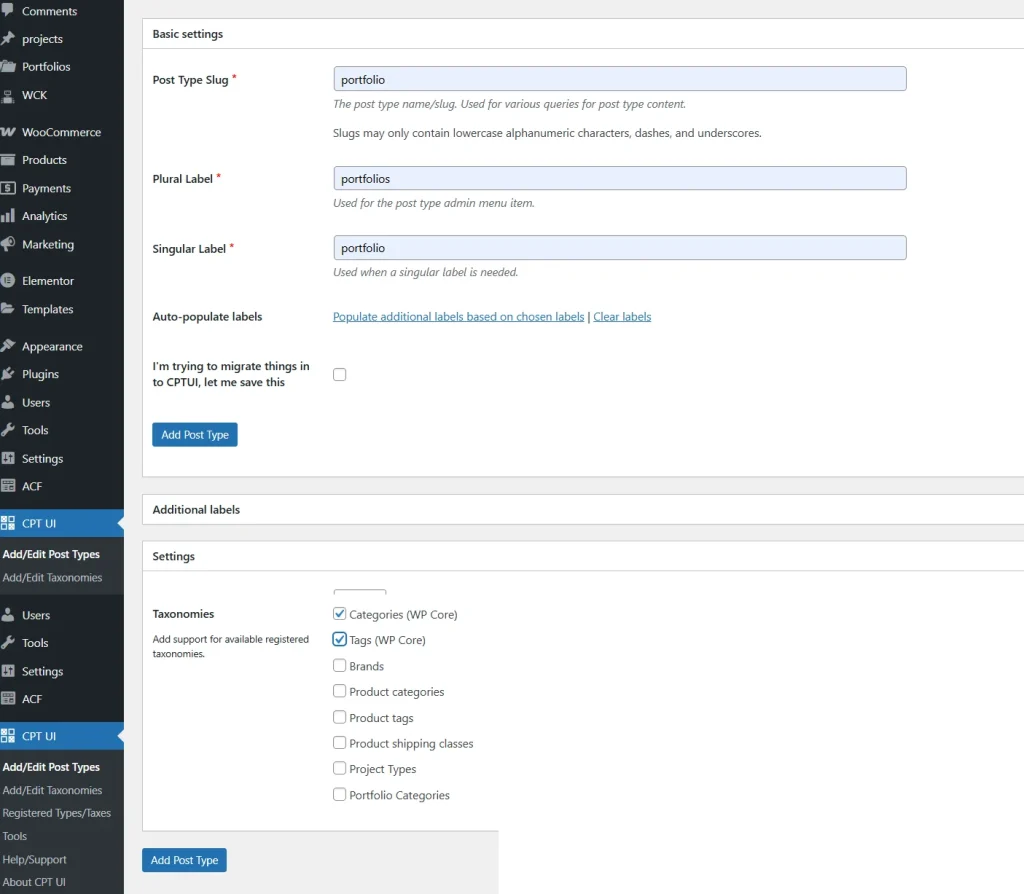
CPT UI Edit Post Type screen showing the Portfolio post type with default WordPress Categories and Tags enabled for flexible content organization.
Step 2: Create Custom Taxonomies for Your CPT
Custom taxonomies let you group content under domain-specific filters, not just generic ones like “Uncategorized.”
Example: You’re building a course website. You could create a taxonomy called Course Level with values like Beginner, Intermediate, and Advanced.
Here’s the code:
| function create_course_taxonomy() { register_taxonomy(‘course-level’, ‘course’, array( ‘label’ => __(‘Course Level’), ‘hierarchical’ => true, ‘rewrite’ => array(‘slug’ => ‘course-level’), ‘show_in_rest’ => true )); } add_action(‘init’, ‘create_course_taxonomy’); |
This gives you a new taxonomy section under your CPT menu in the dashboard.
When you edit a Course post, you’ll see a “Course Level” box where you can assign levels easily.

WordPress dashboard showing the custom “Course Level” taxonomy nested under the Courses post type for better course categorization.
Step 3: Connect Custom Post Types with Relationships
Relationships help link one CPT to another, for example:
- Events linked to Venues
- Courses linked to Instructors
- Projects linked to Clients
The simplest way is to use ACF Relationship Fields or the Meta Box plugin.
- Go to Custom Fields → Add New.
- Add a Relationship Field.
- Choose the target CPT (for example, connect Events → Venues).
- Save and assign it to your CPT.
Now, when editing an Event, you can select its Venue from a dropdown and display it on the frontend with a simple ACF template tag:
| <?php $related_venues = get_field(‘related_venues’); if ($related_venues) : foreach ($related_venues as $venue) : echo ‘<p>’ . get_the_title($venue->ID) . ‘</p>’; endforeach; endif; ?> |
Pro Tip: Relationships make your content smarter, they prevent duplication, improve SEO through contextual linking, and add depth to your user experience.
Step 4: Display Relationships on the Frontend
Once your CPTs are linked, you can show related items in templates or sidebars.
Example: On a Course page, display its Instructor info and related Courses. This can be done with ACF’s relationship functions or WP_Query loops.
Result: Visitors see structured connections boosting engagement and internal linking automatically.
Why Advanced Setup Matters
When your CPTs are linked through categories, tags, and relationships, your site transforms into a true content ecosystem.
- Easier navigation and filtering for visitors
- Stronger internal linking (SEO win)
- Smarter content management
It’s the difference between a flat website and a professional-grade CMS built on WordPress.
WP Ultimate CSV Importer Pro
Get Ultimate CSV/XML Importer to import data on WordPress faster, quicker and safer.
Best Plugins for Custom Post Types
Even though WordPress lets you create Custom Post Types manually, sometimes a plugin can save you time and headaches, especially when you’re managing multiple CPTs, fields, or relationships.
Here are the most reliable, developer-tested, and SEO-friendly plugins to supercharge your dynamic WordPress sites.
1. JetEngine
Best for: Elementor users who want dynamic content blocks and post listings.
JetEngine integrates with Elementor to display CPTs dynamically, perfect for portfolio, job, or listing sites.
It’s more design-oriented, giving you the creative control that developers get with code.
2. Meta Box
Best for: Developers who want more control and faster performance.
Meta Box is a lightweight alternative to ACF same features, less load. You can create custom fields, relationships, and settings pages, all with flexible code or UI.
Why Devs Love It: You can export your field groups as PHP code and integrate them directly into your theme or plugin.

3. Advanced Custom Fields (ACF)
Best for: Adding custom fields, relationships, repeaters, and flexible layouts.
ACF gives you full control over the structure of your content. From text boxes to image uploads and repeater fields, it helps your CPTs collect any kind of data.
It’s also Gutenberg-compatible, meaning you can use fields directly in block editors.
Example: Add “Client Name” and “Project URL” fields to your “Projects” CPT in minutes, no PHP needed.

4. Pods Framework

Best for: Building complete dynamic websites with CPTs, taxonomies, and relationships all in one place.
Pods is a no-code powerhouse that lets you create CPTs, add fields, and even relate them together like connecting “Courses” to “Instructors.”
It’s intuitive for beginners yet powerful enough for developers.
Bonus: Pods supports REST API and custom templates, ideal for headless WordPress or complex builds.

Pods Admin interface showing the creation of a new custom post type called “Courses” with simple, code-free setup steps.
5. Toolset Types
Best for: Users who want an all-in-one system to create, design, and display CPTs visually.
Toolset Types helps you create CPTs, taxonomies, and relationships while designing front-end templates using a drag-and-drop interface perfect for users who prefer building without code.
Use Case: Quickly build a directory, real estate site, or e-learning system without touching PHP files.
6. Custom Post Type UI (CPT UI)
Best for: Beginners and site owners who want a visual way to create post types and taxonomies.
This plugin is like your CPT control center. You can create new post types, attach existing taxonomies, and manage everything from the dashboard, no coding required.
Pair it with Advanced Custom Fields (ACF) to add custom fields and templates.
Pro Tip: Use CPT UI to register post types and ACF to design their data fields, a perfect combo for non-coders.

Final Verdict
If you’re a beginner, go for CPT UI + ACF.
If you’re a developer, use Meta Box or Pods.
If you’re a designer, using Elementor JetEngine will feel natural.
Each plugin has the same goal: to help you build structured, dynamic, and scalable WordPress sites without friction.
Conclusion: Turn WordPress into a Fully Dynamic CMS
When you step back and look at everything we’ve covered, one thing becomes crystal clear: Custom Post Types are what make WordPress truly limitless.
They’re the backbone of every professional-grade site you’ve ever admired, from e-learning platforms to real estate listings to agency portfolios. Without them, WordPress would still be just a blogging tool.
By now, you’ve learned how to:
- Build CPTs using plugins like CPT UI and ACF (perfect for beginners).
- Create CPTs manually or programmatically for full developer control.
- Use taxonomies, categories, and relationships to structure your content smartly.
- Choose the best plugins that fit your workflow and experience level.
When you combine all these, you turn WordPress into a dynamic content powerhouse, one that’s fast, organized, SEO-optimized, and built for growth.
Remember: Start small. Maybe just one CPT like “Projects” or “Courses.” Once you see how clean your content becomes, you’ll never go back to using regular posts for everything.
So, whether you’re a solo blogger, business owner, or web developer, this is your cue: “Start building smarter, not harder”.
Start Creating Your First Custom Post Type. Turn your WordPress site into a dynamic, scalable CMS today.
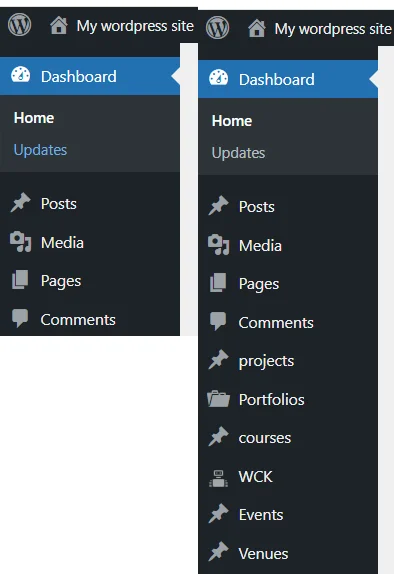
“Static WordPress site” (posts only) vs. a “Dynamic CMS site” (Posts + Projects + Events + Courses).
FAQs: Everything You Need to Know About WordPress Custom Post Types
1. What’s the relationship between Custom Post Types and WordPress?
Custom Post Types extend the core structure of WordPress. By default, you have “Posts” and “Pages.” CPTs let you define new content types like Projects, Courses, or Testimonials that behave just like posts but stay organized separately. In simple terms: Posts = blog content. CPTs = everything else your site needs.
2. How do I display my Custom Post Type content on the front end?
You can display CPT content in several ways:
Use Query Loop Block (block themes) for automatic listings.
Create archive-{cpt}.php and single-{cpt}.php templates for full control.
Or use page builders like Elementor or Gutenberg with dynamic widgets.
Example: Create archive-project.php to display a grid of all your Projects with featured images and links.
3. How do I add categories or tags to my Custom Post Type?
You can attach existing taxonomies or create new ones:
For existing categories/tags, just include this in your CPT arguments:
‘taxonomies’ => array(‘category’, ‘post_tag’).
Bonus Tip: Creating custom taxonomies like “Project Type” or “Course Level” gives your site a cleaner structure and better filtering options.
4. What’s the difference between Custom Post Types and Custom Fields?
CPTs define what kind of content you’re adding (like Projects or Courses), while Custom Fields define what details you’ll store (like “Client Name,” “Project Budget,” or “Duration”). They work hand-in-hand to structure and reuse your content.
5. Are Custom Post Types SEO-friendly?
Definitely, in fact, they help improve SEO when set up properly. By structuring your content and URLs (like /projects/ or /courses/), you give search engines a clearer understanding of your site’s architecture.
Just make sure to:
Enable “Has Archive” when registering your CPT.
Use SEO plugins like Rank Math or Yoast to optimize your CPTs.
6. Can I export or migrate my CPTs to another site?
Yes! The Tool WP Ultimate CSV Importer Pro can help you migrate CPT data, fields, and taxonomies safely. It’s perfect for agencies or developers managing multiple client sites.
