Table of Contents
Are you a beginner who has just begun your WordPress journey? No stress, we’ve got your back. Publishing a post on WordPress is surprisingly straightforward!
The learning curve with WordPress may be a little steep, but once you get the hang of it, you can leverage its brilliant features to upgrade your digital presence remarkably. This blog will cover all the basics you need to know to create a WordPress post.
Want to know the best part? You don’t need any coding skills to create a WordPress post! Exciting, right? No more waiting, let’s begin the tutorial.
Step-by-Step Instructions on How to Create a WordPress Post
We’ve broken down the entire process of creating a WordPress post into three simple steps to make it easier for beginners to follow along.
Step 1: Writing and Formatting Your Post
a. Add New Post
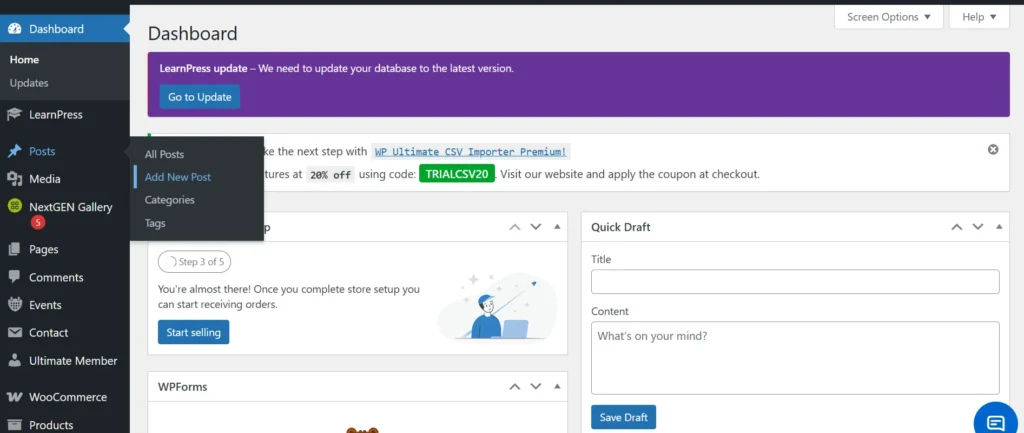
Complete your WordPress setup. Go to the WordPress dashboard to begin working on your site. You can create a new post by clicking “Posts > Add New Post” from the menu bar on the left.
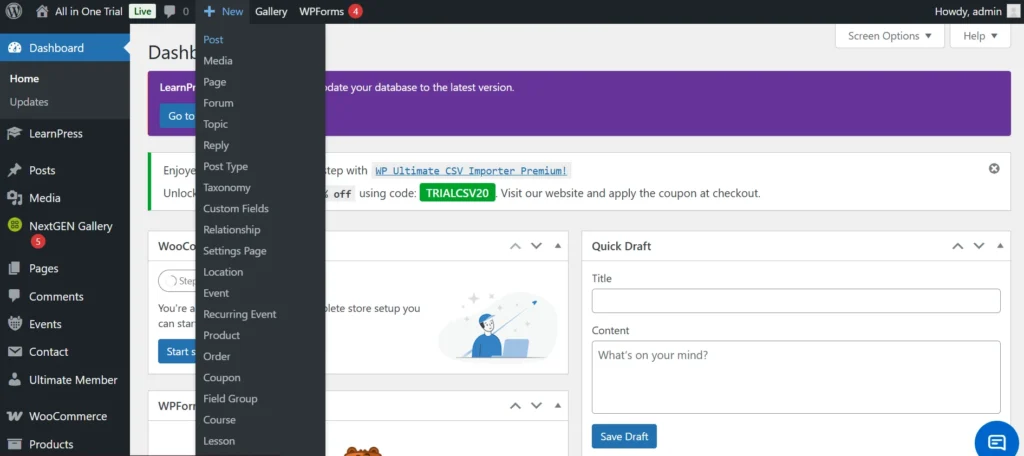
You can do the same by clicking “+ New” from the admin bar at the top and selecting “Post.”
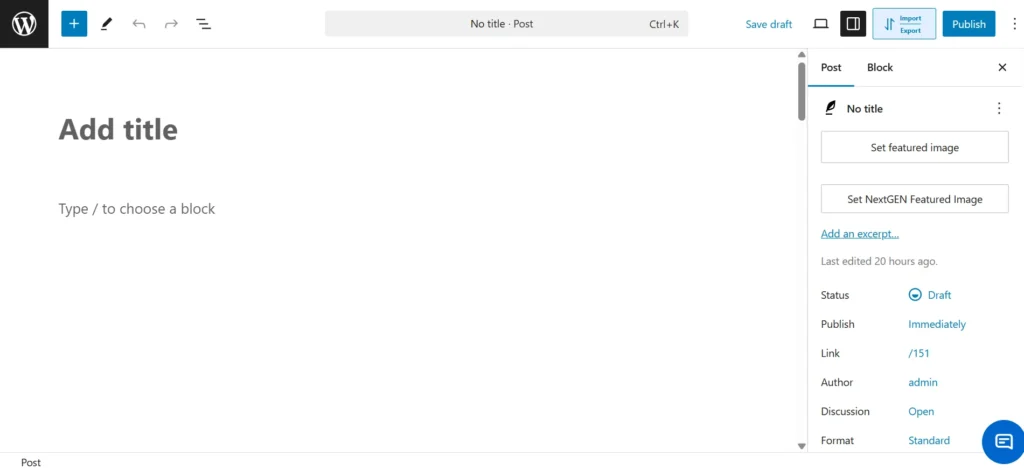
Your new post will be opened in the WordPress default editor (Gutenberg Block Editor) or the classic editor, according to your settings. In this tutorial, we will continue our WordPress post creation for beginners with the default visual editor.
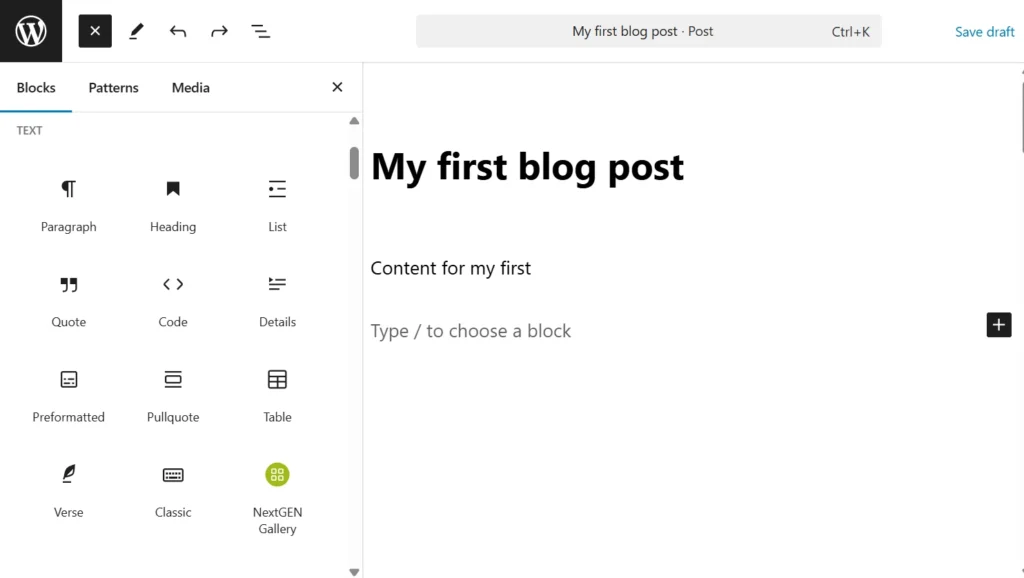
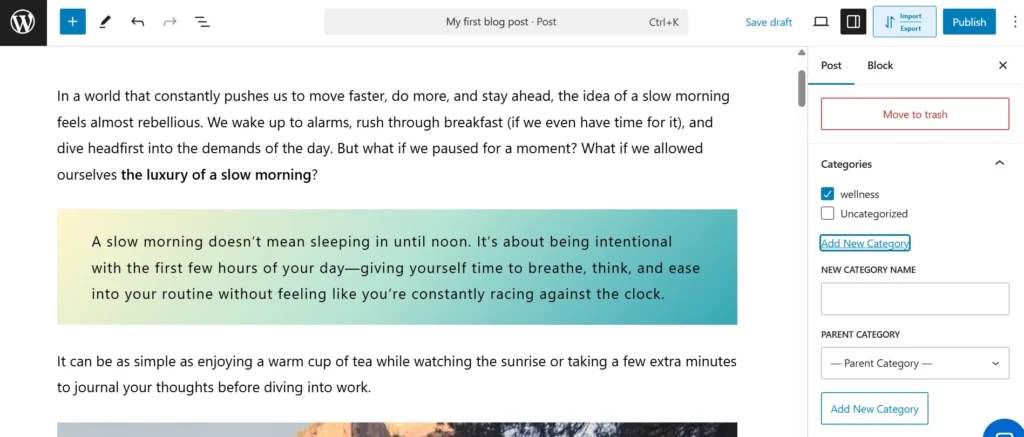
b. Add Title and Content
Start by adding a title in the “Add title” section, then type your content in the block right below it.

To add a new block, just click on the “+” icon. The plus icon in the top left corner is the toggle block inserter, which can also be used to add content blocks to your post.
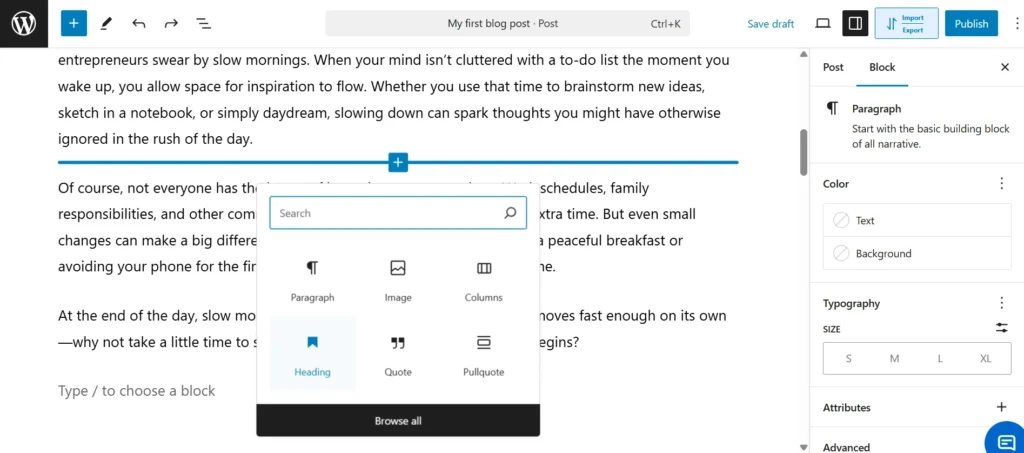
c. Add Formatting
You can add a paragraph, heading, quote, list, column, or table to your post through blocks to format your content for better readability.
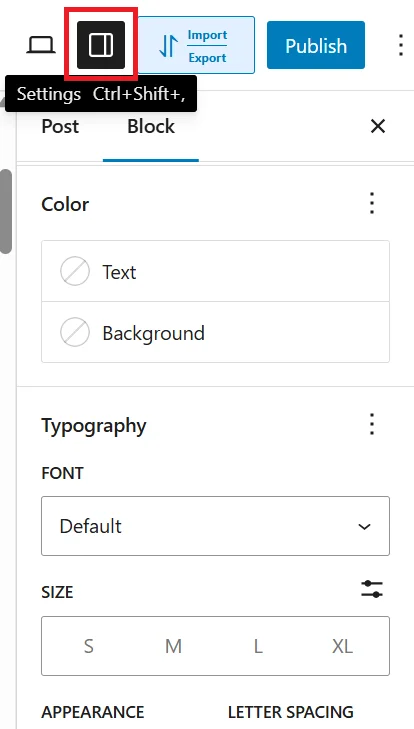
Enable the “settings” to see additional formatting options like typography, color, size, background color, etc.
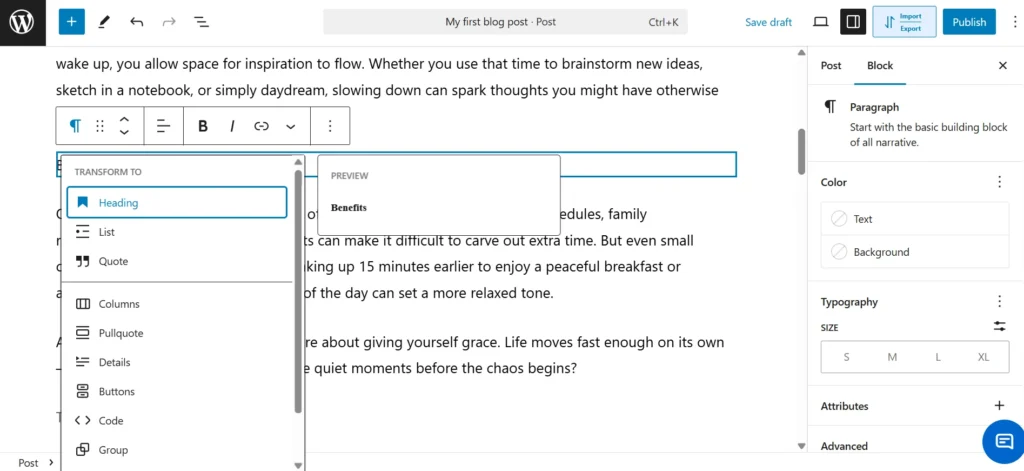
If you want to change any of the blocks to a different format—for example, transforming a paragraph into a quote or a heading—you can do this by clicking on the current block type and selecting the new block type you want to use.
WP Ultimate CSV Importer Pro
Get Ultimate CSV/XML Importer to import data on WordPress faster, quicker and safer.
d. Add Media Content
Now that you’ve added all your text content, it’s time to add some images and media elements to liven up your post. To add an image, click the “+” icon, navigate to the “Media” section, and select the image block from the available options. Click on “Image,” select the file from your device, and upload it to your post.
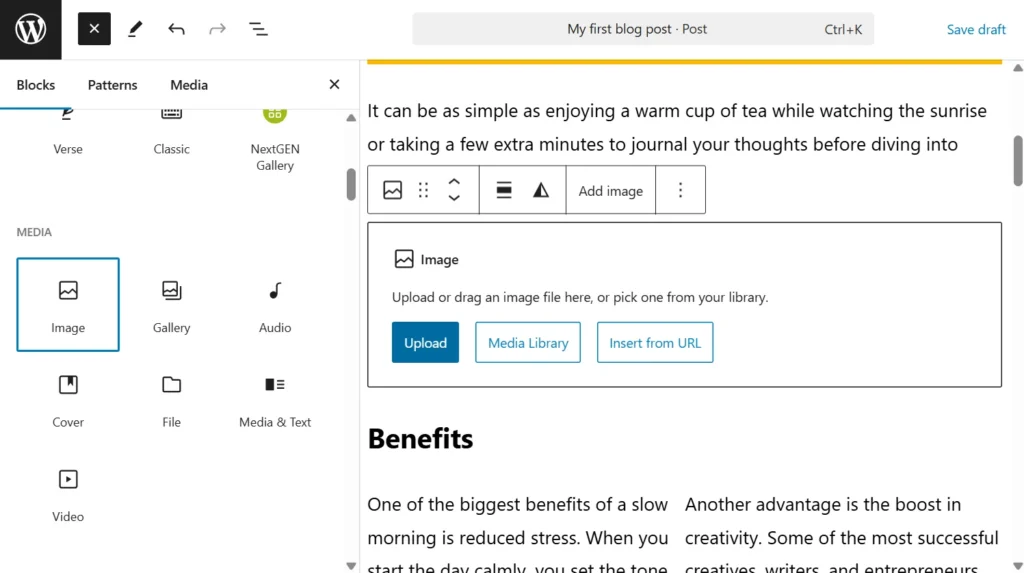
Similarly, you can add other media formats such as video, audio, file, and more. You can upload media files from your desktop, insert them via a URL, or just copy and paste them from your clipboard.
Uploading your media files to your WordPress media library will make it easier for you to reuse or access the images anytime and anywhere within WordPress.
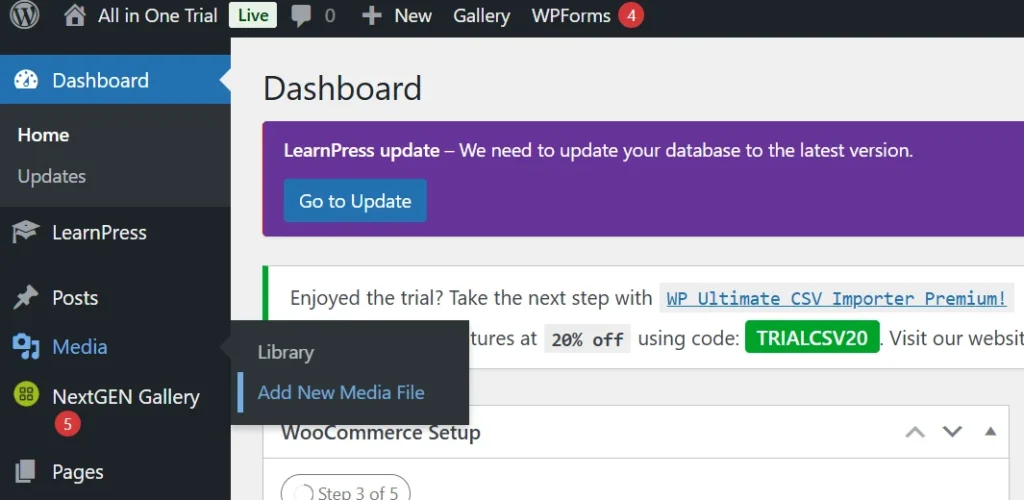
To upload files to your Media Library, go to your WordPress Dashboard, choose Media from the left sidebar, and then click the Add New button at the top. After that, you can simply drag and drop your files or click Select Files to upload them directly from your device.
Step 2: Customizing Your Post
a. Set Featured Image
The featured image acts as the thumbnail for your post and is displayed whenever your post is shared as a link. Choosing an image that is relevant to your brand or content can attract and intrigue visitors, encouraging them to engage with your post.
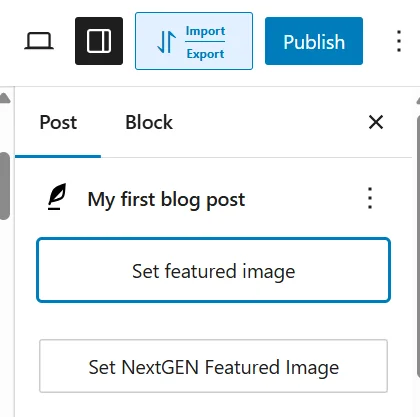
Head over to the Post settings panel, then choose the option labeled “Set featured image” to add your main visual.
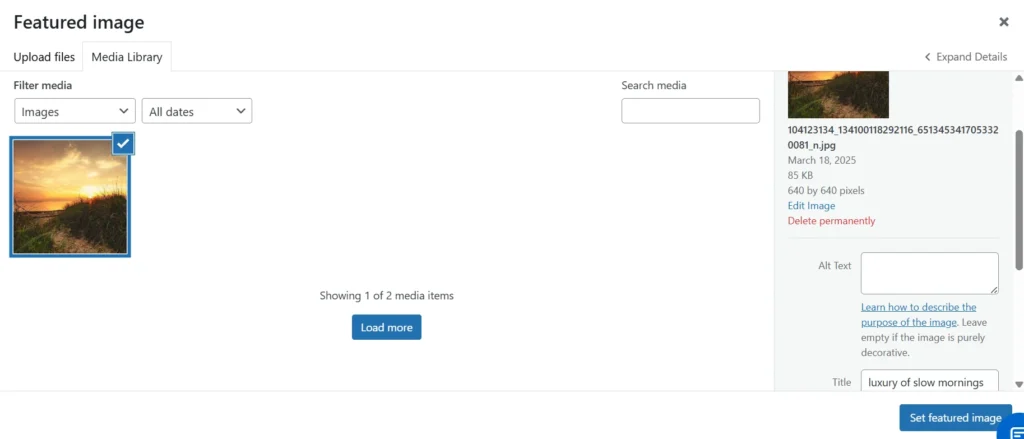
Upload your desired image. To further optimize your post for SEO, add a title, alt text, description, and caption.
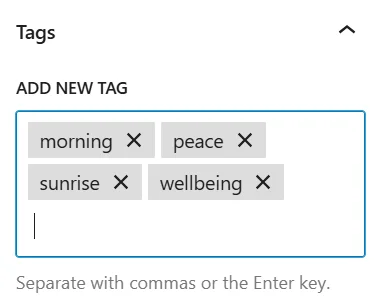
b. Add Categories and Tags
Categories help you keep your content organized, and they benefit your audience by finding related content from your website under the same category. Tags are distinctive to each post and are narrower in scope compared to categories.
For instance, if Sports is a category, then land sports and water sports could serve as tags.
Both categories and tags are very advantageous for improving user experience and SEO.
To create a new category, select “Add New Category” and type its name. Once you have added your post’s category, check the checkbox to apply it to your current post.
To add tags, simply enter the subcategories relevant to your post in the “Add New Tag” field.
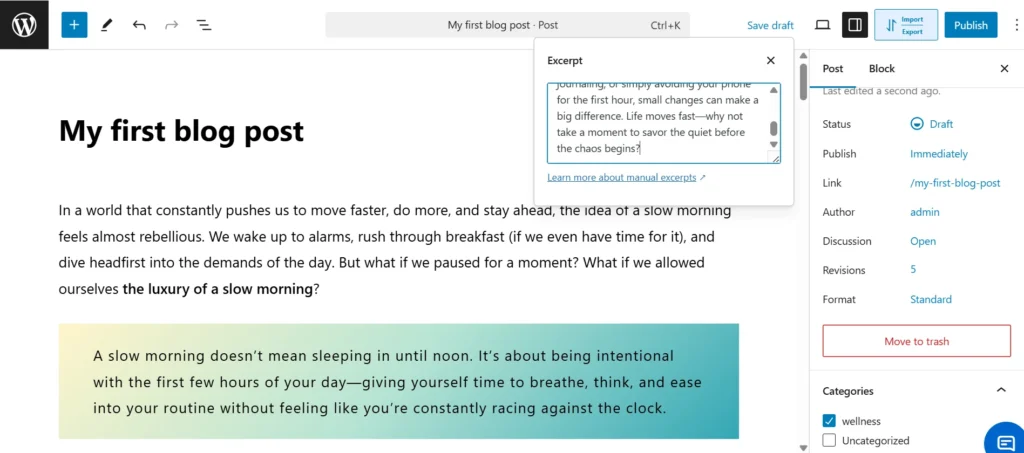
c. Add an excerpt
An excerpt is a preview of your post that appears on the homepage, search engines, and other locations. If you leave the excerpt field blank, WordPress will automatically create a summary by taking the first 55 words from your post content. To have a more meaningful and relevant summary, it is better to manually add an excerpt.
d. Adjust post settings
- Status and Visibility – you can set the status of your post to be draft, pending, private, scheduled, or published.
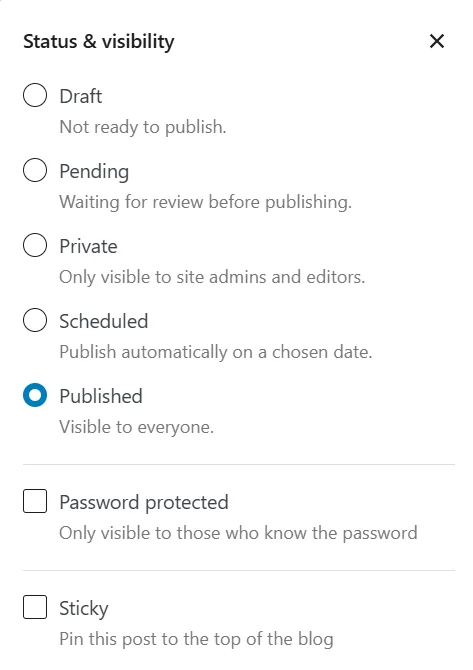
- Password Protection – if enabled, only those who have access to your password can view your post.
- Sticky – if enabled on a post, it will remain at the top of your blog section, irrespective of any newly added posts.
- Link – commonly known as the slug or permalink- lets you personalize the ending segment of your URL.
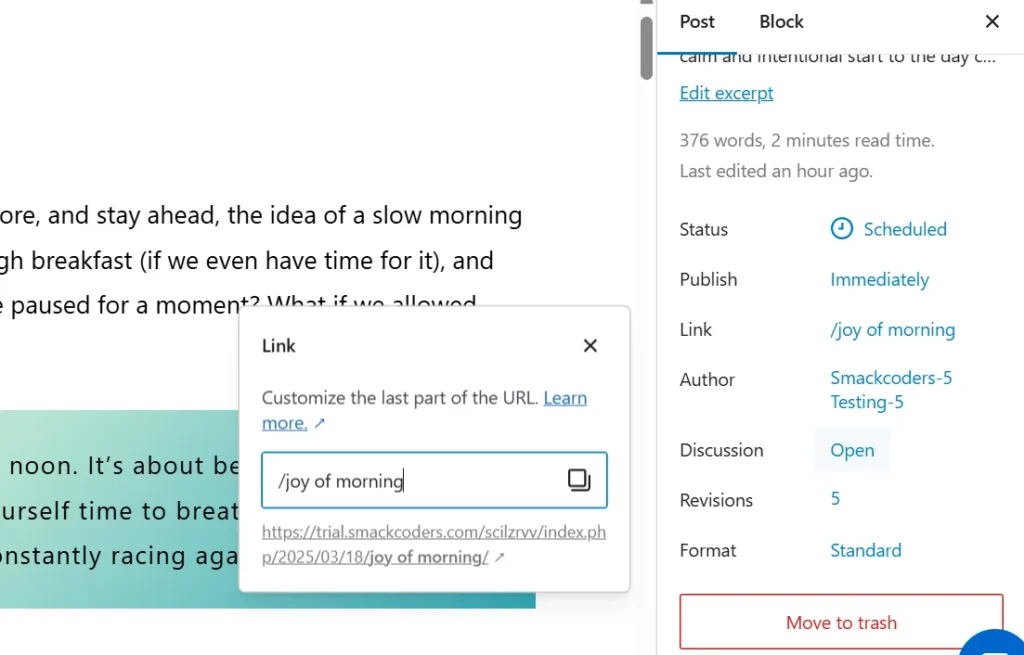
- Author – the creator of the website will be set as the author, unless changed manually. If your website has multiple contributors, you can select and set the author name from the list of registered users.
- Discussion and Reviews – if set to “open”, visitors will be permitted to comment and reply to your post. If set to “closed”, the visitors will not be allowed to comment or reply. In this section, you can also enable/disable pingbacks and trackbacks, which are automated alerts sent when other WordPress bloggers are linked in your post.
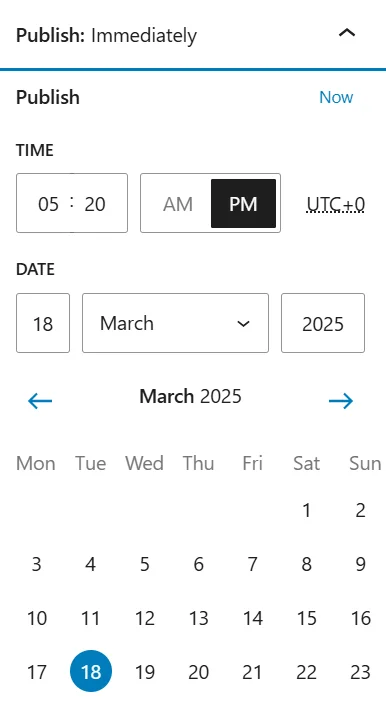
Step 3: Publishing Your Post
Your post is now fully prepared and ready to go live. You have the option to publish it instantly for immediate visibility or use the scheduling feature to set a specific date and time for it to be automatically published. This way, you can strategically plan your content rollout without manual intervention.
To schedule your publication,
Press “Publish,” then select the scheduling option to pick the specific date and time for your post to go live on your website.
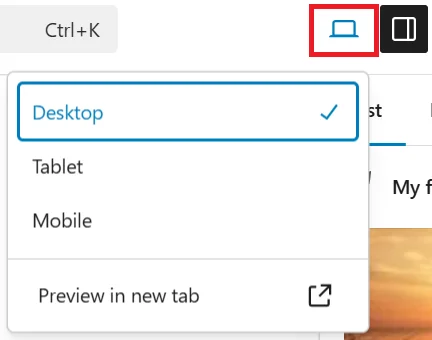
Quick Tip: Before hitting publish, always preview your post to see how it will appear on your website. This ensures everything looks just right. You can also view how your post will look on other devices like tablets and mobiles by clicking on the “view” option.
When you’re happy with the formatting and overall appearance of your post, click the “Publish” button.
Congrats! You have now successfully created and published your first WordPress post.
Conclusion
Whether you are a beginner or a seasoned blogger, WordPress allows you to publish a WordPress post without coding. By following the right steps, you can efficiently create WordPress posts that are engaging, well-structured, and optimized for your audience.
Now that you know how to create and publish WordPress content, we encourage you to explore the various other features that WordPress offers. This beginner’s guide has shown you an easy way to create WordPress posts. But don’t stop here. Explore our other WordPress blogs and tutorials to make the best out of your WordPress site!
WP Ultimate CSV Importer Pro
Get Ultimate CSV/XML Importer to import data on WordPress faster, quicker and safer.
