Vtiger WooCommerce integration Bi-directionally integrates the Contact, Products, and Sales order of Vtiger CRM with WooCommerce effectively. It eliminates data duplication and error with a single source of data at one location. You can sync any particular record using Onsave sync or Sync record between any specified period using historical sync. The record sync is secured and confidential through WooCommerce API.
https://youtu.be/OEBo3r-G2IM
Pre-requisites
- Vtiger 6.5-7.5
- WordPress PHP 7.4
- WooCommerce latest version
Installation
To install the extension Vtiger WooCommerce integration,
- Navigate to Settings
- Then upload the downloaded package of the extension” WooCommerce Integration for Vtiger CRM.zip”
- Now click on Import
- The module has been successfully installed.
Setting up: Generate an API key
For configuration, you need to get the consumer ID and consumer secret from WooCommerce. Do follow the below steps to generate the API Key.
- Navigate to WooCommerce-> Settings
- Select Advanced from the top sidebar and click on Rest API
- Now click on Add a key.
- Here provide a description and Select the Permission as Read/Write from the drop-down
- Finally, click on Generate API Key
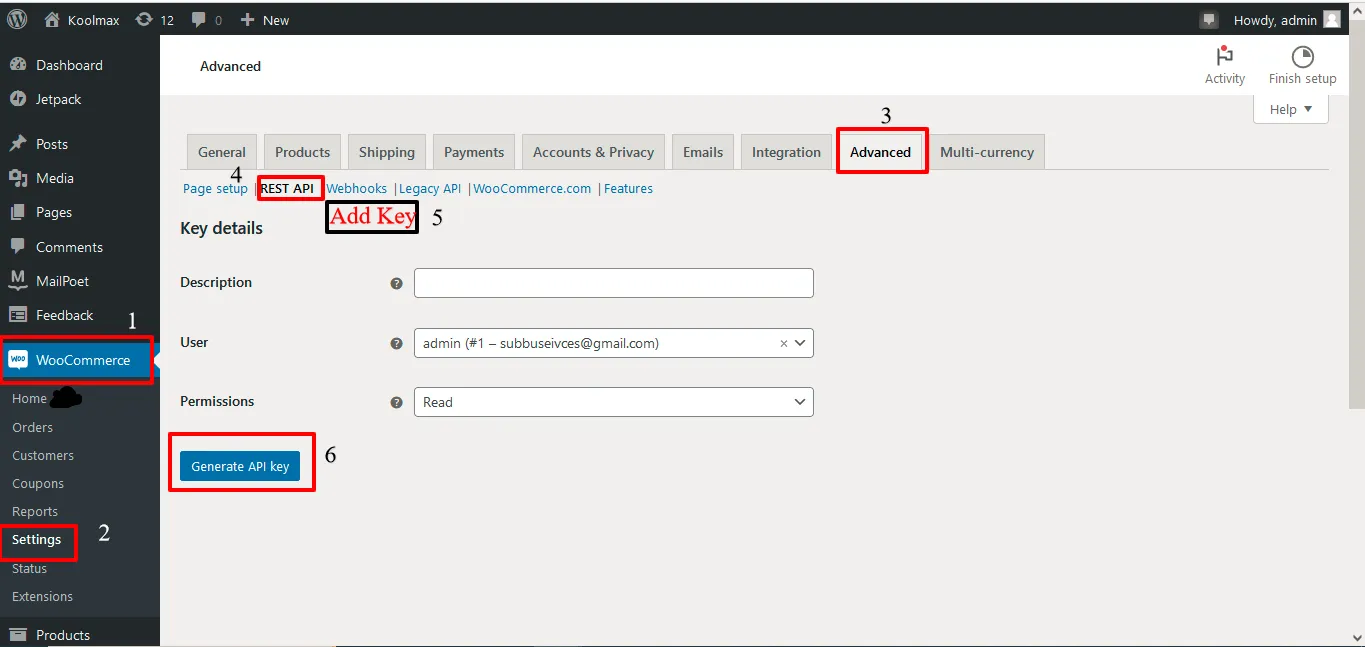
The Consumer key and Consumer secret have been generated.
To connect WooCommerce with Vtiger CRM enter the consumer key and consumer secret generated on WooCommerce to the extension.
- Log in to your Vtiger CRM
- Navigate to the Tools, and select WooTiger.
- On the WooTiger extensions click on the settings and provide the WordPress URL.
- Copy and paste the Consumer Key and Consumer Secret of WooCommerce to the appropriate field of the WooTiger settings page.
- Finally, click on Save.
- Now WooCommerce and Vtiger have been connected for the record sync

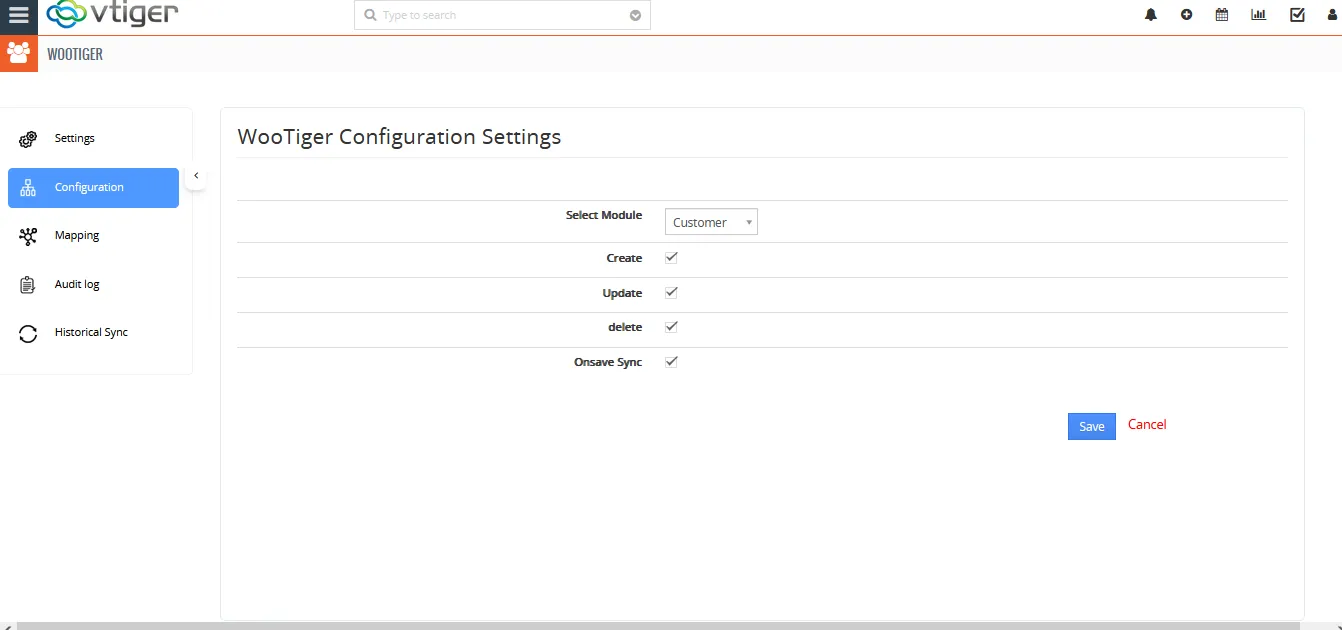
Configuration
The important thing before the synchronization of records is the configuration. For that,
- Navigate to the Configuration tab.
- Select the module from the drop-down for which you need to sync records.
- Enable/Disable the checkboxes Create, Update, and Delete to sync records corresponding to the selected checkbox.
- For example, you enabled the checkbox to create, update, and Disable the delete function. Then it will sync records only when the record is created or updated
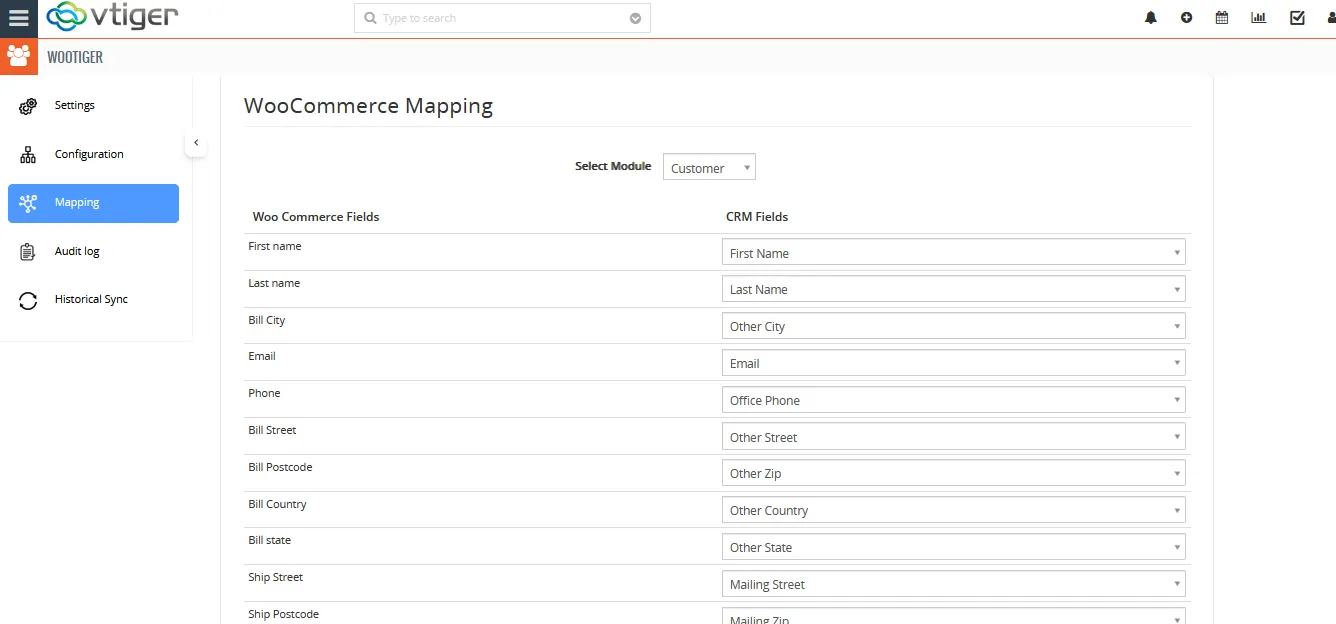
Mapping
Once you configure the settings, you need to map the fields. Field mapping is to map the Vtiger fields with the corresponding WooCommerce fields so that your records’ fields are synced perfectly on both sides.
The fields are mapped already. To customize mapping select the appropriate WooCommerce field corresponding to Vtiger fields.
Modules to be synced
- The Contacts of the Vtiger CRM are synced as the customers in WooCommerce and users in WordPress.
- The Products of Vtiger CRM are synced as products of WooCommerce and Vice versa
- The Sales orders of Vtiger CRM are synced as orders in WooCommerce.
Onsave sync
- Enable the Onsave sync on the configuration to sync records whenever it was saved.
- Select the module for which you want to sync records on save.
- You can also disable the Onsave sync option when you don’t need to sync your records instantly on save.
- Sync records from Vtiger to WooCommerce instantly when the record has been saved.
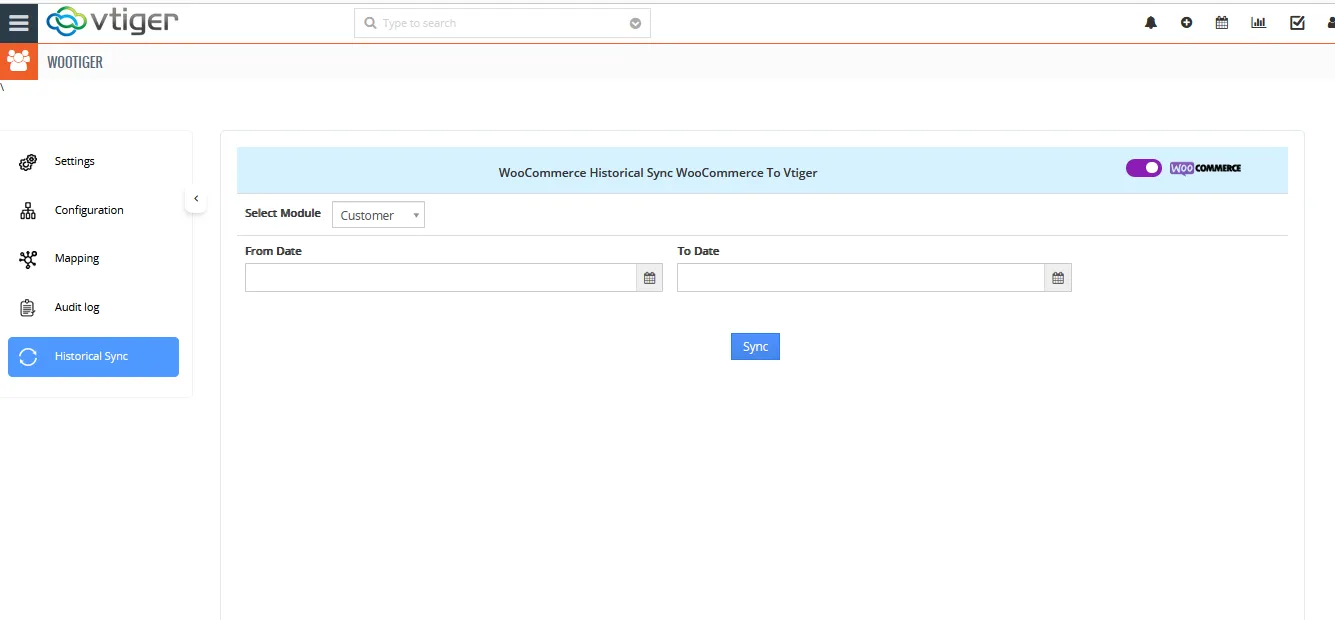
Historical Sync
Sync records Bidirectionally from Vtiger to Woo Commerce and WooCommerce to Vtiger CRM between any specific period.
Vtiger to WooCommerce
- Select the “Vtiger to WooCommerce” tab to sync records from Vtiger CRM to Woo commerce.
- Provide the From-date and To-date between which the records are to sync
- Click on Sync.
- Now all the Vtiger records between the chosen period will be synced to WooCommerce.
WooCommerce to Vtiger
- Select the “WooCommerce to Vtiger ” tab to sync records from WooCommerce to Vtiger CRM.
- Provide the From-date and To-date between which the records are to sync
- Click on Sync.
- Now all the WooCommerce records between the chosen period will be synced to Vtiger CRM.
Audit trails
The Audit page displays all the success/failure statuses of the record sync. To view the record’s sync history, navigate to the Audit tab.
Here you can see the record’s sync history, the module name, and the cause of the unsuccessful record sync.
