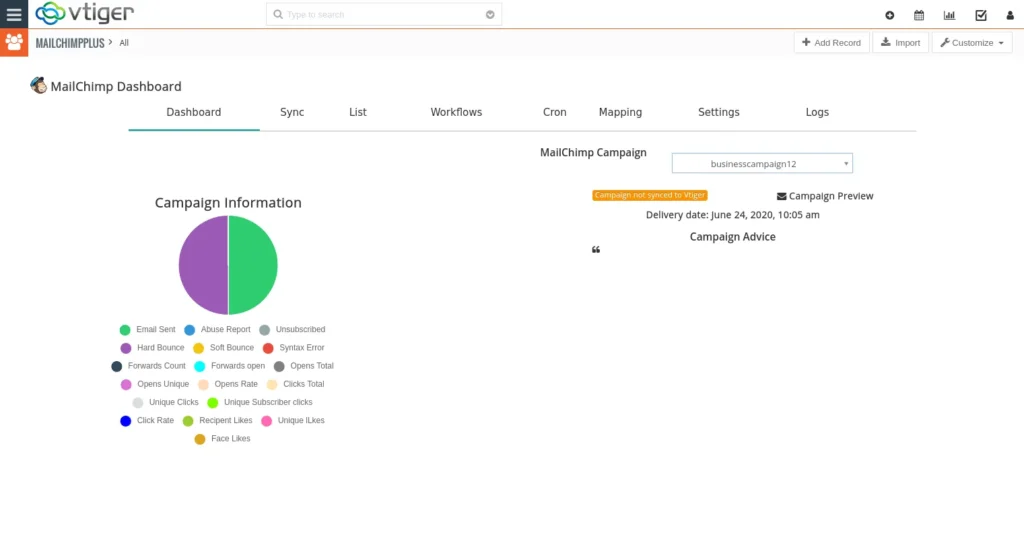
You can view your Vtiger Mailchimp Report details for Campaigns directly inside your CRM.
- Go to Marketing ->MailchimpPlus
Audience/List Synchronization #
Vtiger MailChimp Plus Integration gives you complete access to create and update Audience in both Vtiger CRM and MailChimp.
Sync Audience from MailChimp to Vtiger CRM
Fetch your MailChimp Audience and sync Subscribers as Vtiger Leads, or Contacts, and Accounts. You can sync Subscribers based on the module configuration.
Step 1 – Fetch Audience from MailChimp
- Select Marketing > MailChimpPlus > Sync
- Click on the ‘Get Lists from MailChimp’ button to fetch Lists from MailChimp.

Note:
This will only fetch Lists and not sync any records to Vtiger CRM. The fetched List is listed in the dropdown.
- Choose any one List/Audience and click on ‘Sync Subscribers to VtigerCRM’. Note you can only sync records to Vtiger if you have done mapping.
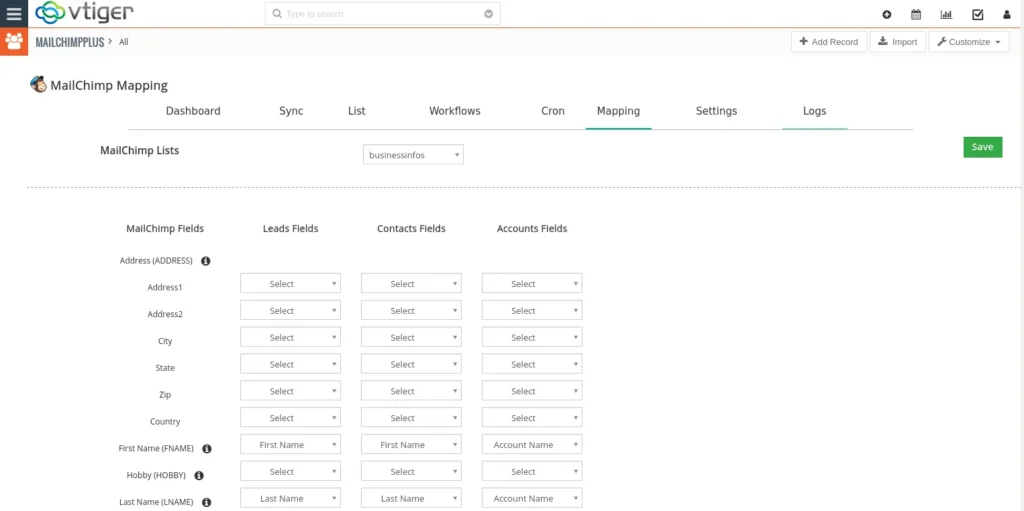
Step 2 – Mapping Audience Fields
Vtiger MailChimp Plus Integration syncs your Audience subscribers to Vtiger only if you done mapping before sync.
Mapping lets you match the fields of MailChimp with VtigerCRM fields.
To do mapping,
- Choose the Mapping section in MailChimpPlus. Select the Audience/List you want to sync from the dropdown.
- Start relating the VtigerCRM fields to the appropriate MailChimp Audience fields. Once done, save the mapping using the Save button.
Step 3 – Sync MailChimp Subscribers to VtigerCRM
Audience sync is done based on the mapping. The MailChimp Audience gets sync to the CRM Lists module.
- Choose the List from the dropdown that you wish to sync. Then click on ‘Sync Subscribers to VtigerCRM’.

Sync List from Vtiger CRM to MailChimp
The List from Vtiger CRM is synced to MailChimp instantly at the time of record gets saved or updated.
- Go to Marketing ? MailChimpPlus.
- Create a new record by choosing ‘Add record’ present at the top right corner.
- After finishing record creation, save the record.
If the records are imported in bulk into VtigerCRM, then the newly added records can be synced via Cron setup.
Sync Selective records to MailChimp
Vtiger and MailChimp integration allows you to manually sync particular records from Vtiger to MailChimp.
- Move to Contacts/Leads/Accounts module in Vtiger.
- Select any one record.
- In the record detail view, select ‘Sync to Mailchimp’. Choose the lists that you want to add this particular record as Subscriber.
- Click Save.
- Move to Marketing -> MailChimpPlus -> List.
- Choose the appropriate List and click Send Changes to MailChimp.
Unsubscribe and Remove Subscriber from List
You can add subscriber to a list and able to unsubscribe or remove that subscriber from the particular list.
To Unsubscribe from list
- Go to Leads/Contacts/Accounts module.
- Choose one record that you want to unsubscribe.
- In its detail view, you can see the ‘Unsubscribe’ button if it is a subscriber of a particular List. Click on it to unsubscribe.
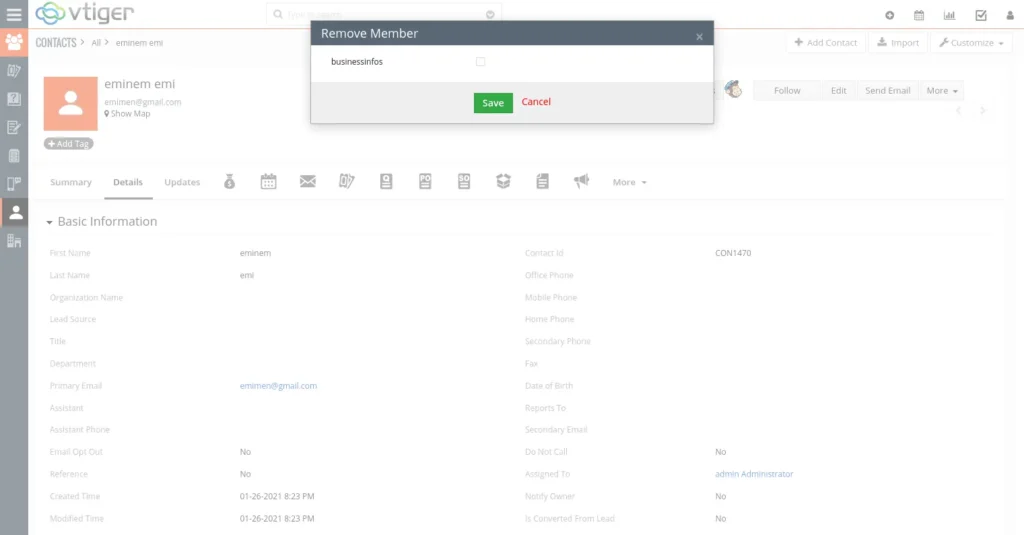
To remove a subscriber from list
- Choose a record in Leads/Contacts/Accounts.
- Click the ‘RemoveFromList’ button.
Campaign Sync of VtigerCRM MailChimp #
Sync Campaign from MailChimp to Vtiger
Vtiger MailChimp Plus Integration enables to get the Campaign sent with your email marketing tool MailChimp.
Note: you can only sync Campaigns after you sync the List between Vtiger and MailChimp.
Step 1 – Fetch MailChimp Campaigns:
- Go to ‘MailChimpPlus ? Sync’ to start sync Campaigns.
- Click on the ‘Get Campaigns from MailChimp’ button to fetch Campaigns from MailChimp.

- You can view all your Campaigns get listed in the dropdown.
- Choose one campaign you want to sync to Vtiger. Click on ‘Sync’.
The sync only happens if you do mapping for the campaign.
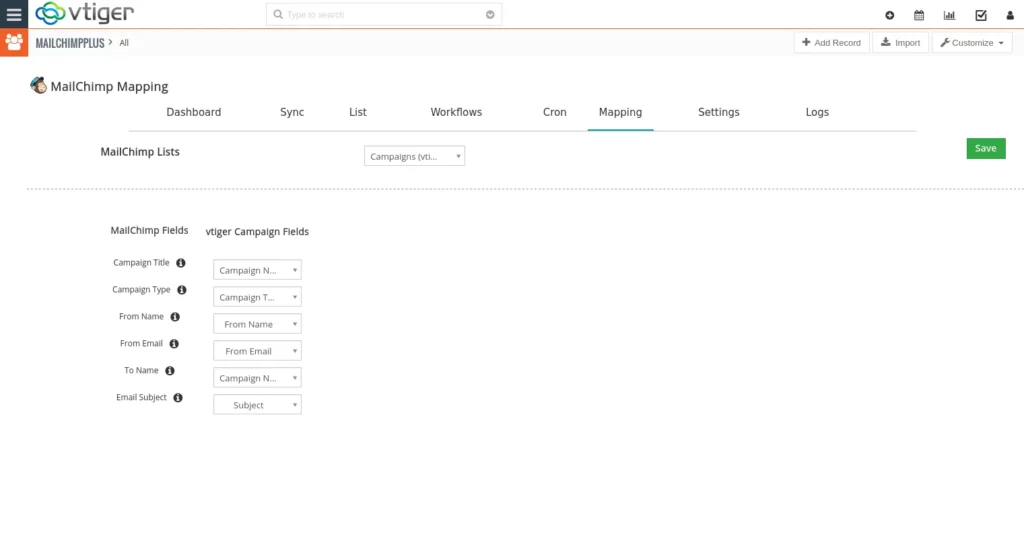
Step 2 – Mapping Campaign Fields:
- Go to MailChimpPlus > Mapping
- Choose required Campaigns and start mapping fields of Vtiger Campaigns with the corresponding MailChimp fields.
- Once you are done, click ‘Save’ to save the mapping.
Step 3 – Sync Campaign to Vtiger CRM:
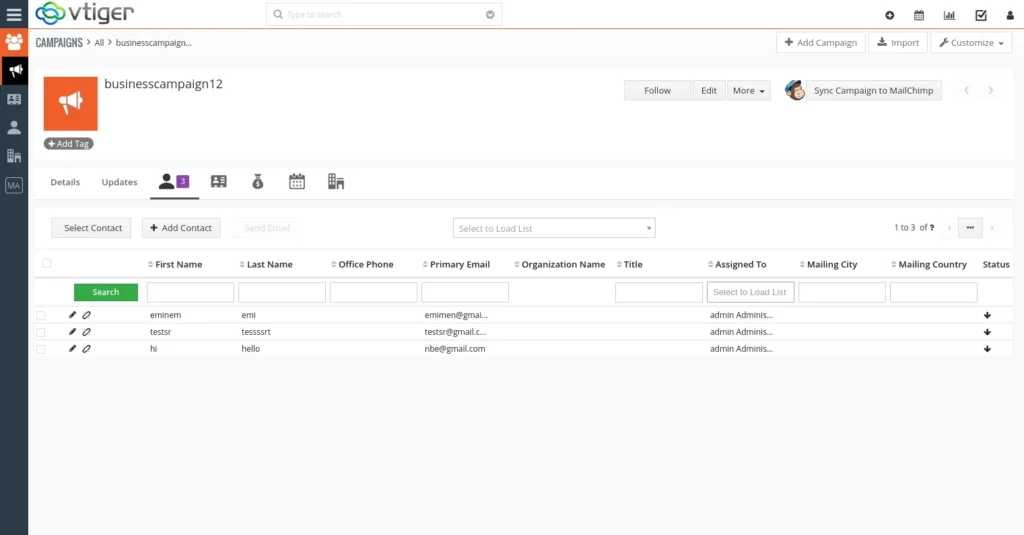
The Campaigns in MailChimp are synced to the CRM Campaigns module.
- Go to MailChimpPlus -> Sync.
- In the ‘Sync Campaigns’ section, choose the Campaign from dropdown and click on the ‘Sync’ button to sync the campaign to VtigerCRM.

In the Campaign detail view, you can see the details of subscribers
Sync Campaign from Vtiger to MailChimp
With Vtiger MailChimp Plus Integration, send your Campaigns created inside VtigerCRM to email marketing tool MailChimp at the instant of saving with no export or import work.
Step 1 – Mapping Campaigns Fields:
- Go to Marketing ? Mailchimp Plus ? Mapping ? Choose required Campaign
- Map the related fields of the Vtiger Campaign with MailChimp Campaign fields.
- Then save the mapping using the ‘Save’ button.
Step 2 – Sync Campaign to MailChimp:
In your VtigerCRM Campaigns modules, start creating a new Campaign.
- Go to Campaigns Module ? Edit view of a Campaign and enable the ‘Sync to MailChimp’ field**
- Click on Save to send the changes
The Campaign automatically sends to your MailChimp at the instant of saving the record.
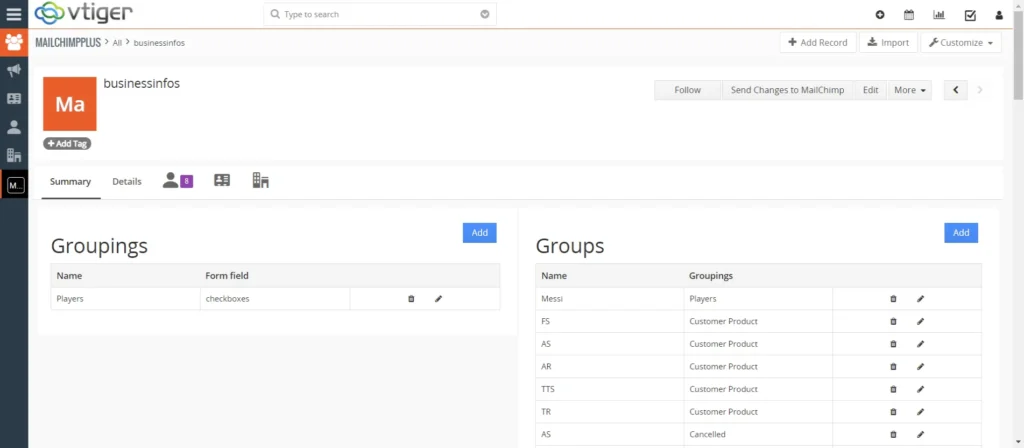
Create Groups & Groupings #
You can create group and groupings inside the List in VtigerCRM,
- Navigate to the List section, select any one List to create a group and grouping inside the List.
- In the List Detail view, click on ‘Add’ to create many groups/groupings for the List.
- Click on the Edit icon to modify and you can delete the groups/grouping from the List.
You can also relate group and groupings for each individual subscriber in Vtiger. Follow the below steps to do that,
- Navigate to a Lead/Contact/Account record detail view in Vtiger.
- Click on the MailChimp Freddie icon.
- Choose the groupings under groups that you want to relate to that particular subscriber and click on ‘Update’ to send the changes.
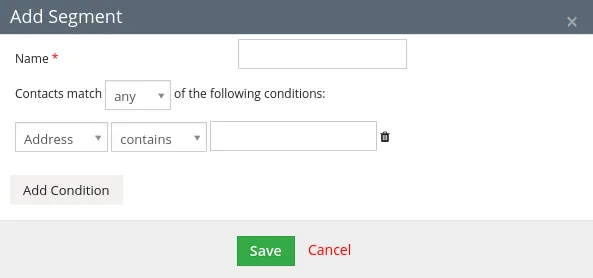
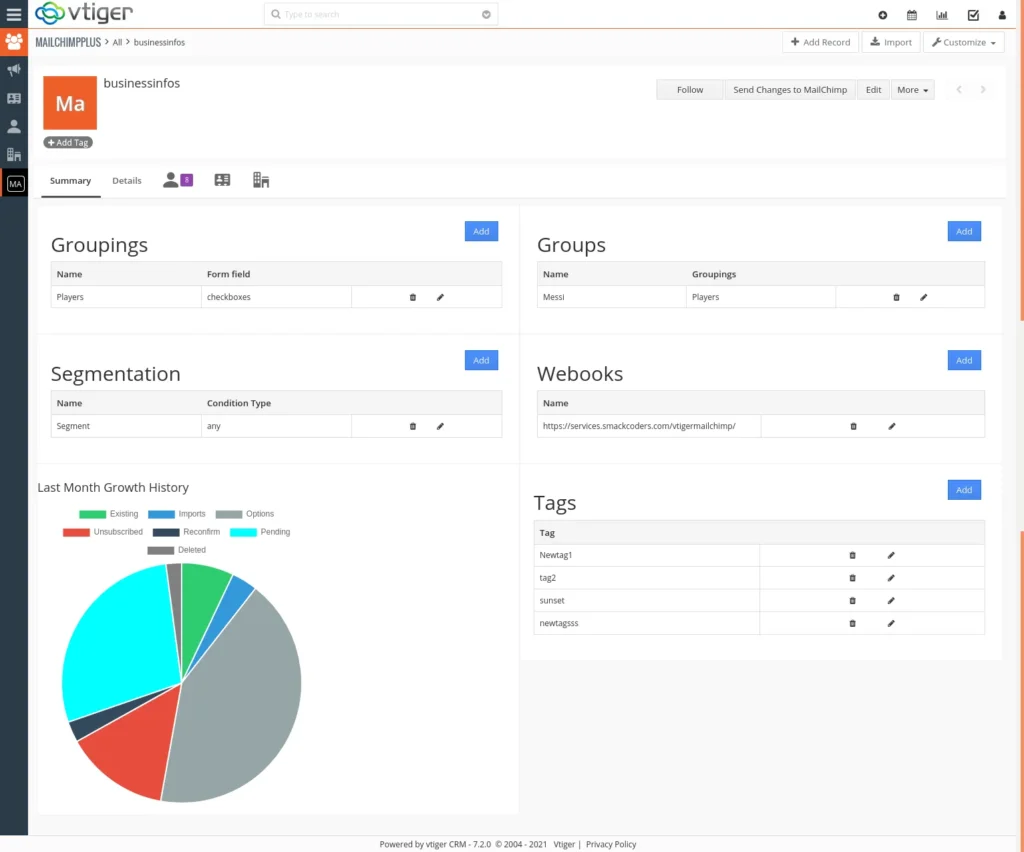
Create Tags, Segments, and Webhooks
Vtiger MailChimp Plus enables you to create tags, segments, and webhooks directly inside the List in VtigerCRM.
- Choose one List under the ‘List’ section.
- Add new segments, tags, and webhooks as you need for the List inside VtigerCRM.
Screenshot of Add Segments
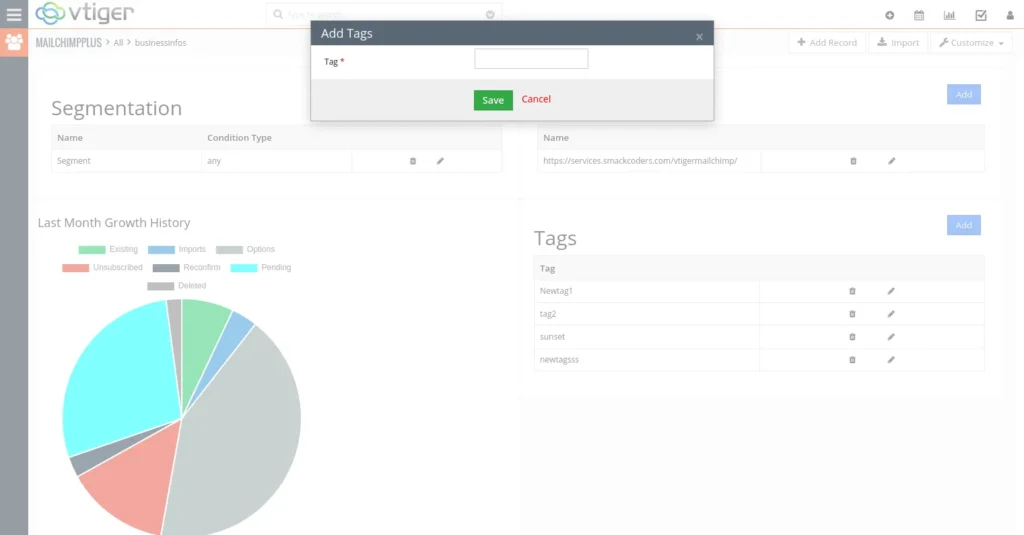
Screenshot of Add Tags
Screenshot of Add Webhooks
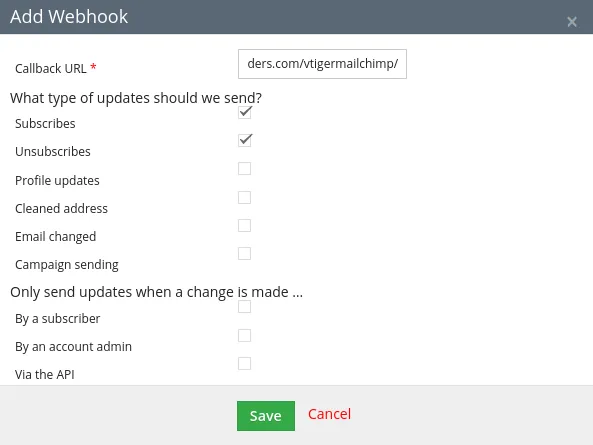
- Click on the ‘Edit’ or ‘Delete’ icon of the tags or segments or webhooks to change or remove it from the List.
You can relate tags individually for each subscriber in Vtiger.
- Select any one record in Vtiger Leads/Contacts/Accounts module.
- Click on the ‘Tags’ button from its detail view.
- Choose the tags that you want to relate to that particular Lead/Contact/Account.
- Click ‘Save’ to update the changes.
Workflow and Cron Setup #
With Vtiger MailChimp Plus, you can optimize the synchronization process between VtigerCRM and MailChimp by defining your own rules for adding, updating, or removing subscribers.
Add/Remove record
- Define conditions on which the records are added/deleted to your MailChimp Lists.
- You can create any number of workflows for every module.
- Conditions can be set with AND, OR rules.
- Conditions with ‘AND’ rule will execute when all the conditions are met.
- The conditions with ‘OR’ rule executes when anyone condition is met.
Create a new workflow:
- Go to ‘MailChimpPlus > Workflows’
- Click ‘New’ to create a new workflow.
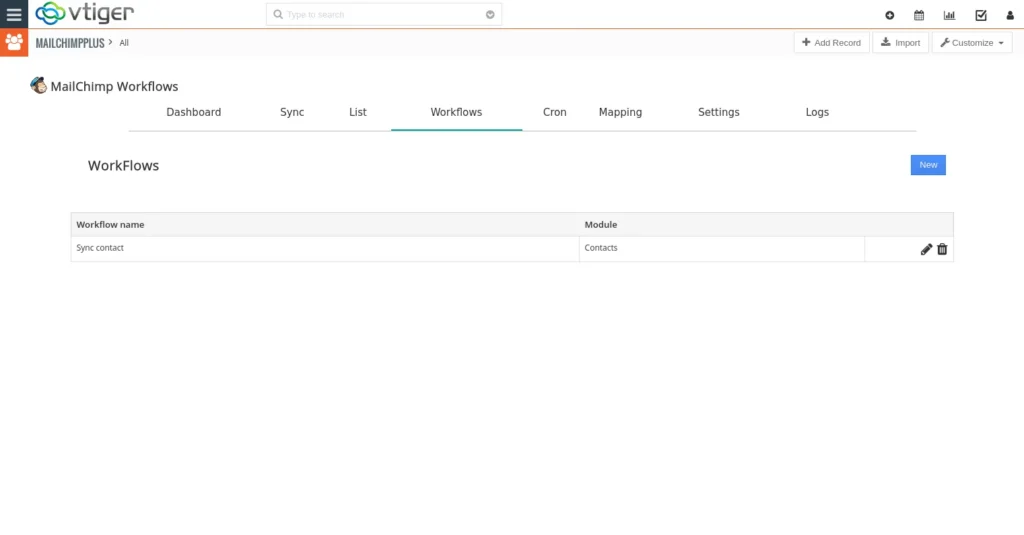
- To edit the already existing workflow, tap the pencil icon of the appropriate workflow.
- Provide a name for the Workflow.
- Choose the module from the dropdown.
- Enable the checkbox, if you want to add/update the record and send the record to Mailchimp Audience.
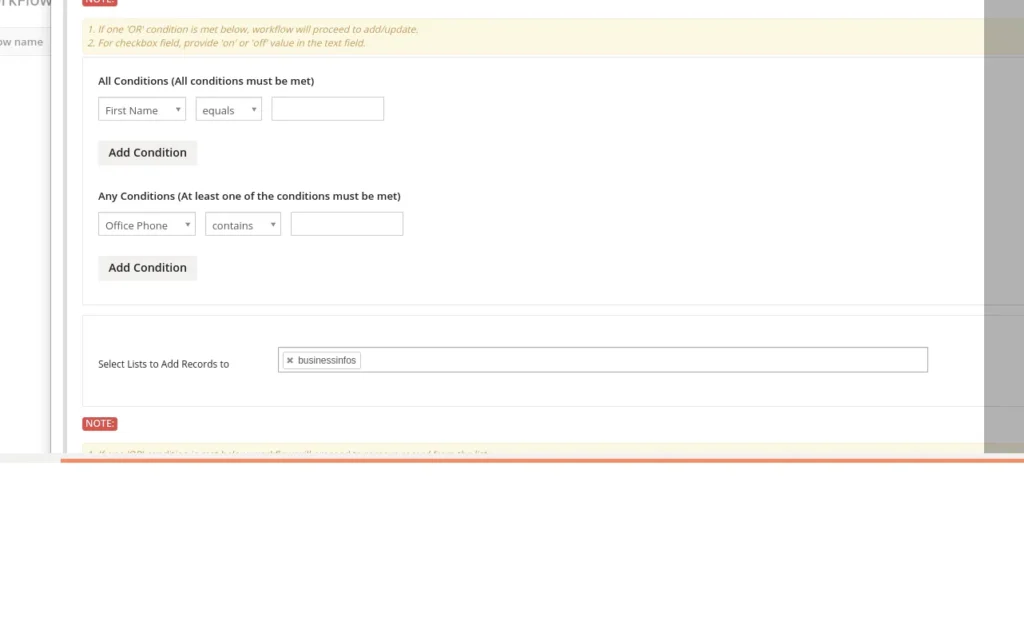
- Give conditions based on AND or OR rules.
- Use the ‘Add Condition’ button to add multiple conditions.
- Then mention the appropriate Lists in the ‘Select Lists to Add Records to’ textarea to apply changes to that Lists.
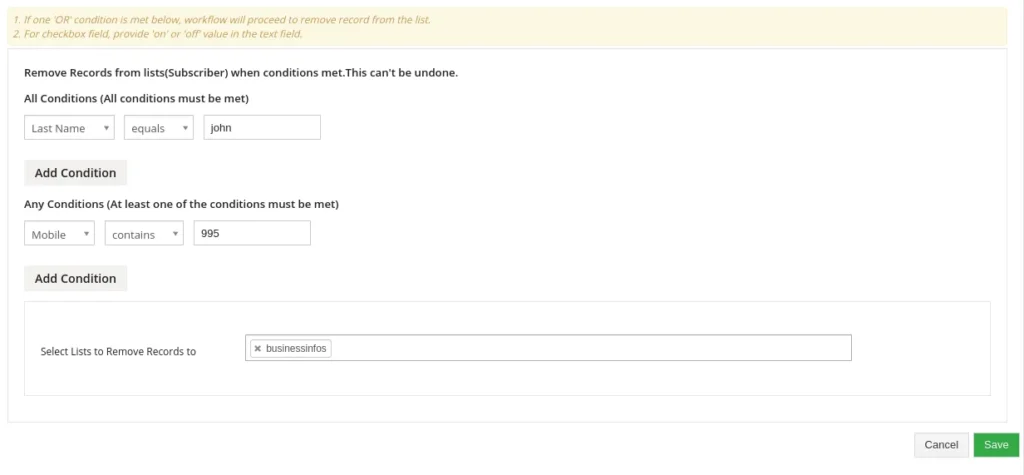
To remove records from the Mailchimp Audience/List,
- Provide conditions to perform actions based on it.
- Mention the Mailchimp Lists in ‘ Select Lists to Remove Records to’ textarea. Once you create, click Save.
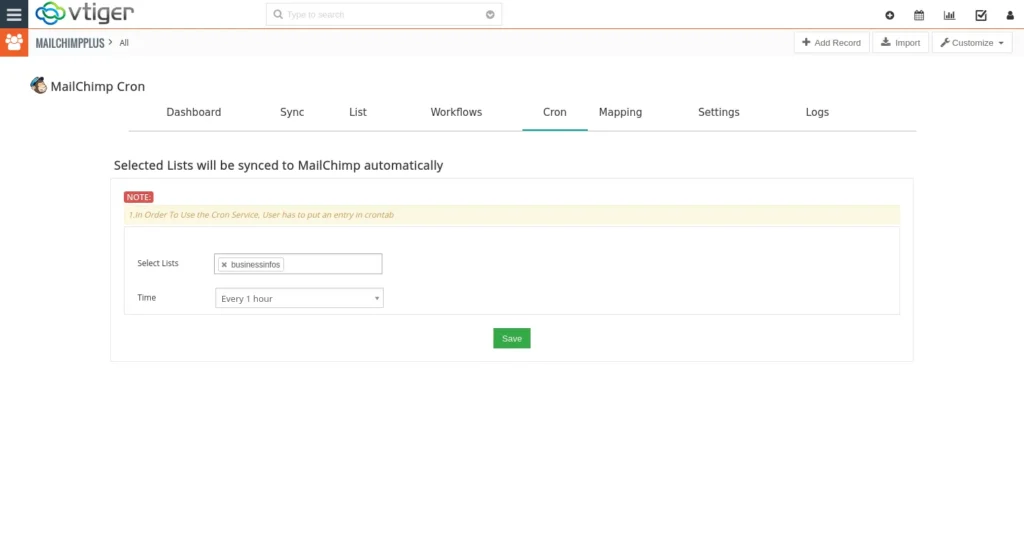
Cron Setup
To schedule your records sync between VtigerCRM and MailChimp, you need to configure Cron.
- Navigate to ‘Marketing ? MailChimpPlus ? Cron’.
- Choose all required List and the frequency of time to attempt sync.
- Click Save.
Logs and List Growth History #
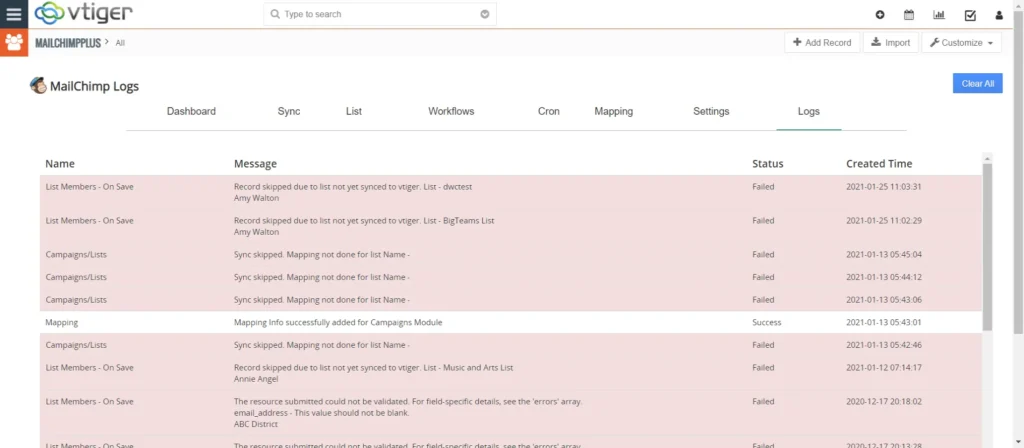
Logs
View logs for the entire sync process between Vtiger and MailChimp. The Vtiger MailChimp plus Integration logs list both success and failure transactions with the time of execution.
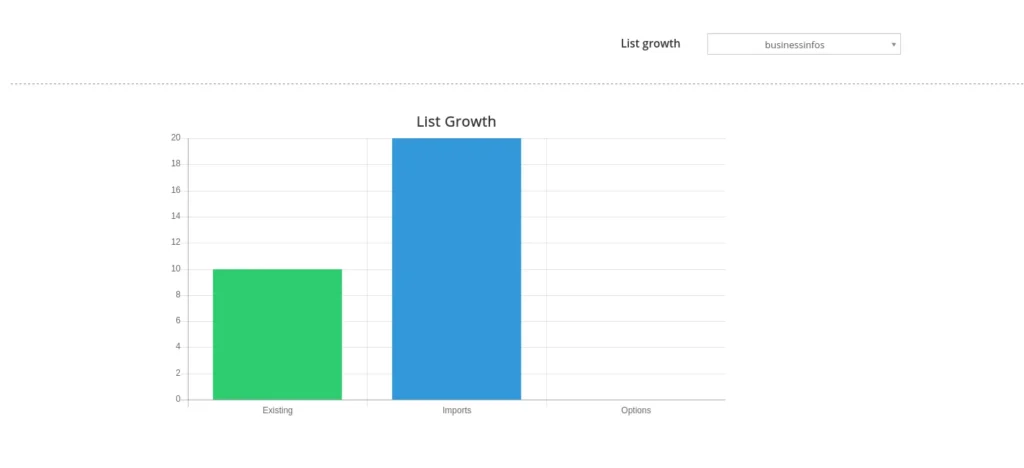
List Growth History:
This will show you the entire growth history of every Mailchimp Audience/List.
- Go to MailChimpPlus > Dashboard.
- Scroll down and select List from the List growth dropdown.
- Now you can view the details like existing subscribers, unsubscribed, etc.,
You can also view the monthly growth history of each list inside Vtiger.
- Go to MailchimpPlus -> List.
- Choose any one list, it’ll navigate to the detail view of the List.
- Scroll down to see the last month’s growth history of the List.
Other links #
Connect Vtiger Mailchimp to Sync Leads & Contact Data & Email Campaign