Managing content structure is easier with ACF taxonomy – no code required. Using Advanced Custom Fields, you can create any custom taxonomy in WordPress and assign it to any post type in minutes. Whether you’re running a blog, product catalog, or membership site, an ACF taxonomy field gives you full control over how content is classified. This guide covers everything – from setup to Gutenberg integration – updated for 2026.
Note: Some features in this guide – such as assigning custom field groups to taxonomies – require ACF Pro.
Key Takeaways
- ACF lets you create and assign custom taxonomies to any post type without code
- Custom taxonomies work with Gutenberg, WooCommerce, and REST API natively in 2026
- Always sanitize taxonomy queries and use nonces for security
- Use transient caching for large taxonomy sets to maintain performance
The Importance of Custom Taxonomies
Before we dive into the steps for creating custom taxonomies with the ACF plugin, let’s take a moment to understand why custom taxonomies are valuable for your website. While WordPress offers built-in taxonomies like categories and tags, these might not always align with your specific requirements.
In such cases, custom taxonomies enable you to classify your content in a way that better suits your needs. They offer a structured organizational system and offer flexibility in categorizing your content based on your unique requirements.
How to Create Custom Taxonomies in WordPress
To begin creating custom taxonomies with ACF, make sure you have the plugin installed on your website. Once installed, you will see the ACF menu listed in the sidebar. Follow the steps below to get started:
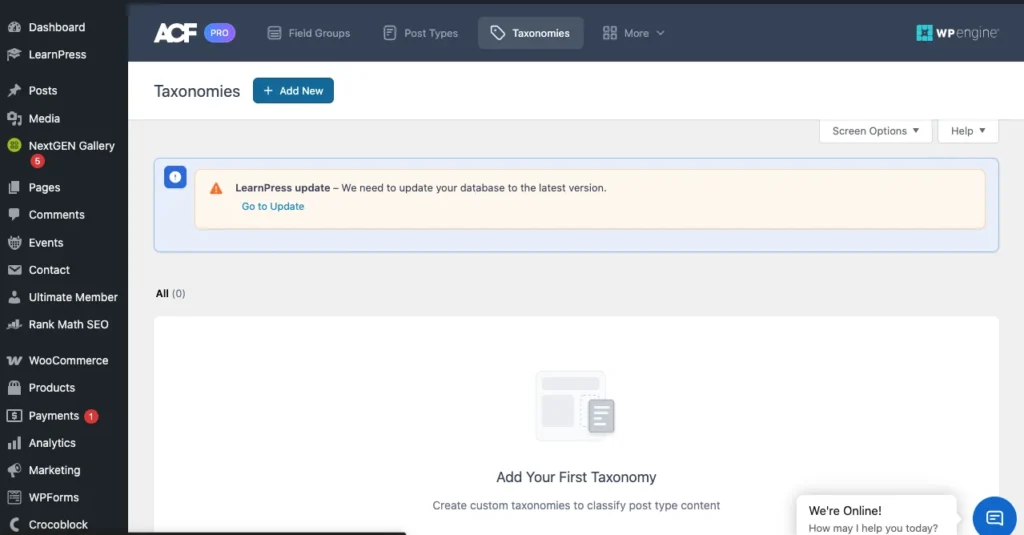
1. Navigate to ACF >> Taxonomies and click “Add New.” This will take you to the “Add New Taxonomy” page.

2. Fill in the required fields to configure the basic settings. Provide the plural label, singular label, and taxonomy key. The field for the taxonomy key is automatically generated based on the singular label, but you can edit it if desired.
3. From the “Post Types” field, select the post types to which you want to assign this custom taxonomy. You can choose multiple post types.
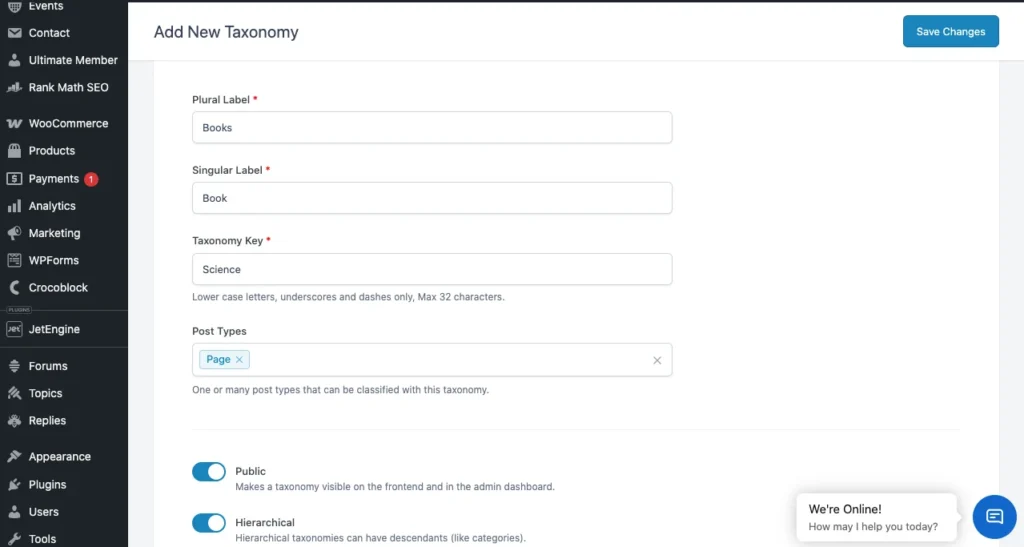
4. By default, the taxonomy will be visible on the front end. If you want the taxonomy to have a hierarchical structure, enable the “Hierarchical” toggle button.
Additional Settings Configuration
ACF makes configuring settings simple with additional settings that you can access by toggling the bar. Here’s a brief overview of the available tabs:
General: Enable the “Sort Terms” option to sort the taxonomy terms. If you have the default term enabled, provide the term name (mandatory), term slug, and term description. You can also provide a general description of the taxonomy. The “Active” toggle is enabled by default, but you can deactivate the taxonomy without deleting it.
Labels: Define the labels for the taxonomy, which will be used throughout the admin dashboard. The labels are automatically generated based on the singular and plural labels you configured in the basic settings, but you can edit them if necessary.
Visibility: Control the visibility of the taxonomies on the front and admin dashboards.
URLs, permissions, and REST API: These settings are preconfigured, but you can make changes based on your specific needs. For more detailed information, refer to the ACF official documentation on custom taxonomy.
Once you have configured the settings, click “Save Changes” to apply the custom taxonomy in ACF.
Pro tip: Set show_in_rest => true when registering your ACF taxonomy to enable Gutenberg and REST API support – a critical step for 2026 WordPress setups.
Adding Values to Custom Taxonomies
There are multiple ways to add value to a custom taxonomy. One option is to visit the “Add New” or “Edit” page of any record in the post type to which you assigned the custom taxonomy. You will find the custom taxonomy listed as a submenu below the post type’s submenus. For instance, if you assigned “CTax1” to the “Posts” post type, you will find a “CTax1” submenu listed below the “Posts” submenus. From there, you can create custom taxonomies.
How to Add a Custom Field to a Taxonomy in WordPress Using ACF
You can also assign a custom field group for WordPress to your custom taxonomy. To do this, follow these steps:
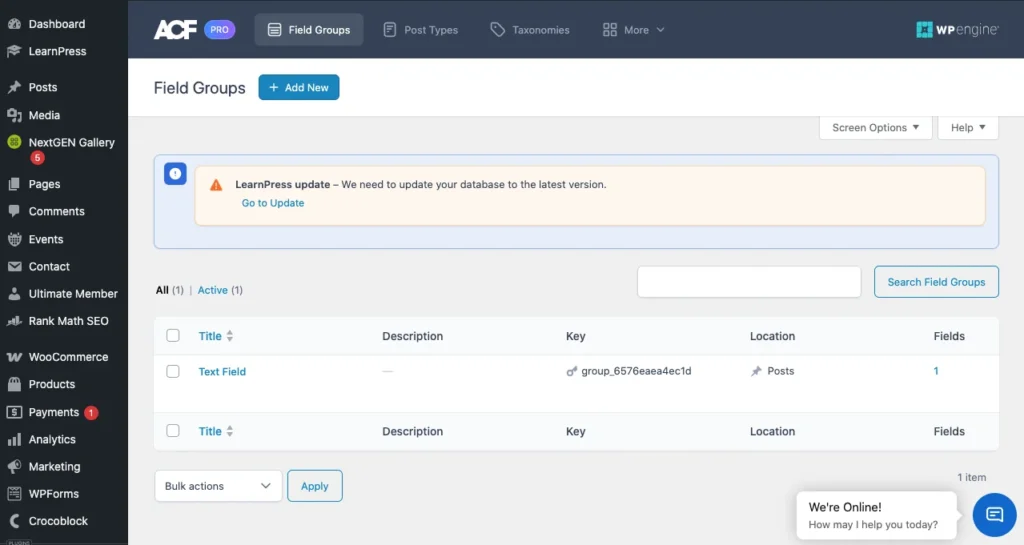
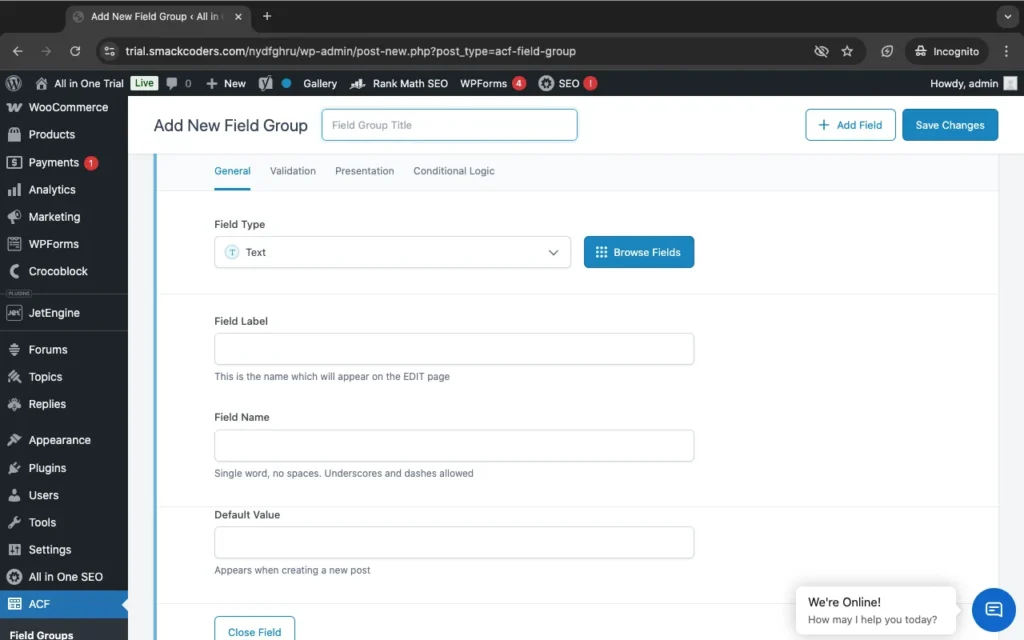
1. Go to ACF >> Field Groups and click on “Add New.
2. Provide a title for your field group.
3. Add field types by selecting them from the drop-down menu. Enter the field label, field name, and default value.
4. In the “Settings” section, choose “Taxonomy” >> “is equal to” >> “your_taxonomy” from the drop-down menus.
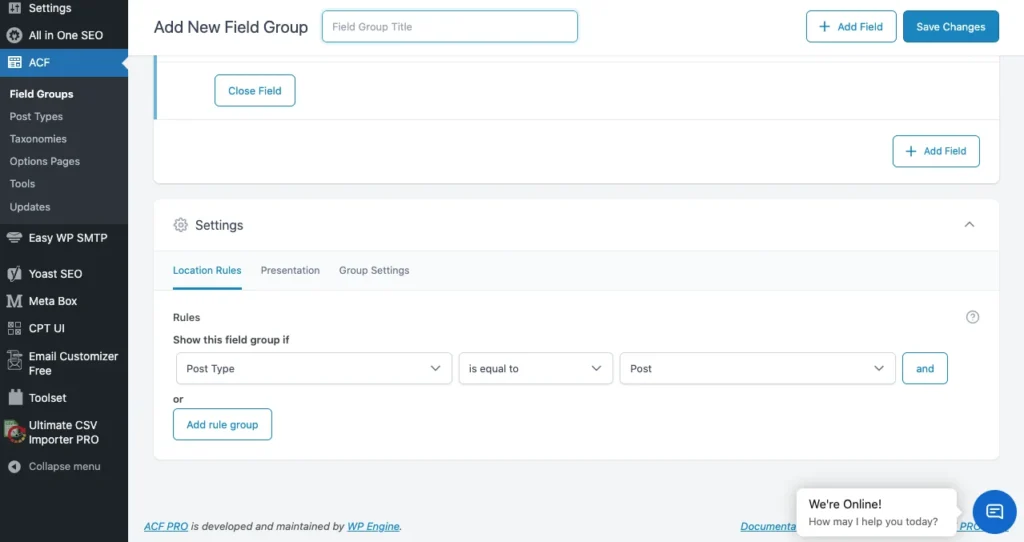
5. Click “Save Changes.”
Now, the custom fields you created will be assigned to your custom taxonomy, enhancing the flexibility and functionality of your website.
Custom Fields vs Taxonomies in WordPress: Quick Comparison
| Feature | Custom Fields | Taxonomies |
| Purpose | Add specific data to individual posts | Group and classify content |
| Examples | Price, author bio, event date | Categories, tags, custom genres |
| Structure | Individual data fields | Broader classifications |
| Hierarchy | Non-hierarchical | Can be hierarchical or flat |
| Used for | Post-level metadata | Content relationships |
| ACF Role | Define and manage field types | Create and attach fields to terms |
| Output | Text, image, number, date, etc. | Term name, slug, taxonomy label |
How to filter posts by custom fields and custom taxonomies on archive pages?
To filter posts by custom fields and custom taxonomies on archive pages using Advanced Custom Fields (ACF) in WordPress, you’ll need to use custom queries to modify the main WordPress loop. Here’s a step-by-step guide to achieving this:
- Create Custom Fields and Taxonomies: First, ensure you have created your custom fields and taxonomies using Advanced Custom Fields. You can create custom fields for posts using ACF’s interface, and you can register custom taxonomies using code in your theme’s functions.php file.
- Modify the Main Query: In your theme’s functions.php file or a custom plugin, add a filter to modify the main WordPress query on the archive pages where you want to apply the filtering. You’ll use the pre_get_posts action hook for this purpose.
- Uncomment and Customize: Uncomment and customize the lines within the custom_archive_query function to filter posts by your custom fields and taxonomies. Replace ‘custom_field_name’, ‘desired_value’, ‘custom_taxonomy_name’, and ‘desired_term’ with the appropriate values from your ACF setup.
- Save Changes and Test: Save your changes to functions.php or your custom plugin file, and then visit the archive pages where you’ve applied the filtering. Ensure that the posts are being filtered according to your custom fields and taxonomies.
By following these steps, you’ll be able to filter posts by custom fields in WordPress archives and taxonomies on archive pages using ACF in WordPress.
How to retrieve taxonomy images using Advanced Custom Fields?
Below are the steps to get an ACF (Advanced Custom Fields) taxonomy image:
- Create a Taxonomy Field:
First, you need to create a taxonomy field in your ACF field group. When creating the field, make sure you select the “Taxonomy” field type.
- Assign the Field to the Appropriate Taxonomy:
After creating the taxonomy field, assign it to the desired taxonomy (e.g., categories, tags, or a custom taxonomy you’ve created).
- Set Up the Field for Image Selection:
Within the field settings, ensure that you’ve set it up to allow image selection. You can do this by choosing the appropriate field type (e.g., Image or File) and configuring any other settings as needed.
- Retrieve the Image in Your Template:
Once your field is set up and content has been assigned, you can retrieve the image associated with the taxonomy term in your template files.
You can retrieve the taxonomy field value using ACF’s get_field() function. Pass the name of the field and the taxonomy term ID.
For example
php
$image_id = get_field(‘taxonomy_image’, ‘category_’ . get_queried_object_id());
$image_url = wp_get_attachment_image_url($image_id, ‘full’);
Display the Image:
Once you have the image URL, you can use it to display the image in your template using HTML or any other markup you prefer. For example,
php
if ($image_url) {
echo ‘<img src=”‘ . esc_url($image_url) . ‘” alt=”Taxonomy Image”>’;
}
Replace ‘taxonomy_image’ with the actual name/key of your ACF taxonomy field and ‘category_’ with the appropriate prefix for your taxonomy (e.g., ‘category_’, ‘post_tag_’, or ‘your_custom_taxonomy_’).
By following these steps and using ACF functions like get_field(), you can easily retrieve and display the taxonomy image associated with your custom taxonomy terms in WordPress templates.
Modern Integration of ACF Custom Taxonomies with Gutenberg (WordPress 6.6+ & PHP 8.1+)
Modern Security Practices
1.Security: Nonces and Input Sanitization
When filtering posts via $_GET or $_POST (e.g., for AJAX or form submissions), always:
Use Nonces
Use wp_nonce_field() in forms and verify with check_ajax_referer() or wp_verify_nonce() on the server side:
// In your form
<?php wp_nonce_field(‘my_filter_action’, ‘my_filter_nonce’); ?>
// In your handler
if ( ! isset($_POST[‘my_filter_nonce’]) || ! wp_verify_nonce($_POST[‘my_filter_nonce’], ‘my_filter_action’) ) {
wp_send_json_error(‘Invalid nonce’);
}
Sanitize All Input
$category = isset($_GET[‘category’]) ? sanitize_text_field($_GET[‘category’]) : ”;
$post_id = isset($_GET[‘post_id’]) ? absint($_GET[‘post_id’]) : 0;
For arrays or nested values:
$filters = isset($_GET[‘filters’]) ? array_map(‘sanitize_text_field’, (array) $_GET[‘filters’]) : [];
2. Use acf_get_field() Instead of get_field_object()
ACF 6+ recommends using acf_get_field() for performance and clarity:
$field = acf_get_field(‘custom_field_name’);
This returns the field configuration without loading post meta, making it more efficient when you only need settings, choices, or labels.
3. Taxonomy Images or Metadata
If you’re getting taxonomy images (e.g., with ACF), you should avoid global functions and use term IDs directly with sanitized input:
$image_id = get_field(‘taxonomy_image’, ‘category_’ . absint($term_id));
$image_url = wp_get_attachment_image_url($image_id, ‘medium’);
Always validate $term_id to avoid injection issues.
4. REST API Integration (ACF & Custom Fields)
ACF supports exposing fields via the REST API using the ACF to REST API plugin or natively if using ACF Blocks/JSON.
Make sure fields are registered correctly:
add_filter(‘acf/rest_api/field_settings/show_in_rest’, ‘__return_true’);
Or expose specific fields manually in a custom endpoint:
register_rest_field(‘post’, ‘custom_acf_field’, [
‘get_callback’ => function($object) {
return get_field(‘custom_acf_field’, $object[‘id’]);
},
‘schema’ => null,
]);
5. Avoid Direct Database Queries for ACF/Taxonomies
Use native WP functions like get_posts(), get_terms(), and meta queries:
$args = [

    'post_type' => 'product',

    'meta_query' => [

        [

            'key' => 'custom_field',

            'value' => sanitize_text_field($_GET['value']),

            'compare' => '='

        ]

    ]

];

$query = new WP_Query($args);
6. Use acf_register_block_type() for Blocks
For Gutenberg support and REST-friendly integration:
acf_register_block_type([
‘name’ => ‘testimonial’,
‘title’ => __(‘Testimonial’),
‘render_template’ => ‘template-parts/blocks/testimonial.php’,
‘category’ => ‘formatting’,
‘icon’ => ‘admin-comments’,
‘supports’ => [‘align’ => false],
]);
Then access fields in the template like:
$name = get_field(‘name’) ?? ‘Default Name’;
Performance Optimization for Large Taxonomies
1. Use WP-CLI for Bulk Operations
Add 1,000 terms in seconds:
wp term create genre “Sci-Fi” “Fantasy” “Mystery” –porcelain
2. Cache Tax Queries with Transients
$cached_terms = get_transient(‘cached_genres’);
if (false === $cached_terms) {
$cached_terms = get_terms([‘taxonomy’ => ‘genre’, ‘hide_empty’ => false]);
set_transient(‘cached_genres’, $cached_terms, HOUR_IN_SECONDS);
}
3. Optimize tax_query
Avoid nesting OR + AND without indexed fields. Use IN instead of multiple OR clauses when possible:
‘tax_query’ => [
[
‘taxonomy’ => ‘genre’,
‘field’ => ‘slug’,
‘terms’ => [‘sci-fi’, ‘drama’],
‘operator’ => ‘IN’,
]
]
Multilingual Support (ACF + WPML/Polylang)
WPML + ACF Integration:
- Enable Translate for your custom taxonomy in WPML > Taxonomy Translation
- Ensure ACF fields for taxonomy terms are marked translatable in WPML settings.
WPML automatically detects ACF fields on taxonomy terms when properly configured.
Polylang:
- Register taxonomy with pll_register_string() if needed
- Use term translation functions:
$translated_term_id = pll_get_term($term_id, ‘fr’); // Get French version
Frequently Asked Questions (FAQ)
1. How do I get field from taxonomy using ACF in WordPress?
Use get_queried_object() combined with the ->name property inside your taxonomy template:
php
$term = get_queried_object();
if ($term) {
echo $term->name; // taxonomy name
echo $term->taxonomy; // taxonomy type
echo $term->slug; // taxonomy slug
}
To display it with full detail on the frontend:
php
<?php $term = get_queried_object(); ?>
<h1><?php echo $term->name; ?>
<span><?php echo $term->taxonomy; ?> (<?php echo $term->count; ?> articles)</span></h1>
<p><?php echo $term->description; ?></p>
Place this in taxonomy.php or single.php — it dynamically fetches the term based on current context.
2. What is the difference between the_field() and get_field()?
In the Advanced Custom Fields (ACF) plugin for WordPress, both the_field() and get_field() are used to retrieve the value of a custom field that you’ve created.
However, they differ in how they handle the output:
the_field() directly outputs the field value with formatting, while get_field() retrieves the value as a variable for further processing. Choose the appropriate function based on whether you need to immediately output the field value or if you need to manipulate it first.
3. How do I display custom taxonomy terms in the block editor?
You can use ACF blocks or custom blocks built with JavaScript/React. Here’s the most common method using ACF blocks:
1. Add a Taxonomy Field via ACF to a block.
Field type: Taxonomy
Return format: Term Object
2. In your PHP render template, output the term data:
$term = get_field(‘my_taxonomy_field’);
if ($term && is_object($term)) {
echo esc_html($term->name);
}
Ensure ‘show_in_rest’ => true is enabled when registering the taxonomy to make it appear in Gutenberg.
4. How do I secure custom taxonomy queries?
Security Checklist:
Sanitize User Input
$term_slug = sanitize_text_field($_GET[‘genre’]);
1. Validate Taxonomy Terms
if (!term_exists($term_slug, ‘genre’)) {
wp_die(‘Invalid term’);
}
2. Use current_user_can() for admin actions
if (!current_user_can(‘manage_categories’)) {
wp_die(‘Permission denied’);
}
3. Avoid SQL Injection
Never use raw $wpdb queries with unsanitized values. Use prepared statements or built-in functions like get_terms().
5. Can I use custom taxonomies with WooCommerce products?
Yes, WooCommerce supports custom taxonomies for the product post type. For
example:
register_taxonomy(‘brand’, ‘product’, [
‘label’ => ‘Brand’,
‘public’ => true,
‘hierarchical’ => true,
‘show_in_rest’ => true,
]);
You can use ACF to attach taxonomy fields to Brands. Then add filtering functionality via tax_query. Display brands on product templates using get_the_terms() or get_field() (for ACF)
Conclusion
Custom taxonomies with ACF give you a structured, scalable way to organise WordPress content – without touching a single line of code. Follow this guide to create taxonomies, assign field groups, and manage them efficiently across any post type.
Need to import or export ACF custom taxonomy values? The WP Ultimate CSV Importer Pro handles it seamlessly – check the ACF import guide here.
