If you are looking for how to import ACF custom fields for WooCommerce products, the most reliable method is using WP Ultimate CSV Importer with properly structured CSV, XML, Excel, or Google Sheets files. ACF WooCommerce custom fields are stored as meta keys, which must be mapped correctly during import. For growing stores, manually adding additional product data is time-consuming and error-prone. Bulk importing ensures consistency across large product catalogs. It also enables faster updates, easier migrations, and structured data management. WP Ultimate CSV Importer supports multiple file formats and cloud sources like Dropbox. This makes it suitable for SMBs, developers, and high-volume WooCommerce stores. With proper field configuration, even repeaters and complex ACF metafields can be imported accurately. Automation further reduces repetitive manual work. Let us break down how ACF works with WooCommerce before starting the import process.
Key Takeaways
- ACF WooCommerce fields are saved as post meta (meta keys).
- Import files can be CSV, XML, Excel, Google Sheets, or Dropbox-based.
- Correct meta key mapping is critical for successful imports.
- Repeater and complex ACF fields require structured formatting.
- WP Ultimate CSV Importer enables scalable and automated WooCommerce product imports.
How to Add Custom Fields to WooCommerce Products using ACF?
Before starting the import process, you must first create the custom fields properly using ACF.
WooCommerce manages your products, and Advanced Custom Fields allows you to extend those products with additional data. When both WooCommerce and ACF are installed and activated, you can easily create structured advanced product fields for WooCommerce.
After activating the plugins, go to the Custom Fields or ACF section in your WordPress dashboard and click the Field group.
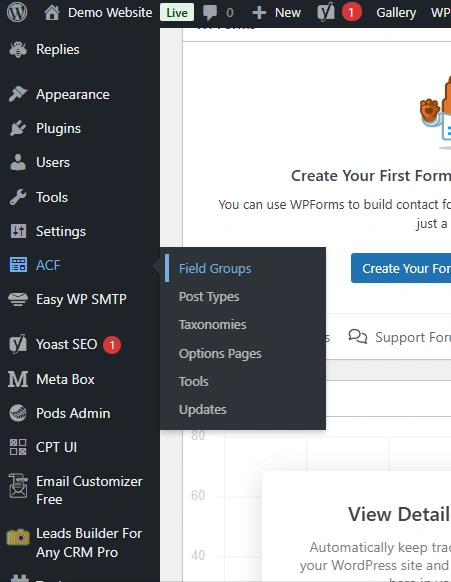
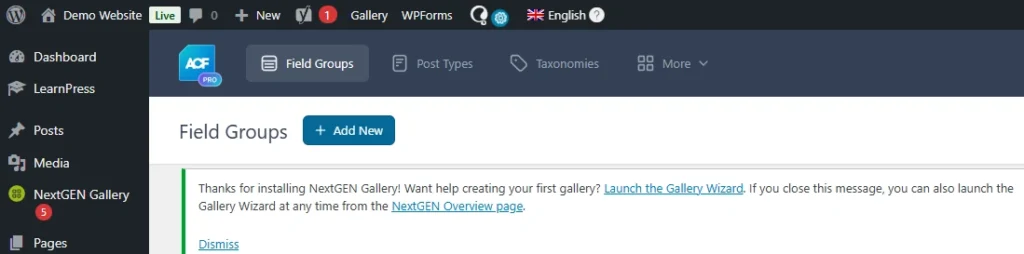
Then click the Add “New button”. This creates a new Field Group.
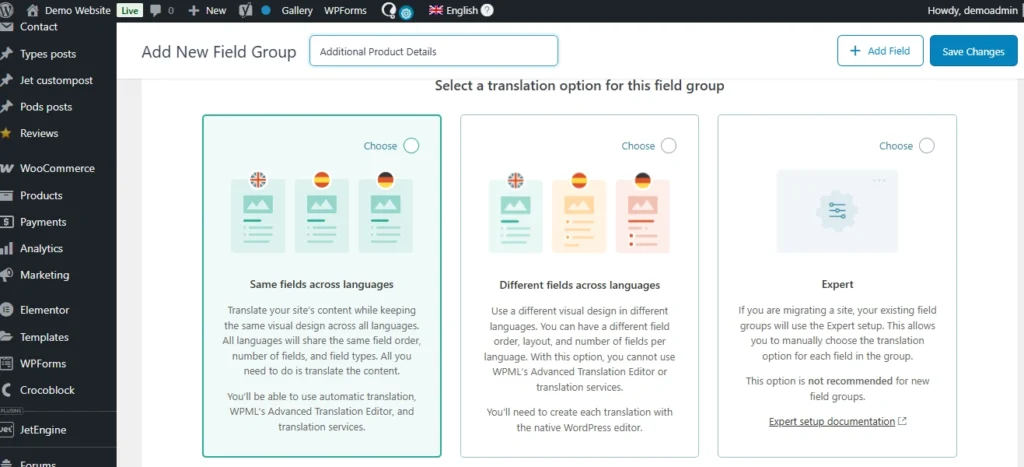
At the top of the page, you must enter a Field Group Title. This title is only for admin reference. For example, you can name it “Product Specifications” or “Additional Product Details.” This name helps you organize your fields in the backend.
Inside the field group, click Add Field to create your custom fields. For each field, you need to fill in the Field Label, Field Name, and choose the Field Type. The Field Label appears in the product edit screen. The Field Name is the internal key stored in the database. This Field Name is very important because it must match exactly when importing WooCommerce ACF custom fields using a CSV file.
For example, if your Field Label is “Brand,” your Field Name can be “brand.” If your Field Label is “Warranty Period,” your Field Name can be “warranty_period.” During import, the CSV column header must use these exact field names.

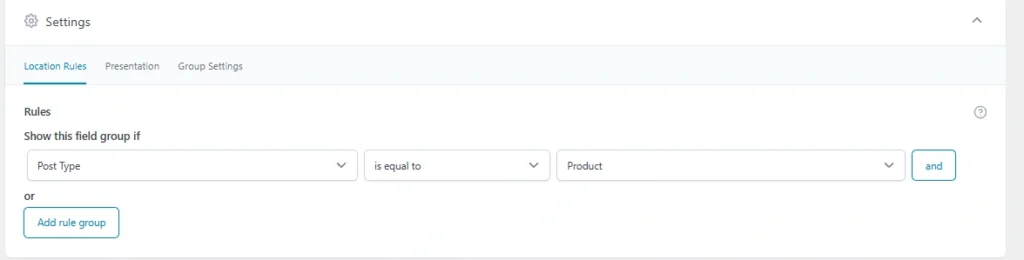
After adding all required fields, scroll to the Location section and set the rule so that the field group appears when the Post Type is equal to Product. This ensures the custom fields are displayed on the WooCommerce product edit page.
If multilingual settings are enabled on your site, you will see translation options within the same field group screen. Here you can decide whether the field values should be copied across languages or translated separately, depending on your store’s configuration.
Once everything is configured, click Publish or Save to activate the field group, which is in the top right corner of the page.

To verify the setup, open any WooCommerce product in the admin area and scroll down the page. Your newly created custom fields should appear there. Enter some sample data and update the product to confirm that the fields are working correctly.
Once confirmed, your custom product fields are properly configured and ready for bulk import.

WP Ultimate CSV Importer Pro
Get Ultimate CSV/XML Importer to import data on WordPress faster, quicker and safer.
Prerequisites Before Importing
Before importing ACF custom fields for WooCommerce products, make sure WooCommerce and ACF are installed, and your field group is fully created and verified.
Next, install WP Ultimate CSV Importer Pro. Go to the Smackcoders website, log in to My Account, download the plugin, then upload, install, and activate it on WordPress. Ensure the WooCommerce and ACF modules are enabled in the plugin settings.
Also, finalize your ACF field names, decide on product types (simple or variable), and ensure each product has a unique SKU if updating existing items. Once this is done, you are ready to prepare your CSV file for import.
Preparing the Import File for ACF Fields
Before importing, your product data file must be structured correctly so WooCommerce and ACF fields can be mapped properly. The Importer supports multiple file formats including CSV, XML, Excel (XLS/XLSX), and Google Sheets, giving you flexibility depending on your data source.
Include all required product details such as Product Name, SKU, Price, Categories, and Product Type. For variable products, make sure parent and variation details are structured correctly. Using a template from the importer is recommended to prevent errors.
For ACF fields, the file headers must exactly match the Field Names you created in your field group. This ensures the custom product data is imported correctly. Any mismatch in field names will prevent data from appearing in the product editor.

Check for common formatting issues like empty headers, duplicate SKUs, or missing mandatory fields. Each row should represent a single product, and all essential fields must be filled. Correct preparation ensures your WooCommerce ACF import runs smoothly.
For a deeper understanding of how ACF field exports and imports work in WordPress, you can explore our detailed guide here:
WP Ultimate CSV Importer Pro
Get Ultimate CSV/XML Importer to import data on WordPress faster, quicker and safer.
Importing ACF Custom Fields Using WP Ultimate CSV Importer
This section covers the full step-by-step process of importing WooCommerce products along with ACF custom fields using WP Ultimate CSV Importer Pro.
Step 1: Uploading the Import File
First, go to the plugin in your WordPress dashboard and select Import. Upload your prepared file, which can be CSV, XML, Excel (XLS/XLSX), or Google Sheets.
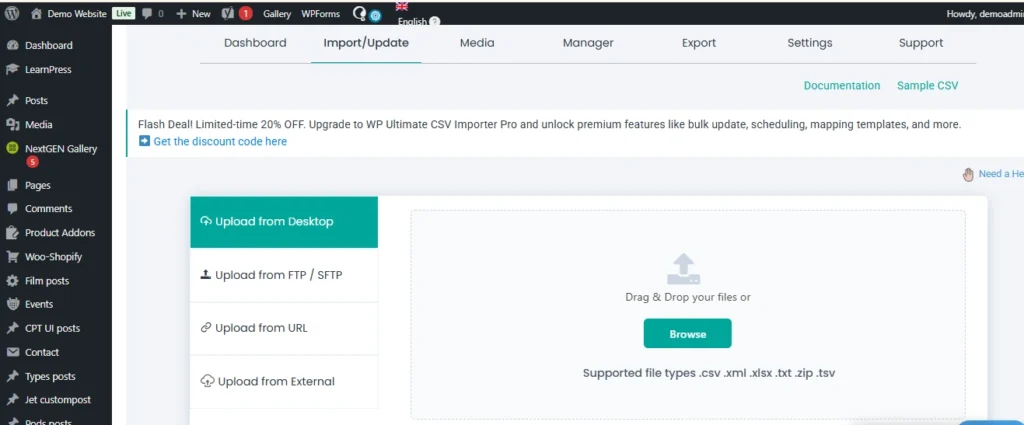
Then choose the fresh import and change the import record as “WooCommerce Product”.
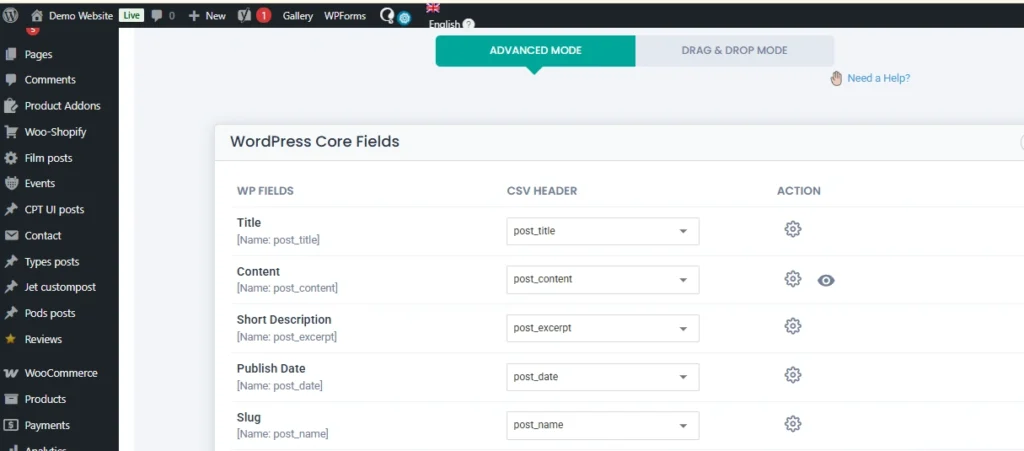
Step 2: Mapping WooCommerce Product Fields
Next, map your standard WooCommerce product columns. Assign your file columns to fields such as Product Name, SKU, Price, Categories, and Product Type. Correct mapping ensures each piece of data goes to the right place in WooCommerce. For variable products, make sure parent and variation details are correctly matched.
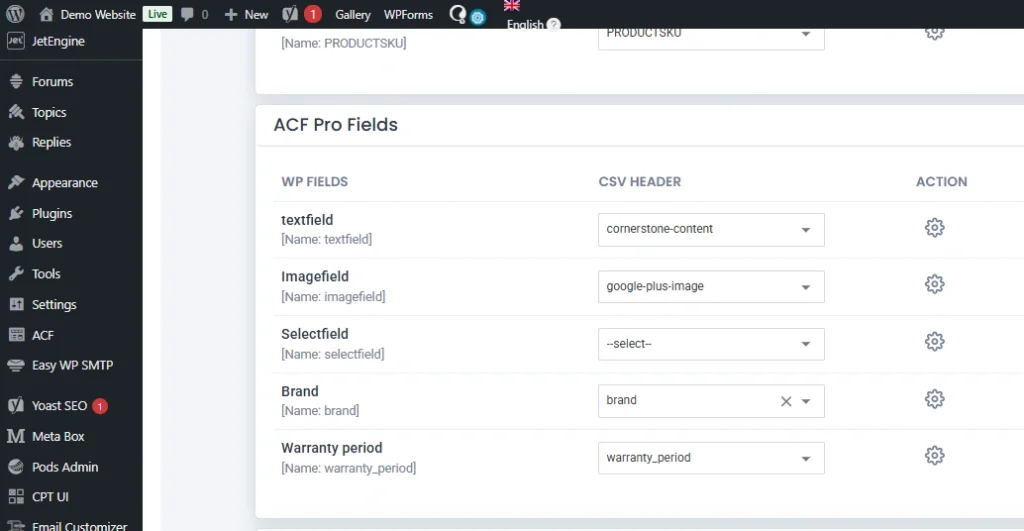
Step 3: Mapping ACF Custom Fields
After mapping the standard fields, map your ACF custom fields. Match each column header in your file to the corresponding Field Name in ACF. The importer supports complex fields such as repeaters or grouped fields. Ensure each ACF field is mapped correctly so that the data appears properly in the product editor.
Step 4: Running the Import Process
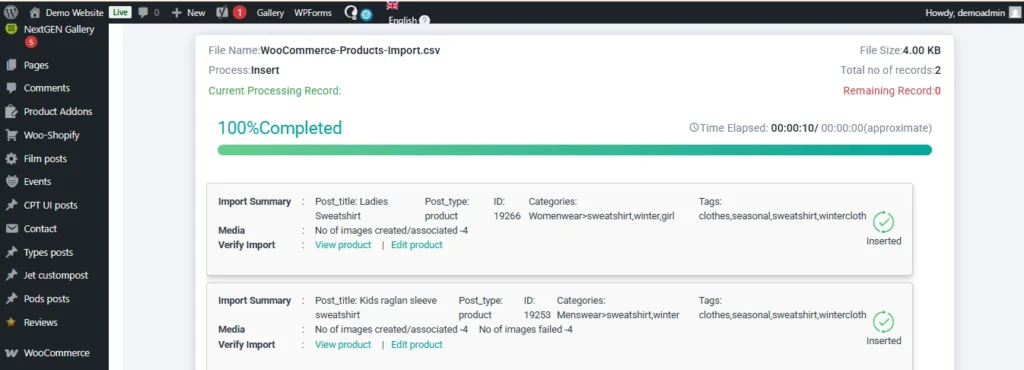
Once mapping is complete, run the import. The plugin will validate your data, execute the import, and generate a log. For large catalogs, the plugin processes products in batches to prevent server timeouts.

If you are updating existing products, include a unique identifier such as SKU or Product ID. WP Ultimate CSV Importer also allows scheduling imports, enabling WooCommerce to import products automatically on a regular basis.
After the import finishes, review the logs for any errors. Fix any issues and rerun the import for the affected products. Correct mapping and a clean file ensure that all WooCommerce and ACF custom fields display properly.
Verifying Imported ACF Data
After the import is completed, you need to check whether the data has been imported correctly.
First, go to the WordPress admin area and open any imported WooCommerce product. Scroll down to the product edit page.
The ACF custom fields you created should be visible, and the imported values should be correctly filled in those fields.
Next, open the same product on the frontend of your website. Check whether the custom field values are displaying properly on the product page.
If the values are visible in the backend and displayed correctly on the frontend, it means the import was successful.
WP Ultimate CSV Importer Pro
Get Ultimate CSV/XML Importer to import data on WordPress faster, quicker and safer.
Common Issues and Troubleshooting
When importing WooCommerce ACF custom fields, small configuration mistakes can prevent data from appearing correctly. Below are the most common issues and how to resolve them.
| Issue | Possible Cause | Solution |
| ACF field not showing in product editor | Field group not assigned to Product post type | Edit the field group and ensure the location rule is set to Post Type = Product |
| ACF data not imported | Field Name does not match file header | Ensure the file column header exactly matches the ACF Field Name |
| Data saved but not visible on frontend | Theme/template not displaying ACF fields | Update your product template to retrieve the field using get_field(‘field_name’) |
| Variable product import errors | Parent and variation structure incorrect | Ensure parent product and variations are properly structured and linked via SKU or parent ID |
| Duplicate products created | SKU not used for updates | Use SKU or Product ID as a unique identifier when updating existing products |
| Special characters or broken values | File formatting issues | Clean the file and check delimiter, encoding, and empty headers |
| Import stops midway | Server timeout or large file size | Split the file into smaller batches or increase server limits |
Most problems occur due to meta key mismatches or incorrect product structure. Always double-check field names, SKU values, and mapping settings before running large imports.
With proper preparation and correct mapping in the Importer, WooCommerce ACF imports work reliably even for large product catalogs.
Best Practices for Small and Medium Businesses
For small and medium businesses managing WooCommerce stores, structured imports are not just about convenience. They are about saving time, reducing errors, and preparing for growth.
Before running any large import, always take a complete website backup. This gives you a safe recovery point if something unexpected happens. Even when using reliable tools like WP Ultimate CSV Importer, backups are a standard best practice.
If possible, test your import on a staging site first. Import a small batch of products with WooCommerce ACF custom fields and verify everything. Once confirmed, proceed with the full catalog import on the live site.
Maintain a structured master file for your products. Whether you use CSV, Excel, XML, or Google Sheets, keep a clean and standardized format. Use consistent column headers that match your ACF field names. This makes future updates and scaling much easier.
For growing catalogs, always use SKU as the unique identifier. This helps when you need to update pricing, stock, or advanced product fields for WooCommerce without creating duplicates.
When dealing with large product databases, avoid importing thousands of records immediately. Split files into manageable batches if necessary. This reduces server strain and improves stability.
If your business frequently updates product data from external systems, consider configuring scheduled imports. This allows WooCommerce to import products automatically at defined intervals, reducing manual work.
Finally, document your field structure. Maintain a clear list of all ACF field names and their purpose. This helps developers, marketers, and operations teams stay aligned when modifying or expanding your WooCommerce ACF custom fields.
A structured approach today prevents data chaos tomorrow.
Frequently Asked Questions (FAQs)
1. How can you add custom fields to products in WooCommerce?
You can add custom fields to WooCommerce products using the Advanced Custom Fields plugin. After installing ACF, create a Field Group, add your required fields, and set the location rule to Post Type equal to Product. Once saved, the fields will appear on the WooCommerce product edit page.
2. How Do I Import Custom Fields to WooCommerce Products?
To import custom fields, prepare your product data file with column headers that exactly match your ACF Field Names. Then use WP Ultimate CSV Importer Pro to upload the file, map the WooCommerce fields, and map the ACF fields correctly before running the import.
3. How to import variable products in WooCommerce?
When importing variable products, you must structure the parent product and its variations correctly in your file. Each variation should be linked to the parent using SKU or a parent identifier. During mapping, ensure the Product Type is set correctly for both parent and variations.
For a detailed step-by-step explanation on how to import variable products in WooCommerce.
4. How to use ACF with WooCommerce?
ACF works with WooCommerce by attaching custom fields to the Product post type. You create a field group in ACF, assign it to Products, and then use those fields to store additional product information such as specifications, technical details, or extra attributes.
5. Does ACF work with WooCommerce?
Yes. ACF integrates seamlessly with WooCommerce because WooCommerce products are a custom post type. ACF allows you to extend product data without modifying WooCommerce core files.
6. What additional product options are available in WooCommerce?
WooCommerce supports simple products, variable products, grouped products, and external products. Using ACF, you can also create advanced product fields for WooCommerce such as brand details, specifications, warranty information, compatibility data, and more.
7. How to get an ACF field in WordPress?
You can retrieve an ACF field value using the function get_field(‘field_name’). When working with WooCommerce products, you can pass the product ID if needed to fetch the correct value.
8. What should be done if the ACF-imported data is not showing on the WooCommerce product frontend?
First, confirm the data is visible in the product editor in the backend. If it is saved but not displaying on the frontend, check your theme or product template. Ensure the correct ACF field name is being used in the template and that the field group is properly assigned to Products.
Importing structured product data into WooCommerce becomes straightforward when your ACF fields are configured correctly and your import file is properly prepared. The success of importing ACF fields into WooCommerce depends on accurate field names, correct mapping, and using a reliable import solution.
With WP Ultimate CSV Importer Pro, you can import WooCommerce products along with ACF custom fields from CSV, XML, Excel, or Google Sheets, update products using SKU, and manage even complex field structures efficiently.
If you have any questions about setup, mapping, or advanced imports, you can contact the Smackcoders support team directly at:
[email protected]
Start streamlining your WooCommerce ACF imports today and manage your product data with confidence.
